Closet Makeover: Phase 1
Whew… if you've been following along in my Instagram stories, you know that Phase 1 of this closet makeover was a doozy! Let us start with how it looked last week……
Whew… if you've been following along in my Instagram stories, you know that Phase 1 of this closet makeover was a doozy! Let us start with how it looked last week…
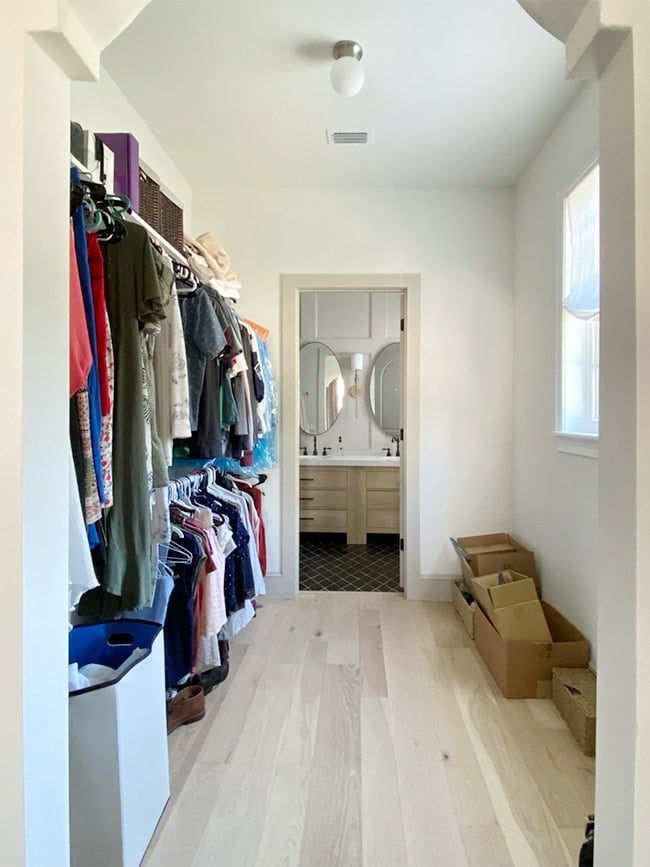
Before going any further, make sure you are caught up with the Design Plans so you can follow along!
The first step of this makeover was adding wallpaper to the ceiling (much easier to do before the cabinets/trim are installed). If you recall from the Design Plan post I was leaning towards this wallpaperand ended up purchasing it, but was later notified that it was on backorder, so I went with my second choice…
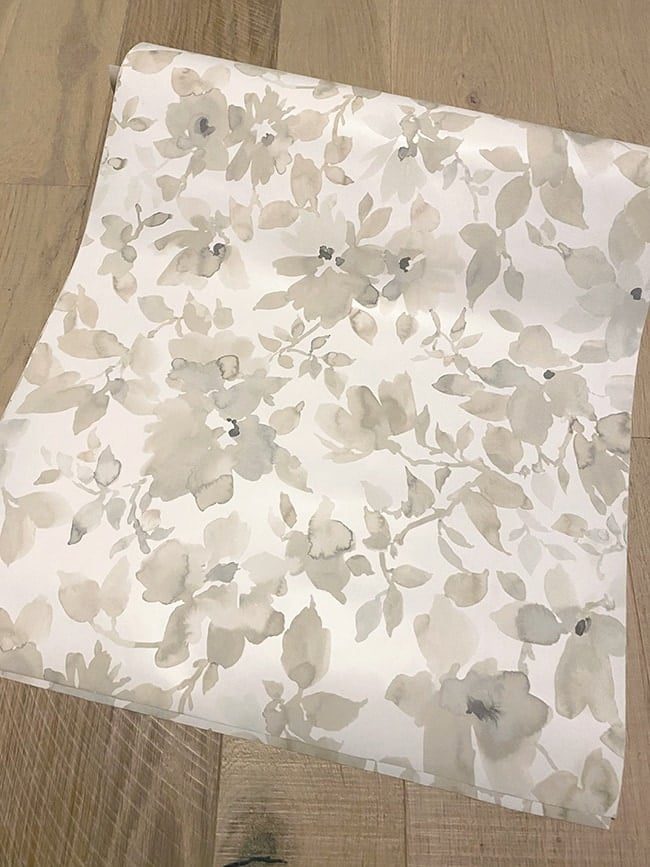
I cannot tell you how many times I have had to go with Plan B (or C, or D…) and it ended up working out even better than Plan A. When projects do not go as planned, there is always a silver lining! This paper was a better choice because it is peel and stick (easier to install on a ceiling), the color was a well suited match to our trim, and I could not be happier with the way it turned out.
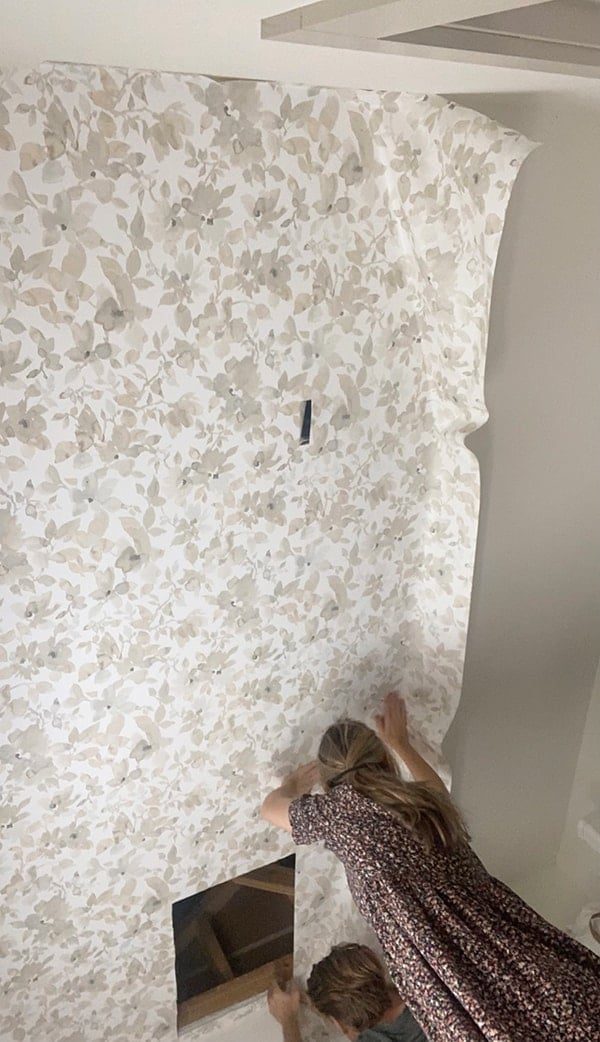
I will not go too much into detail on the install (you can watch a timelapse of it in my stories) but basically, you want to line up the edge all the way down first, then smooth out side to side. This was my first attempt at wallpapering a ceiling, and it is definitely more challenging with gravity working against you…
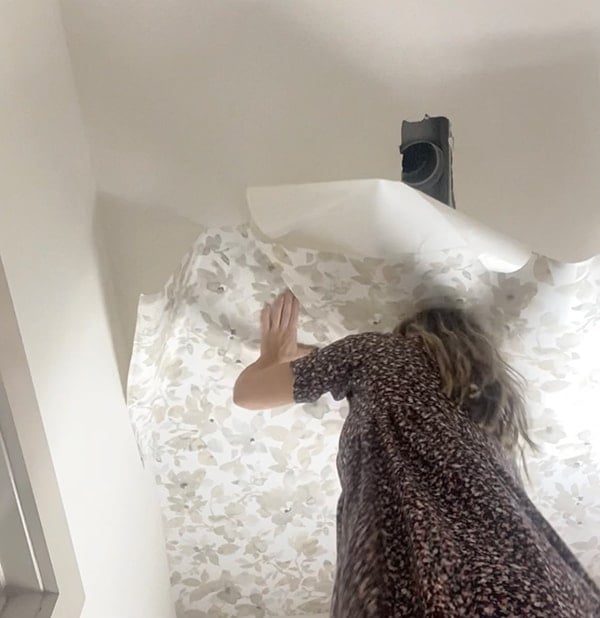
I would highly recommend two people for this! Fortunately, our closet is small so it only took a few hours and no sore neck the next day.
We had a few obstacles to work around (the AC vent, ceiling light and attic access):
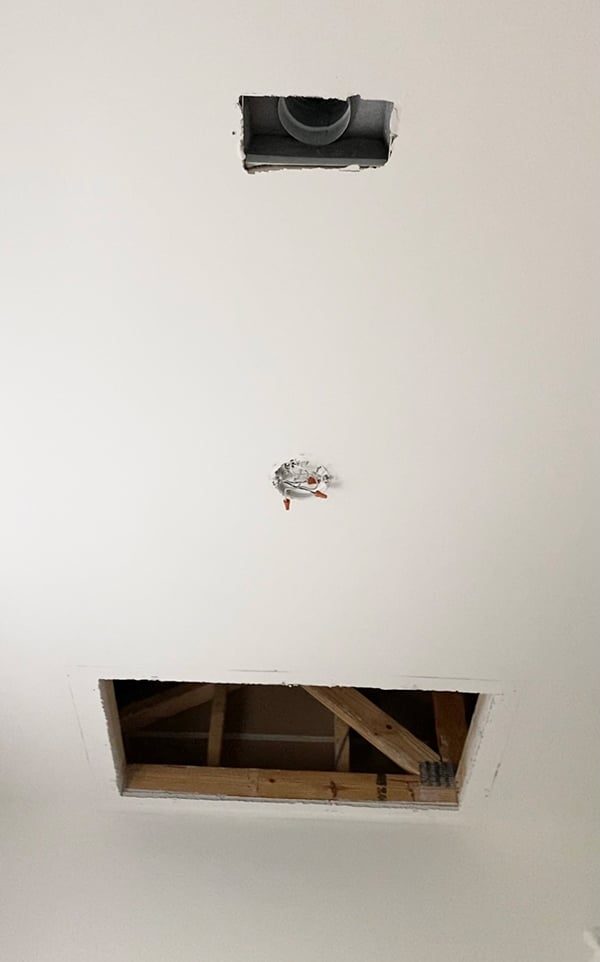
Not a big deal—the paper cuts like butter with a sharp utility knife.
We were so close to only needing three rows… but after the crown molding is installed, the wallpaper would have ended up about 1/8″ short. Fortunately, we had enough wallpaper to cut a section to fill in the gap.
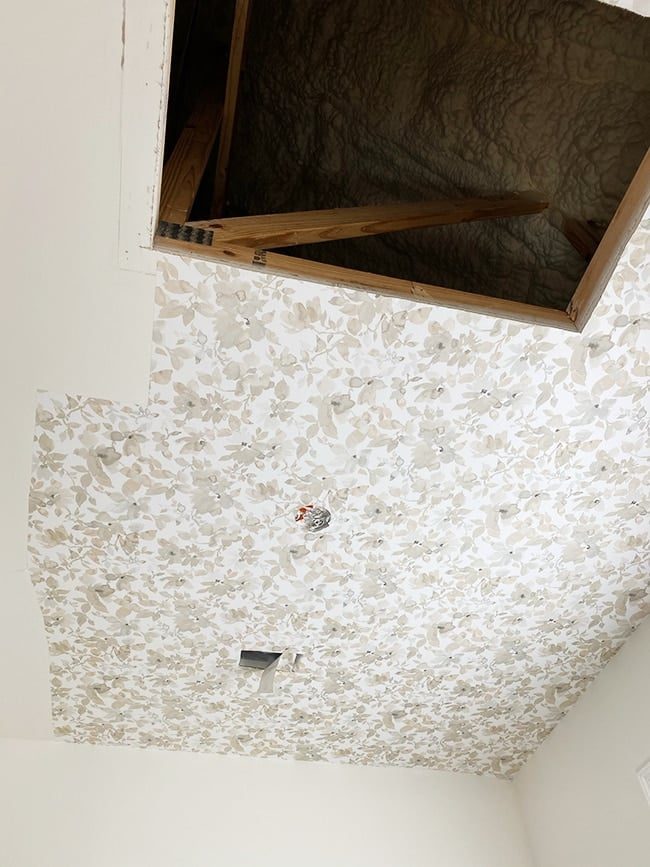
This attic access is another situation we have to address later, since the crown will stick out slightly past the opening. My solution is to wallpaper over a thin piece of hardboard and attach that to the ceiling with heavy duty velcro strips.
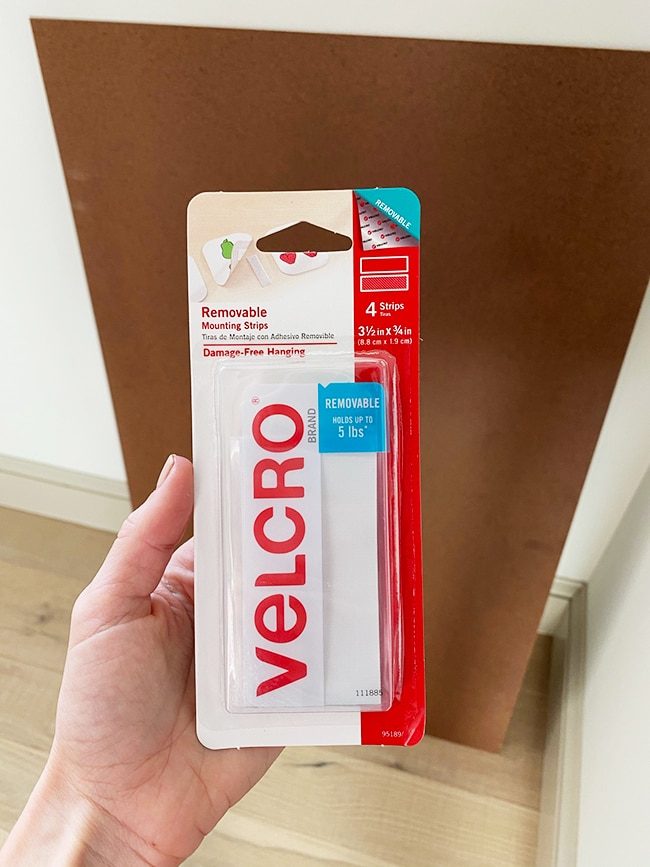
We cannot do this until after the crown is installed though, so that will have to happen in Phase 2 (to be continued!) For now, just ignore the funky cut edges and know that it will all be hidden the behind cabinet trim.
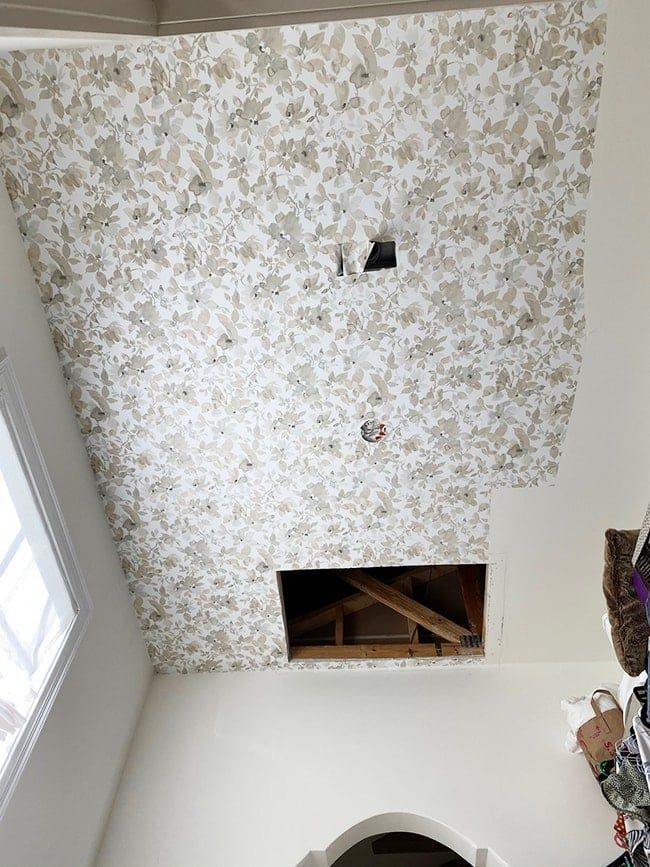
See how well suited it is with the trim? Almost like it was color matched…
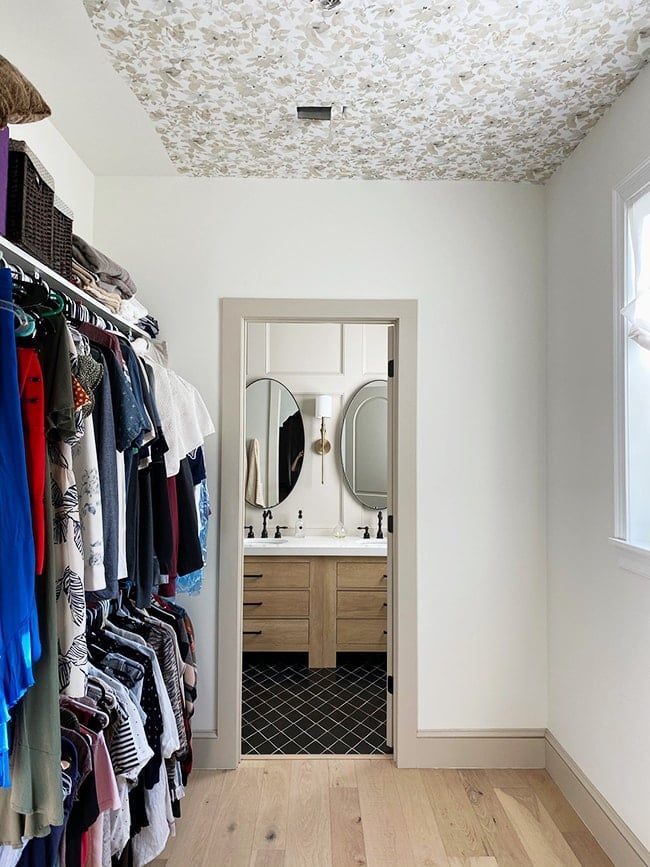
Alright, now let us get to the real stuff. Time to clear out the closet and start building these wardrobes! If you recall from the Design Plans post, we are installing five Ikea Pax wardrobes in various sizes (three on the left, two on the right).
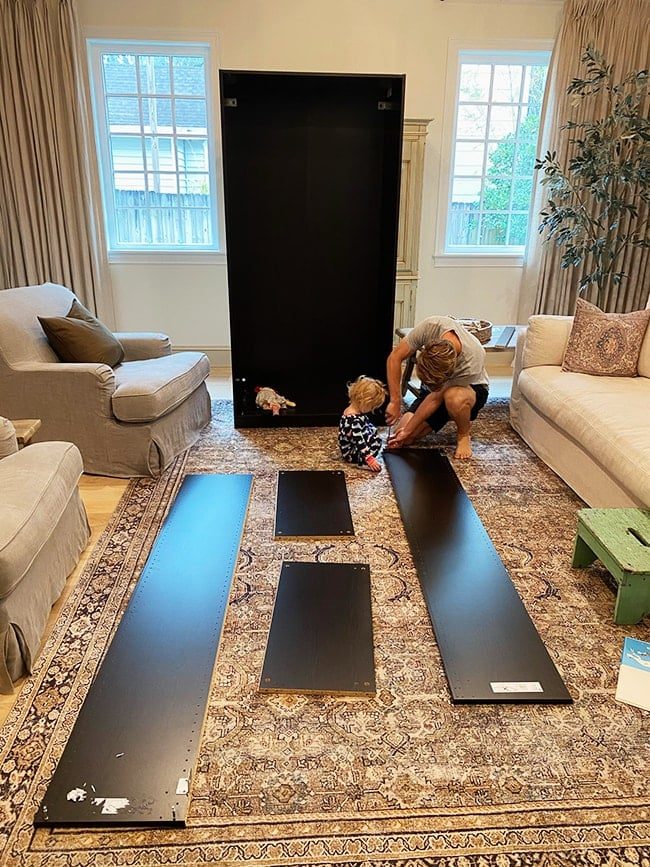
Ah, if only this whole project could be as unfussy as assembling Ikea furniture. Before getting the wardrobes in place, we had to build a platform for them to sit on, so first we had to remove the baseboards.
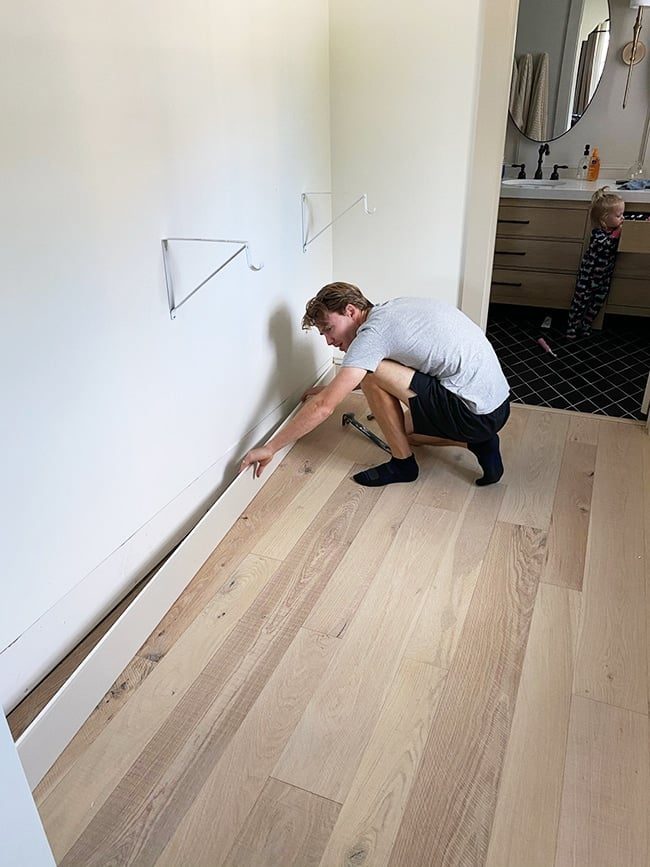
A platform will allow us to add tall baseboards to match up with the rest of the room, and give them a custom built-in look. The frame is built with 2×4's, and is pretty much the same process we did for our Sektion cabinets in the playroom (more detailsin this post):
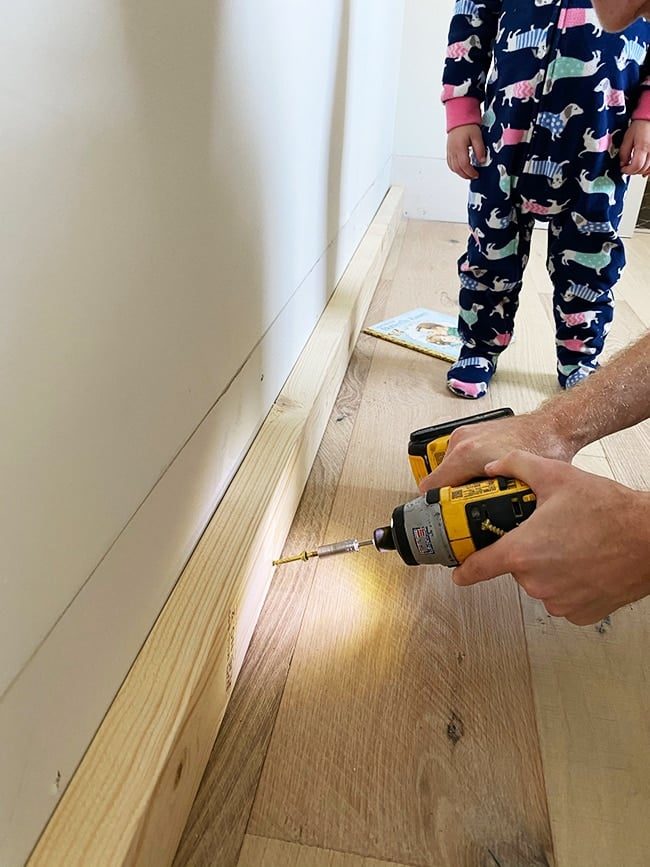
We built the frame *slightly* narrower than the depth of the Ikea wardrobes, to account for any unevenness in the wall (you do not want the frame to stick out past the wardrobes and leave a big gap at the baseboard!)
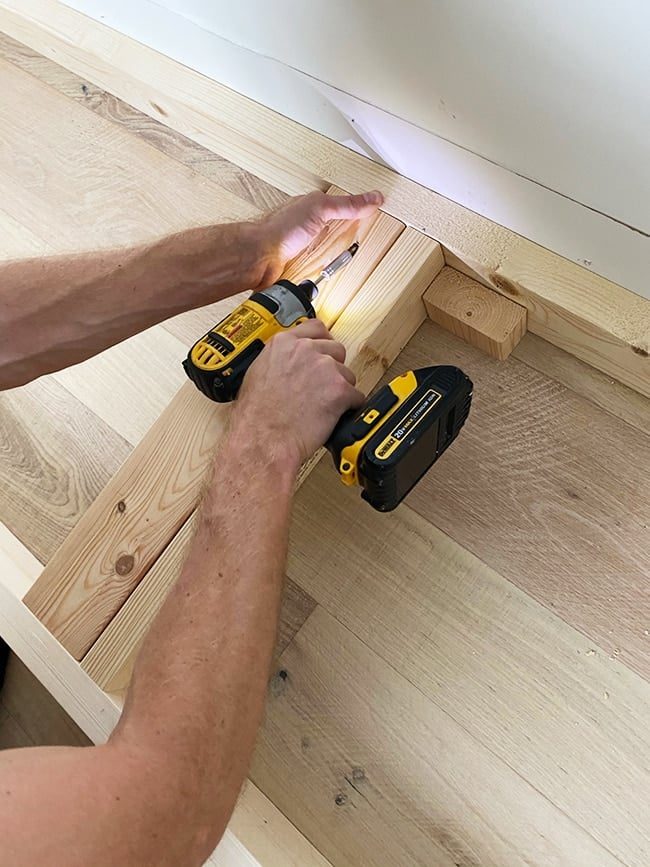
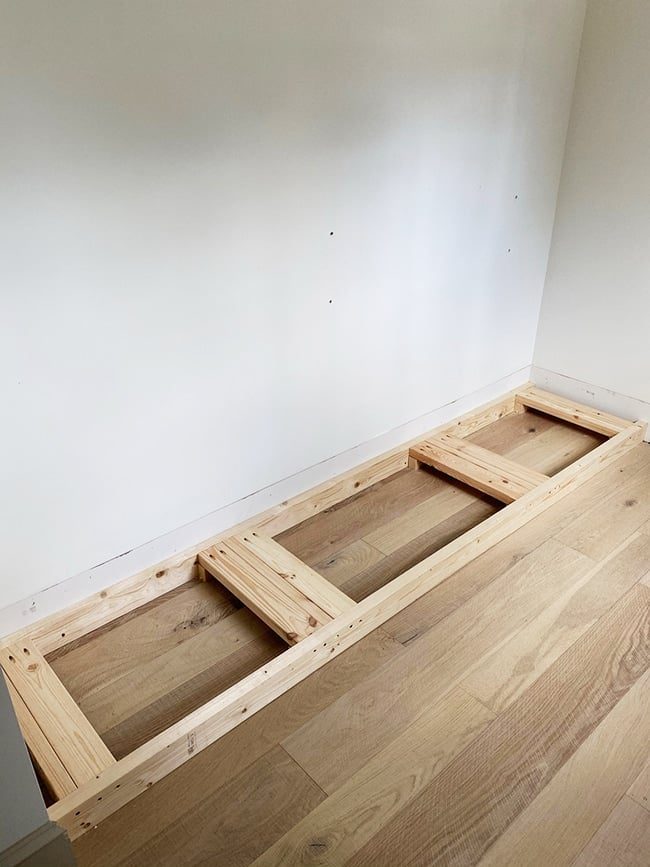
Cross pieces were added to support the edges of each cabinet box, but the Pax wardrobes also have leveling feet at the bottom so we added additional 2×4's on either side for those to sit on.

Those were attached with pocket screws, and 2×4 blocks underneath for added support.
Here is the finished left side!
The process was pretty much the same for the smaller standalone boxes on the right side. Each 2×4 gets attached to each other and the walls (no need to drill into the floor).
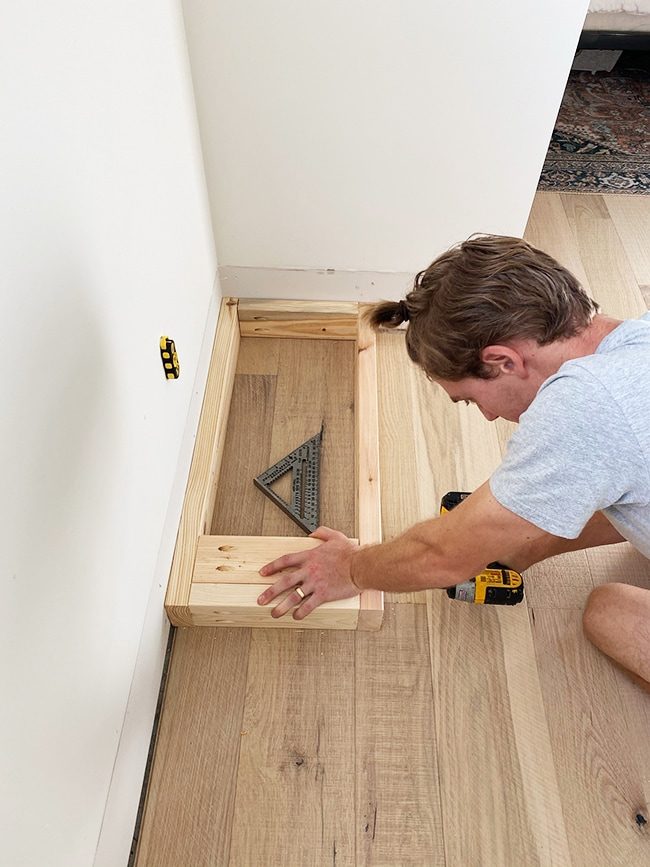
Side note: see that little magnetic stud finderon the wall? It is one of our favorite new tools—much more reliable than the battery powered type IMO. It grabs onto the drywall nails attached to the studs so there is no guesswork.
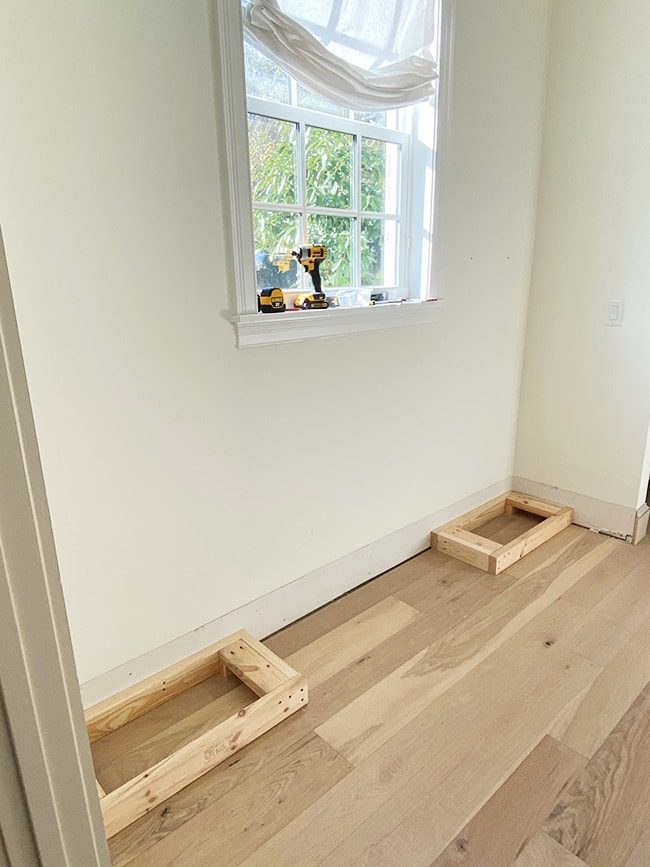
All platforms done!
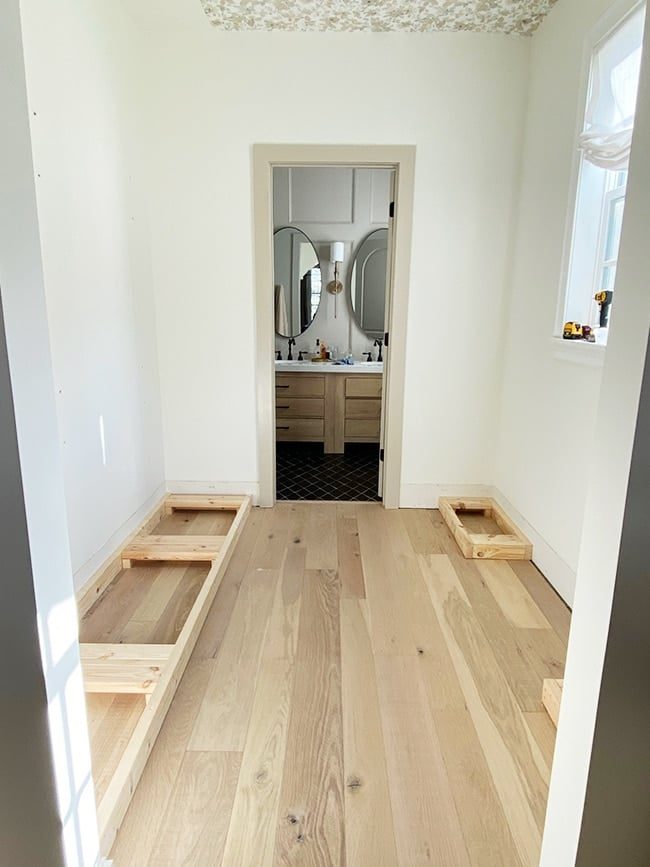
The last step is making sure the frames are level to the floor, and using shims where needed (we used these plastic shimswhich break off cleanly).
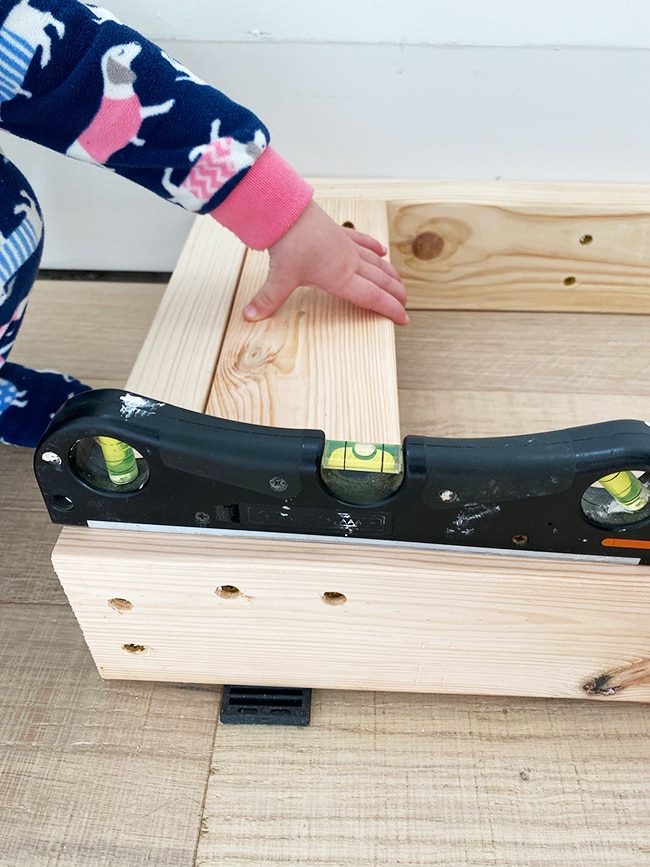
Now comes the real test… let us see how they fit! Turns out we did not need to use the leveling feet to adjust since our bases were already level.
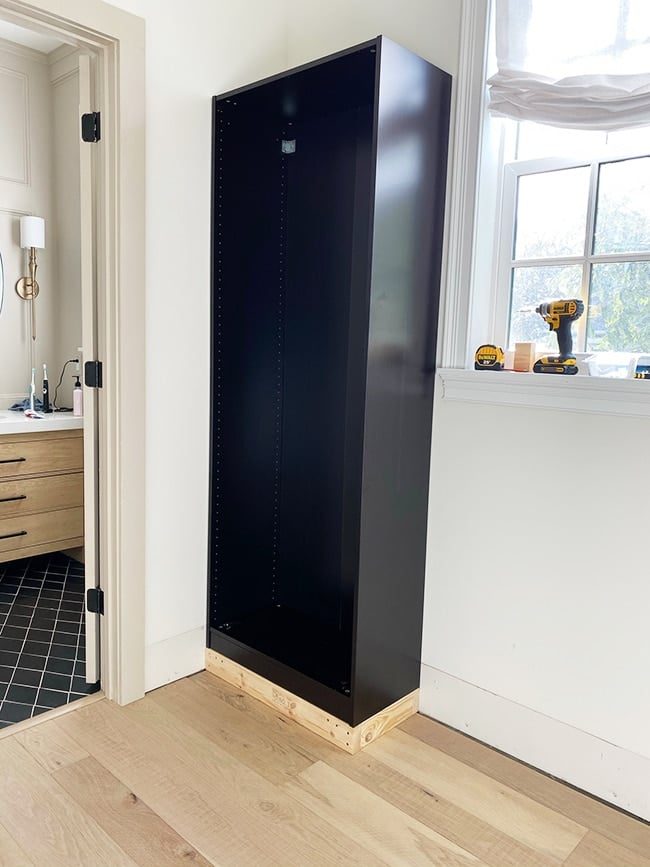
It helped that we were not trying to make the frames *exactly* the same size as the wardrobes. Walls are unpredictable and throw everything off (ahem, this is foreshadowing for what's to come…)
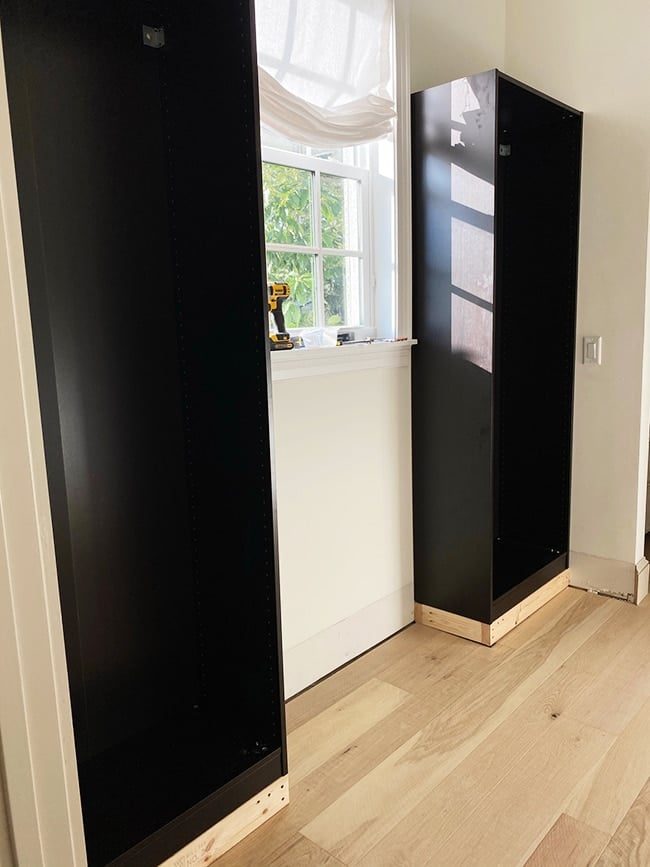
Watching these go up was the most exciting part of our entire weekend.
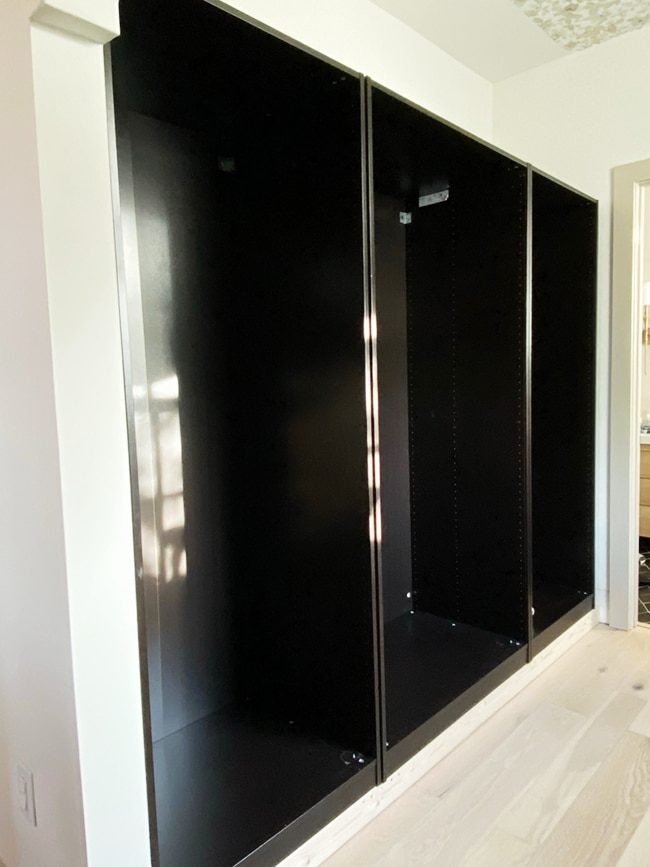
I know things will change once the doors are on, but the closet actually felt more spacious after the wallpaper and wardrobes went in. They draw your eye up and make the room feel so much taller, and the black boxes seem to give the walls more depth. I am hopeful this space will not feel too crowded when it is all done.
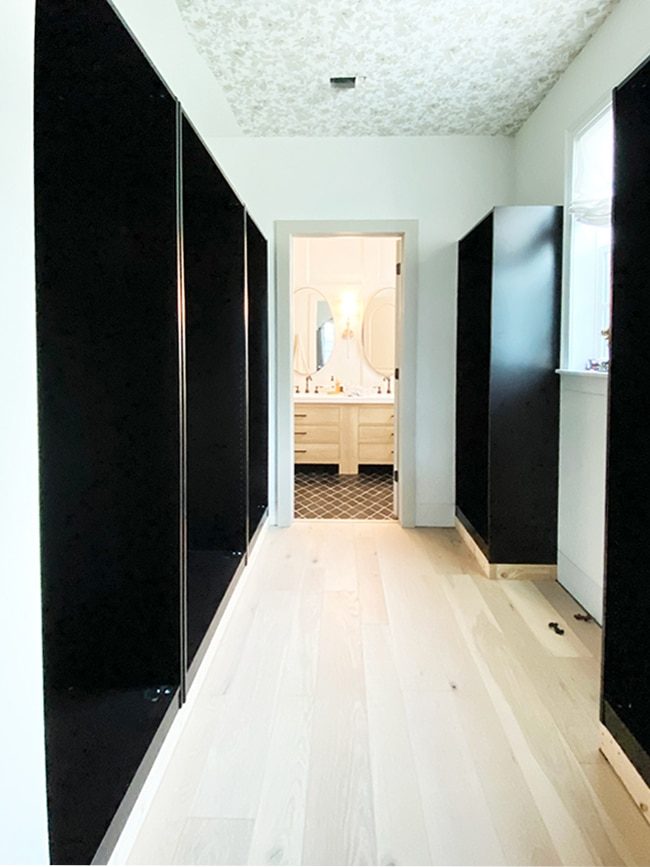
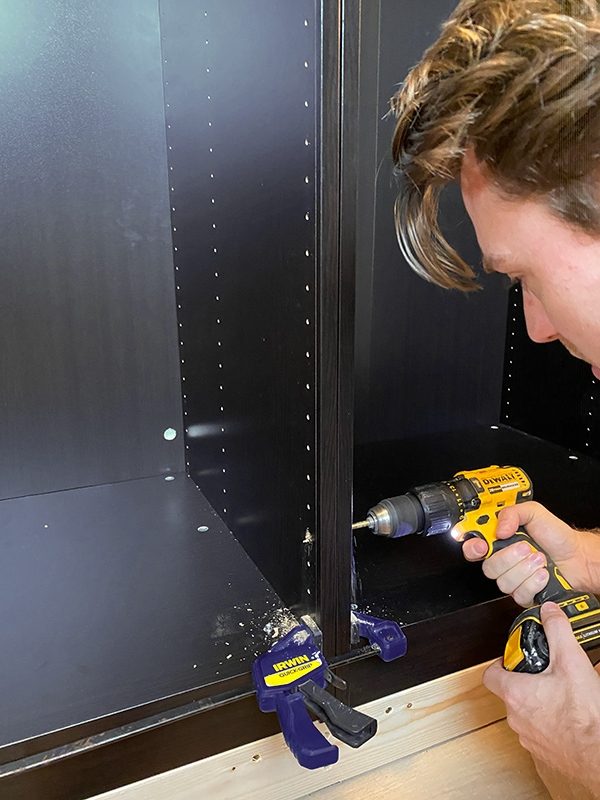
The next day, we started by attaching the wardrobes to each other with the bolts provided by Ikea (make sure to line them up flush and clamp together first!)
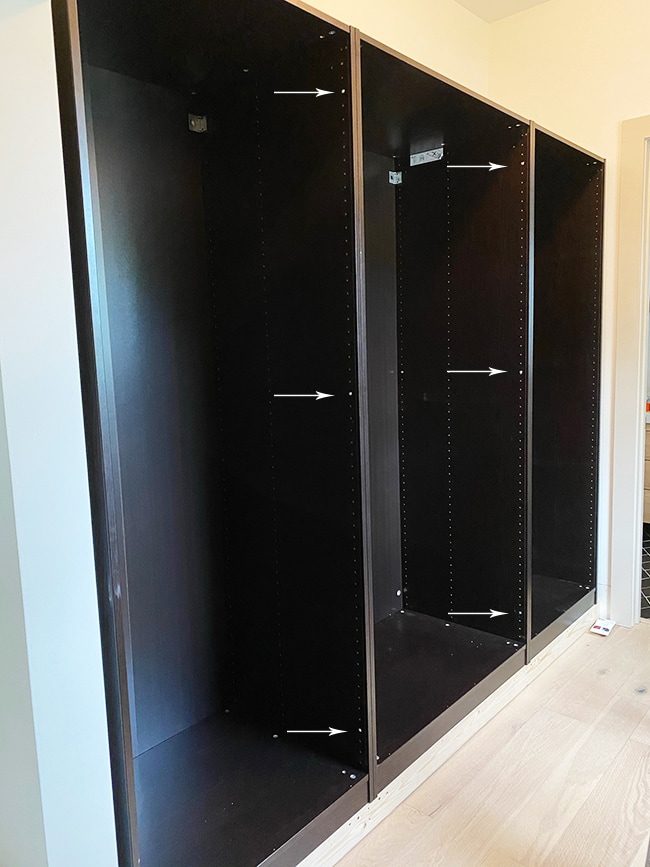
We used three fasteners along the front on each side of the center wardrobe:
Next, we attached each cabinet to the back wall using the provided brackets. Because the bracket locations did not hit studs, we first used self-drilling drywall anchors:
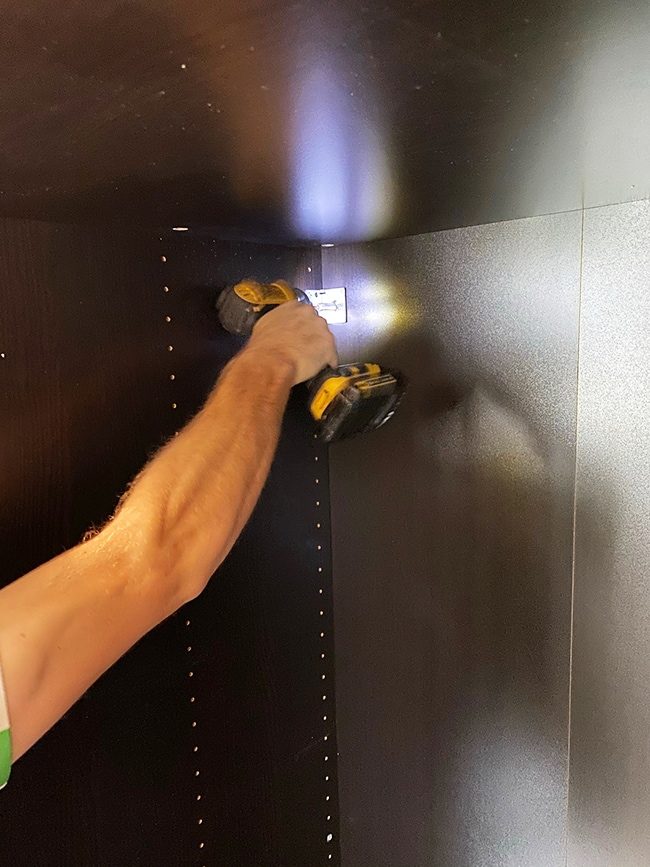
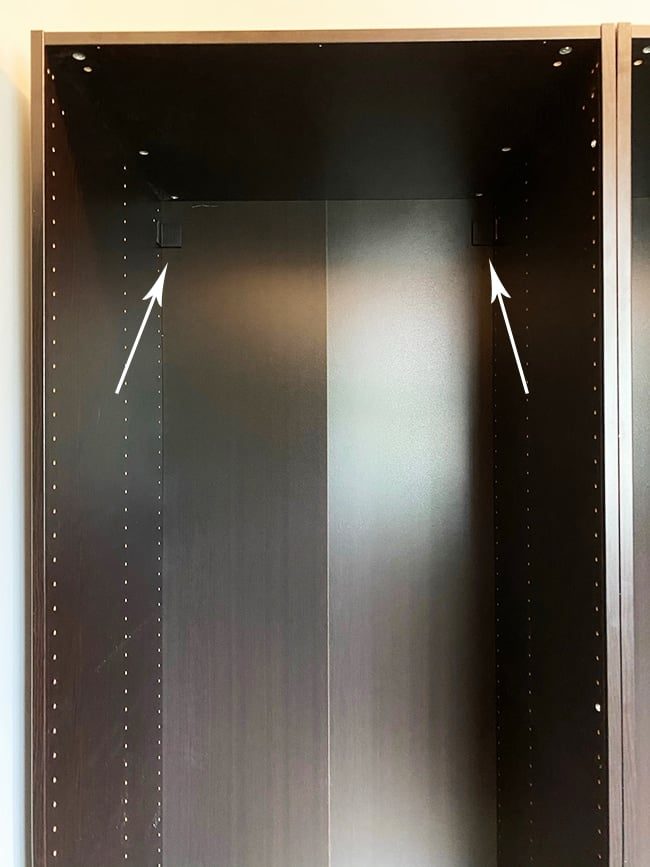
Black caps clip onto the bracket so they are not too noticeable—these will also be hidden behind clothing rods (I'll be filling all the unused holes with black caps as well!)
With the wardrobe boxes secure, it was time to move onto the next challenge—building the upper wardrobe boxes. This took plenty of careful planning, starting with mocking up each piece and laying it out in Illustrator to determine how much material was needed.
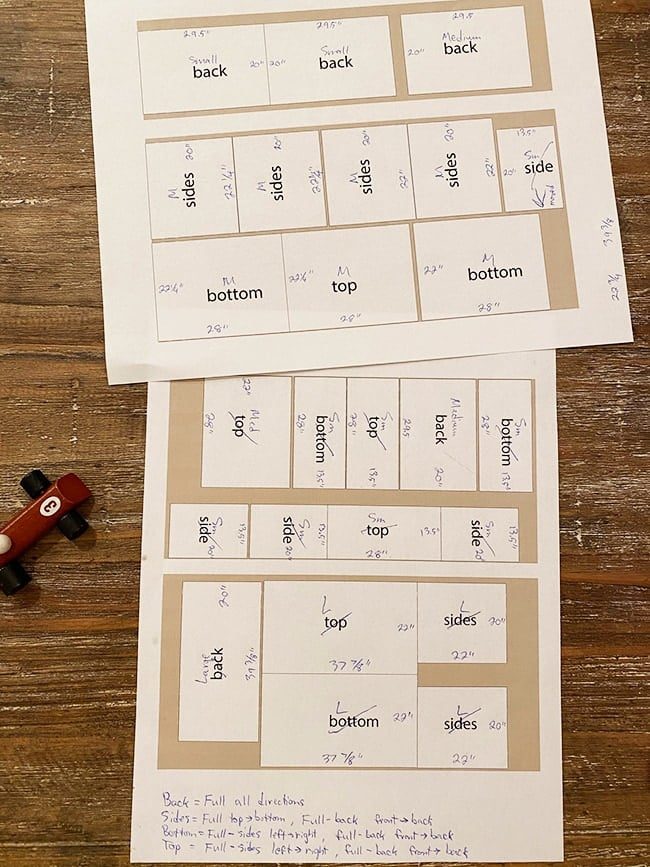
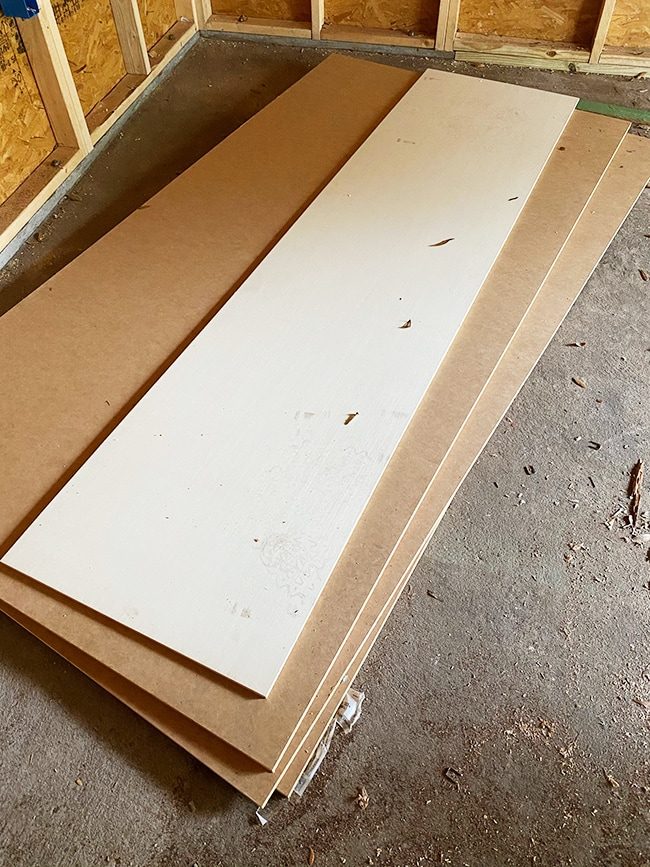
We ended up needing three sheets of 4×8' MDFfor all five cabinets, plus a half sheet of 1/2″ plywood we already had to use for three of the back pieces. We opted for MDF instead of cabinet grade plywood because it was half the cost, it cuts particularly smoothly with no splintering, and these would be rarely used/hidden behind doors so splurging genuinely was not necessary.
It took a while to arrange/rearrange all the cuts in order to maximize each sheet, and also calculate the dimensions for each one (since we were working with three different wardrobe sizes and two different material widths), but eventually, we had our plan and got to cutting.
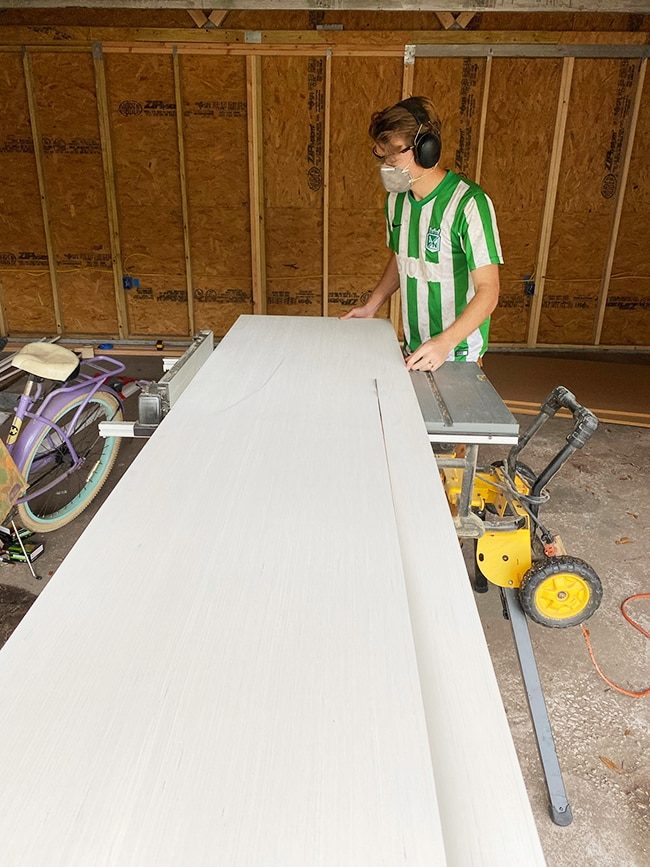
Using the table saw was fastest, so we did that for almost all of the cuts (the full size MDF sheets are particularly heavy—you will want two people for this!) There was only one cut that was too wide to fit onto the table saw, so a circle saw was used for that.
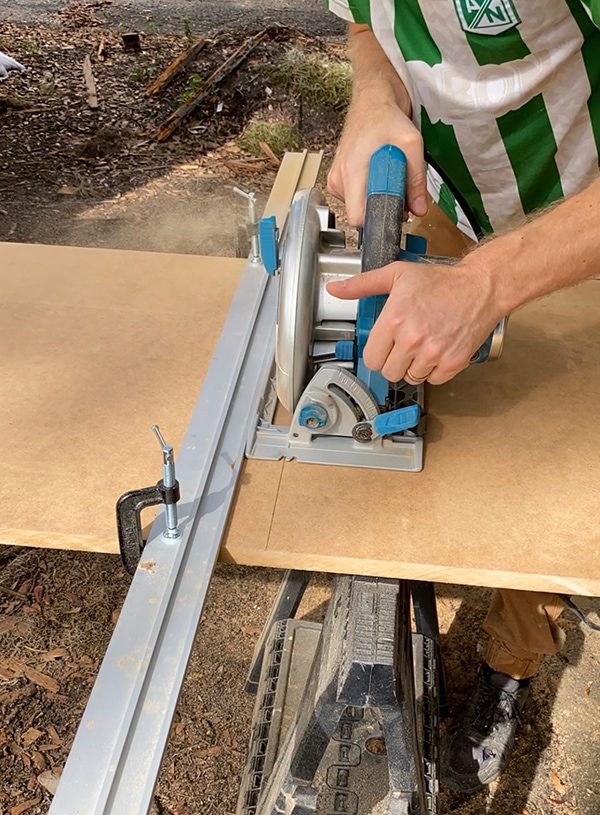
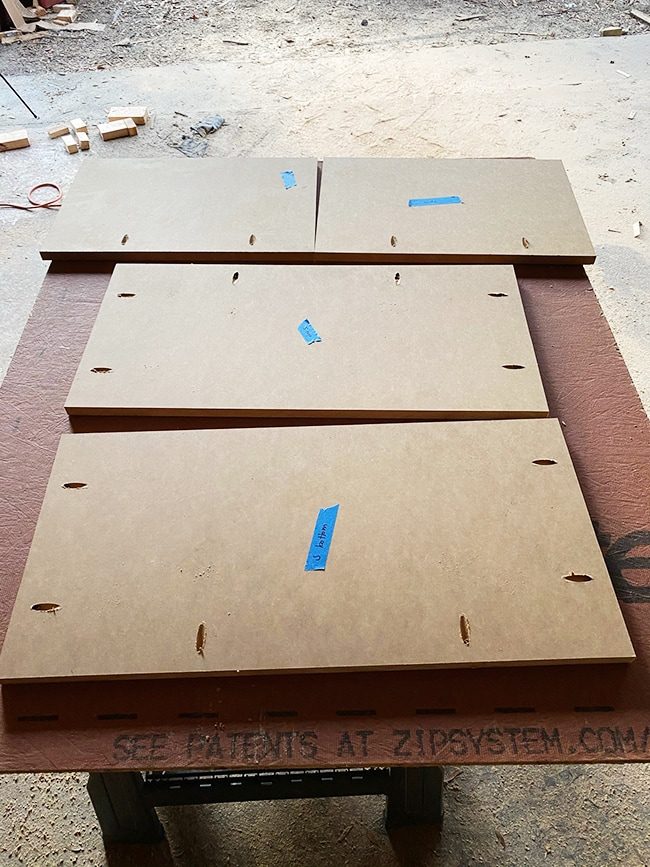
Each piece was labeled and organized as we went, and two hours later, all 25 sides were cut and ready.

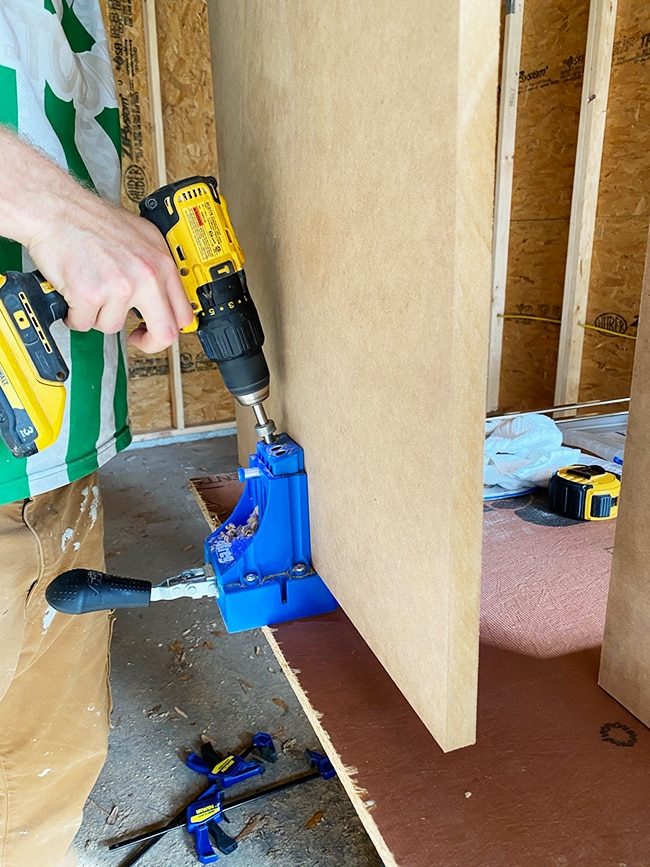
Time for assembly! Pocket holes are the way to go here and I am a big fan of our Kreg Jig K5 system. We used the 1 1/4″ screws in the kit (coarse threads are better for MDF) and drilled two holes per side on the shorter boxes, three for the large boxes.
Each box has five sides:
Then it was time to assemble! After adding a bead of wood glue on the edges, we used our extra long bar clamps to hold everything flush and in place while the screws were inserted.
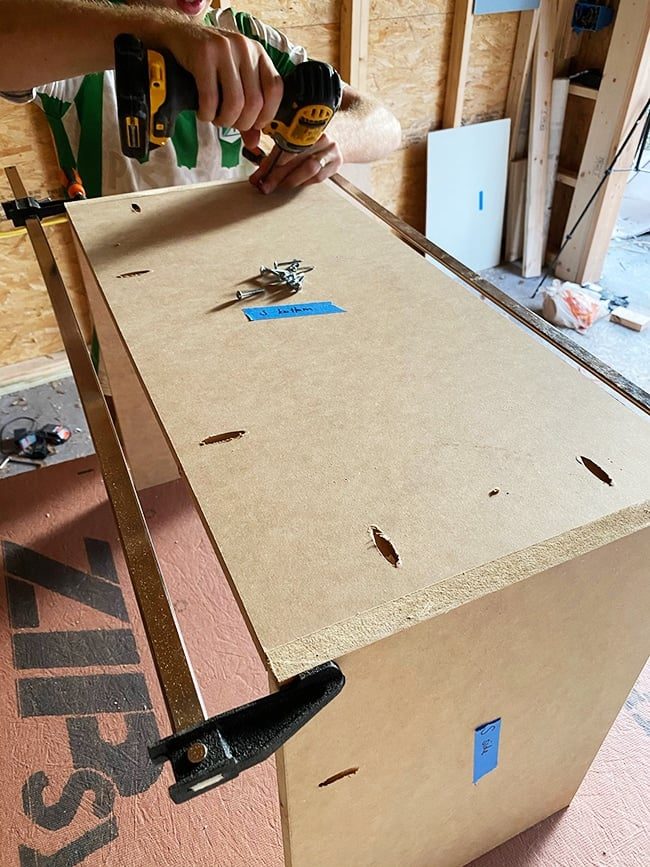
Then flipped it over to do the same for the other side.

Finally, the box was flipped on its front and the back piece attached (also with pocket screws).
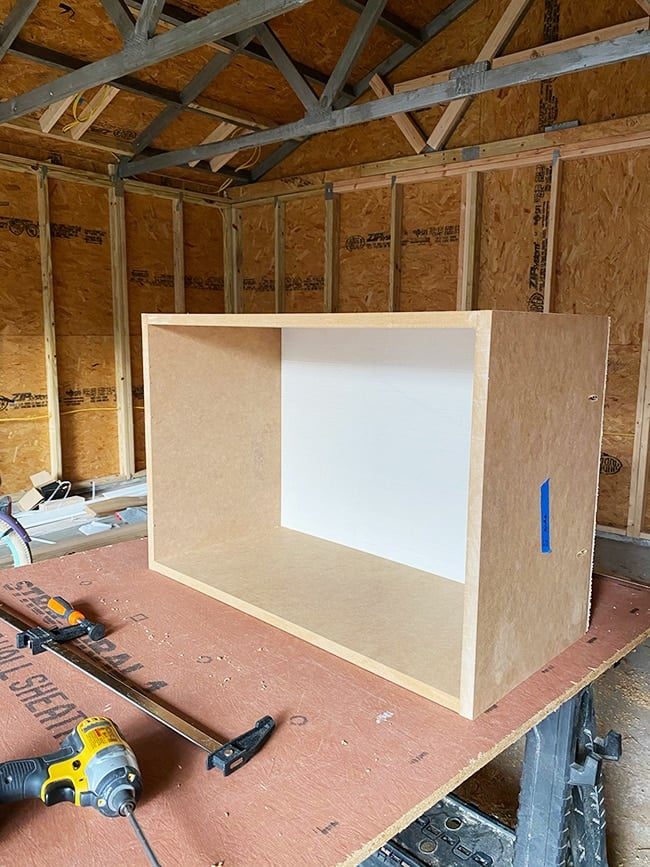
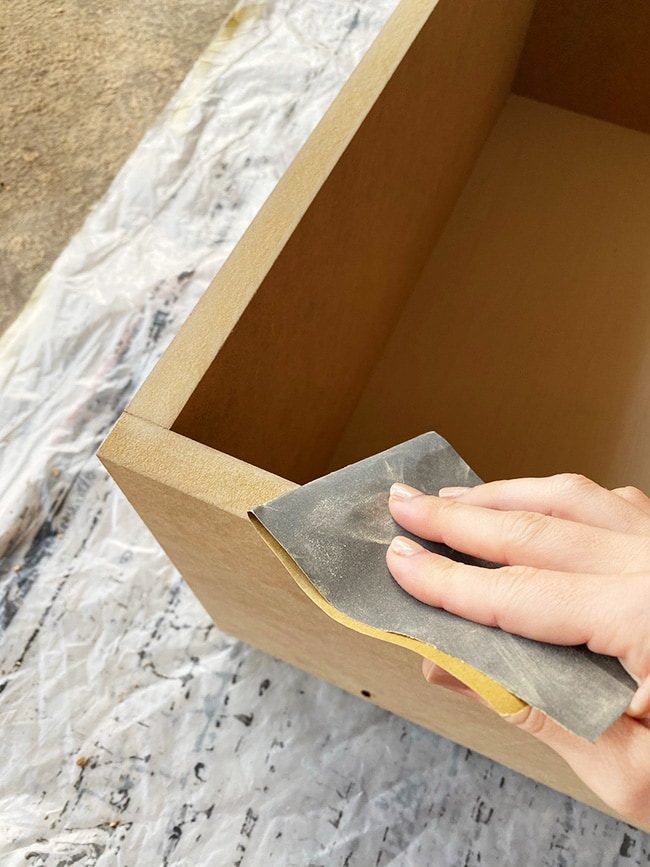
Once all five boxes were made, it was time for paint. Cut edges of MDF are pretty rough, so I first sanded them down for a smoother finish.
I used Valspar Cracked Pepper in semi-gloss because it was what I had on hand, and I just needed them to be black. They'll be hidden behind doors when closed (only seen by us when open, and rarely opened) so the color genuinely did not matter too much, as long as it was black.
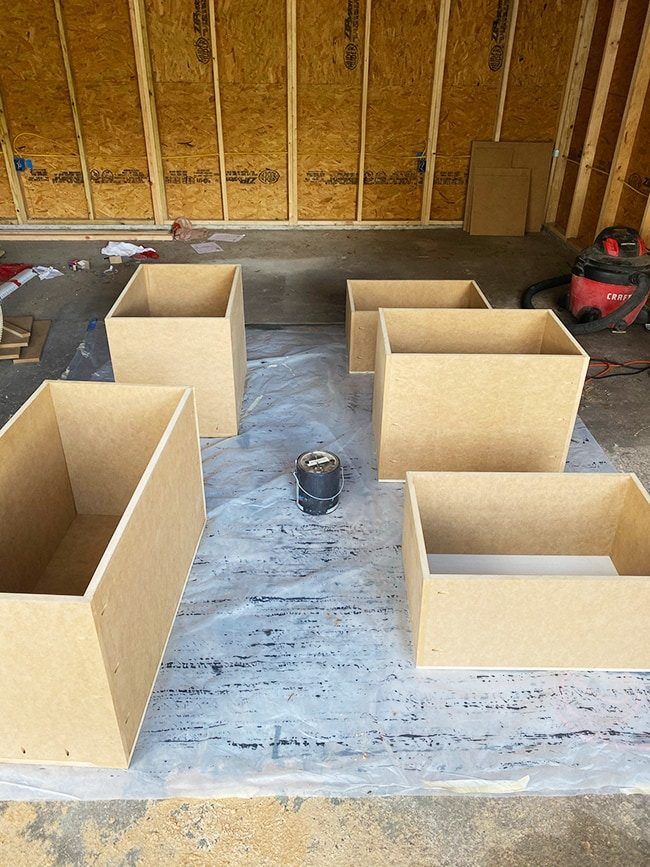
I have not bought the paint for the doors yet (leaning towards SW Tricorn Black) and I can always go over the boxes later if needed, but figured it was easier to paint them all now before they were installed. MDF and raw plywood soak up paint like a sponge, so it took just one quick coat for each (I only had to paint the inside and the face).
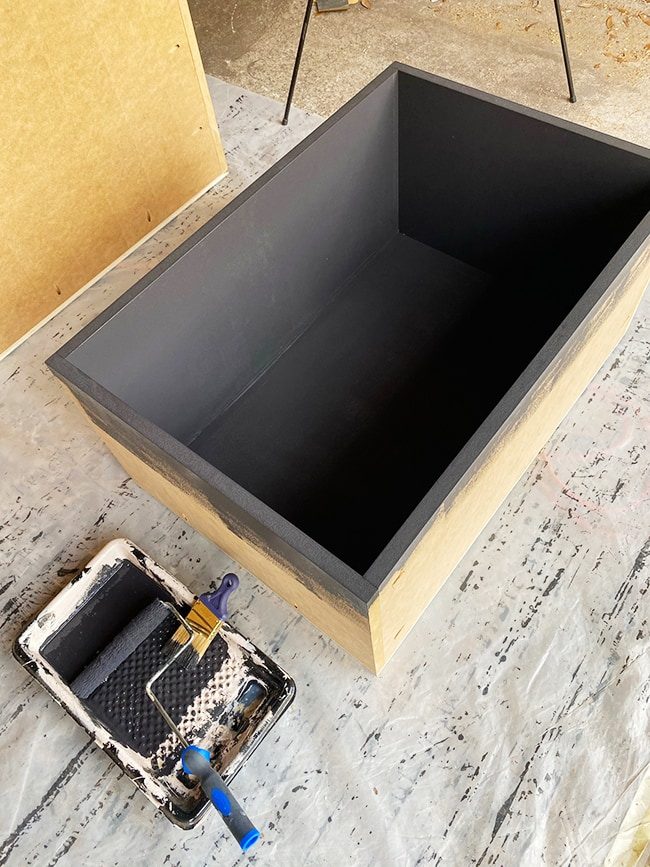
Moment of truth… time to get it in place!
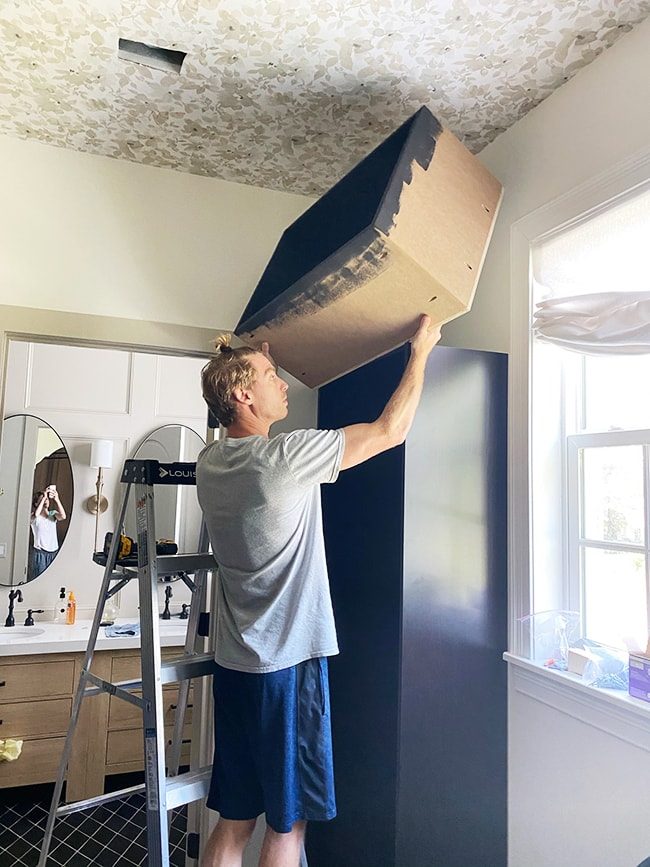
Relief! It lined up almost perfectly. There was a slight overhang on the left side, but that will be hidden behind doors so it is perfectly fine.
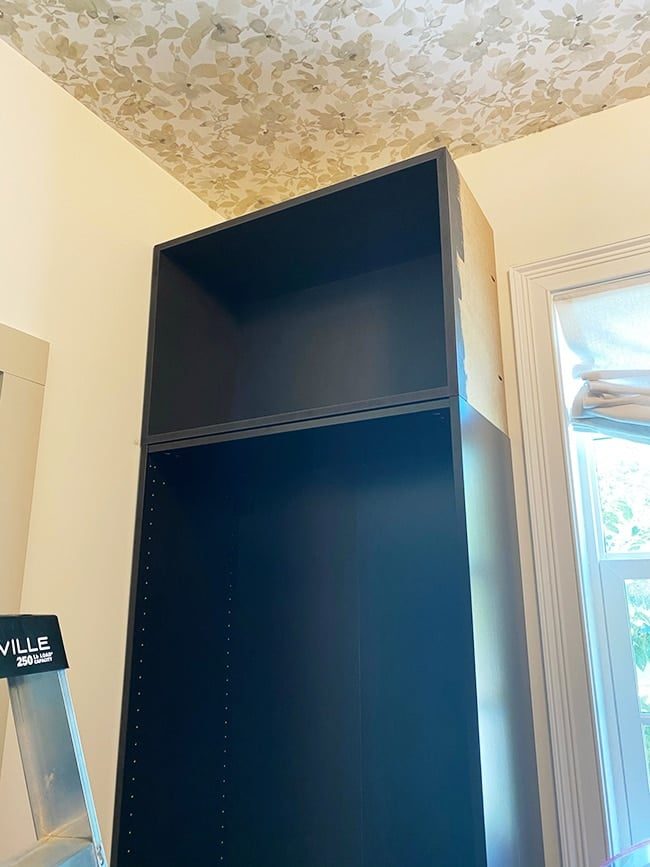
Sadly, that is where our luck ended. Upon hoisting the second cabinet into place, we realized it was a good 1/4″ too wide.
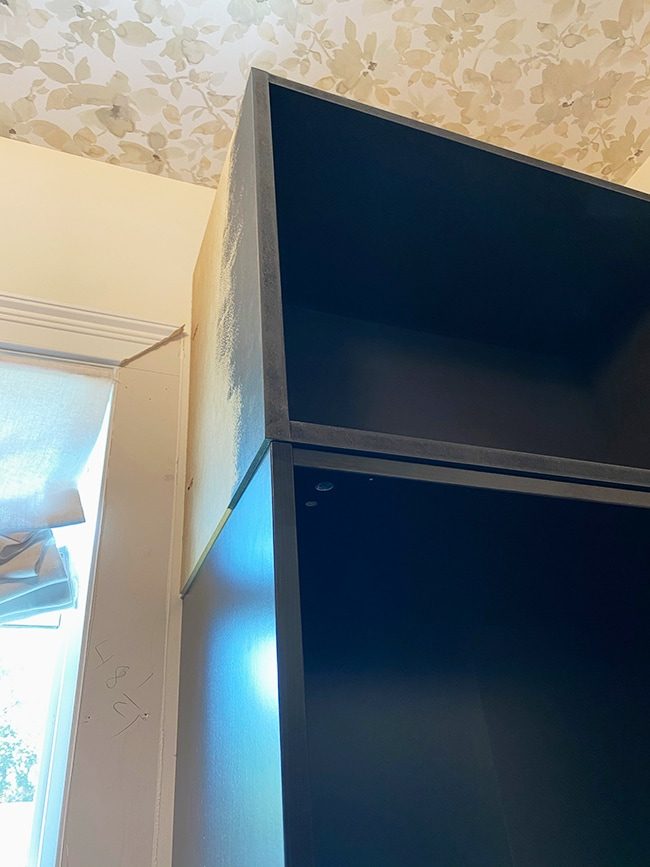
Then we checked the third cabinet—it was 1/8″ too wide.
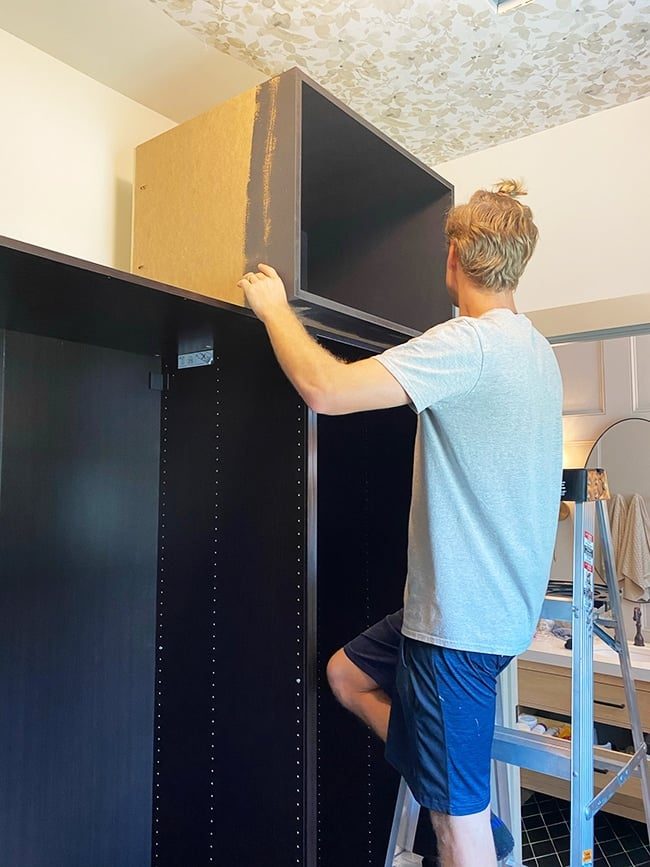
Fortunately we were spared with the biggest cabinet, that was the right size (good thing, cause I was barely able to hoist this beast up over my head the first time)…
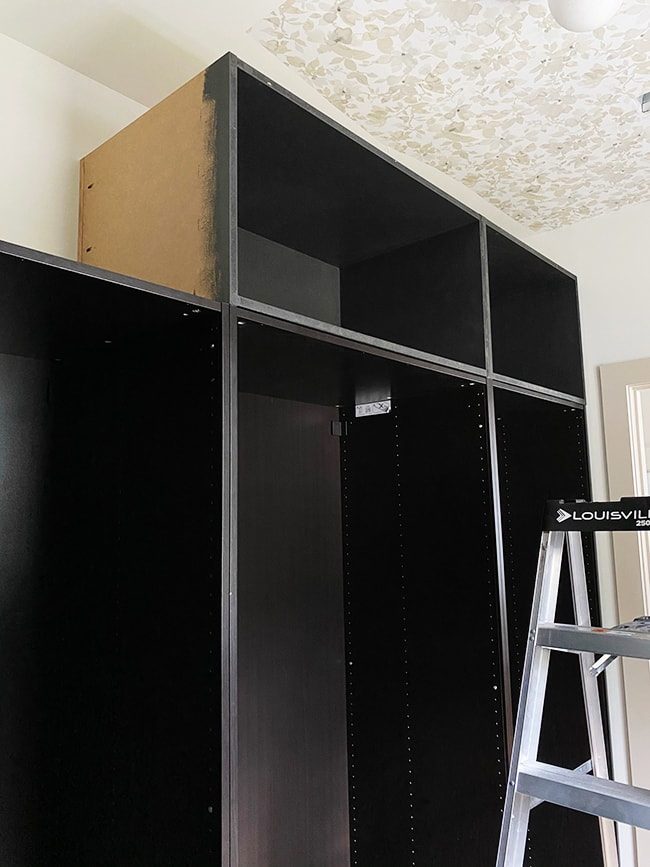
Before carrying the last one inside, we compared the wardrobe size to the cabinet sizes and realized they were almost all too wide—ugh. In our over-confident rush to get these finished, we failed to double check each measurement after cutting before assembling the boxes. Total rookie mistake.
We learned our lesson by spending the rest of the afternoon redoing our work—taking apart, cutting, re-drilling and reattaching three of the boxes.
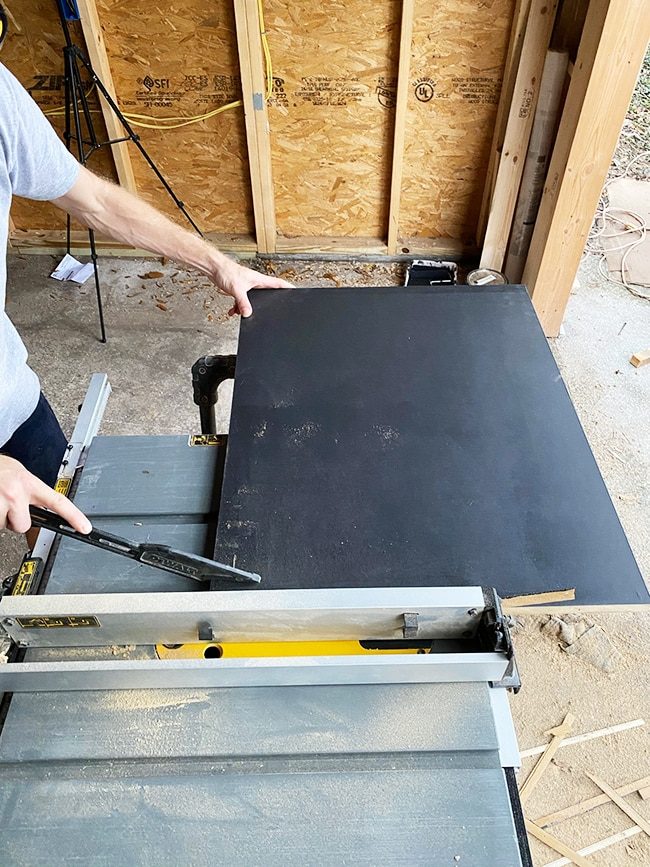
Finally, we brought the new and improved boxes back inside and wiggled them in place. It all seemed okay until…
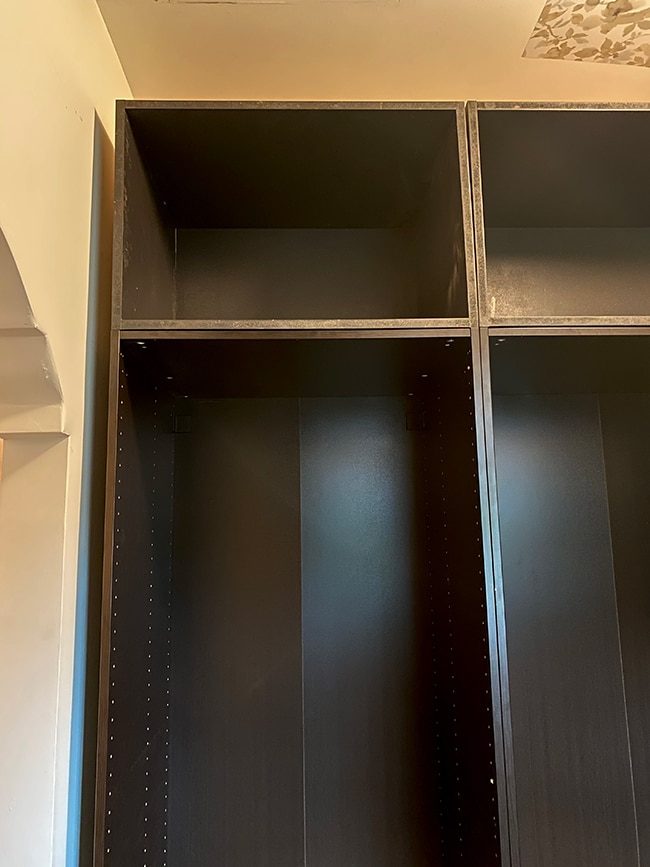
See that crooked gap on top? This cabinet was definitely not square. Down it came, disassembled once more, and reassembled with a square. Honestly I cannot believe how many mistakes we made with this project. There are so many moving parts, it is easy to skip over the most basic steps I guess. Especially when you are racing to get it done before your baby wakes up, ha.

Once we squared up the cabinet and reattached the back, we were able to line everything up pretty well. It still was not well suited… because we made yet another mistake of trying to build boxes to the *exact* width/depth of the Ikea wardrobes, which did not account for any imperfections in the wall behind it. On the far right cabinet, one edge was hitting the back of an uneven spot in the wall, preventing it from sitting flush to the wardrobe. If we would have shaved just 1/2″ off the depth of these boxes, we'd have enough wiggle room to position them perfectly without worrying about making them flush against an (uneven) wall, too. This was the approach we used for the platforms—we just did not apply it to the upper boxes as well. Live and learn.
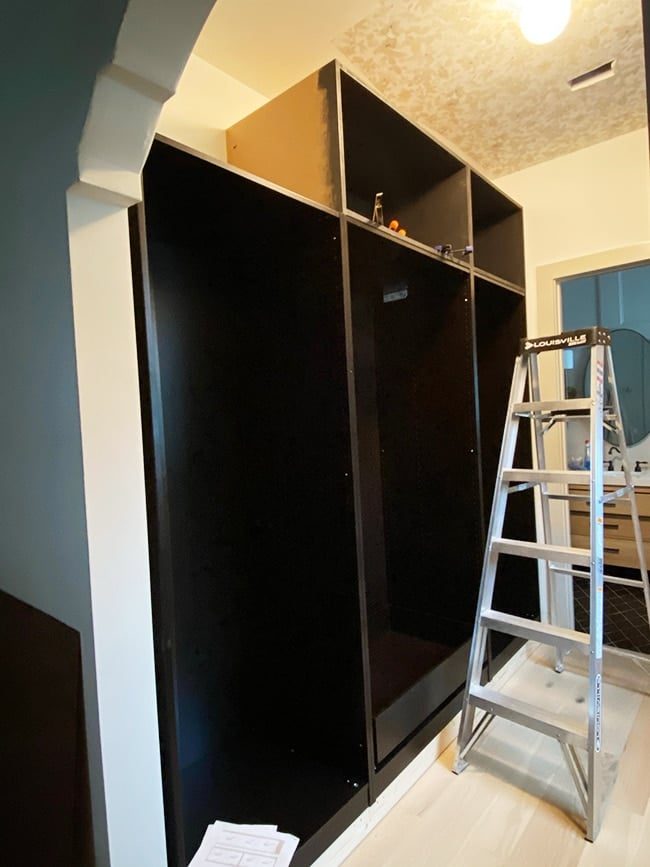
To attach the upper boxes to the wall, we made an “L” bracket with two 2×4's, screwed the top into a stud in the wall, and the bottom to the cabinet (learned this tip from Chris Loves Julia). Finally, something we did not screw up, ha!

Just one L bracket per box is enough to keep them secure. We also screwed them into the top of the wardrobes which made them shift somehow and left us with a small gap between each cabinet. I swear, these boxes are so sensitive.
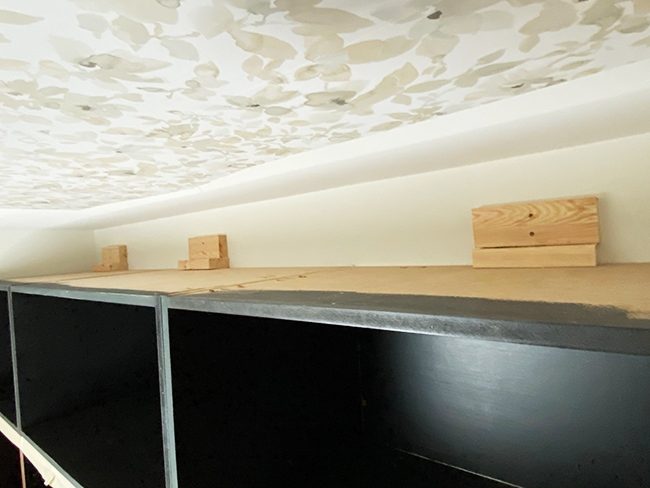
One thing I was not loving was the noticeable rough texture of the painted MDF edges. Even though the boxes will be hidden behind doors, the finish was bothering me so The choice was to investigate. Apparently the way to get around this issue is to either use an oil-based primer first (since MDF absorbs water-based paint and raises the grain) or use a good wood putty first. It was too late for primer and wood putty would have been a long, messy affair so I just tried sanding it down…

You can see the huge difference between the sanded edge on the right—it made it completely smooth. I figured a second coat of paint might raise the grain again and it did a little, but certainly not as bad as before. This I can live with!
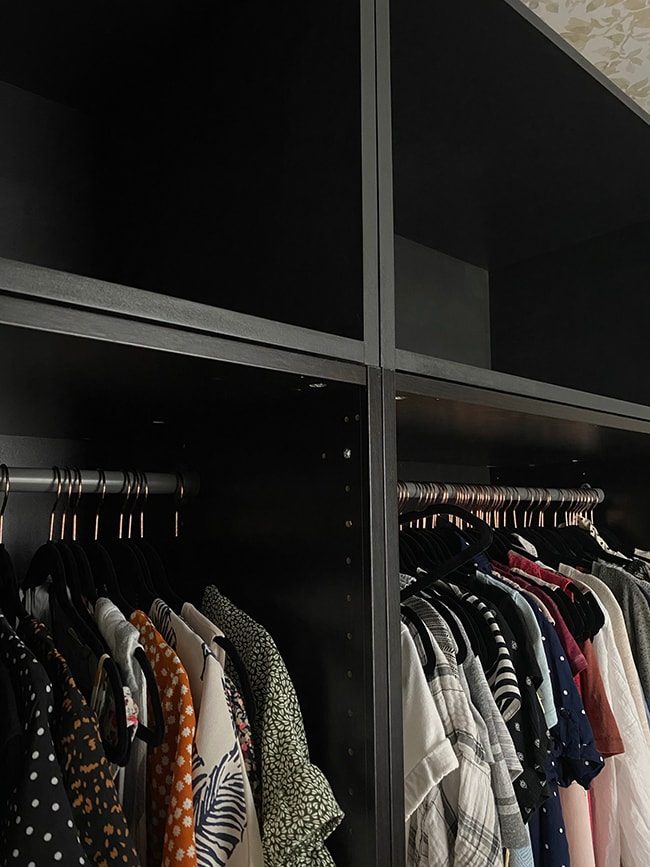
Again, the goal was just to have black wardrobes/cabinet boxes that will blend in behind the closed doors. Not trying to match the black/brown Ikea finish, I do not mind if that is a little different since we are the only one who will see it. If does bother me later, I can always touch up the edges with the black paint we end up using on the doors/trim so at least those will all match perfectly.
After all the ups and downs of this multi-day saga, Phase 1 is complete. We have functioning wardrobes!

This staged shot lasted all of five minutes before we shoved all of our belongings back in. We are still missing some shelves and things to organize them, but walking into this space makes me smile (it feels SO tall! And dark, and handsome).

Of course, you still have to look past all the gaps, lack of trim and finish panels, and missing doors and drawer fronts. As much work as Phase 1 was, I am afraid Phase 2 will be a significantly larger operation. This is where everything will have to be precise—down to the 1/32″—and there is no hiding any mistakes. It is about to get real complicated.

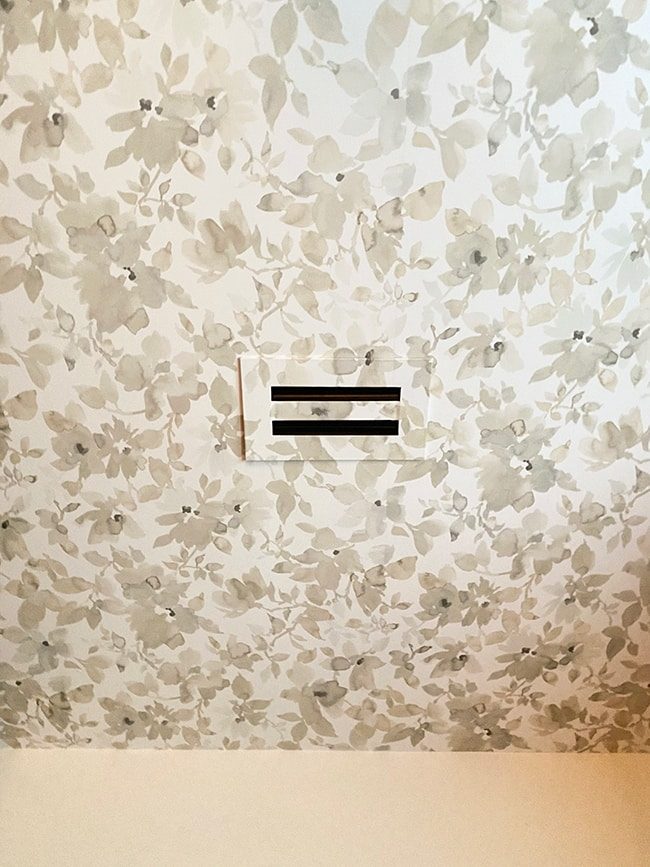
Did you notice something new on the ceiling?? Remember the old vent that was there before? Well there is a new grill in town…
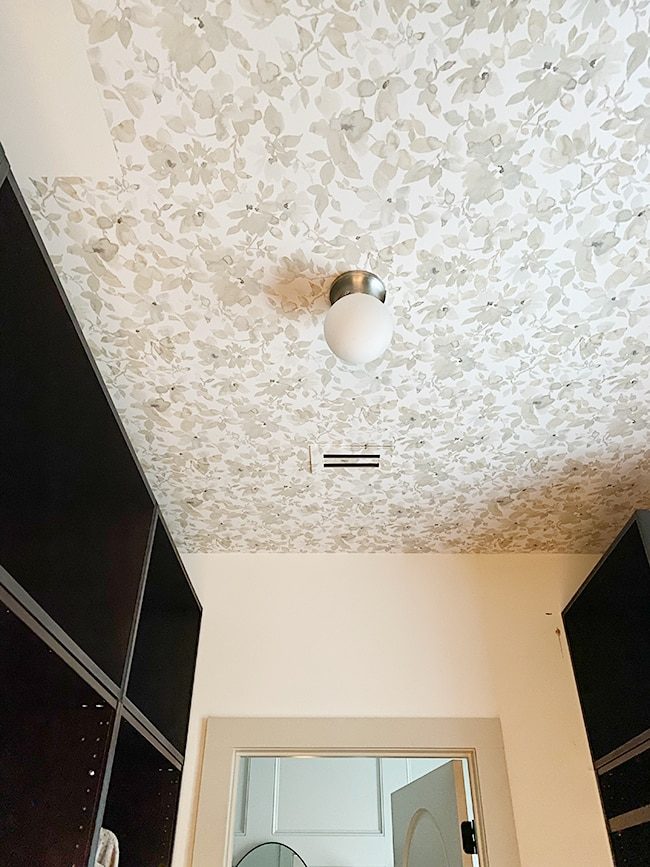
I found this minimal style vent coveron Amazon… much cleaner than the builder grade, right?

I was able to wallpaper right onto the flat front, so now it blends in much better than a bulky white register that would have stood out like a sore thumb on a focal wall.
And that concludes the end of Phase 1. Phase 2 will consist of the following:
- Adding 2×4 blocking along the top and sides for filler pieces
- Cutting, painting and attaching filler pieces, side panels, baseboard and window trim
- Cutting, painting and attaching decorative crown & baseboard molding
- Building a vanity desk with a custom accessory drawer
- Adding additional trim and mirror glass to doors
- Painting and installing doors & drawer fronts
- Finishing attic access panel, installing light and hardware
Whew… that is quite the list! Maybe this will have to be split into two more phases. Painting will take the longest, by far (we are spraying them all and that is quite a process) so I am not sure when the next update will be. We are waiting on the doors to arrive to test fit before we cut any of the filler pieces, which should happen by the end of the month.

In the meantime, I am planning an easy/fun DIY to do this weekend that I cannot mess up. I need a morale boost over here after last weekend, hah. Onward and upward! Let us see what next week brings…
