Heights House Master Bathroom Layout
Today's post is an important milestone, as it marks the very first room design for our new build—the master bathroom! We have actually decided to tackle all 3 bathrooms…
Today's post is an important milestone, as it marks the very first room design for our new build—the master bathroom! We have actually decided to tackle all 3 bathrooms in this house over the next month (apparently our lives are not hectic enough right now) but I am especially excited about the design for the master. Let us get right to it!
It is on the small side, but we chose to sacrifice space here to gain more in other areas of the house. The bathroom is at the end of what will be our walk-in/hallway closet with rows of cabinets/doors (more on that in another post)…
Oh hey, look at our new doors!
The vanity wall is straight ahead. We will have 7' of vanity + counter space with three wall-mounted sconces.
To the left of the vanity will be the toilet in the corner:
Across from the toilet is the shower. We shortened the length from the plans, so the entrance will be facing the toilet (we will add a frameless glass door here).
Then there is the shower:
And there is the bathroom entrance, looking back into the closet:
Rotating now to the left, you can see the bathroom and closet windows:
And back to the vanity wall on the left. The room gets a good amount of natural light with a 3'x4' window, and the tall 9'4″ ceilings help give the illusion of more space.
The vision for this bathroom is elegant, rich and refined, warm and luxurious with attention to detail. What it lacks in size it will make up for in luxury and style.
What will this look like, you ask?
It all started with the discovery of Bedrosians Magnifica line. It is thin porcelain tile, available in large format sizes (up to 60″x126″) made to cover surfaces like walls and countertops—so you can do things like this:
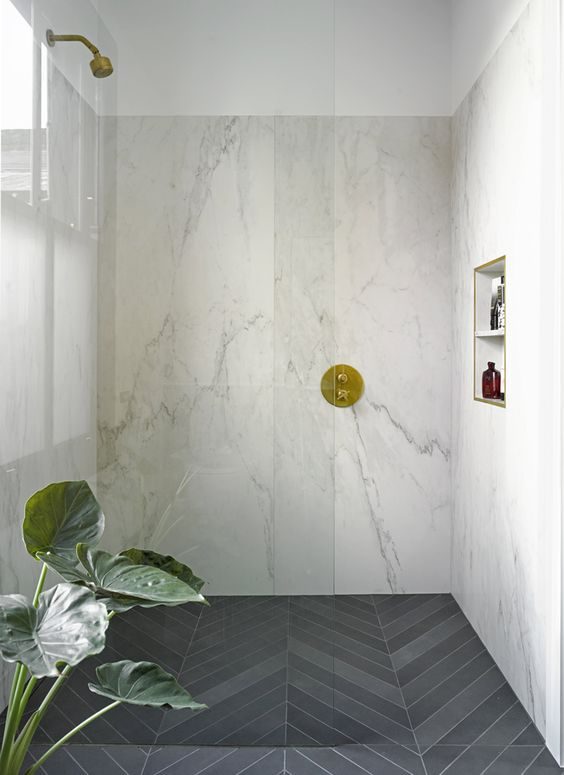
TOTAL GAME CHANGER. I immediately fell in love with the Calacatta Super White, with its striking gold and grey veining:
The Calacatta Super White is available in the four unique slabs above, which join seamlessly together. The plan is to wrap all three shower walls (floor to ceiling) and continue the stone across this entire back wall…
This porcelain is what dreams are made of, and I excitedly placed the order and built the rest of my design plan around it.
Then, a couple weeks ago, I was told they were out of stock and I had to choose something else. I was CRUSHED. But no good renovation comes without its detours, so Plan B it was. After much internal debate, I decided on the Lincoln Super White:
This porcelain also has four unique slabs, and I'll use C and D on the back focal wall which should join together seamlessly. The biggest thing it is lacking is the gold tones I wanted, but the more subtle pattern has genuinely grown on me and I think will work nicely with the black floors. Plus, it reminds me of lightning which is one of my favorite things in life 🙂
Here is an actual photo of one of the slabs they sent from the factory—they'll be arriving tomorrow!
I am still a bit nervous since this is the first time I have ever worked with a material like this, but if it turns out as expected, this feature will be to die for (it requires special installation, and our installer is booked for another 2 weeks or so, but it will be worth the wait!)
For the floor tile, I looked no further than Bedrosians Paseo line. These are handmade ceramic tiles available in several shapes and sizes, and an array of different colors:
I had to choose something unfussy so it would not compete with the porcelain walls, but I still wanted something eye-catching (in a subtle way) and luxurious. And what represents luxury more than a diamond?
I may or may not have squealed when I opened these. Absolutely striking in person—you can tell these are handcrafted and high quality.
Do you know how hard it is to find examples of diamond floor tile? I scoured Pinterest and could not find anything like it. That only solidified my decision, because now I get to share something new! I hope you guys like it as much as I do. Can you visualize it in the room?
With the tile out of the way let us move onto the rest of the room! The bold walls had to be balanced with something calm yet still interesting, so The choice was to go with a panel molding treatment on the vanity wall (and possibly the window wall too, have not quite decided yet). Here are a few inspiration photos…


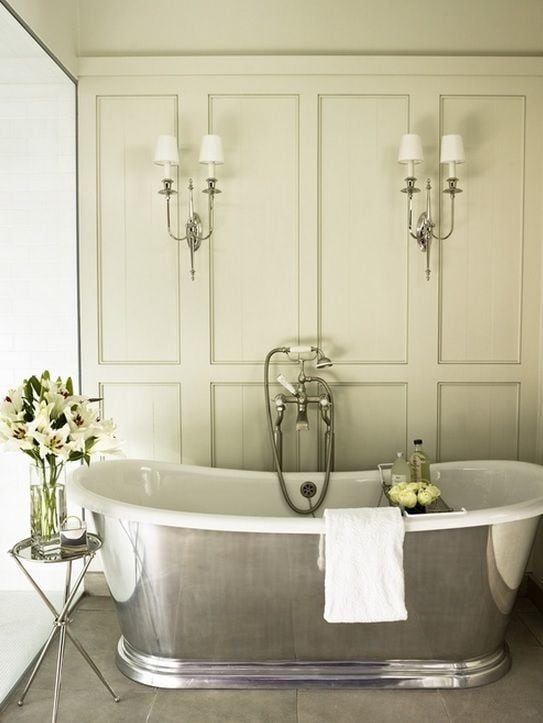
The exact style and color is TBD, and the spacing will be a bit tricky since we have mirrors and sconces to work around. But I prefer the look of molding vs drywall whenever possible, especially in smaller spaces. And tile walls were a no-go due to cost and the fact that there is already so much tile in the room. It is all about balance!
So let us talk about the vanity. This was easily the most difficult piece of this design puzzle, because of my specific requirements:
1) It had to be 7' long (to maximize storage/counter area and leave the right amount of space next to the toilet—plus the sconce locations had been set for this size)
2) It had to have lots of hidden storage (ideally drawers)
3) It had to be a light-medium natural wood tone
4) It had to be relatively affordable
You guys, I spent MONTHS scouring the corners of the internet, exhausting every page of results from every possible source I could think of and nothing came close. At one point I started to resign to the fact that I would have to go custom made, but could not bring myself to fork over the $4k+ that would have cost.
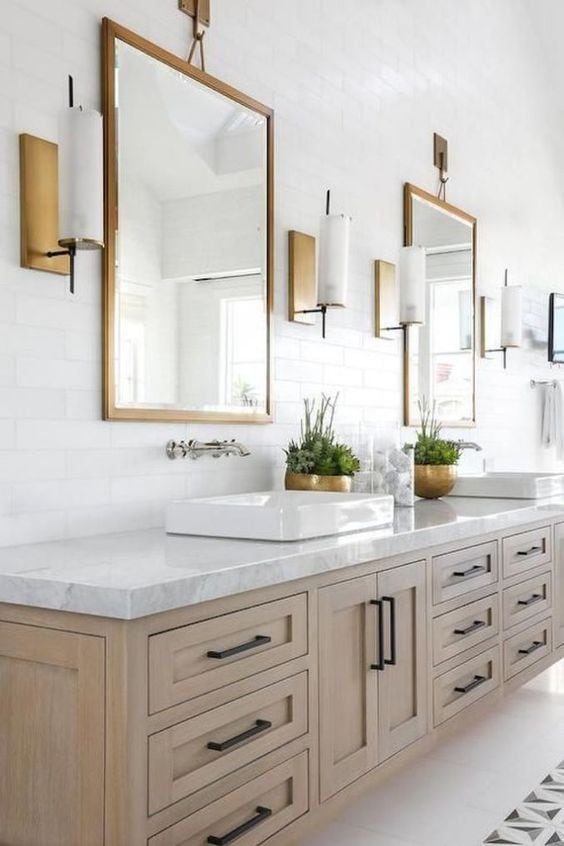
Then, I got creative. There were not any 7' vanities that meet my criteria, but 42″ is a relatively common size, and 42″ + 42″ = 7' — BINGO!
That opened up a whole new world of options, and the search continued. It was not long before I found this vanity on Overstock…
Unfussy, sleek, exactly 42″ and meets all of my requirements. Cue the happy dance! It comes with the stone top and sink, but I'll be using my own counter and sinks. Here is the design plan again to refresh your memory…
We will secure the vanities together and place one long stone slab so it will look like one big vanity. Smart, right? Let us just hope it works out as planned (I think it will).
With the biggest decision out of the way, it was time to bring on the fun part—accessories! The choice was to stick with Overstock for the rest of the bathroom after realizing what a huge selection they had of bath options. I have partnered with them in the past (remember our guest bedroom makeover last year?) and they loved the concept of this bathroom, so they were on board to partner again for this space!
The counter will be a stone slab (something white and low maintenance), and I ordered two of these $47 undermount sinks:
I chose an oval shape to break up all the hard lines of the vanity/wall molding. It looks like these are currently out of stock, but they have a similar model here.
For the faucets, I opted for a widespread dark bronze/black in an antique style.
Since I'll be using brass sconces, I thought I would mix it up to add variety and interest. The dark metal will look rich against the light counter and walls. The faucets are solid brass, heavy and well made with great reviews. It is definitely more of a traditional oil rubbed bronze color (black) in person:
I also picked up the matching pop-up drains (always make sure your drain matches your faucet!)
Long before I planned this bathroom, I already knew the type of sconces I wanted. I came across these beauties for $128 and it was a done deal:
They look identical to the photos in person and they'll be well suited for this room! So elegant with just enough detail to make them unique.
Then it was time to mirror shop. This could have been tricky, since I have such a tall and narrow space to fill (the sconce locations were set and could not be moved). I was also dead set on framed oval mirrors, which genuinely narrowed the search down. Lo and behold, Overstock came through and I found these 24×40″ mirrors for under $100!
They just so happened to be the exact size I needed, fitting perfectly between the sconces and the right height for our tall ceilings. And such a bargain too—this was my luckiest find yet.
The last piece of the puzzle was the shower faucet. This actually had to be planned out months ago, so the plumber could install the correct valve during rough-in. I purchased the Delta universal valve body which works with most of Delta's shower trim designs. This would allow me to choose the trim design later, and allow flexibility down the line if I want to change the look. Delta is a reputable brand and quality was a huge deciding factor, and fortunately they offer a range of styles and price points. I used one of their most budget friendly Trinsic faucets in my One Room Challenge makeover a few years ago…
I loved the champagne bronze color and decided to go with that again, but this time I settled on the Dryden trim style (another one of their more affordable options):
I like that it is unfussy and will not distract from the porcelain walls. One suggestion my builder made was to install the handle at the front of the shower entrance, so you will not get drenched with cold water when you turn it on. I did not even think about that but it makes well suited sense! You can see the valve on the left wall.
Another solution for a shower that is too small for a bench—add a foot cubby! This will come in handy in a few months when my belly sticks out past my toes 🙂
And that, my friends, is the master plan! Fortunately this is not a project we have to tackle ourselves, since we will have our builders crews on site to finish the tile, plumbing and electric in the house. We do plan to DIYing the wall molding, however, and will need to start on that as soon as the tile is complete to stay on schedule. Fingers crossed we are 6-8 weeks away from getting the keys!
I have been posting previews of the latest updates in my Instagram stories, and I am also hoarding inspiration over on my Pinterest (look at my Bathroom board see the style I am channeling for all three bathrooms). Vlog update coming next week!
PS—I cannot thank you all enough for the kind words and well wishes on last week's announcement. We cannot put into words the joy we are feeling right now. And I am finally starting to get some energy back here in the 2nd trimester, so I am looking forward to being much more productive over the next few months!