New Laundry Room: Frosted Decal Door & more details
Well, we have made it through another week of DIY misadventures and I am back to share what went down. If you caught last week's post, we were about to build some…
Well, we have made it through another week of DIY misadventures and I am back to share what went down.
If you caught last week's post, we were about to build some drawers for underneath the washer/dryer…
First I had to order some drawer slides. The box depth is only 12″ and The aim was to maximize the space so I looked for full extension slides on Amazon, settling on these since the price was right and they could get here in 2 days:
We were disappointed to discover that the were not, in fact, full extension as stated in the title. Not only that but one set was missing screws and the other only had eight for all four rails. Unfortunately you cannot just use any old screws with these so we had to go digging through our spare screw stash to find anything that would work. But let us keep moving along…
I enlisted my former-cabinet-builder Dad to help, as I am 200% confident I would never be able to do anything this precise on my own. After deciding on a game plan and picking up some wood at Lowe's, it ws time to get to work. My dad suggested two drawers instead of one large one to help hold the weight, so we had to build a divider in the center. We used a 2×2″ scrap piece of wood for the base, first drilling countersink holes:
Then securing it to the bottom after making sure it was exactly straight and level (particularly important when dealing with drawers):
Once that was in, we cut a 1×2″ for our vertical divider piece (which the drawer fronts would rest on) and my dad fashioned a couple pocket holes on either side to secure it to the top.
This is what they did before the Kreg Jig, folks. It is actually way faster if you are doing just a few than having to break that thing out.
Once the pocket holes were ready, we nudged it into place…
And in it went.
Next it was time for the sides. We used 1×3″s here cut to 12″ and attached the slides first:
Then we attached the slides to the center piece:
And the framework was in place.
After inserting the slides, we had to measure the precise distance between both sets to find our drawer width.
Once we had our measurements, it was to the garage to start constructing. I should have consulted my dad first, but I ended up buying 1×10 boards to build the drawers. He said a sheet of 1/2″ plywood is actually ideal since 1 by's tend to be bowed/warped a lot, and when you are building drawers it needs to be a very precise operation. I did not feel like running back to Lowe's so we stuck with the 1×10's and hoped for the best.
Here is all the drawer parts—4 sides, 2 fronts and 2 backs:
For the bottoms, I had a scrap sheet of 1/4″ plywood we cut down on the table saw:
Next it was time for assembly. I positioned a square to make sure it was level, and we used wood glue and finish nails to attach the pieces:
It seemed pretty straight to me… (as good as you can get with this type of wood):
We used more wood glue and finish nails to secure the bottom:
Then attached the rails at the bottom:
Finally, the moment of truth….
Nope. Not gonna work.
Between the original construction of the enclosure, the variances in the drywall and trim, the fact I used the wrong kind of wood for drawers… it genuinely would have been miraculous if everything came together perfectly. Too many factors working against us, I should have known all along.
So instead of trying to make the impossible happen and stress over it, The choice was to scrap the drawer idea altogether. I am learning more than ever with this room that in matters of DIY/remodeling, you just gotta go with the flow and be open to a change of plans. I actually cannot think of any room makeover that has ended up exactly as I had planned, but often times failed plans lead to an even better solution—and I do believe that is the case here. I have found the well suited fabric to make a curtain, and I am loving this idea because it will give it a farmhouse touch, soften up the space which I think it genuinely needs, and I do not have to debate over stained vs white wood 🙂 I even have a matching ironing board cover which I cannot wait to share soon—hopefully next week!
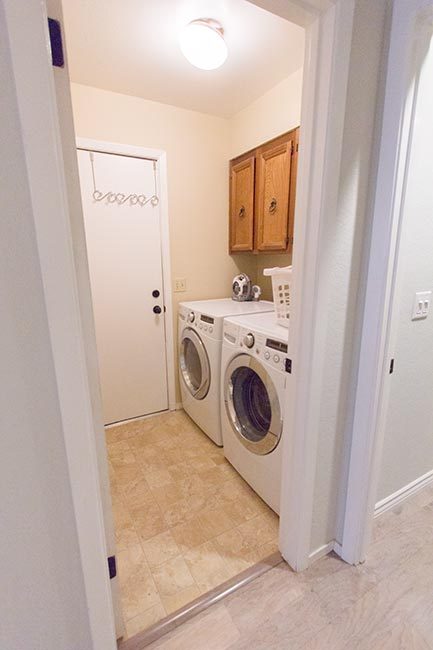
For now, we are getting used to the new space and loving how much easier the laundry process is. Here are the machines in action—no movement at all since adding the trim so we are genuinely pleased with how they ended up!
Now, let us talk about this doorway issue:
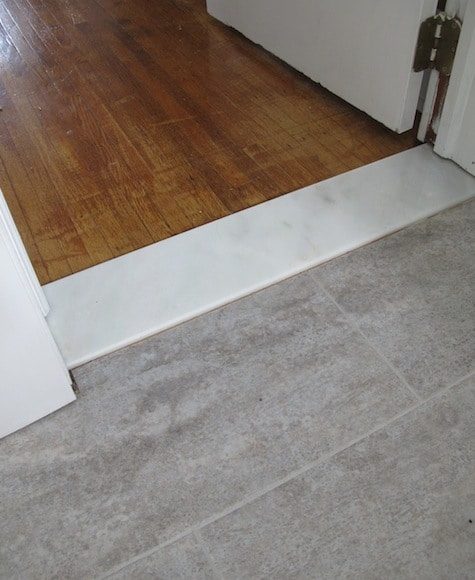
The new door is wider than the original so the doorway had to be opened up, leaving this unsightly gap in the tile. Unfortunately we do not have a single piece of the old tile to replace it, so we had to get creative. Eventually we plan to upgrade the tile so we did not need any elaborate/costly solution. A reader recently pointed out that in Europe they often use wide transition pieces (I believe as a design element?) and linked to a well composed white marble threshold which I thought was well suited:
We were not about to go spend $$ on a custom marble piece for a temporary solution, of course, so we looked no further than a scrap piece of plywood in the garage to do the job. We had some tricky edges to cut around though, which Brad did with some careful measuring and a jigsaw. Here was a practice piece:
After refining the shape, the edges were sanded down for a smooth transition and it was painted in a semi-gloss white to match the trim:
To secure it to the ground, we used a bunch of liquid nails (on the old tile only as not to leave anything permanent on the new tile:
Not too shabby, right?
I caulked in the seams and added a couple layers of protective poly to make it durable and easy to clean.
Once the door was put back on it all came together.
Speaking of the door… we are finally getting to my favorite part. Remember how it looked before?
Just a nice, unfussy glass paned door. But The aim was to give it some style… frosting was the key. After reading multiple horror stories about canned spray frosting, we decided to skip the headache and buy a roll of Gila window frosting. I will not give an in depth step-by-step here because you genuinely need to watch the video on their website, but it pretty much went as hoped. We managed to get by without any air bubbles, but you do have to be careful about bits of paint getting stuck to the film. As part of the prep work, we had to scrap the edges clean of paint with a razor and somehow, little specks of black paint made their way underneath the film while installing. It is genuinely not too noticable though, and not at all from a distance.
Once the frosting was done it was time to add the decal! I whipped up a unfussy Laundry design and sent it to this shop on Etsy who made and shipped it to me for just $5.75:
We found a Youtube video on how to properly install decals and followed it closely. After measuring and taping it into place in the center, we cut the backing off one side and smoothed it onto the glass with a credit card:
It seemed to work great!
Same process on the other side—remove the backing and smooth it down…
Then carefully peel the front off:
It came out so well suited. We loved it.
Strong, right?
Until we looked at it from another angle and realized it was crooked! Do you see it?
We have no idea how/when that happened, but I already ordered another one and it should be here in a couple days. Sigh. I think it will be a lot easier to install with the door already hung though, and we will make sure to triple check our measurements before removing the backing.
This is how it looks from inside, if you were wondering:
So that is the latest from the laundry room. If you are wondering where on earth our cabinets are… well, so am I. Lowe's told us originally that they'd be finished in 4-5 weeks… and somehow that turned into 9-10 weeks, and we still do not have an exact date. Estimated delivery date is 3/12-3/20 and it is looking like we are not going to get this room finished this month. We will be in Florida the last week of March and I was genuinely hoping to have this room wrapped up by then, but with all that is left to do after the cabinets arrive (installation, counter tops, plumbing/sink, tile, baseboards, finishing touches) the chances are looking pretty slim. Another setback in this room, but c'est la vie. Life goes on.
Elsewhere in the house, I have been getting out of this winter rut and adding some Spring touches to make things a bit more bright and cheerful. I'll be sharing more on Instagram throughout the coming weeks, so make sure you are following me there so you do not miss any of it!
There will also be a full Spring house tour coming up in a few weeks here on the blog. Bring on the warmer weather!
This week in the laundry room, we will be installing a giant reclaimed wood shelf on the cabinet wall. We are trying out a new installation method which should be interesting if it works. Stay tuned for that!