DIY Barn Door Plans and Tutorial
Let us kick this week off with a new tutorial, shall we? I built these doors back in the beginning of March—you may remember seeing a timelapse video of the process in…
Let us kick this week off with a new tutorial, shall we?

I built these doors back in the beginning of March—you may remember seeing a timelapse video of the process in Episode 7 of my vlog series:

Feel free to watch it again and refresh your memory, I'll wait.

For those of you who requested a tutorial, the five week wait is finally over because I am here with all the details!
Materials
- 1×4's (for the smaller doors)
- 1×6's
- 1×8's(for the larger doors)
- Wood glue
- Wood filler
- 1″ Screws
- Primer/paint or stain
- Hardware
- Sliding door track for installation
Tools
- Miter saw
- Drill
- Sander
- Finish Nailer
My very first barn door experience was for our laundry room a year ago, and I knew it would not be the last.

It was an easy decision to build one for the new bathroom in order to free up limited space, and I figured I would build a couple more for the downstairs theater room entrance while I was at it since that space was unfinished.
To find inspiration, I browsed through Pinterest (as always) and came up with two different unfussy and easy to build plans using inexpensive 1″ boards I could buy at Lowe's.
After measuring for the sizes I wanted, I laid everything out in Illustrator to determine the cuts. Here is the bathroom door plan:

The doors are built with a base layer of alternating 1x8s (actual: 7.25″w) and 1x6s (actual: 5.5″w) to achieve my desired width of 36.5″—it did not have to be exact, but I wanted it within a few inches. The height was unfussy at 7' tall. The second (top) layer was comprised of 1x6s that would hold all the boards together with two horizontal pieces, two verticals, and a cross bar in the middle for extra stability and style.
The smaller double doors for downstairs essentially followed the same process, with the 1x8s replaced with 1x4s and horizontal center pieces instead of diagonal (The choice was to add this part in at the last minute so it is not shown below, sorry!) The overall height was also taller at 90″.

I used theinexpensive whitewood from Lowe's and the total cost for lumber came to $213 (with my 5% Lowe's card discount).
Once my materials were unloaded, I used my miter sawto cut my boards to length and did a dry fit to ensure everything lined up nicely.

For the diagonal piece on the bathroom door, I simply set the board down into position…

Used a straight edge to mark where it needed to be cut…
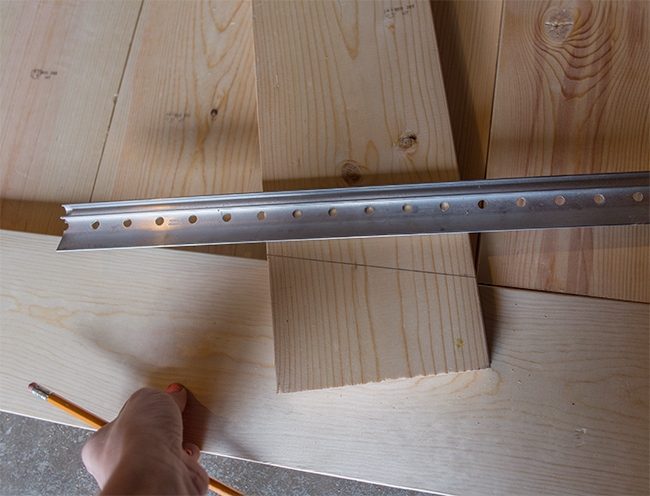
And set my saw to the correct angle, which ended up being a touch under 15 degrees.

Ta-da!

The smaller doors were slightly faster without this step.

Before assembly, I used my Mouseto sand down the edges and make sure they were smooth and splinter free.
Then it was power tool time.

If you have particularly long expandable clamps, they'd be very useful here but I could not find mine so I did the best I could—my wood was pretty straight so that made it easy.

I double and triple checked to make sure everything was square, then applied wood glue for my first piece.
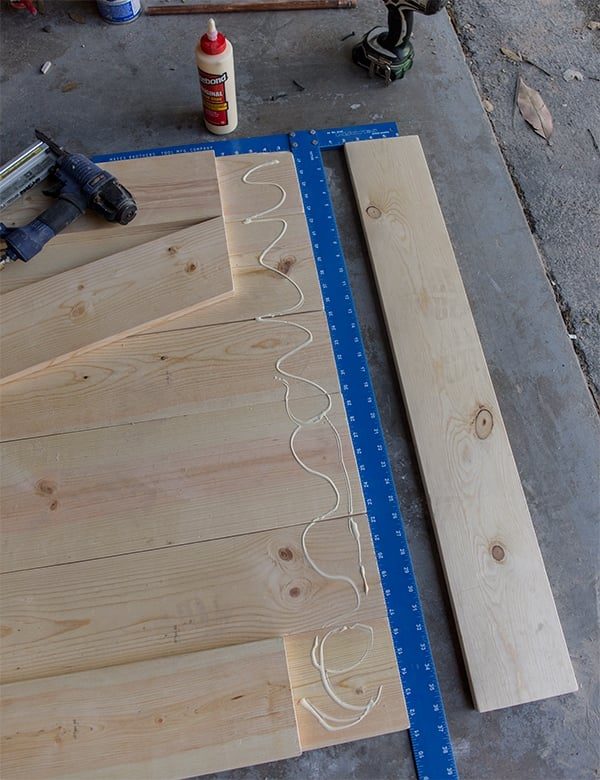
After realigning the board, I attached it to the bottom layer with a finish nailer + 18 gauge nails, one or two per board—this is just to keep everything temporarily in place until they are screwed in from the back.

I repeated the process for the remaining four top pieces, then flipped it over.

Before attaching everything with screws, I made sure to drill pilot holes since this wood splits easily and I definitely wanted to avoid that.

I went along the sides and across the diagonal in the center, averaging a two screws per board, one for the top and bottom. There is not an exact science to this—it is just what seemed sufficient to me.
Once the pilot holes were in place, I used 1″ screws (the total door width is 1.5″ so you will need to be in the 1–1.25″ range!)

Because the wood is soft, I was able to countersink the screws by simply applying a bit more pressure rather than having to go through the extra drill bit step, which saved plenty of time!
Once all the screws are in, the building part is over and it is time for prep work!
I used wood filler over all of the screws, nail holes and some knots and imperfections.

With six surfaces to cover, this took a little time…

Then I came back with my sander to smooth it all out.

Some of the board gaps were a bit larger than I wanted, so I filled it in a bit with caulk.

Finally—paint!
I have had bad experience in the past with knots and wood tannins bleeding through paint which The aim was to avoid, so I used Zinsser's water based primerbefore painting, followed by Valspar Signature semi gloss paint color matched to Kelly Moore's Swiss Coffee (this is all of the white in my house).

This wood is no fun to paint because it takes so many layers…

And these knots are the worst. If money was no object I would spend more on better wood.
I ended up doing 2 thick coats of primer and going over the knots 3-4 times.

And it took at least three layers of paint on top of that.

It was a very long day and night.
But, soon it was all over and I got to add the finishing touches—$3 Lowe's handles that I spray painted black.
For the track hardware, I used a 6 foot track for the bathroom and an 8 foot double door track for downstairs. At these prices, I would never DIY my own barn door hardware… these work so great and they are relatively easy to install. Save yourself the headache.
Barn doors for life.
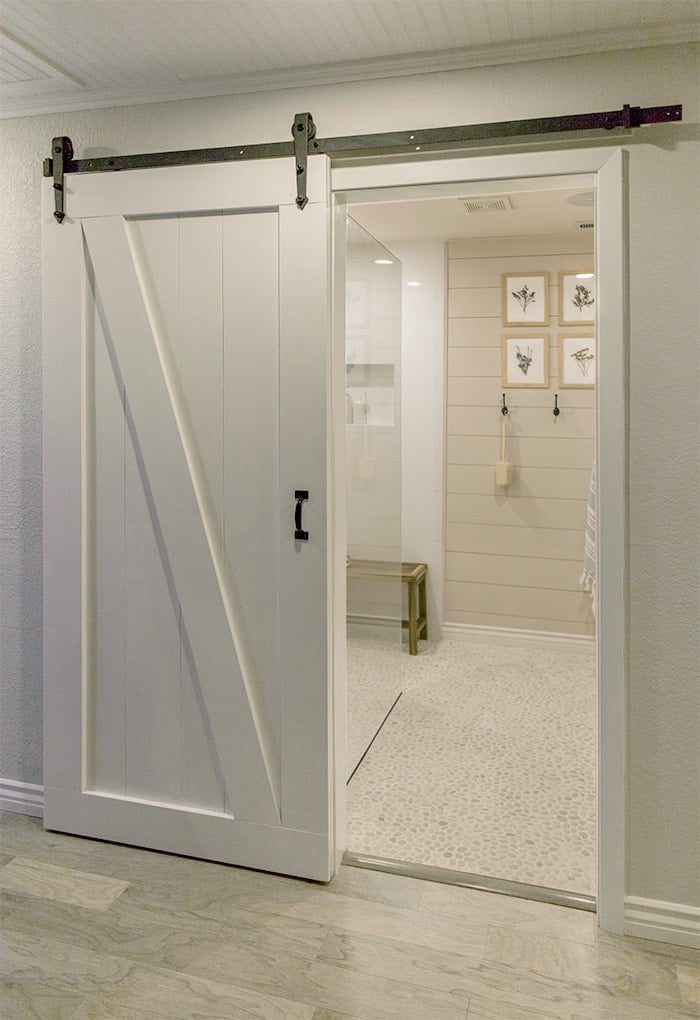

I know you have not seen much of the newly remodeled downstairs area, but do not worry—that is coming next!

The whole space looks so much more polished with these babies.

I am anxious to show off the rest of this space soon!
What are your thoughts? Do you like the clean look of painted white, or the more rustic feel of the salvaged barn wood in the laundry room? Have you ever built your own doors from scratch before? It helps to keep that it is an affordable option if you cannot find an existing door to repurpose or salvaged wood. Whether they are a trend or here to stay, I cannot get enough and do not think I'll ever stop using them!
Another vlog is right around the corner… in the meantime, catch me on instagram and facebook!
If you like this project, look at these popular beginner budget DIYs from my Project Library!
- How to realistically age wood (the easy way!)
- Easy string light planters
- Board + Batten tutorial
- $30 Sofa table

Want to get the look? Here are some of the products I used!
Door Pull - $3
6' Door Track - $60
8' Double Door Track - $125
Whitewood Boards
Kobalt Miter Saw - $146
Black & Decker Mouse - $33
Porter Cable Compressor - $99
Hitachi Finish Nailer - $70
Zinsser Primer - $8