DIY Hypertufa Stone Planter
This post is part of a paid collaboration with Lowe's Home Improvement. All opinions are my own. We are keeping the DIY's coming with one of my new favorite unfussy +…
This post is part of a paid collaboration with Lowe's Home Improvement. All opinions are my own.
We are keeping the DIY's coming with one of my new favorite unfussy + budget-friendly “look for less” projects!

I have been dreaming about these striking oversized limestone planters for months, I am sure you've seen them in high end homes on Instagram and Pinterest…
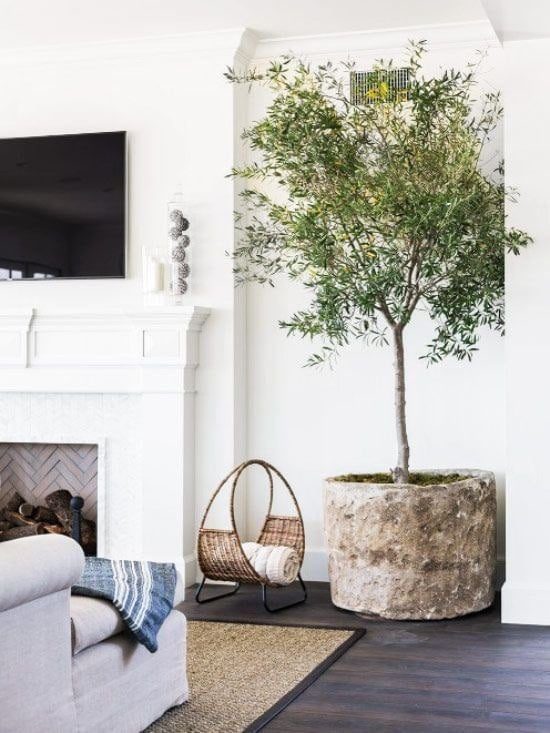
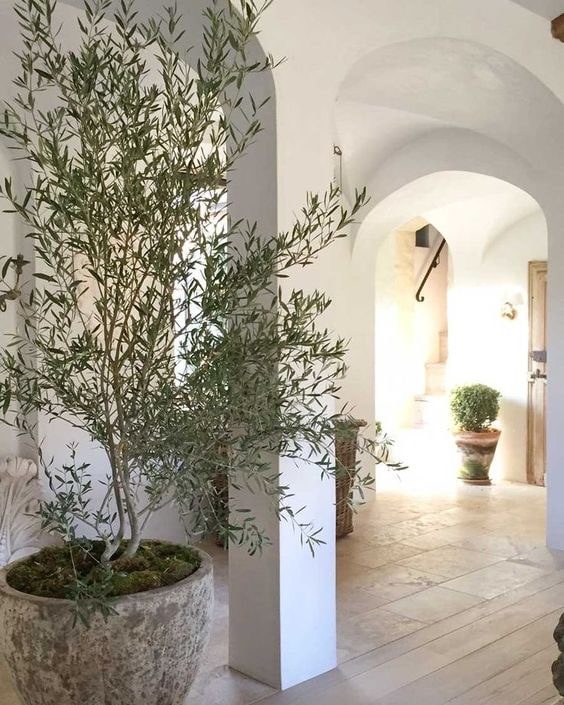
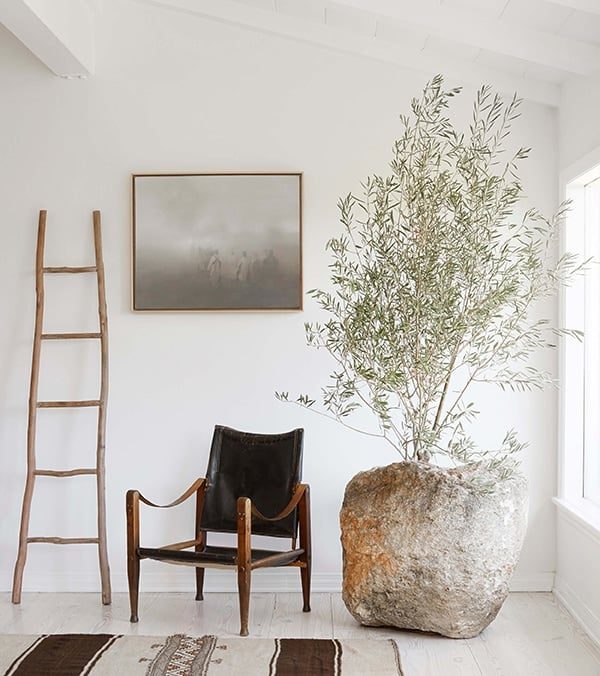
Being the bargain hunter I am, of course I scoured the internet looking to get my hands on one. Turns out they are not exactly cheap—to the tune of around $3,000 for the size I wanted. That is a NOPE from me. I knew there had to be a way to recreate this look that would not cost a small fortune, and after some digging online, I was introduced to the world of Hypertufa.
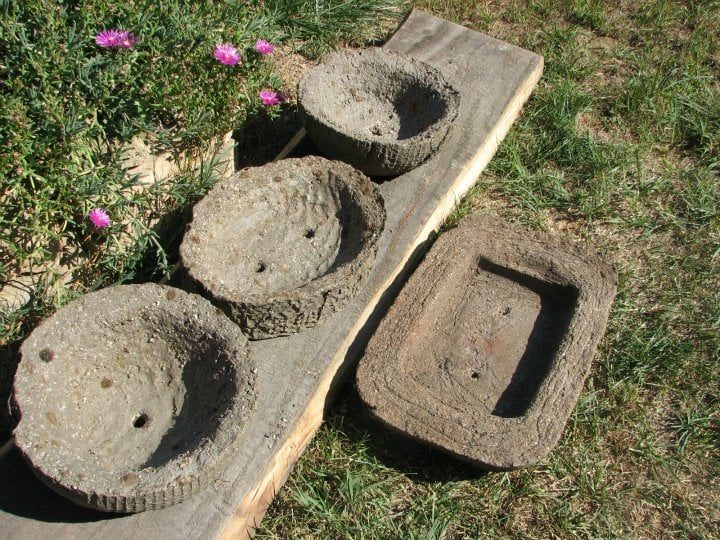
What is hypertufa?
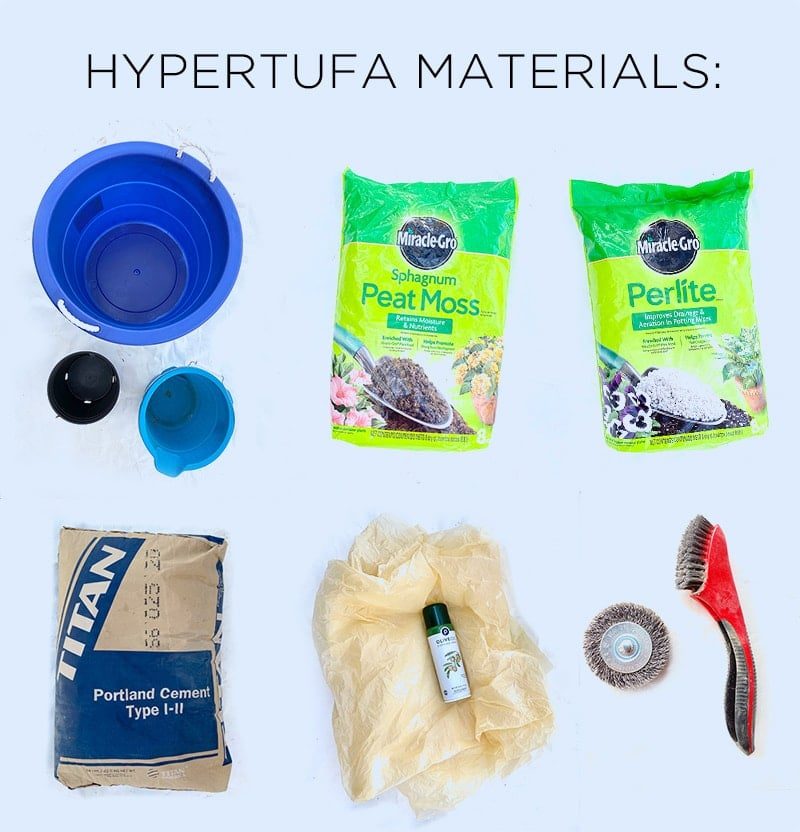
Hypertufa is a porous, cement based mixture that mimics the look of stone. It weighs much less than real stone/concrete, provides good ventilation for plant roots, patinas beautifully over time and can last for decades. I had never heard of such a thing before, have you? It was quite an exciting discovery, one with so much potential because it is easily accessible for anyone to make. Hypertufa requires just a few inexpensive ingredients, very limited tools/materials, and no DIY experience. It is pretty much fool proof! If you've never made one of these, you are in for a real treat. Here is what you will need:
How to make a hypertufa planter
- 1-2 bins or buckets: I used the largest bucket I could find for my outside mold, along with a smaller basket for my inside mold (the second smaller container is optional but I would recommend it)
- Peat Moss
- Perlite or Vermiculite
- Portland Cement
- A large plastic bag or sheet + cooking or silicone spray
- A coarse wire brush (handheld or drill attachment)
- Safety gear: rubber gloves, mask and safety glasses
The recipe is approximately equal parts peat moss, perlite, cement and water—just mix, mold, and let it dry. It is genuinely that unfussy! From the dozens of tutorials I read and videos I watched, it is not an exact science (some say to use 1/3 less cement) and you can even substitute sawdust for moss and vermiculate or sand for perlite. It is one of those fun projects you can experiment with and personalize to make your own.
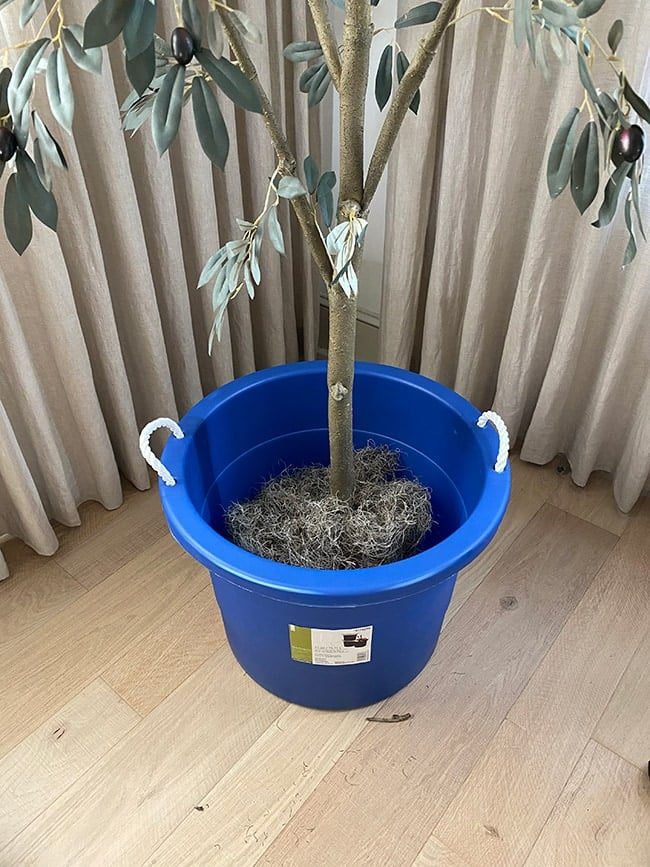
Hypertufa planters can work both indoors and out, and I already had the well suited spot in mind. The olive tree in the corner of our living room was in a basket that was a bit too small for the space, and I was not loving the style with the design of our home. The room needed something more substantial, rustic and aged looking.

I looked everywhere online for the largest inexpensive container I could find to use as my mold, and ended up with this $8 bucket. I liked the slight tapered shape and the size seemed just about right:
Step 1: Prep your mold
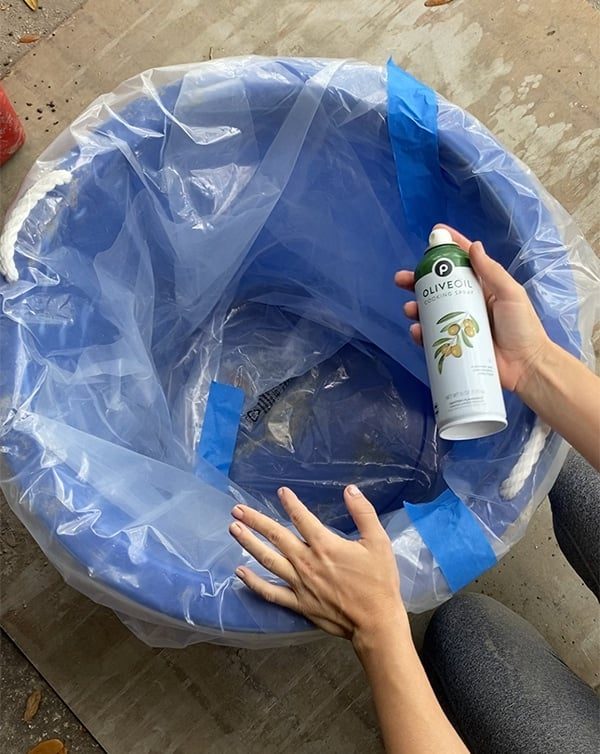
You could pour the mix directly into your bucket, but that would give it a smooth, uniform surface and I wanted a rougher/uneven appearance. I looked around the garage for something to work with and found a sheet of plastic.
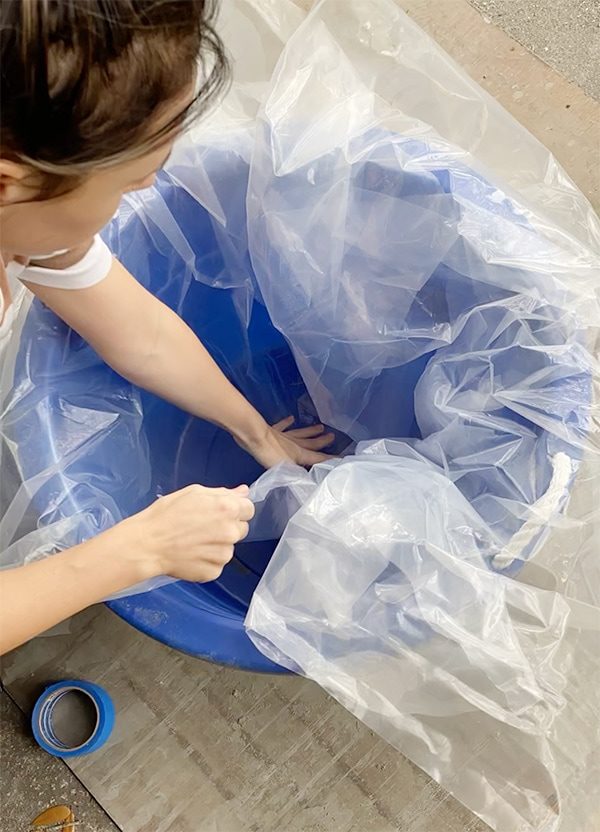
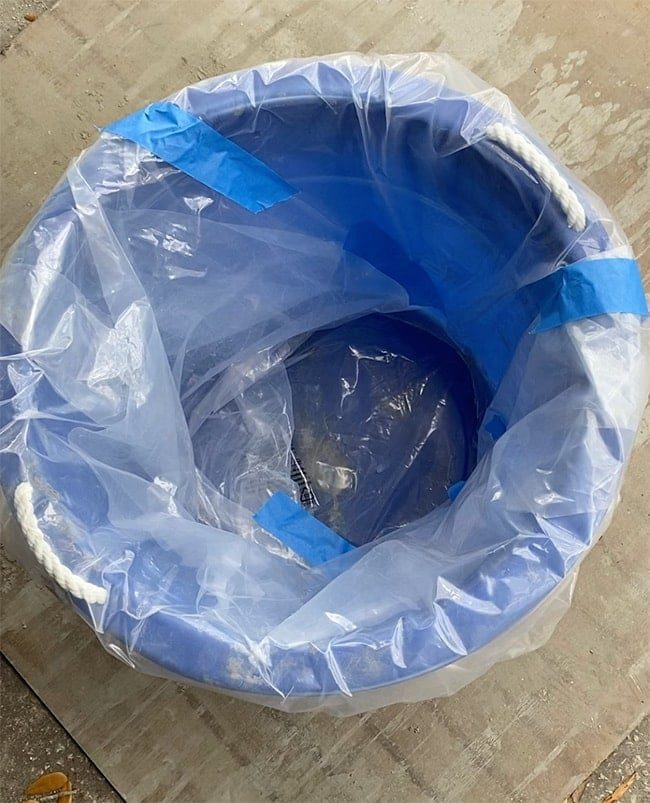
I lined the inside of my bucket, gathering more material in random areas to create an irregular shape and texture. Then I taped down any loose edges and along the top of the bucket.
Step 2: Mix the ingredients
Using a large bin/bucket (a wheelbarrow would be ideal for this size planter) add your dry ingredients: equal parts peat moss, perlite, cement (the order does not matter). Peat moss and Perlite come in 8 quart bags, so I added one bag at a time (and used a small bucket with measurement markings for the cement, but you could also eyeball it).

In total, I ended up using 24 quarts (three bags) of each, which was enough for my large 19″ planter plus a second smaller 8″ pot.
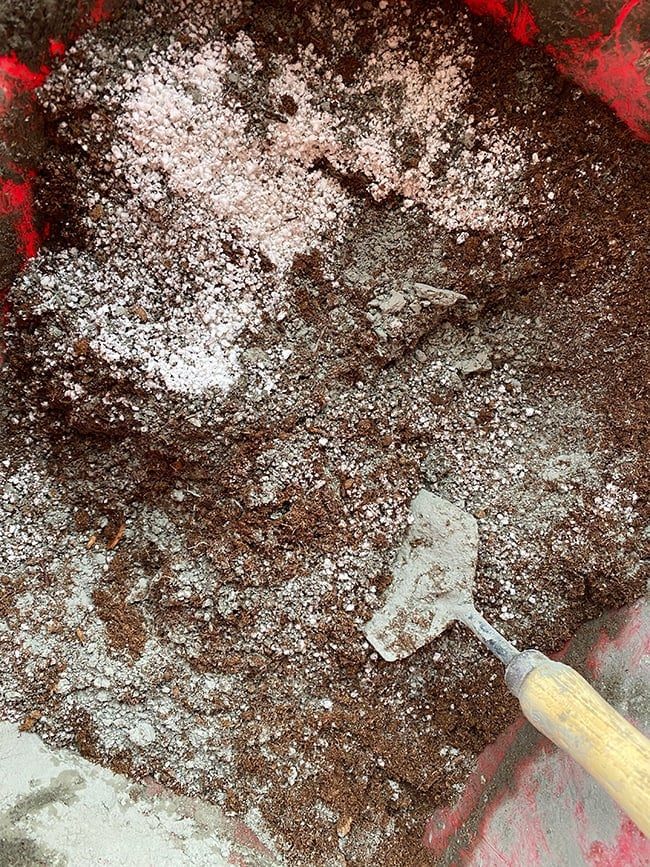
Once all the dry ingredients are mixed together, slowly begin to add water and mix well until you have a thick oatmeal consistency. It is better to be too dry than too wet, because you can always add more water later. I shared videos and timelapses of the process from start to finish on Instagram, so make sure to watch before getting starting!
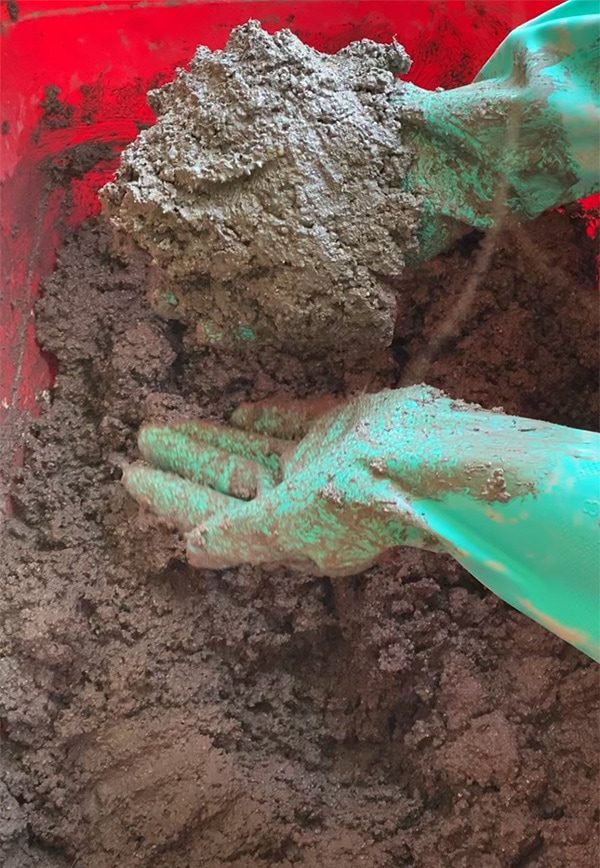
Step 3: Form the mold
First, spray down your bucket (or plastic liner) with cooking or silicone spray (some tutorials say this is not necessary but I say better safe than sorry!)
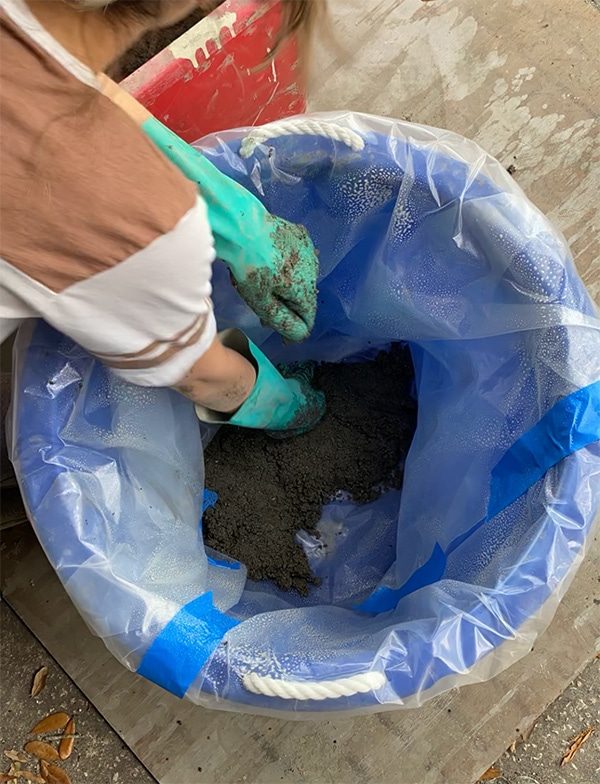
Start by forming a base approximately 3″ thick (the thickness will depend on the size of your planter, but you will want at least a few inches for a larger planter like this). Make sure to pack it down firmly as you go, compressing the mixture so it is structurally solid. If you will be using live plants, you will want to add holes during this stage for drainage.
Next, you can begin to form the walls, pressing the mixture into the sides of the bucket. You will want the walls to be a couple inches thick for strength, but if they are too thick then the planter can start to get heavy (especially one this size). Some people choose to shape the inside of the planters by hand, but I decided it would be easier to use a second mold. This would ensure the walls were a consistent thickness, and also keep the mixture from sliding around.
The only container I had that was the right size was the old planter basket. I figured I could put it in a trash bag coated in cooking spray to keep it from sticking to the concrete (more on that in a sec…)
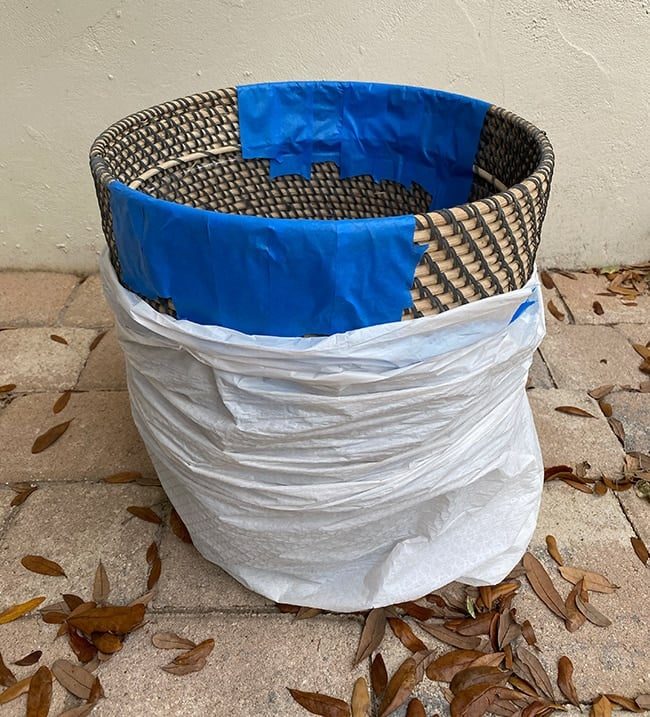
In it went, and I continued to work my way around the perimeter of the bucket, using a trowel to scoop the mixture and compacting it down with my hands.
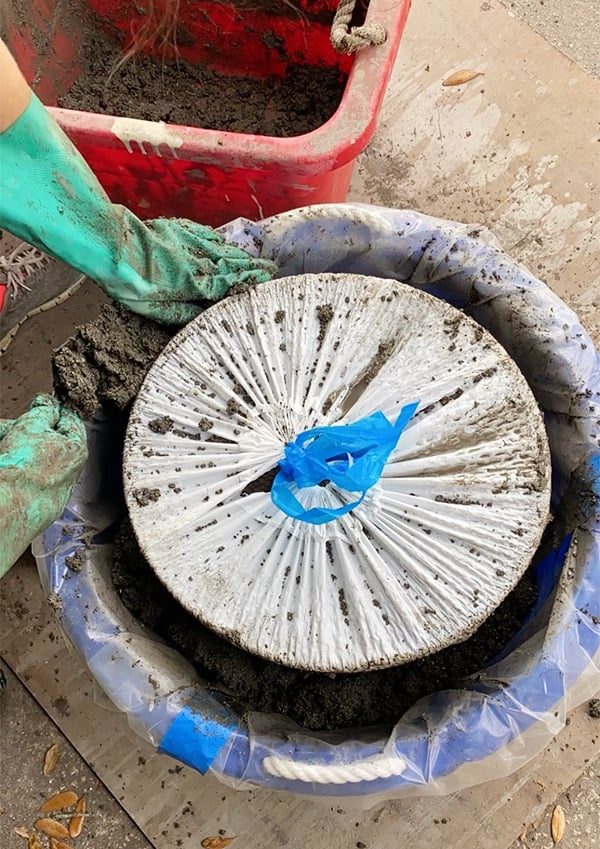
Once I reached the top, I rounded the edges to make them look more naturally worn and give the planter a little extra height.
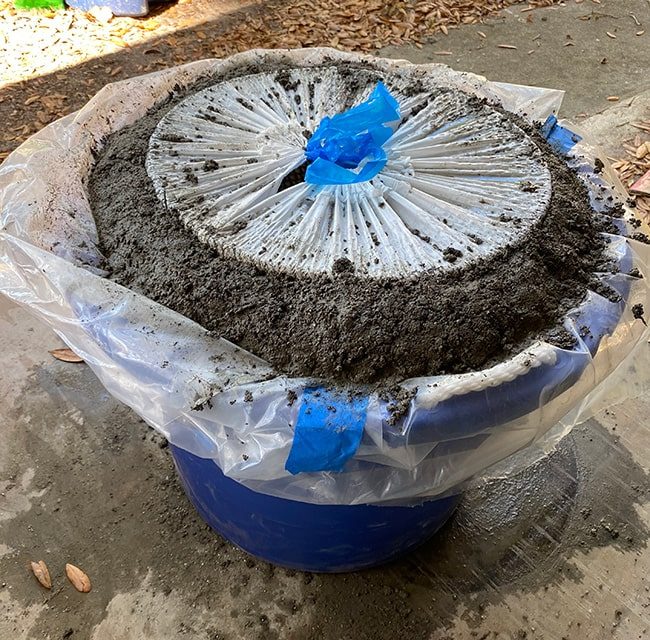
And you are done! Cover it in plastic and walk away.
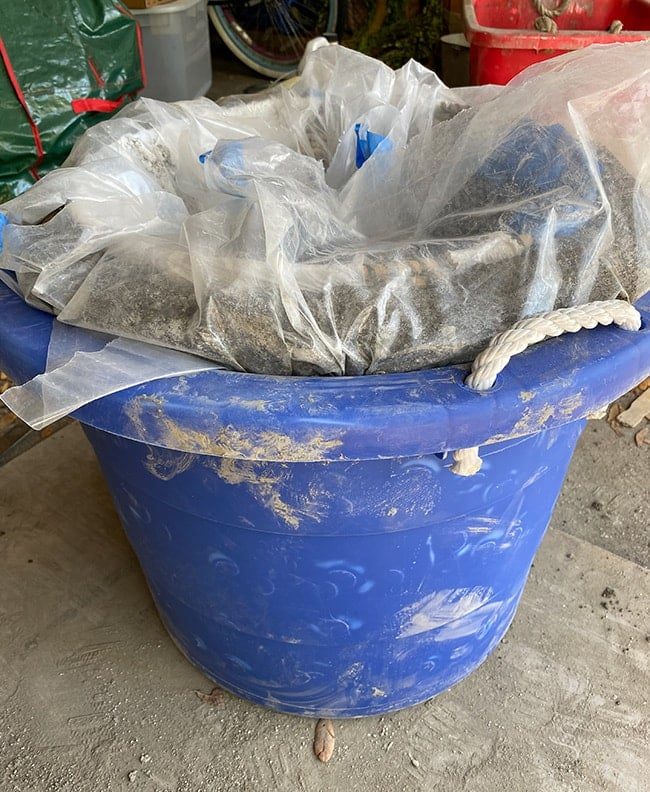
Step 4: Release the planter from the mold
After your planter has been sitting for 1-3 days (depending on the size/mixture ratio and weather), it is time to check on it. It should be hard enough to come loose from your mold and stay intact, but soft enough to rough up the surface. Mine seemed ready after 1.5 days, but there was just one problem…
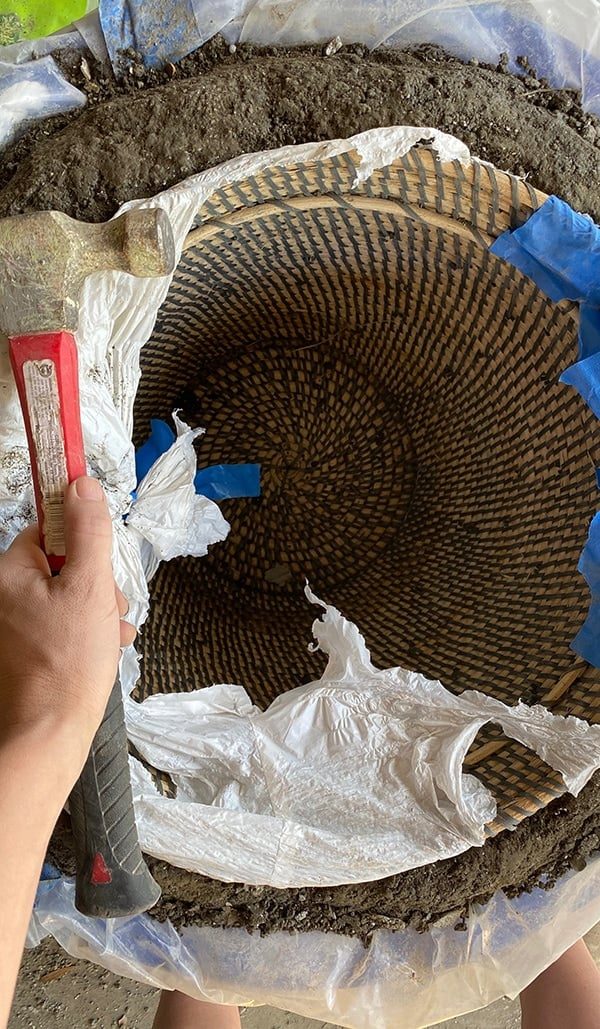
The dang basket would not budge. I tried wedging putty knives and screwdrivers around the edge and prying it out with a hammer to no avail. There was only one way out…
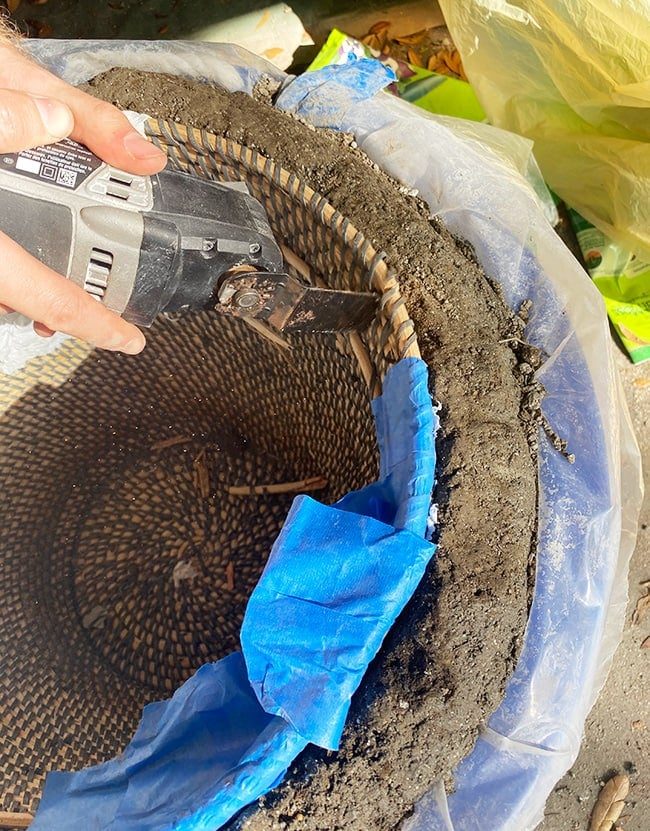
I was sweating bullets watching the dremel tear through the basket, worried it would damage the planter, but fortunately it all worked out (well, not for the basket, RIP).
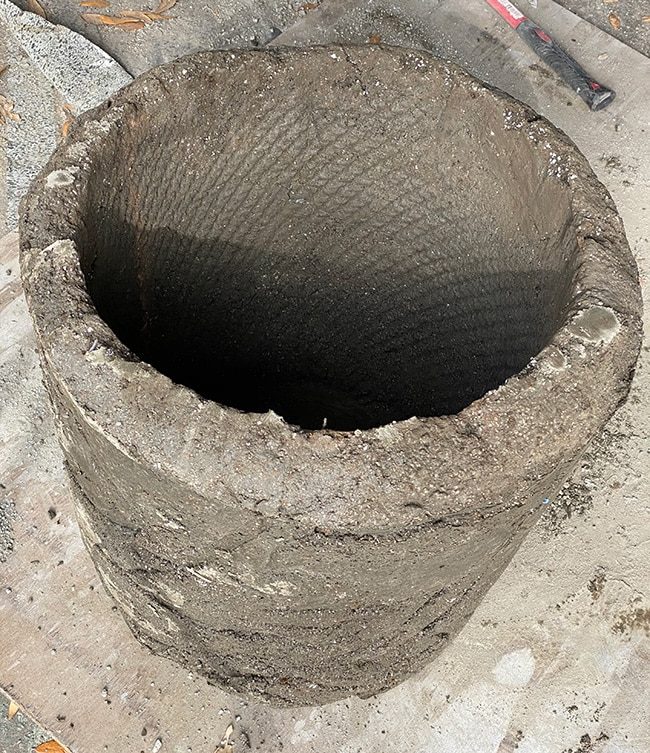
It even left us with a cool texture (although not worth the hassle—stick with smooth plastic!)
Step 5: Rough up the surface
Once the planter was free, it was time to work some magic. I grabbed my handheld coarse wire brush and began to scrape the top layer off.
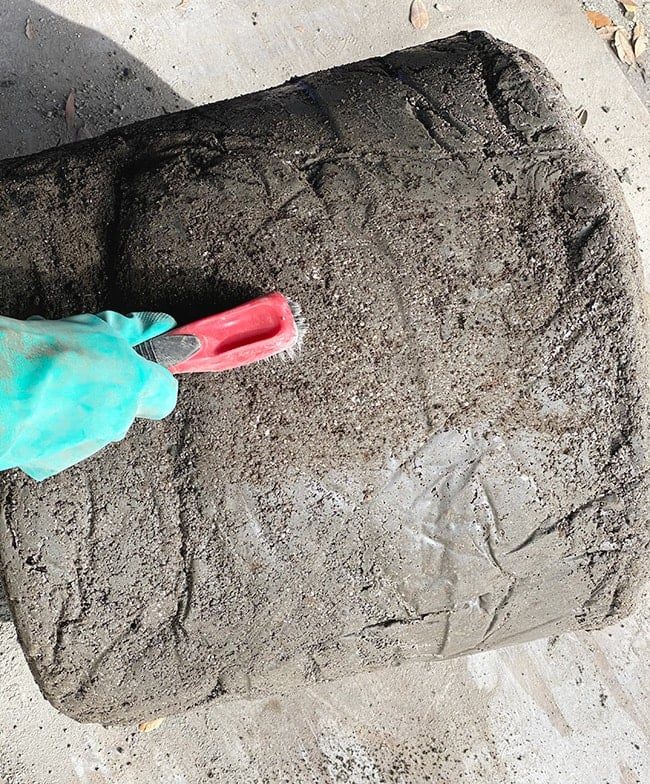
You can see where the texture is rough on one side and smooth/plasticky next to it. It comes off quite easily (the longer you wait, the harder it will be so I would not recommend waiting longer than two days). It would have taken a good 25-30 minutes to completely cover the surface, so instead I used my wire brush drill attachment (the same secret ingredient to my wood aging technique) to speed things up.
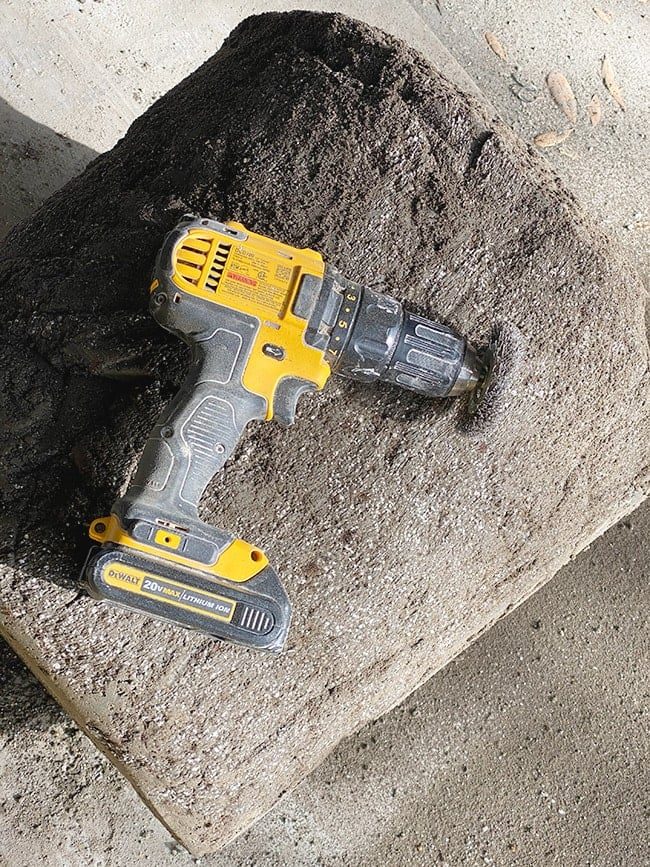
This cut the time in half (if not more) and saved me an arm workout (this little brush is the MVP of 2020!) I noticed there were some crevices formed by the plastic that were deeper than I wanted, so I used a bit of leftover concrete + some water and patched those up.
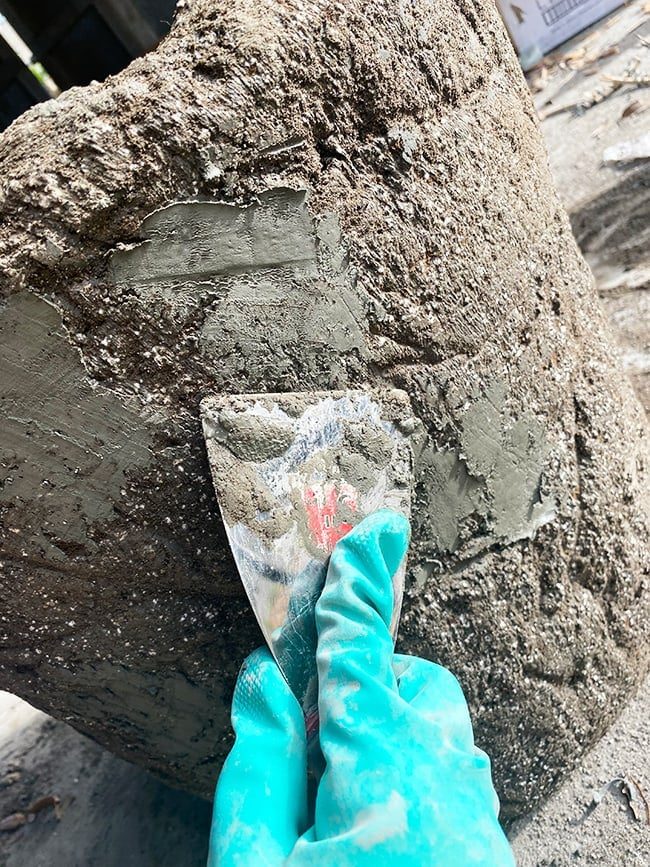
To make sure it did not look like a mistake, I filled in several more cracks/grooves all the way around the planter, which I thought would add variation and interest. I also took some of the dry mix debris from the wire brush and rubbed it into the wet concrete patch to make them blend in more. It is all an experiment!
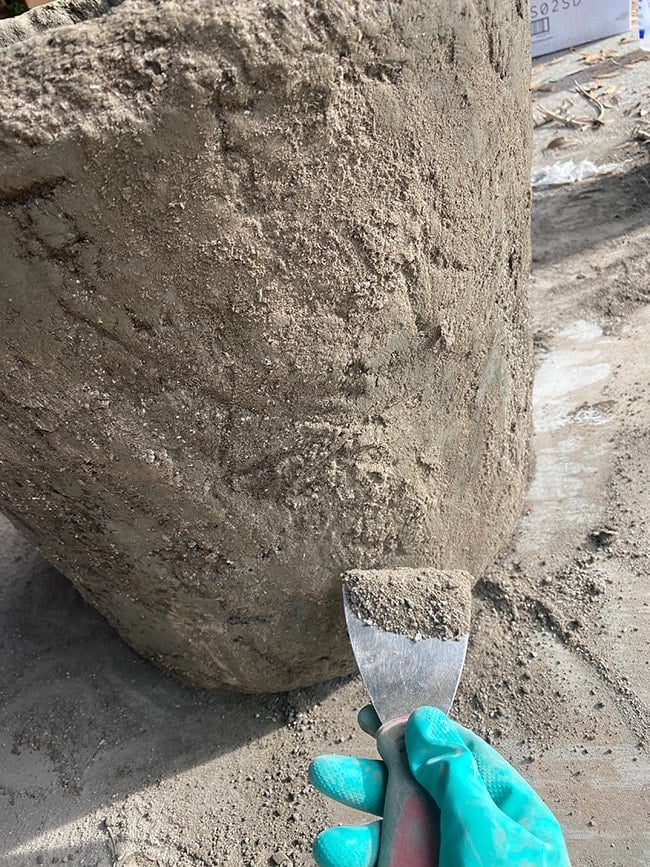
The planter was done, but now the waiting game begins. To prevent it from drying out too fast and cracking, it needs to stay covered and somewhat damp for several days—even several weeks, depending on who you ask. Once I was happy with the way it looked, I misted it down with water.
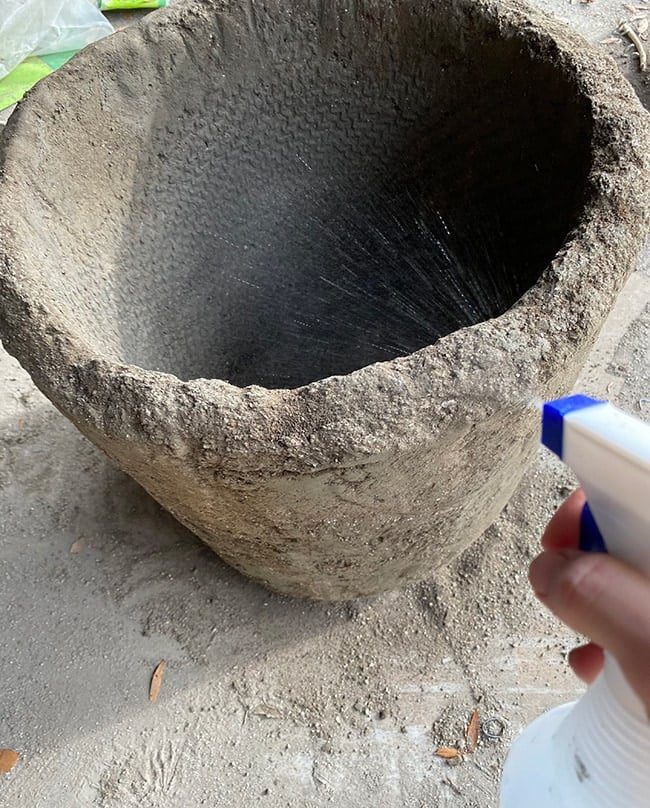
Then I covered it back up in plastic and did not touch it for another week. If you are in a dry climate, you may want to periodically water it down.
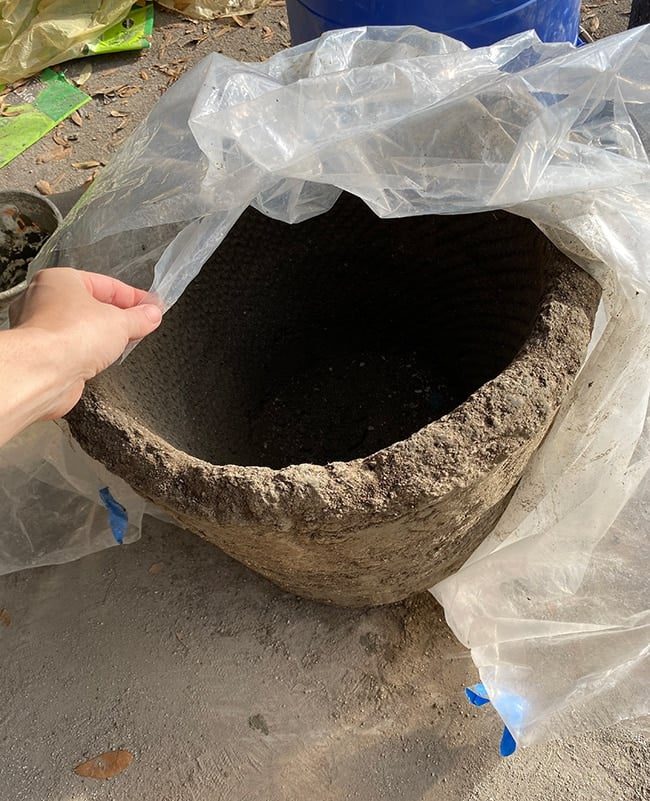
It sat in the garage for a few more weeks before bringing it inside (although it did not need longer than a week). Over time, the planter will become much lighter—both in color and weight—as the water evaporates. This is how it looks in its new home:

You'd never know it was not 200 year old stone, right?

I placed bean bags on top of the tree to keep it in place and Spanish moss from our yard for a natural filler.

For around $40 in materials (plus $15 for the bucket and wire brush) you cannot beat it.

Here is the smaller planter I made with the leftover mix. I did not use any plastic liner or pure cement patch, so you can see the difference it makes. I honestly love this simpler look just as much!
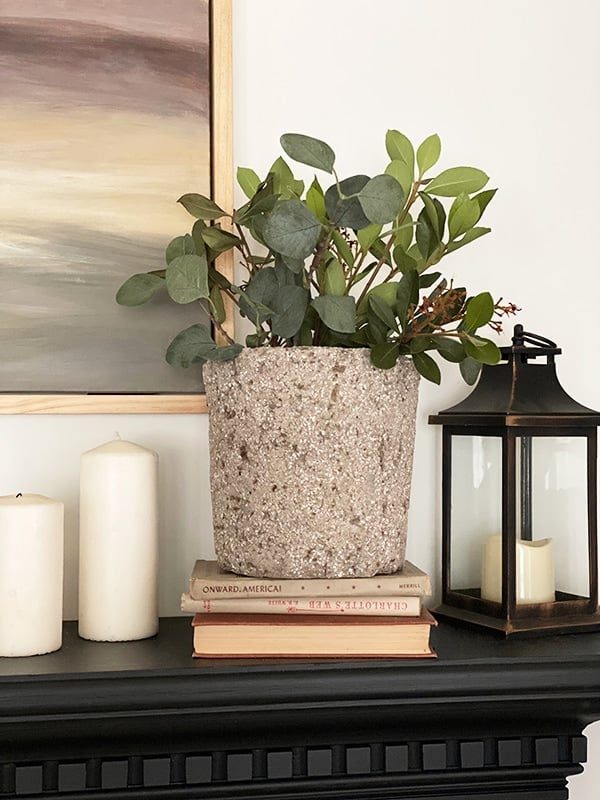
With this one I also formed the inside of the planter with my hands, instead of using a second mold.
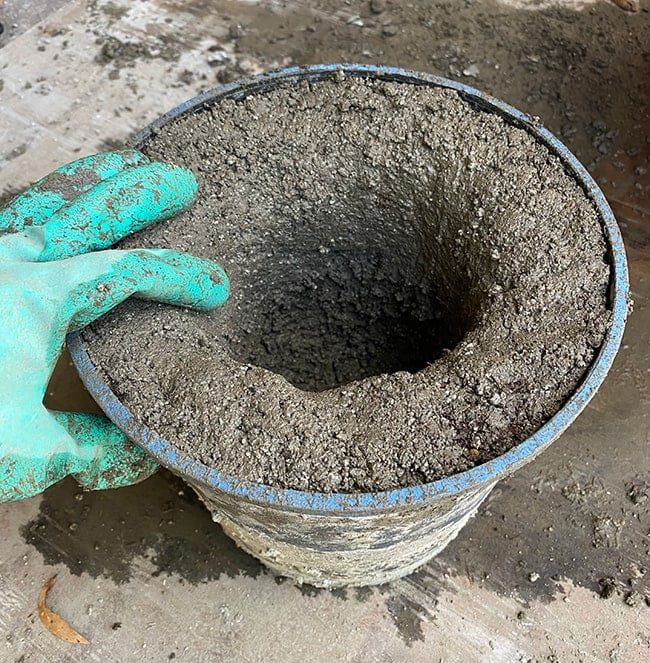
Are not these so neat? I would love to find a genuinely interesting mold and try making one again using vermiculite to see how it changes the look. The options are endless when it comes to the shape of the mold and size of planter, too. It is the well suited addition to our contemporary European style home, but I could see these used pretty much anywhere.

I know we are all trying to minimize our exposure outside the home right now, so if you do not have the materials on hand to make this, you can call and order them through your local Lowe's for curbside pickup or have them delivered. This makes a great weekend project if you are looking for a unfussy DIY idea to pass the time, or save this one for later (you can also browse my DIY project library which has over 100 tutorials).

And do not forget to watch the process in action in my Instagram stories! Have a safe and happy week everyone.
Update: I also made a fluted hypertufa planter using the same large bucket lined with foam pool noodles—this is how it turned out!


 Print
Print DIY Hypertufa Stone Planter
Make this aged 'stone' hypertufa planter with a few unfussy, inexpensive materials Prep Time10 minutes minsActive Time2 hours hrsWait time7 days dTotal Time7 days d Yield: 2 planters Cost: $50Equipment
- Coarse wire brush
- Cooking spray
- Plastic liner
- Safety gloves and glasses
Materials
- 1 bag portland cement
- 3 8-qt bags peat moss (or sphagnum moss)
- 3 8-qt bags perlite (or vermiculite)
- large bucket
Instructions
- Prepare your mold (bucket) by lining it with a plastic sheet and cooking spray
- In a large container, mix together equal parts portland cement, peat moss, perlite and water (mix dry ingredients first)
- Press the mixture into the mold firmly, keeping a consistent thickness as you form the walls (at least 2"). You can use a second smaller mold inside, or build the sides up by hand
- Cover your mold in plastic and wait 24-48 hours for the mixture to harden
- Once the planter is dry enough to stay together, release it from the mold and use a coarse wire brush to rough up the surface
- Place the planter back under plastic, mist it with water to prevent cracking and let it cure for another 3-14 days, depending on your climate, planter size and mixture ratio
Video
https://www.instagram.com/tv/B_SOZHtl_gR/Notes
Look at our full living room tour in this post: