DIY Range Hood Tutorial
How to build a custom DIY range hood using wood and drywall. Includes step-by-step instructions with helpful tips and tricks!
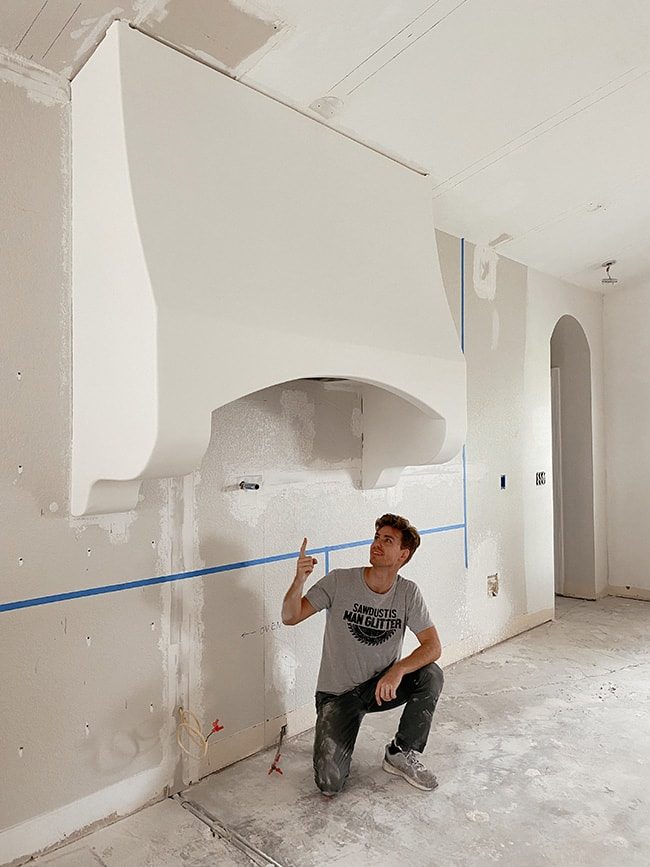
If you enjoyed our recent DIY Fireplace tutorial, you are in for a real treat today! After getting the hang of drywall arches and curves, we decided to step it up a notch and design/build our dream DIY range hood.
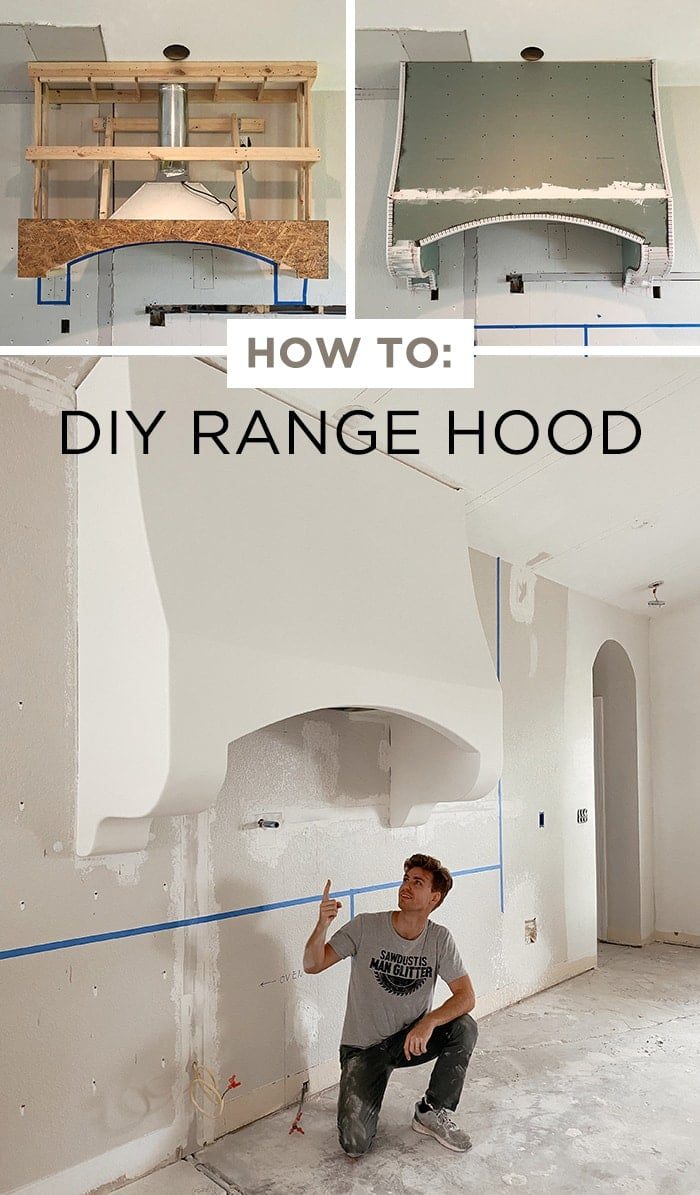
When I say we, I genuinely mean Lucas. I played the role of designer but he spent two weeks building the entire thing with his own two hands, and documenting this tutorial for you. You may have been following along on my Instagram stories (I saved them to a highlight, so you can reference them later) and today we are walking you through all the steps, tools and materials used so you can build your own.
How to build a range hood
Update: you can see the finished range hood in our Modern Mediterranean Kitchenreveal post!

Tools
- Miter saw/chop saw
- Circle sawor table saw
- Drill
- Kreg-jig
- Jigsaw or Dremel multi-max
- Electric sander
- Heavy duty staple gun
- Level
- Stud finder
- Angle finder
- T-square (not required, but helpful)
- Clamps
- Utility knife
- Tin snips
- Taping knives
- Drywall saw
- Sanding sponges

Materials
- Range hood insert (the size/type will vary based on range size + your own preference, we chose the ZLINE 698-304-34 model)
- 2×4's for framing (used six 8' boards)
- 1×4's for framing (I used eight 8' boards)
- 4×8' sheet of 1/2″ plywood (for the arch)
- 1x4x8' MDF(I used five boards)
- 1/2″ 4×8' drywall(I used three sheets)
- Vinyl corner bead (we used 3/8″ bullnose for rounded edges)
- Power Pro construction screws(2″, 2.5″ and 3″)
- Drywall screws
- Wood glue
- Corner bead adhesive
- Joint compound
- Drywall tape
Total cost
Our materials total came to $402 (not including range hood insert).
Step 1: Determine the range hood size, spacing, shape
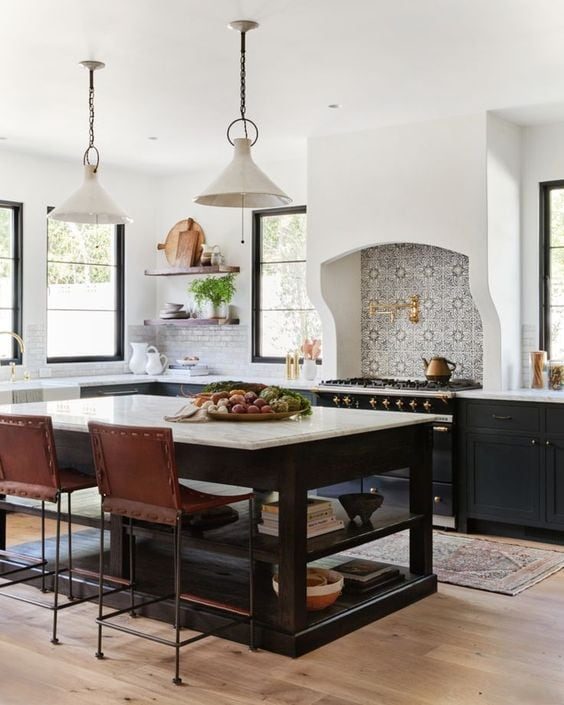
We spent plenty of time looking for inspiration (mostly on Pinterest) and could not find exactly what we were looking for. I loved the idea of an oversized cave surround with chunky, curvy corbels like this:
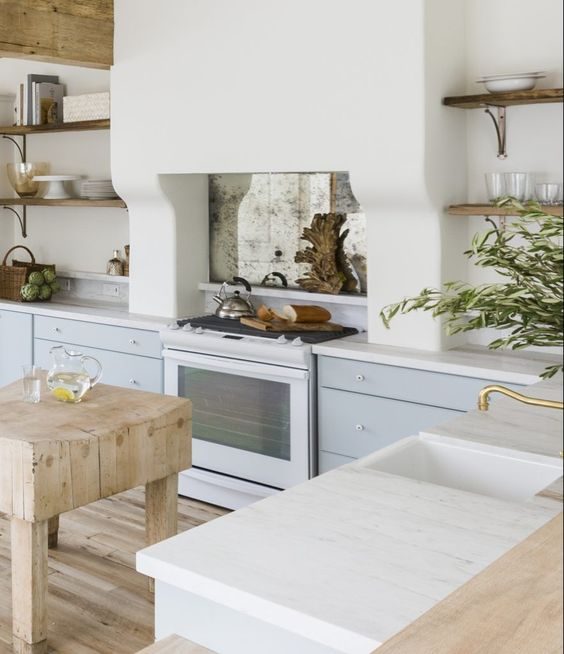
But then we decided we wanted to maximize the counter space and keep the corbels off the counter, like this:
I was hoping to have our kitchen design plans ready to share by now, but I am still ironing out a few details so just bear with me and use your imagination for now. You may be wondering why we are building the range hood before anything else is in the kitchen—that is because we figured it'd be easier to get the hood in before we added wood beams/planks to our ceiling (our next DIY, currently in progress).
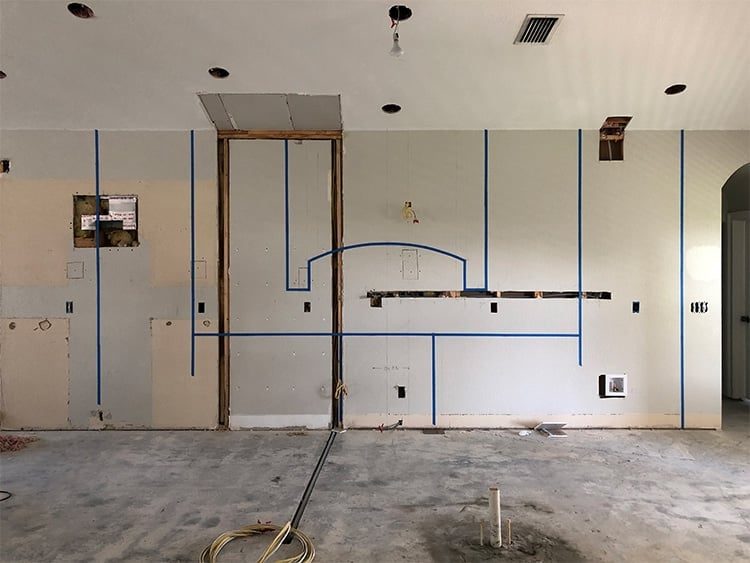
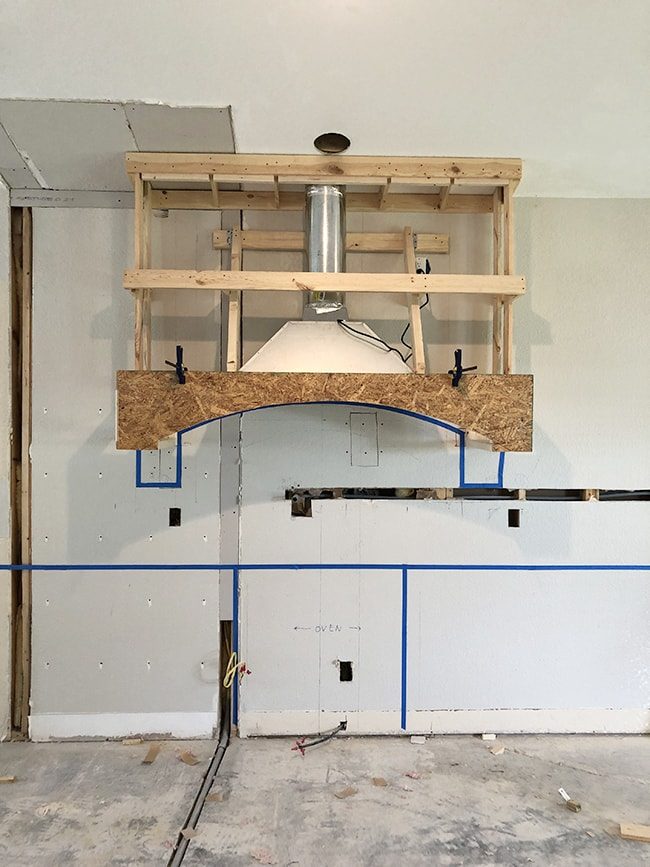
It is always a good idea to use painter's tape to genuinely get a sense of the scale and layout in the kitchen space. After a few iterations, we landed on the size and shape above (the final size is 75″w x 65″h x 22″d—it is quite large). A 36″ stove will be centered underneath and you can see the outline of where a floor-to-ceiling cabinet will sit on the left, and the fridge will flank it on the right (more kitchen details coming soon!)

The photo above shows the adjacent dining area on the left, and the front door is also on the left next to that arched window. Now that we are all situated, let us get to building—take it away, Lucas!
Step 2: Build the support frame for the vent hood insert
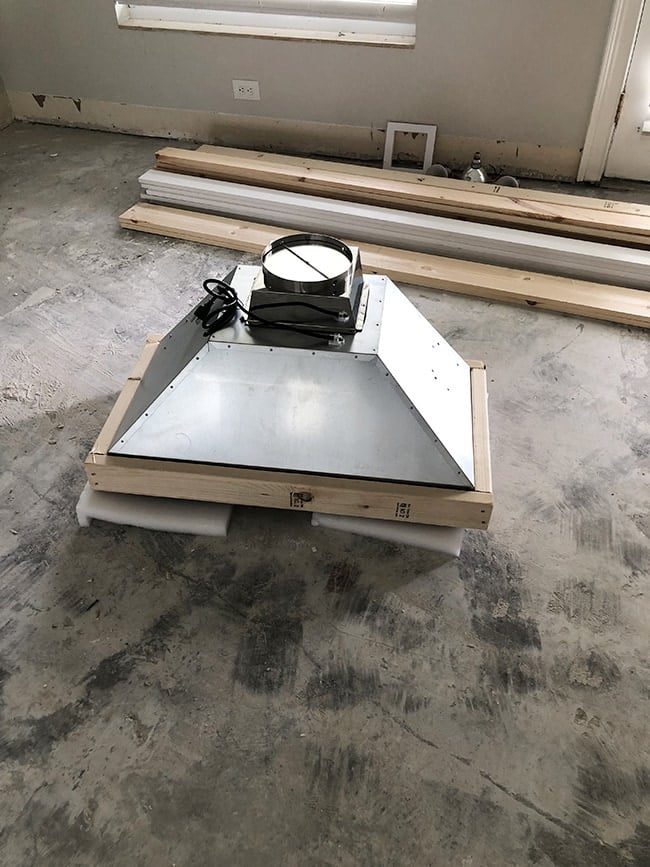
Similar to thefireplace DIY, the first step is to build a frame for the insert. We are using a stainless steel ZLINE 34 inch range hood insert model 698-304-34, with a 700 cfm internal blower (we are using a 36 inch range). The installation is very straight forward—the insert comes with four L brackets that you screw into a frame:

I built my frame slightly larger (1/8-1/4″) than the insert to allow room for the brackets.
To attach the frame to the wall, I first measured with a level, and marked a line where we wanted the insert to be. Follow the manufacturer's specifications on how high above the counter to install it. ZLINE recommends 30-36” above the cooking surface for this insert, and we decided on 35” (the arch opening will sit slightly lower to hide it).

If you are installing this by yourself, a helpful trick is to screw a couple screws in on your line to rest the frame on while you attach it to the studs.

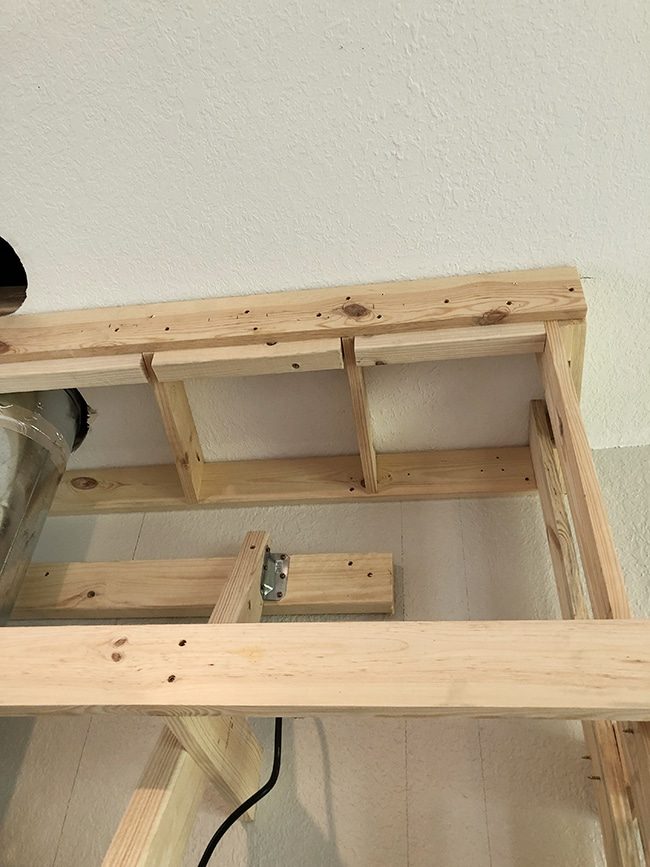
Next, install bracing that will help support the weight of the hood. Our insert frame only crossed two studs, so I added a larger piece that went across four studs above and then attached diagonal bracing between the two.
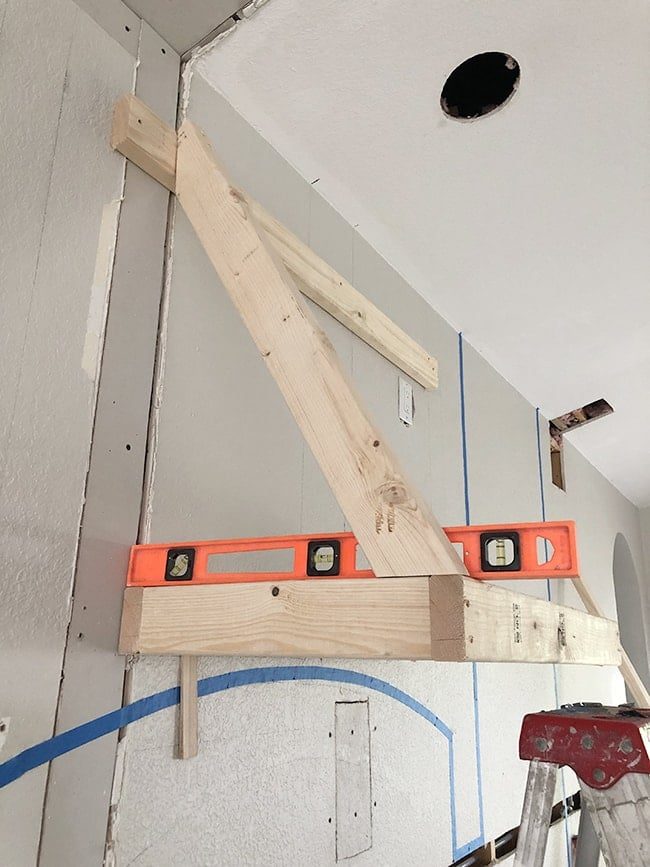
CRITICAL STEP: Make sure the frame is level when you secure it to the wall!
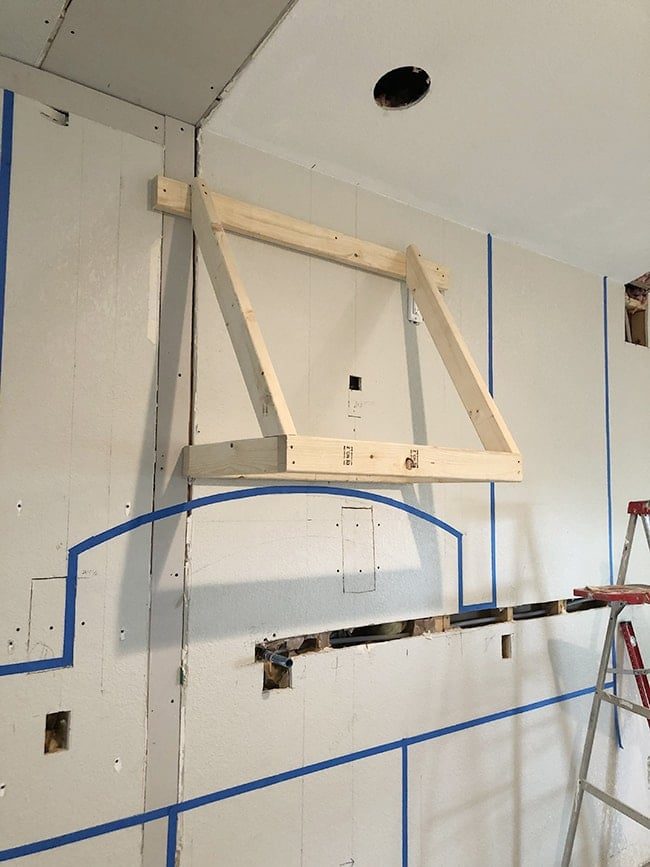
I repeated this process on the other side, and then added strapping and a corner brace for extra strength.
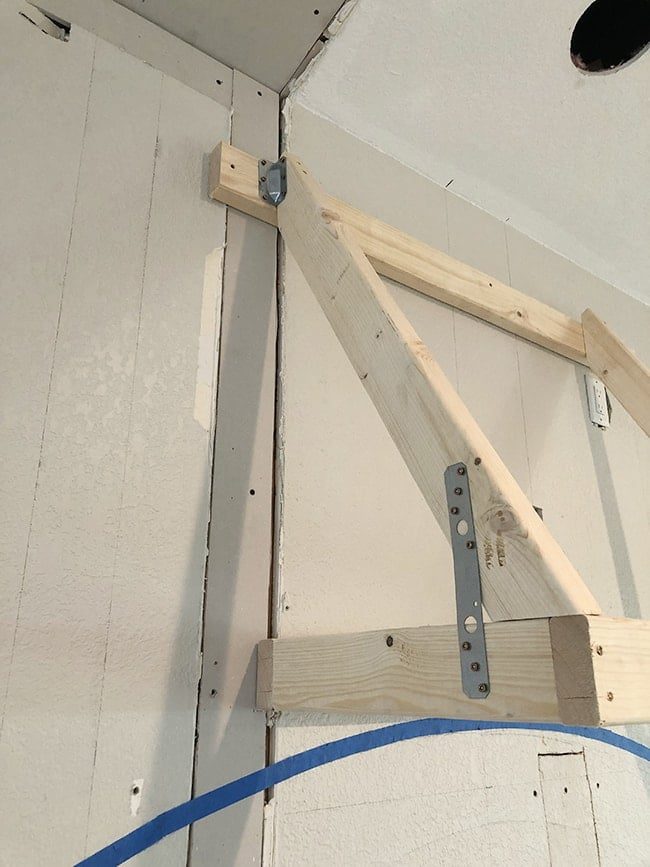
With the insert framing done, it was time to move on to the rest of the hood framing.
Step 3: Build out the bottom of the frame
I used wood glue and PowerPro screwsat each of the joints throughout the frame build.
I started by building a unfussy rectangle on one side out to the tape line, and screwed it into my insert frame. Then I built two smaller rectangles and attached them underneath, to start forming the sides of the hood.

For this stage, you have to think ahead to where the drywall will be attached. It is very important that drywall corners are screwed into something solid, otherwise they could end up shifting in the future, even in a low traffic area like this. Below you can see the smaller 2×4″ that was ripped down and attached to form a complete corner:
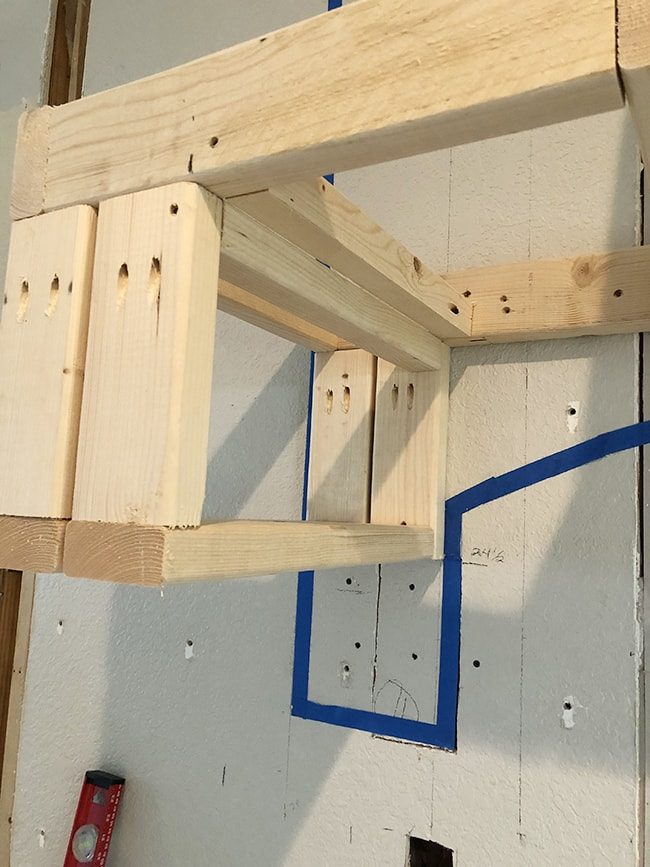
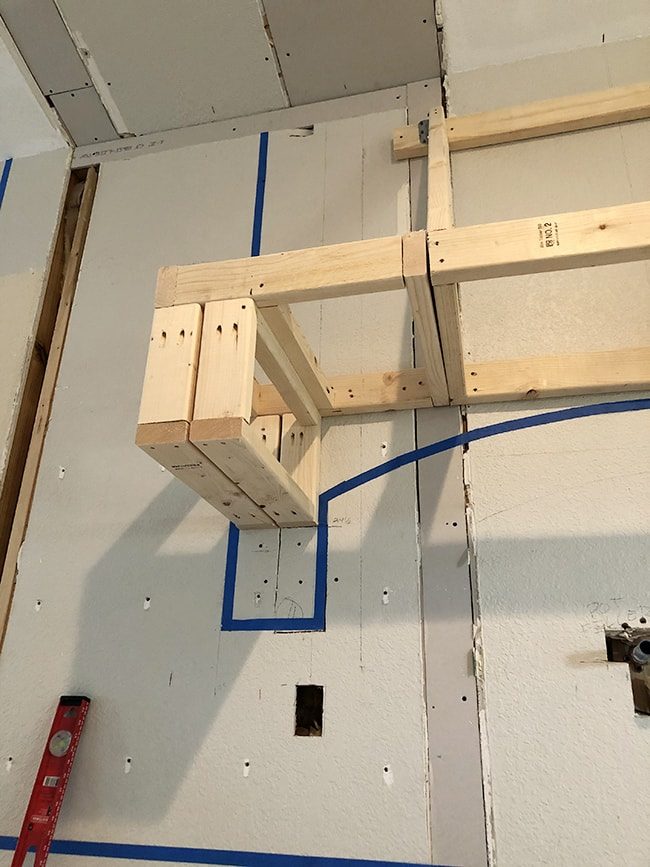
This process was repeated on the right side to complete the main lower section.
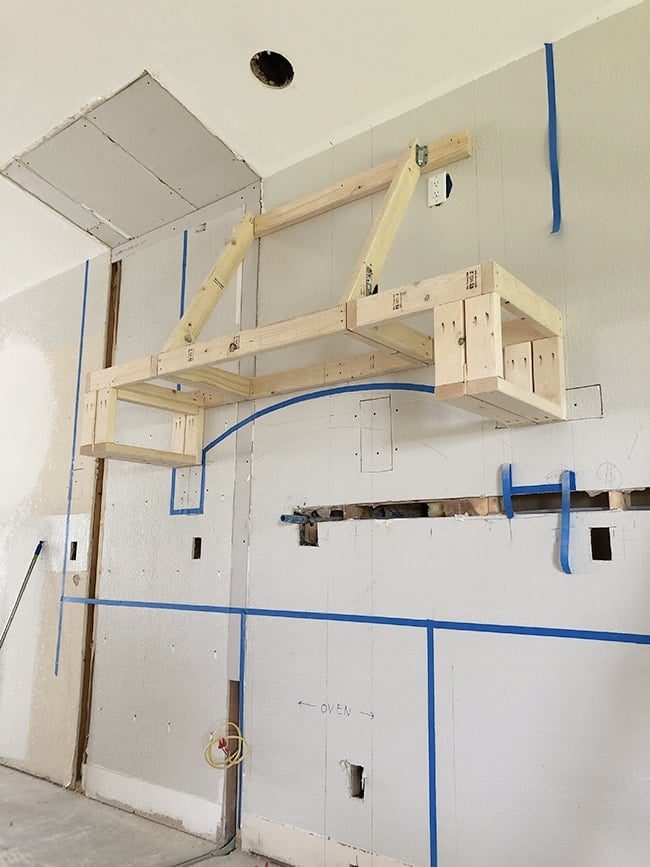
Step 4: Install the range hood insert
Installing the range hood insert is definitely a two person job, as it needs to be held in place while the brackets are attached to the framing. Prior to this, we had an electrician wire an outlet above the hood. We plugged it in to test it out and everything worked, woohoo!
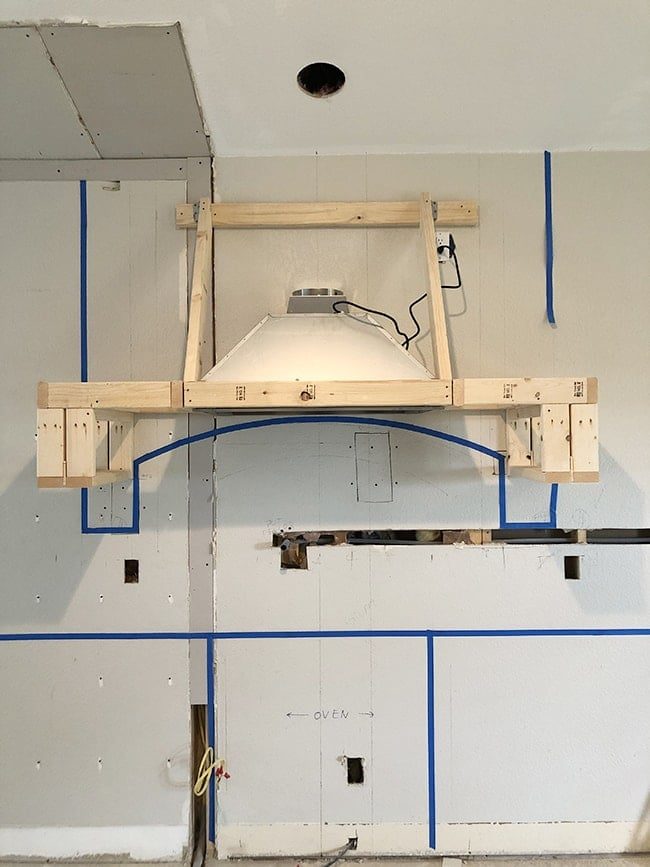
The insert could also have been installed before starting to build out the frame—you just want to make sure to do it while you still have enough access to install the ductwork.
Step 5: Frame out the rest of the hood
With the insert installed, we now knew exactly where the duct would run into the attic so we could determine the size for the top framing rectangle. There are many configurations you can use depending on the type of range hood you are going for. We wanted to maximize the slope going front to back, so we made the depth as close to where the duct would be as we felt comfortable (ignore the hole in the ceiling from the original light fixtures).
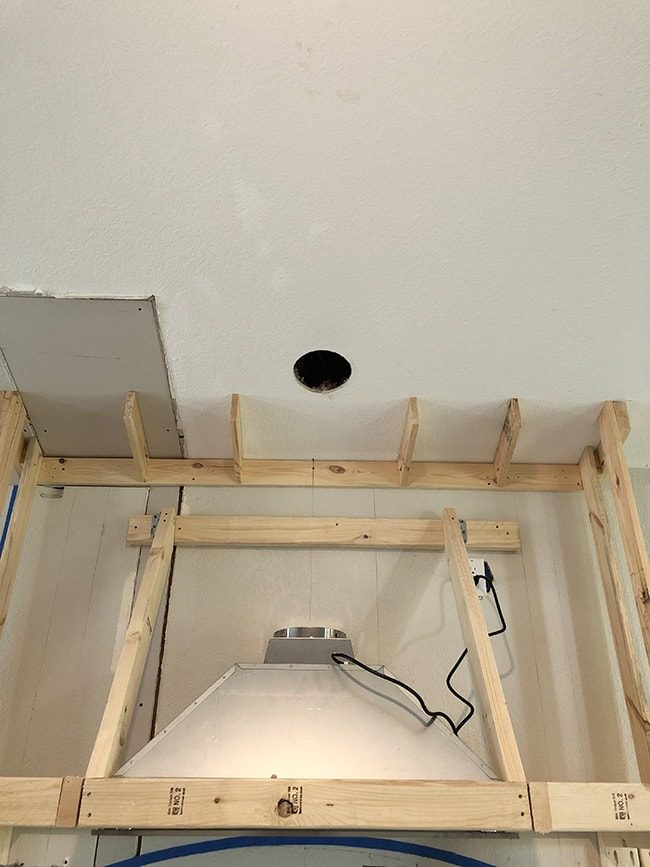
A duct-free or ductless hood is also an option depending on your situation, but for gas burners we decided against a ductless range hood. You could also run the ducting through the wall, but in our scenario it made more sense to go straight up through the attic.
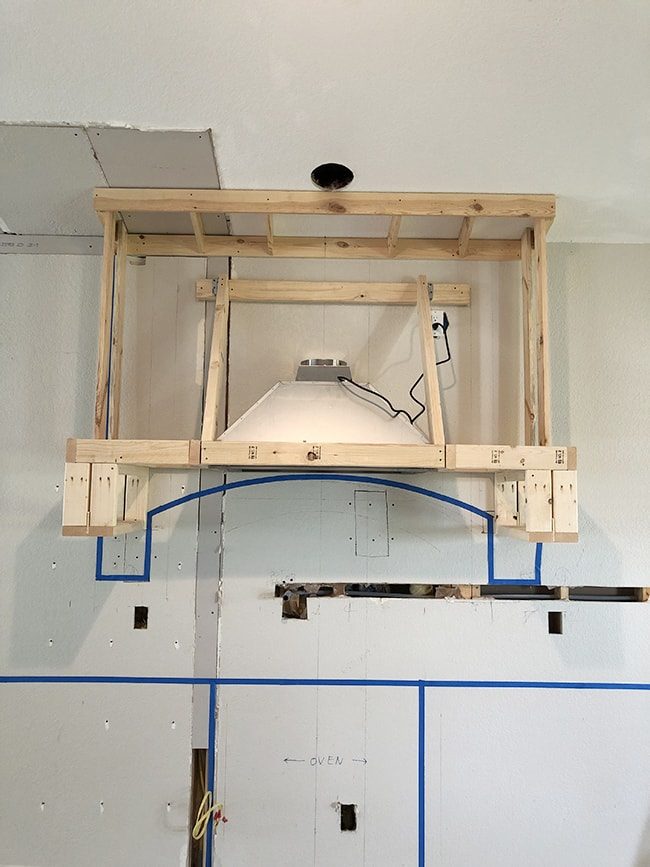
I used 1×4's for the top framing to save some weight (not sure that was genuinely necessary), but you could easily use 2x4s for the entire thing. Because of this, I had to double up on a few areas to ensure the overall width lined up at the top and bottom edges.

Next, I added the four horizontal pieces in the middle with the ends cut to 14º, and attached another 1×4″ running across the entire width. The vertical placement of these pieces will determine the shape of the curve.


Additional sections of 2×4 blocking were added along the top where the vertical MDF strips would be attached. Another (easier) option is to just run the swoop boards all the way up to the ceiling and attach them to the front of the top framing piece.
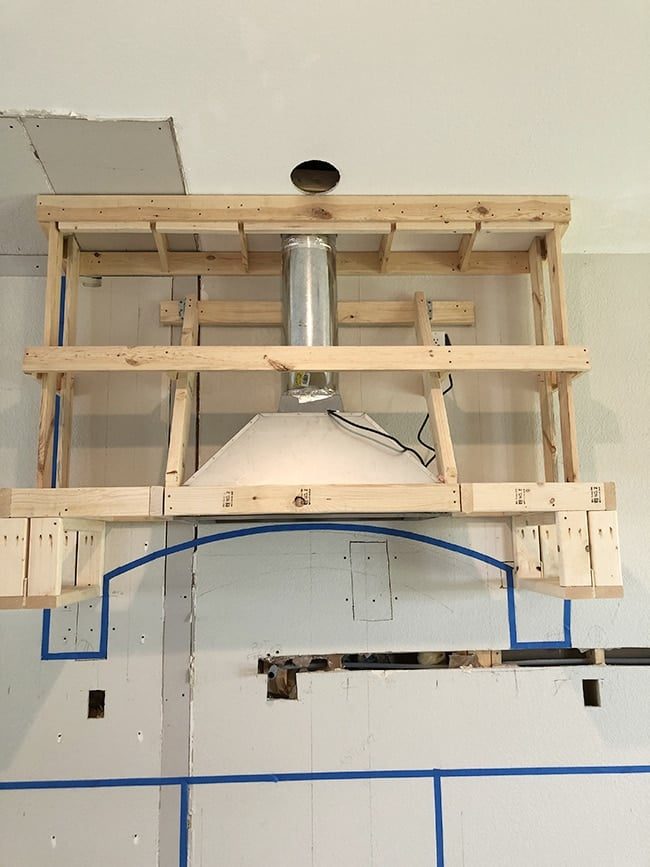
Now for the fun part: framing the arch! Using a 1/2″ piece of plywood, I traced an arch using the string and pencil trick (same way I did the fireplace) then cut it out with a jigsaw.
Once the piece was successfully dry fit, I sanded down any imperfections and traced the arch onto another sheet of 1/2″ plywood to make an identical piece.
To make my “arch sandwich”, I cut down and attached 1×4″ scrap wood to use as spacers, which will create a 2 ¾” thick arch (after the drywall is on).
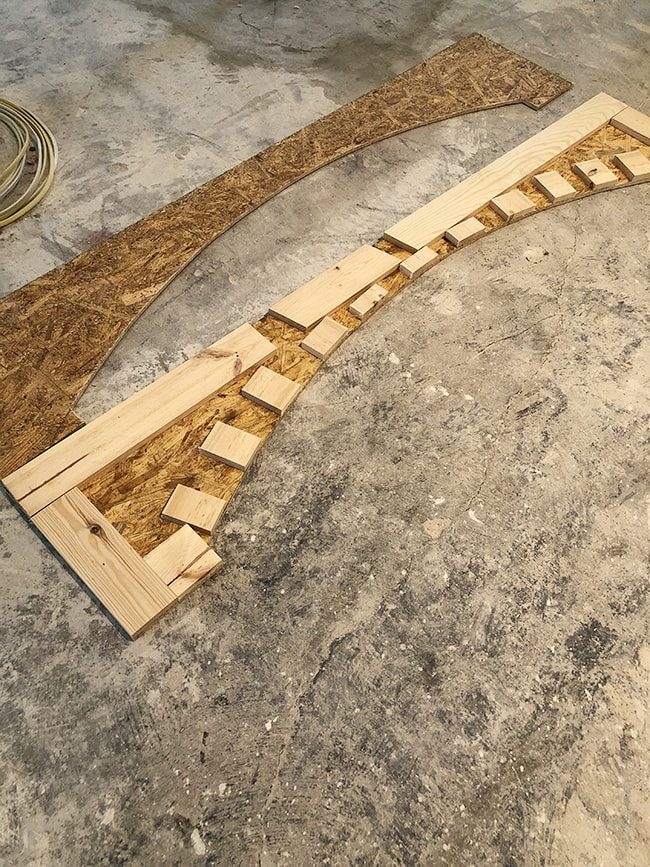
Lots of wood glue and screws were used to attach all the pieces together, then I screwed it onto the front of the frame.


Next it was time to make the top swoop. I used 1×4″ pieces of MDF because they have some flex, unlike wood. You could probably also use thin plywood as well.
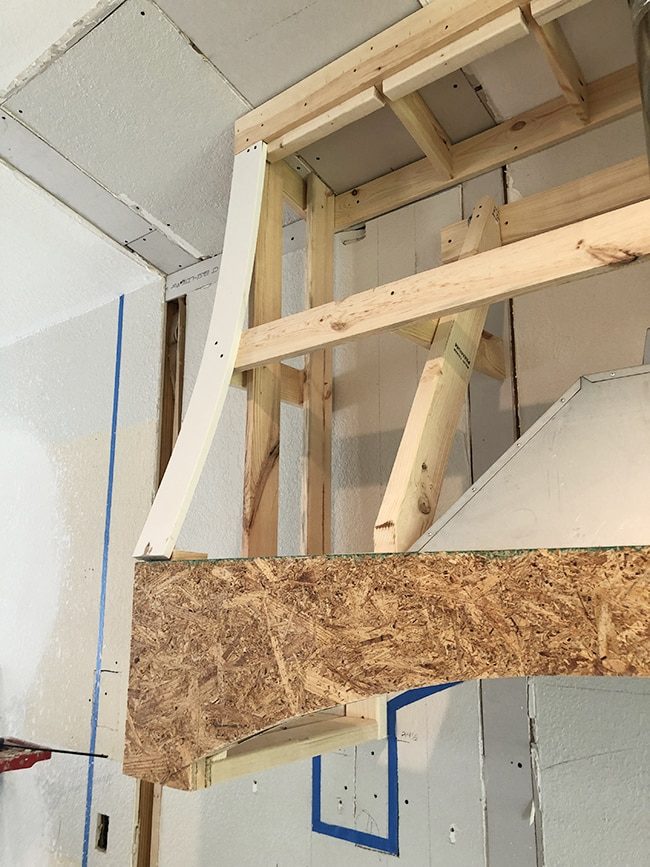
Clamps are very helpful to pull the MDF tight to the horizontal cross piece, and I used plenty of screws to make sure they would not budge.
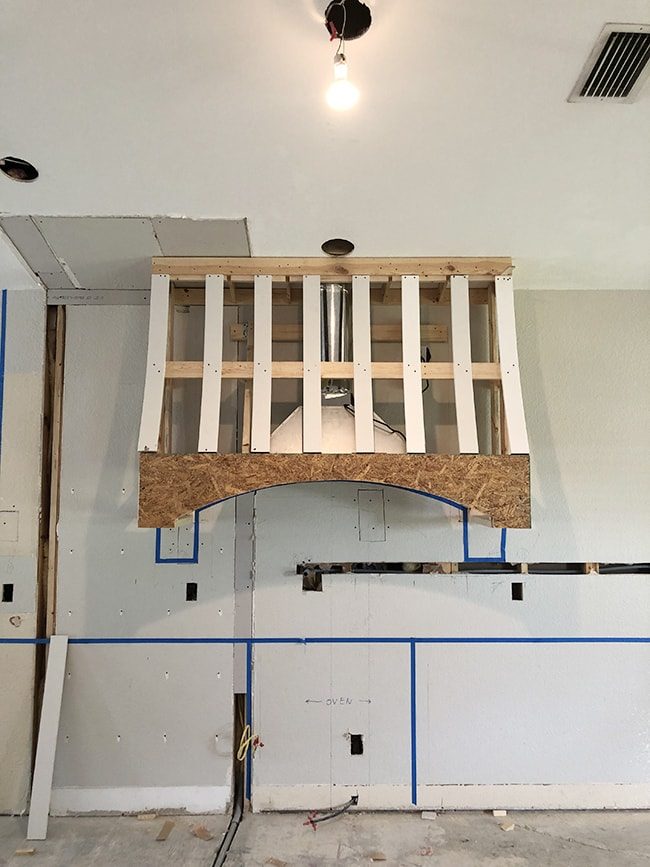

The corners do not need to be mitered to the plywood—these will be covered by drywall.

The last step of framing was the corbels. You could just stop here and have a simpler, slightly more modern looking range hood, but we wanted to be fancy.
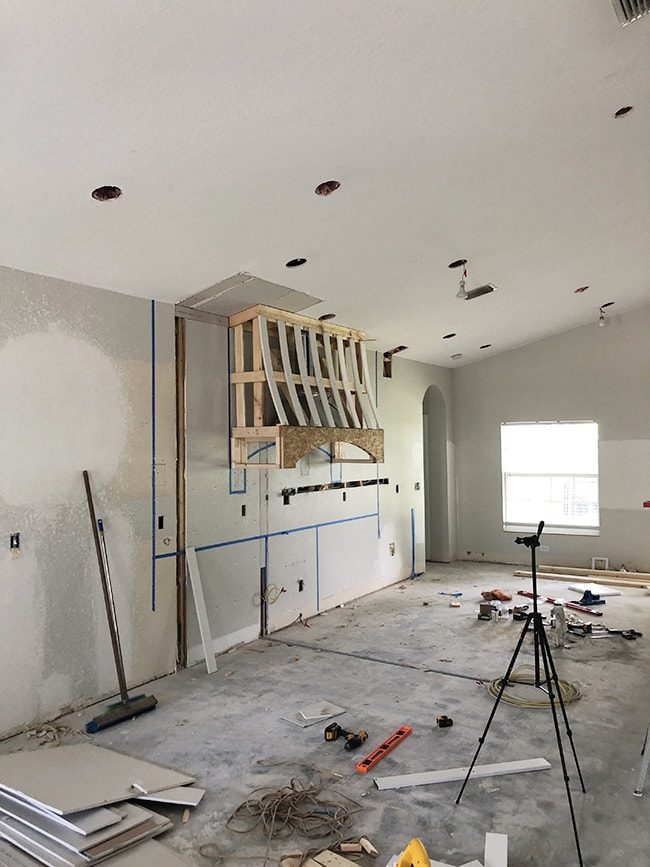
We could not decide on the shape we wanted, so I mocked up two different versions to get a visual. Option 1:

Option 2:
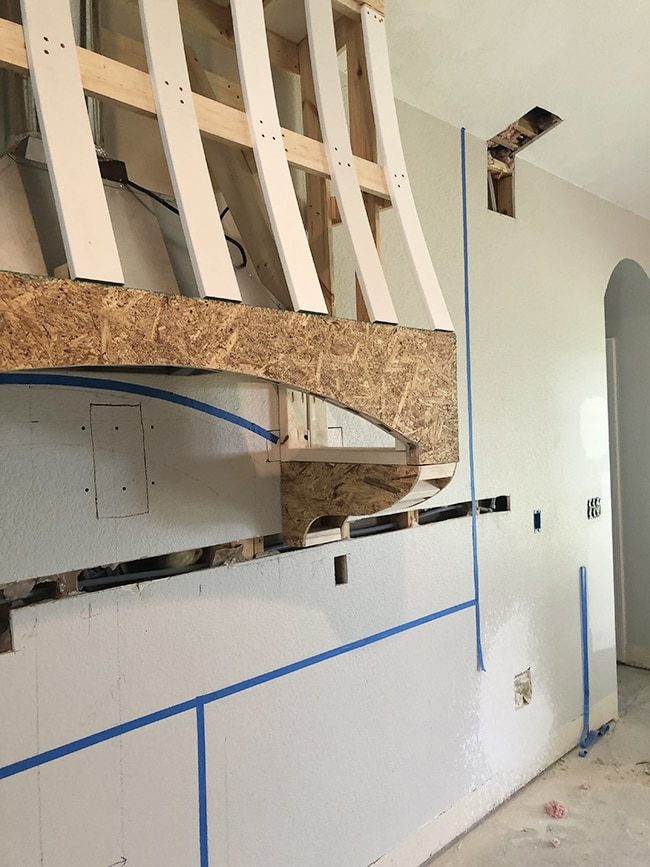
Both:
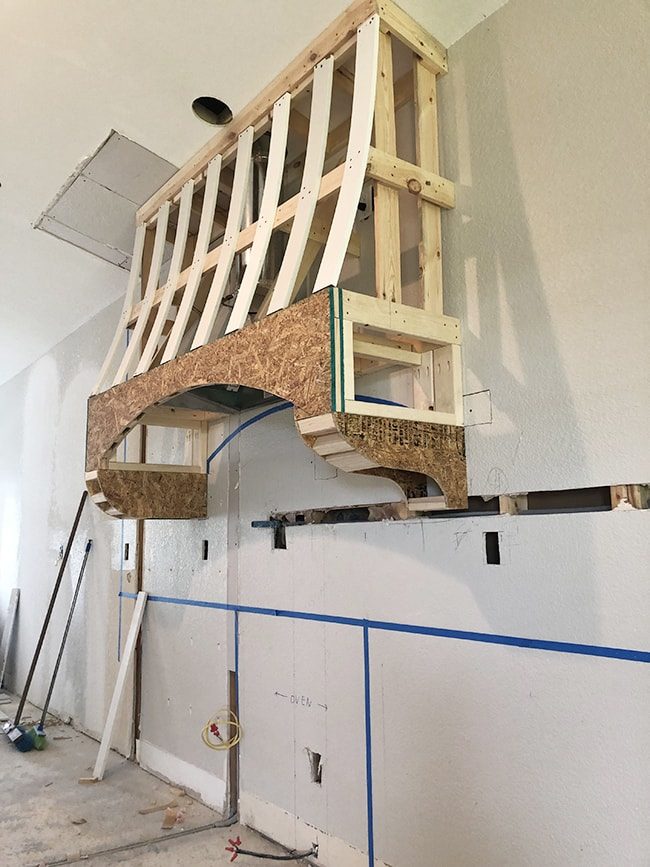

Ultimately we landed on a combination of the two—a double curvy swoop:


These were built just like the main arch, by sandwiching blocks (using 2×4's this time) between two pieces of 1/2″ plywood.

And with that, the framing is done!
Step 6: Drywall
To cut drywall, you simply measure, mark, and score your cut with a utility knife. You then bend the drywall along that score and cut the back paper along the crease. Easy peasy.
There were nine sections that needed drywall, and I started with the largest first.

You might be wondering why the drywall is green? Home Depot was out of normal ½” drywall, but they had the mold resistant version in stock. So that is what I got.

Clamps were once again my best friend here to pull the drywall down while I screwed it in place.
For the curved pieces, it was easiest to attach the drywall to the plywood first, then cut along the edge with a drywall knife (you could also use this dremel if you do not want the arm workout).

You can see this first step demonstrated on the side pieces:


This is a whole lot easier than trying to cut it first and match up the curved edges perfectly.
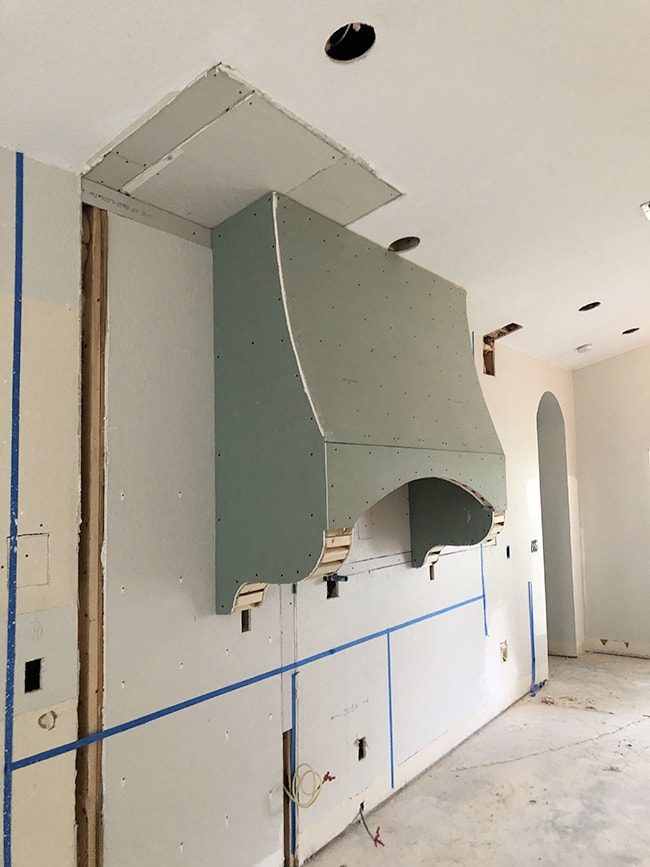

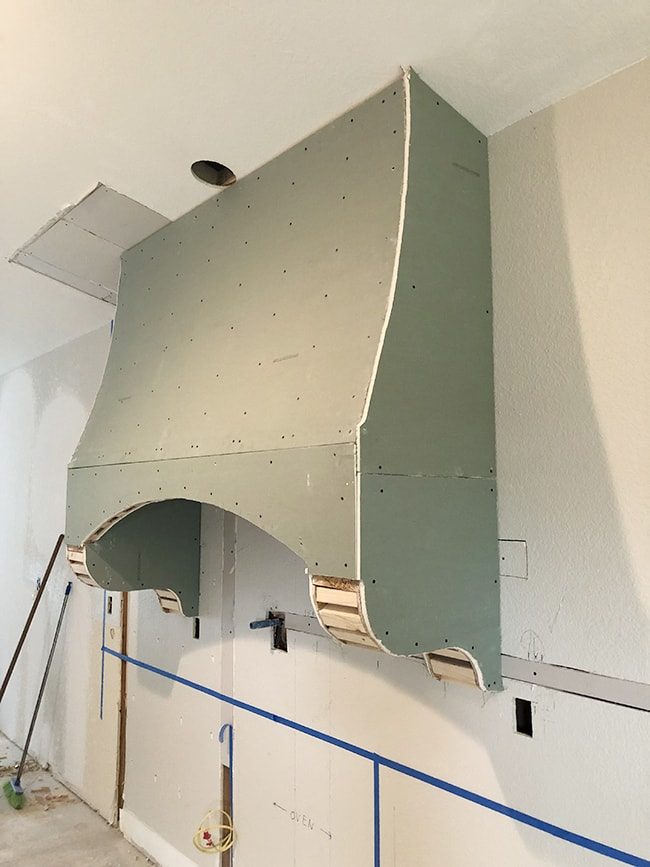
For the skinny piece underneath the front arch, I wet the back of it with a damp towel first to make it flexible, and it bent nicely into shape without breaking (unlike the fireplace arch which was more extreme).

And then there were the corbels… by far the most difficult part of this entire build.
This is where I have to remind you that plenty of what you see in this tutorial I am doing for the first or second time. That means I am learning as I go and am not well suited 🙂 With that said, there might be a better way to drywall these corbels than what I did, but I could not find the answer in my searches so I went ahead with trial and error.
The plan was to score along the front and back of the piece of drywall and match it to the inside and outside curves, creating something like this:
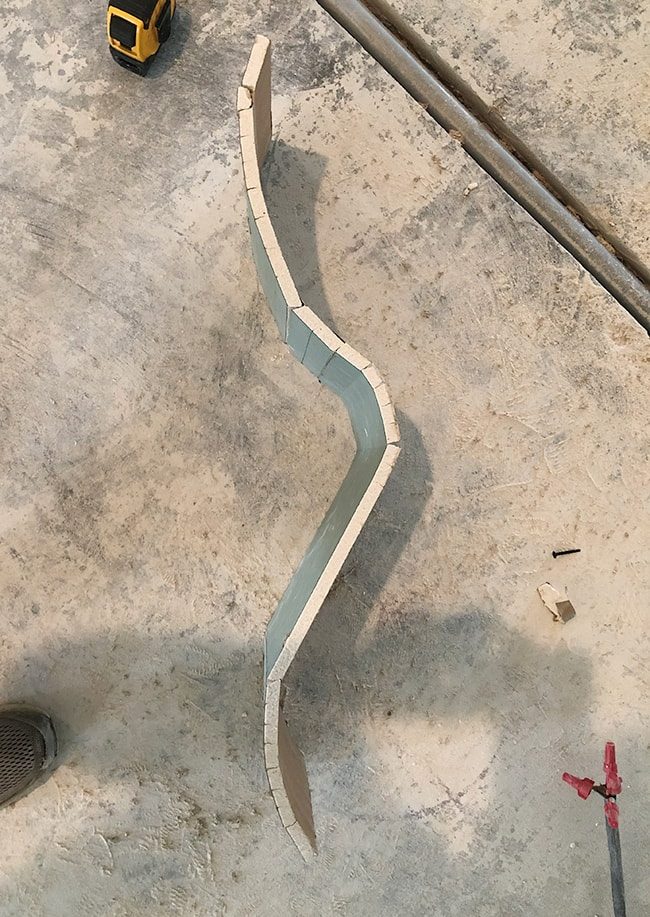
I made five attempts at this before finally getting a piece up that did not crumble and break (the piece shown above is one of the failed attempts). I could have instead tried to layer two pieces of 1/4″ flexible drywall, but I think that approach would have also presented it is own challenges.

However, I knew from experience that joint compound and sanding will pretty much hide/fix anything—and this time was no exception. After using up all of my green drywall on corbel mistakes, I was able to find a scrap piece for the last corbel piece, and the drywall was DONE!

Step 7: Add corner bead (and lots of mudding + sanding)
One feature we wanted for this range hood was rounded corners. It gives it the hood a high-end/elegant look and I was able to purchase ⅜” bullnose corner bead for this (sourced from a local supplier, but Home Depot also sells similar here).

Spray adhesive is recommended for installation, so that is what I used this time. Everything was going fine… until I got to these dang corbels. Because of the sharp outside corners, I had to use our dremel to notch out both sides of the corner bead so it would bend.

It was not easy, but I finally got it in place—with lots of screws and staples for extra reinforcement.


Knowing I would need several layers, I also started filling in some of the drywall gaps and seams with joint compound. I switched to using this joint compoundand it applies and sands very well. The first layer is intended to solidify the corners and fill any major gaps.
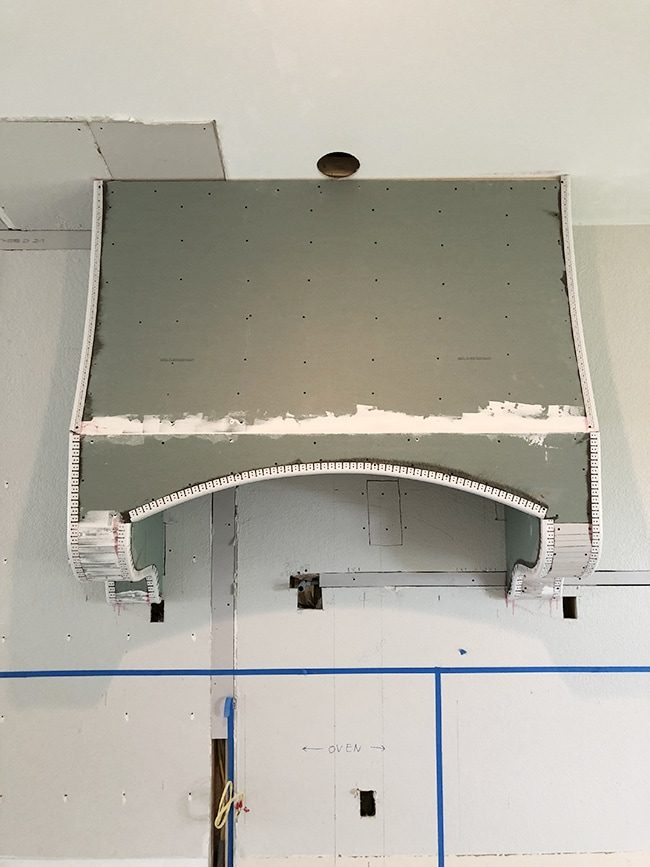
Next I added drywall tape on the seams where two pieces of drywall met, followed by more mud.
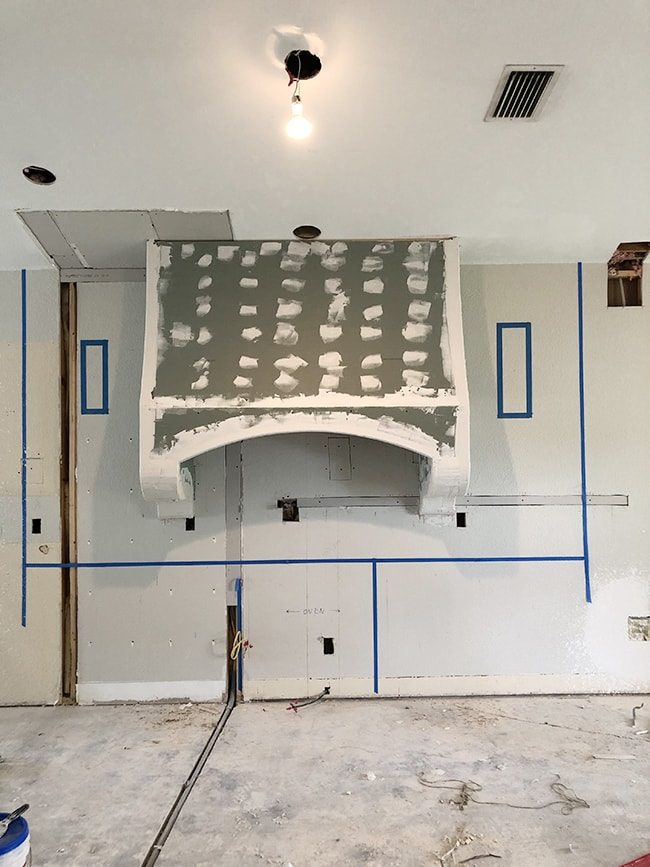
After letting it dry for the recommended 24 hours, I sanded it down with a sanding block—120 grit for the bigger thick blobs, and 220 grit for everything else.

You want to do this by hand, not with an electric sander. It requires some level of artistic ability to make sure everything is smooth and even.

You can repeat the process (mud, dry, sand) as many times as you need until you are happy with the way it looks.

The corbels were (once again…) the hardest part. It took plenty of patience to sand down all the little imperfections to make those curves well suited.
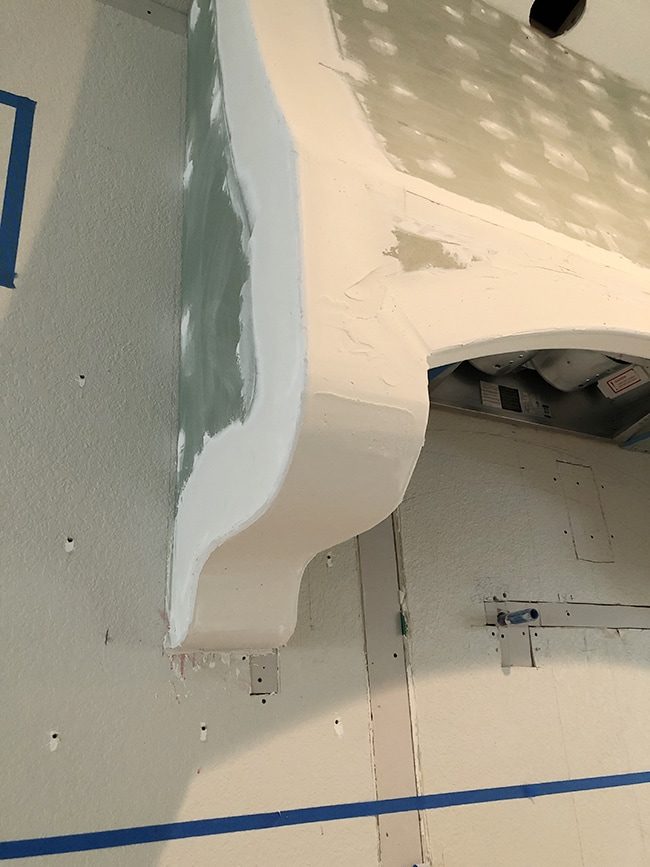
I ended up using three coats plus a few small touchups.

After a few days of sculpting and refining, the hood was done and ready for paint!
Step 8: Prime and paint
Always make sure to use primer on fresh drywall before painting. This stuffis great and a go-to for DIYers.

The hood was painted SW Alabaster—which is now the official official white for the interior (it is the well suited creamy white for this space). What do you think?!
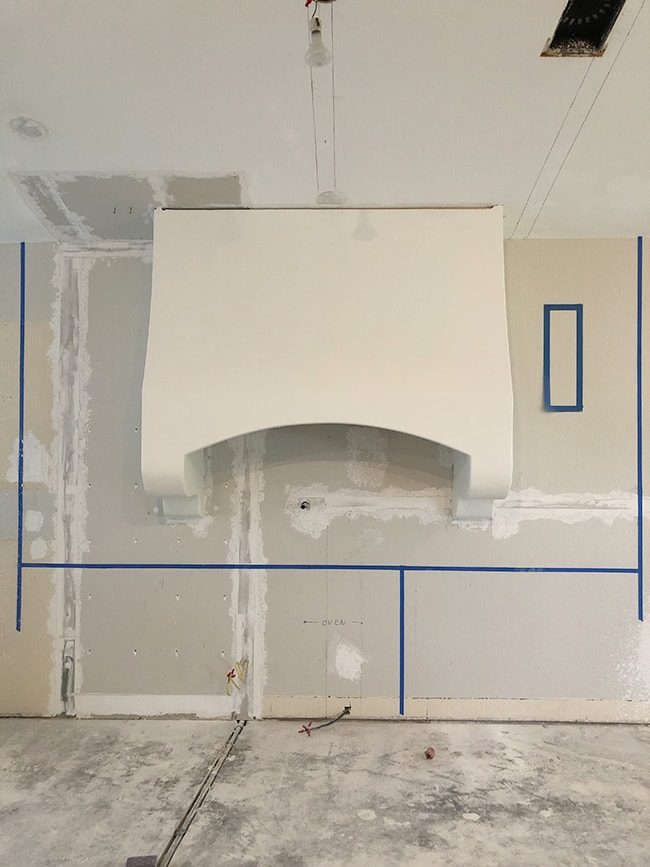
We cannot stop staring at it. Look at those curves…

Not bad for an amateur, eh? The round bullnose makes all the difference, truly.
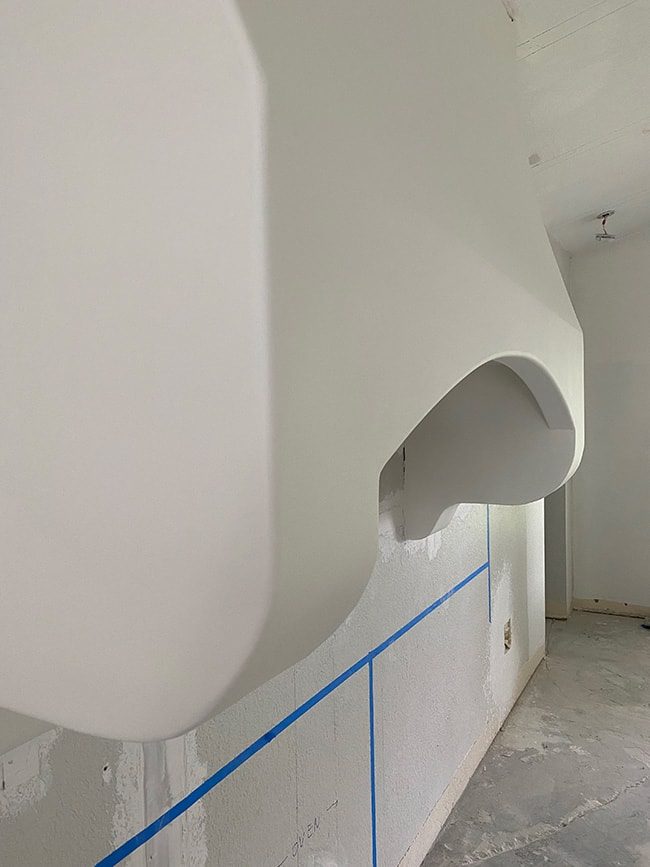
Here are the final measurements. For reference, the wall height is 9' (and the ceiling is vaulted). It is quite large, but I think it is the well suited size 🙂

A round of applause for this guy—did he nail it or what?!
Update: I later appliedvenetian plasterto give it more of an old-world feel. This is how it looks in thefinished kitchen!

As usual, feel free to ask any questions in the comments below. This tutorial covered weeks of work so there is a lot that went into it! This is just the beginning for this Spanish dream kitchen, so make sure to check back here on Friday and follow me on Instagram so you do not miss an update.
If you like this project, look at these popular DIYs from my Project Library!