How to install herringbone brick floor tile
How to install herringbone brick floor tile with step by step photos. A beginner DIY project made easy with thin brick flats!
Today I am sharing the first project of our laundry room renovation—DIY herringbone brick floor tile!
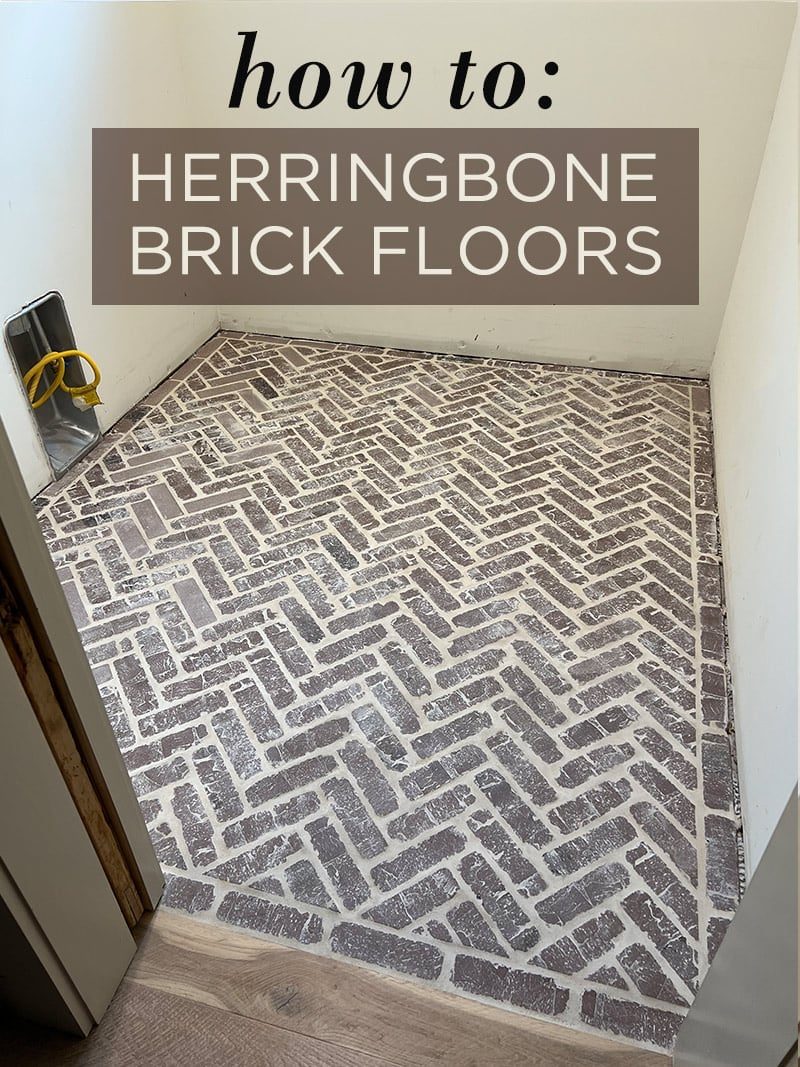
This is a beginner-level tiling project that requires just a few basic tools, and it is definitely do-able with one person. Because the bricks are very forgiving and the end result is meant to be imperfect, this makes a great DIY for first time tilers.
Here is what you will need!
Supplies
- Brick flats (we used 4 boxes of herringbone sheets and 2 boxes of single brick flats in the color Monument)
- Angle grinder with a diamond blade or a wet tile saw
- Framing square
- Thinset or Mastic
- Sanded grout
- Tile Sealer
- Notched trowel
- Margin trowel
- Tile float
- Mixing paddle and drill
- Sponges
- Large bucket
How to install herringbone brick floors
Step 1: Prep your surface

Our subfloors are concrete, so we just had to make sure the surface was clean and free of debris. If you have wood subfloors, you will need to install sheets of cement board before laying the tile.
Step 2: Lay out herringbone brick and make all cuts (dry fit)
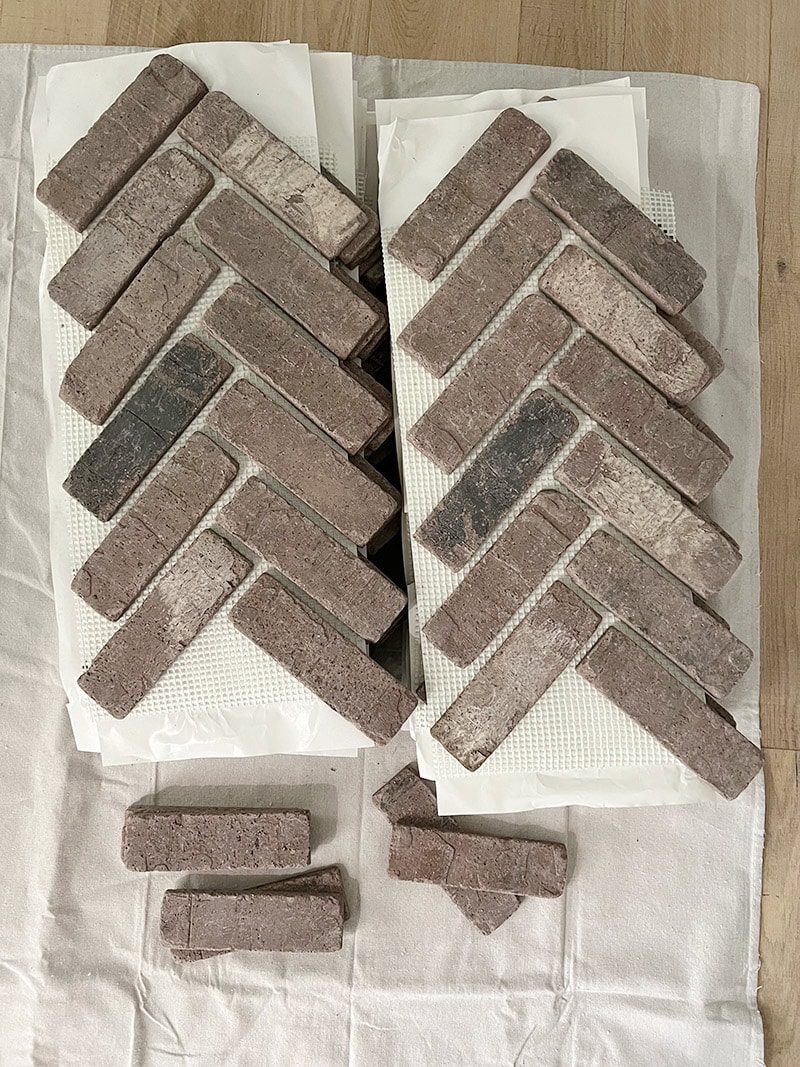
Because the floor design required plenty of cuts and specific measurements, The aim was to do a full dry fit first. The aim was to make sure I was happy with the arrangement, and had enough bricks (I did not order enough herringbone sheets by mistake, and had to fill in the rest with individual bricks).
The choice was to add a border around the edge with individual bricks, and mocked up my design to scale in Illustrator (I am such a visual person and find this particularly helpful!)
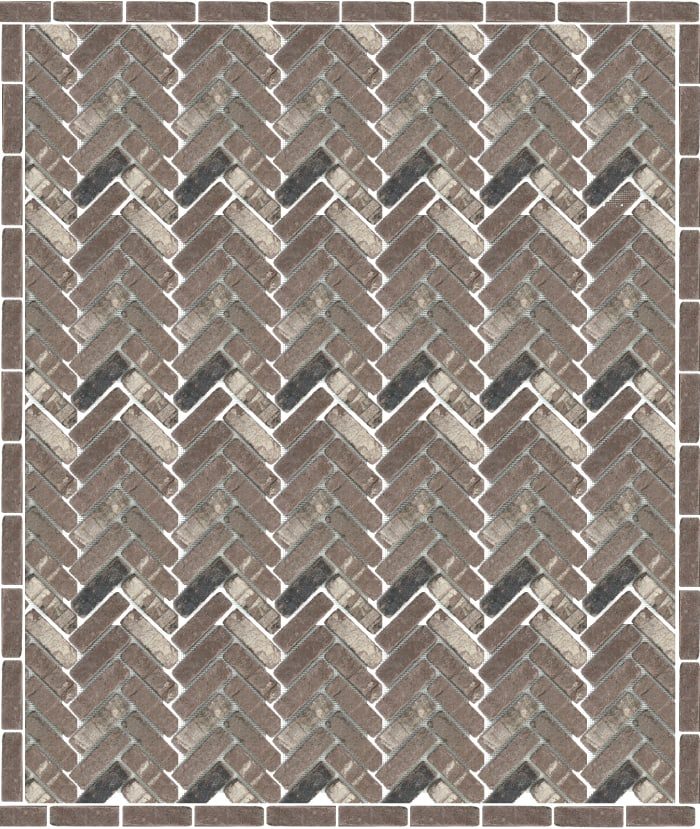
First, I drew a line 3” from the edge on all sides of the room. This is where the herringbone sheets would line up, and it is important they stay square.
The brick spacing on the herringbone sheets are around 1/2”, so I used that as my guide and eyeballed it (these are not meant to be well suited!). A few cuts were required for this part—like this corner by the entrance:
To cut the brick, we used our angle grinder with a diamond blade. You could also use a wet tile saw, but the grinder worked well. We set up a workspace and used a clamp to secure the individual bricks down (it is a very dusty job—make sure to wear a mask and goggles!)
And here is the finished border:

For the first herringbone section, you will want to cut off the top and side edge so the piece can sit flush in the corner. This way, you will avoid having to cut a bunch of tiny triangles to fill in the gaps. We used a framing square, and lined it up as shown:
The glue on these sheets is not the strongest (or maybe they were handled very roughly when unloaded?) so plenty of them were loose. I also wanted more of a monochromatic look, so I replaced as many of the black/white painted bricks as I could.
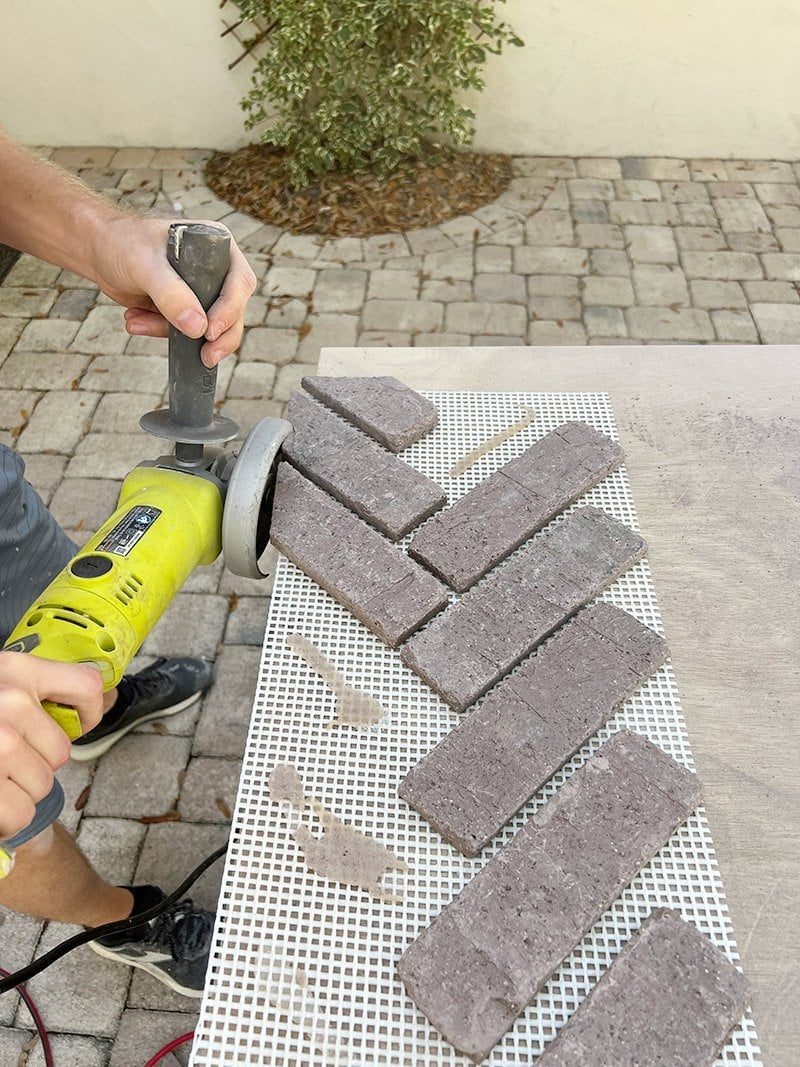
The mesh backing makes cutting so much faster! You can cut them all at once on the sheet.
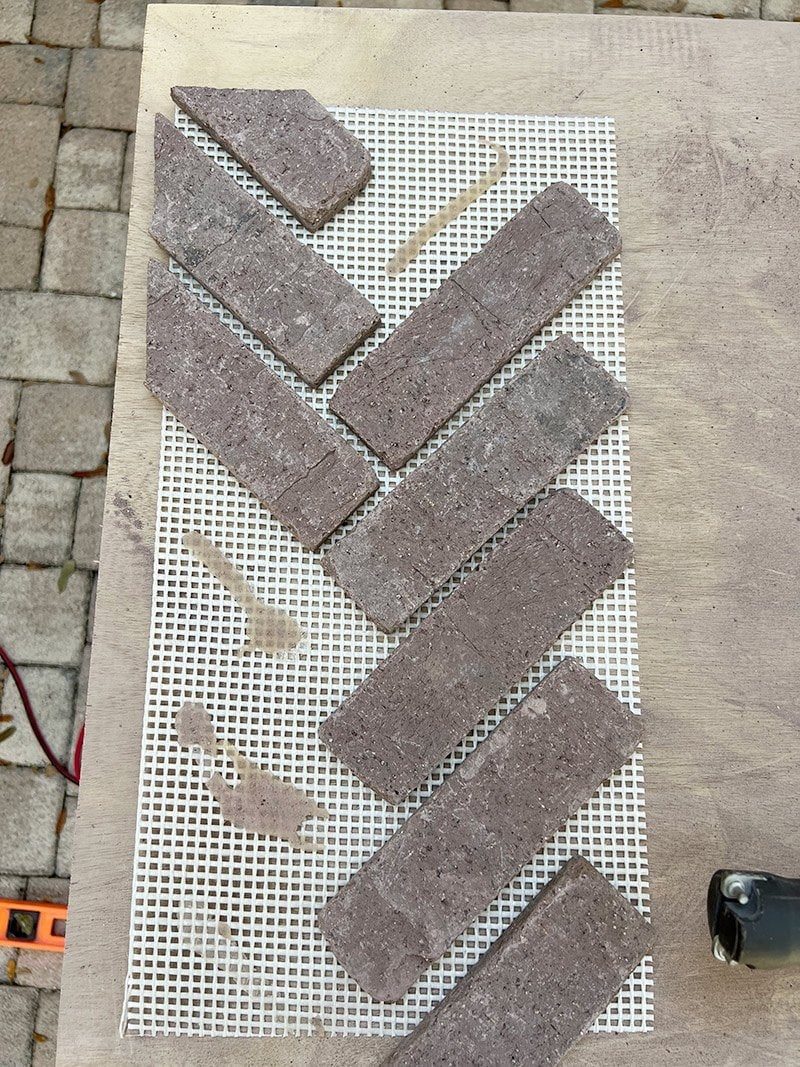
We filled in the empty spots with loose bricks cut to the same length. First piece down!
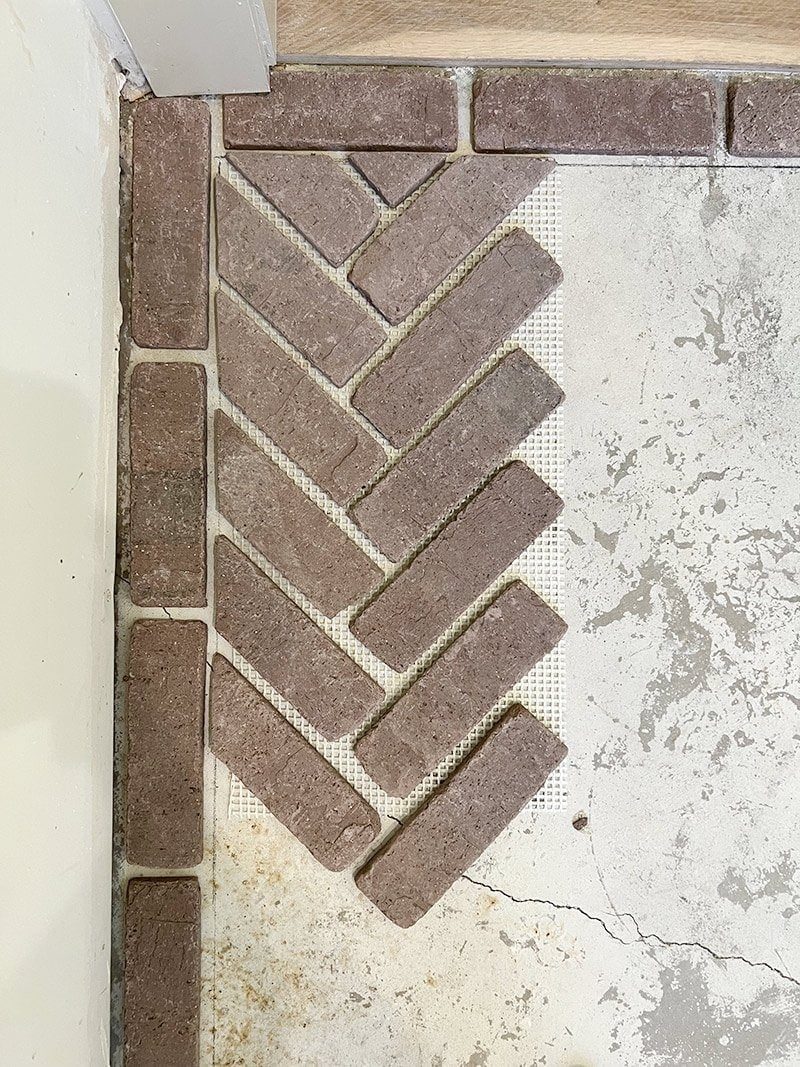
This process was continued for the next two hours, until we ran out of herringbone sheets:
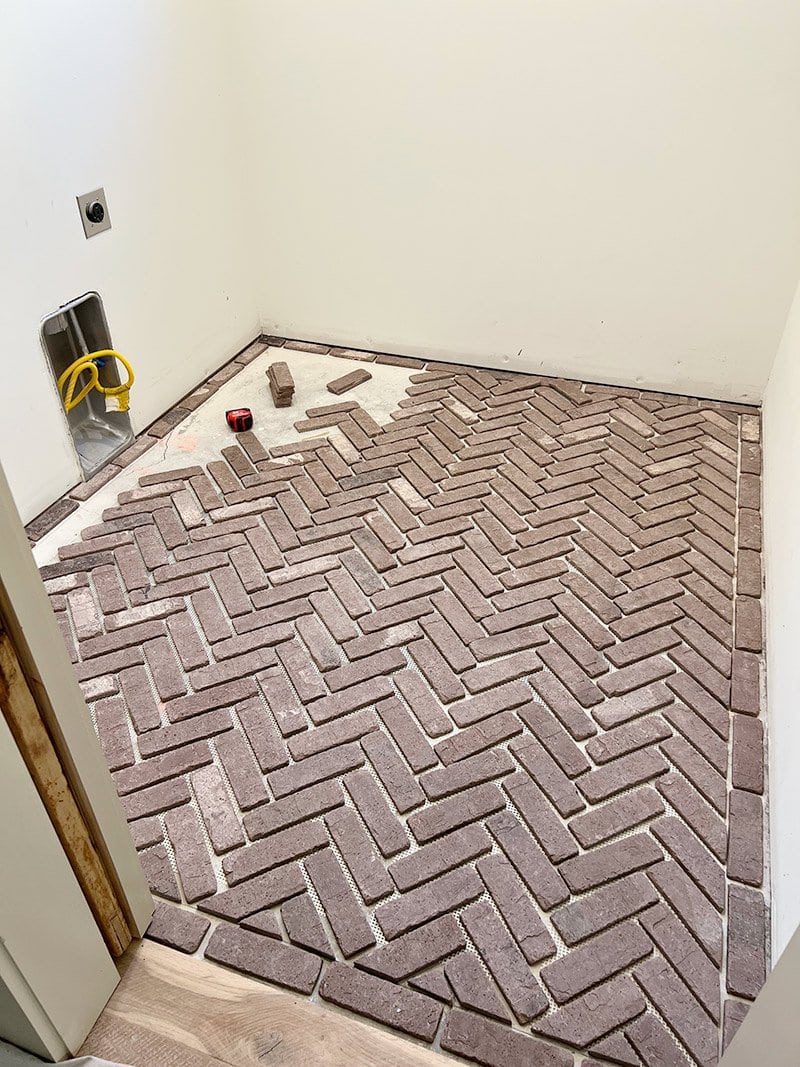
The rest was done by hand with individual bricks, which actually was not too difficult at all—just more time consuming to cut. The beauty of these old bricks is that they do not need to be well suited!
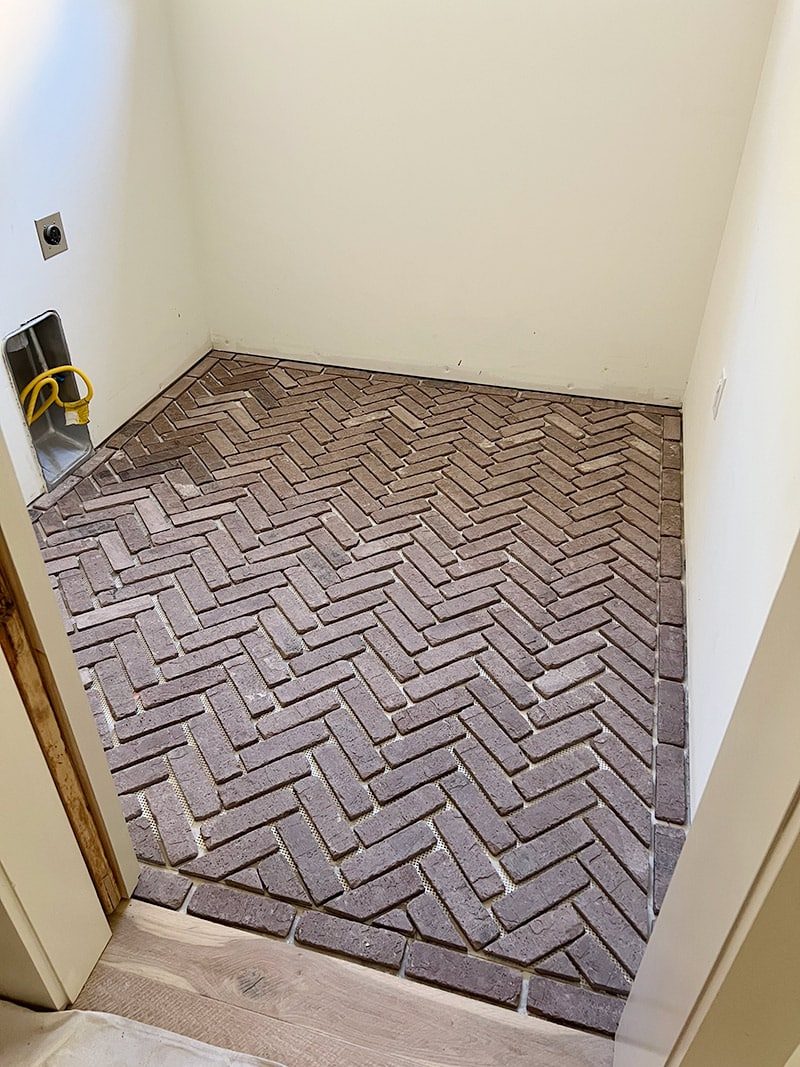
I ran out of unpainted bricks and had to use what I could to finish, but those will all be hidden underneath cabinets so it genuinely does not matter.
Step 3: Apply tile adhesive and install brick flats
After all of the cuts have been made, it is time to start installing. I used mastic because it is premixed, sets fast and I figured that would be the easiest way to go.

We started along the back wall, spreading the mastic with a notched trowel.
I learned soon enough that the mastic sets within 10 minutes, so you do not have much time to make any adjustments and you have to work FAST. This was pretty stressful, and if I had to do it over again, I would use thinset which has a longer drying time.
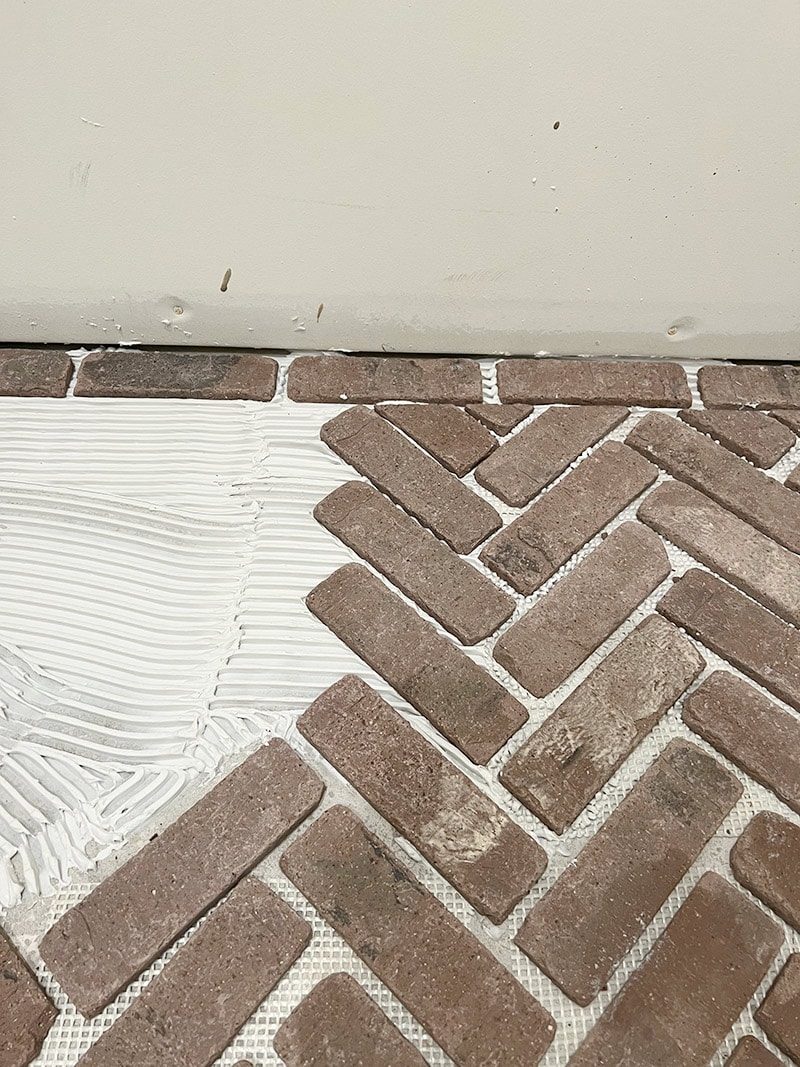
We worked in one section at a time which helped us to keep track of all of the bricks. I also made sure to measure the distance from each row to the wall, to ensure it stayed consistent.
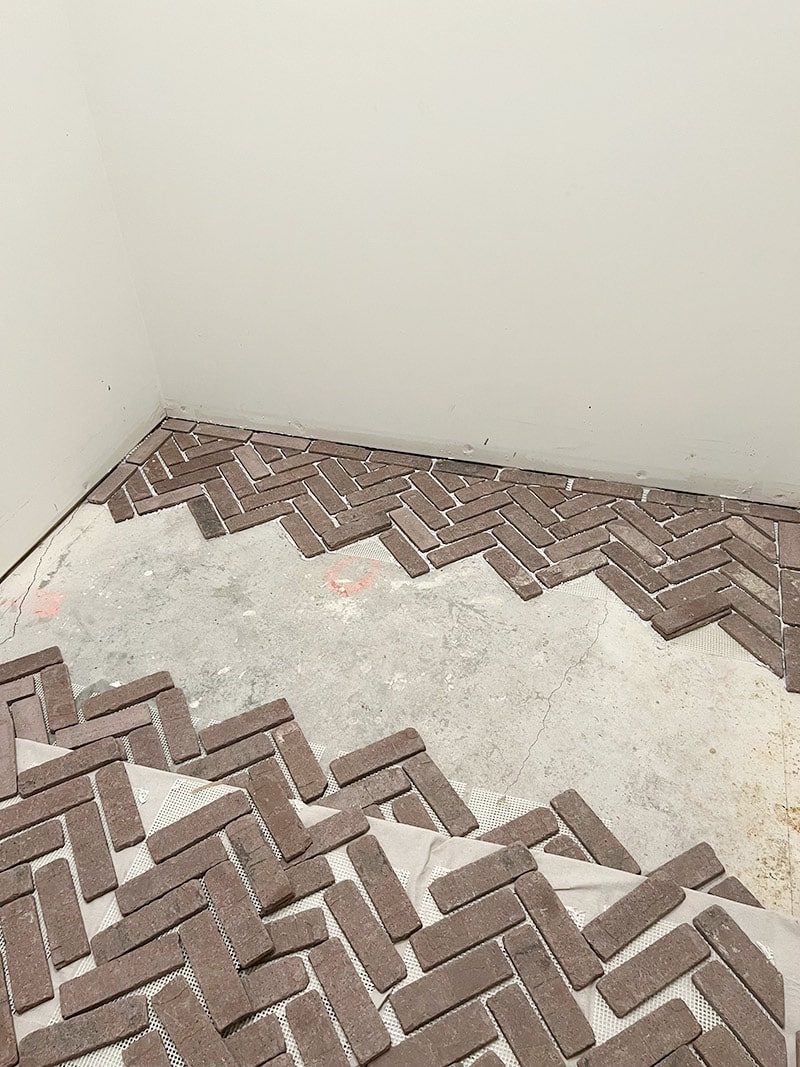
It is important to use plenty of mastic, and press down firmly on each brick to ensure it is fully set in the adhesive (we had to redo a few loose bricks the next day, so check each one!)
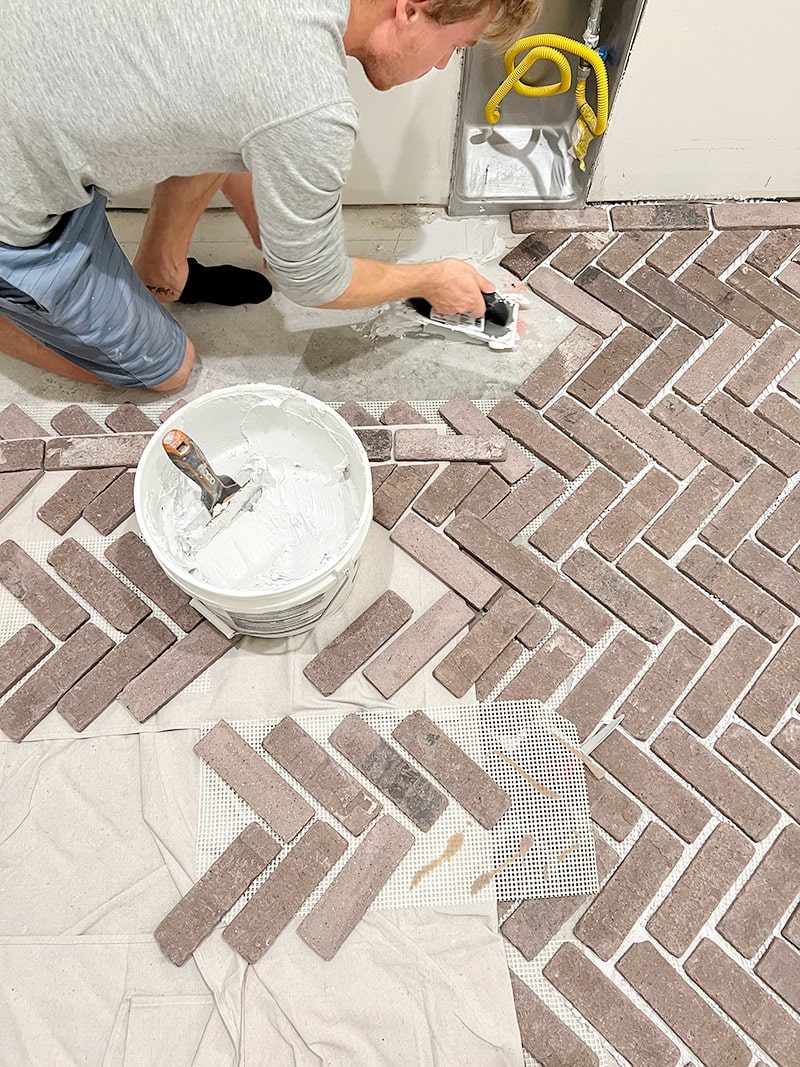
The mesh backing is helpful to keep the bricks in place/aligned, but also makes it trickier when gluing them down since you have to overlap the sheets, and ensure enough mastic makes contact with every brick.
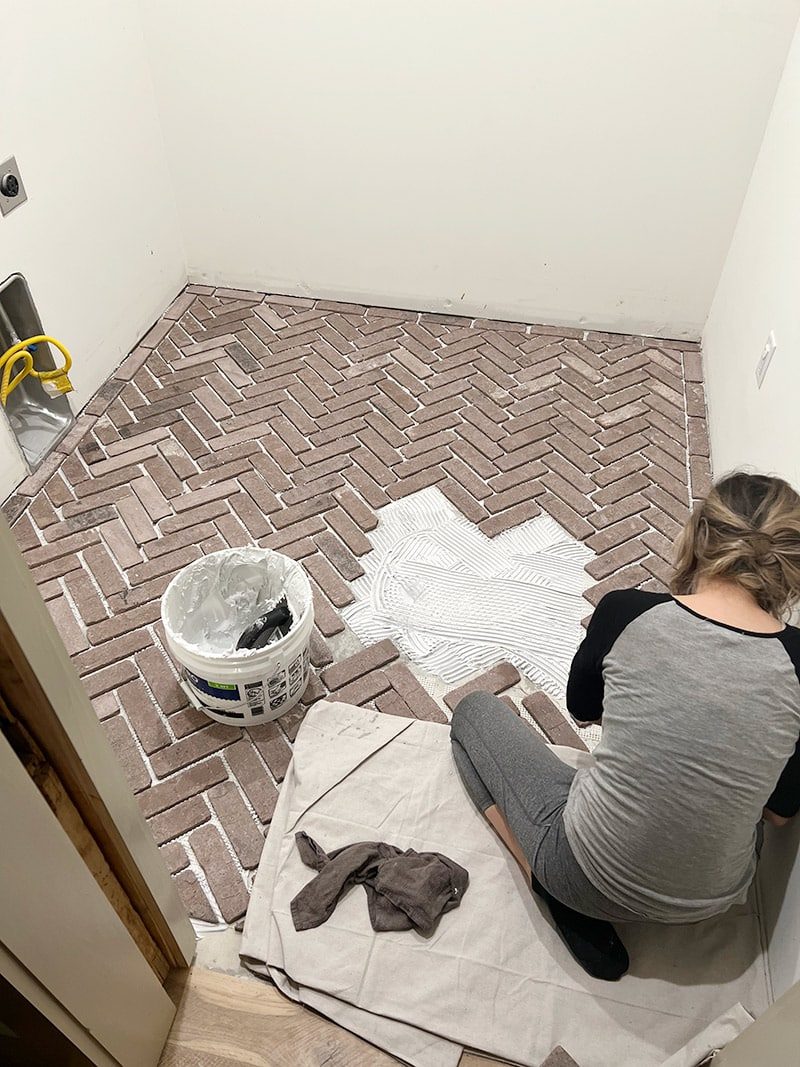
Fortunately, you do not have to worry too much about the spacing. The imperfect bricks and wide grout lines are very forgiving, and you can hide plenty of mistakes when you grout. It is genuinely not noticeable in the end!
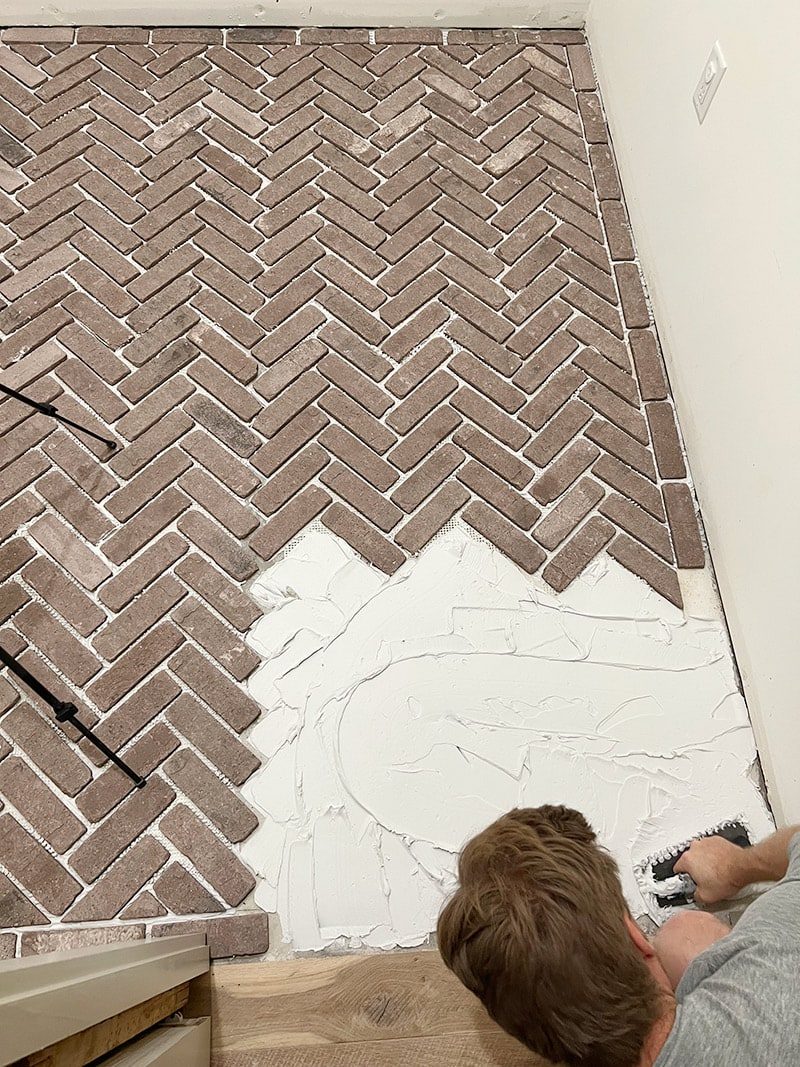
It took two of us 2.5 hours total to lay the bricks.
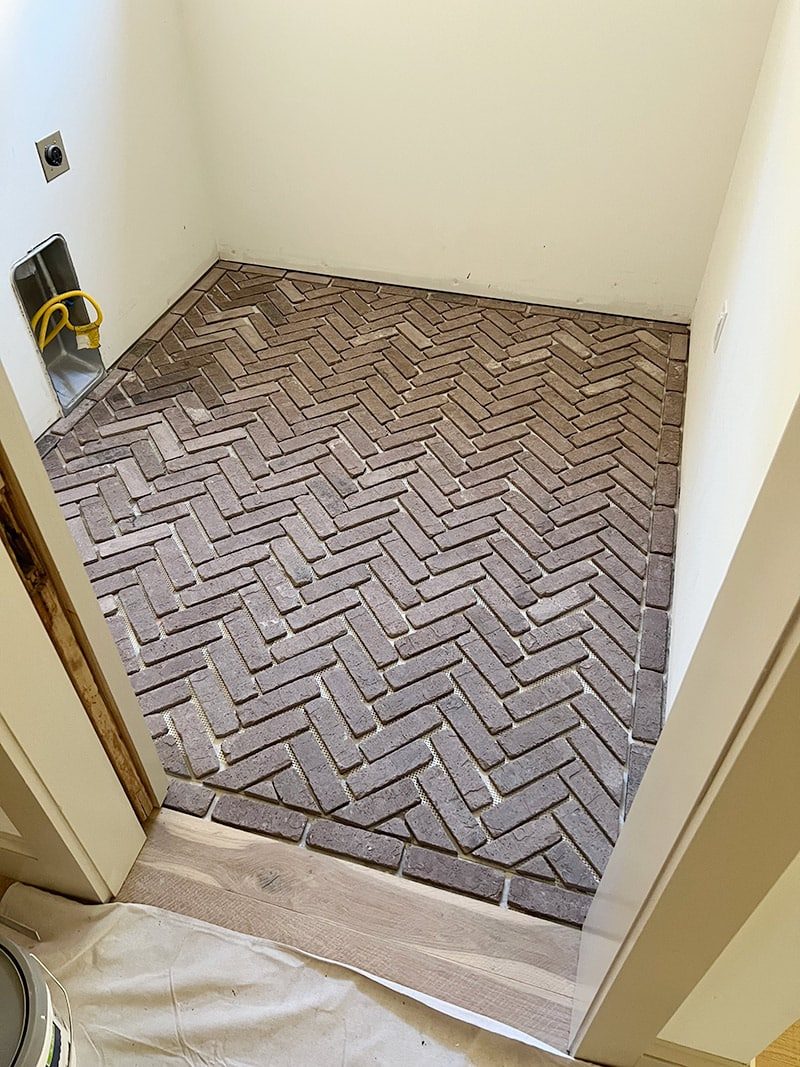
Step 4: (Optional) Apply a grout release or pre-sealer
With unsealed/porous tile, you always want to seal before grouting to protect it from grout stains. You can use a special grout release for this, or simply use the sealer (I chose the latter).
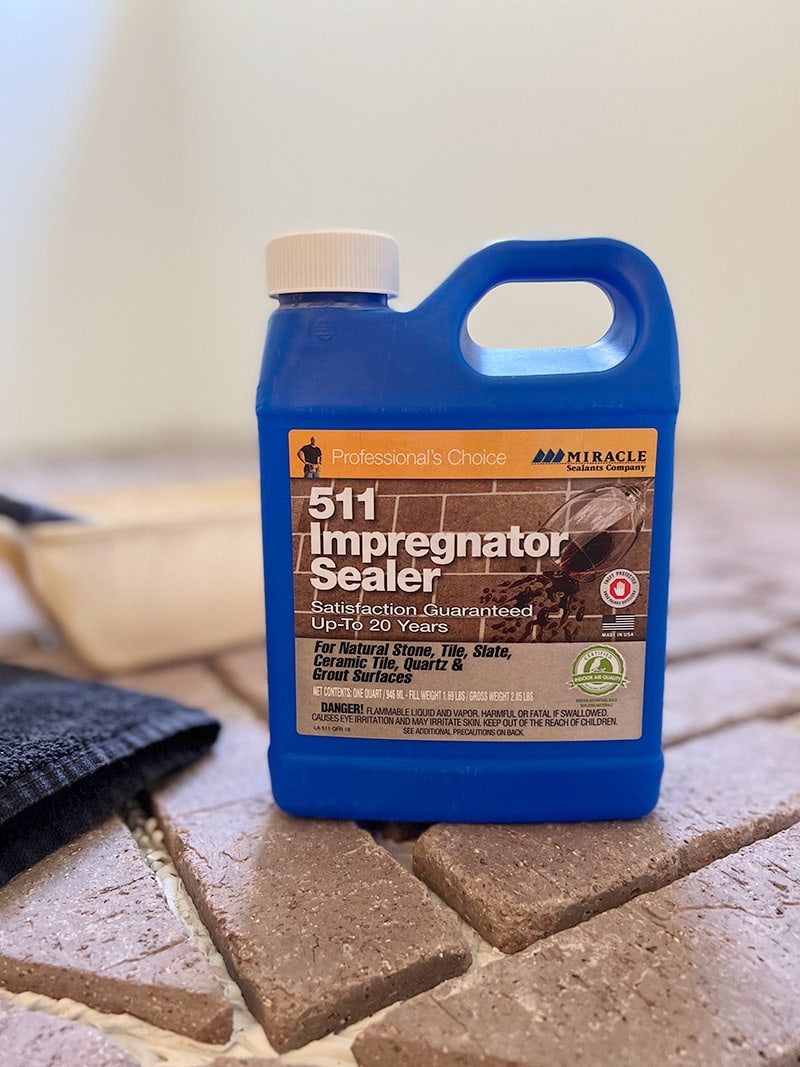
The sealer is quick and easy to apply with a paint brush or roller. Because the brick is so rough and porous, the grout ends up settling into the surface regardless, so I am honestly not sure if this step is necessary in this situation.
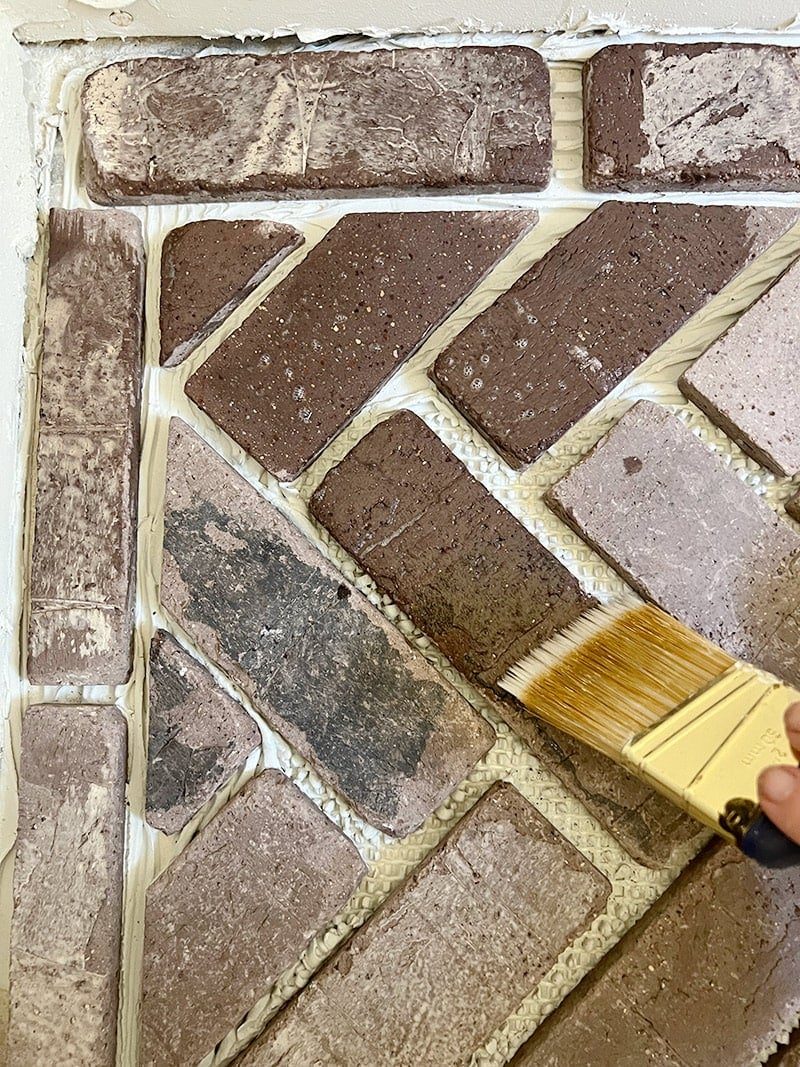
If you genuinely want to preserve the original brick as much as possible and plan to use minimal grout, then this step may help. As you can see it will darken/enhance the color at first, but then it dries invisible.

Step 5: Mix grout and apply with a float
We used two 25lb bags of Polyblend Plus sanded grout in Bone. I chose this muddy beige-gray color to look more like authentic, old brick (stay away from white/lighter colors if you want an aged look!)
The grout + float method is recommended for floor applications, and it was a pretty easy and satisfying process. You just scoop the grout onto the floor, and spread it around using the float, making sure to fill in the gaps completely.
Then you wait 10-20 minutes and wipe it down with a damp sponge.

This is where you can determine the look you want for the floors: “over-grouted” where the grout fills in all the low areas and the surface is more even, or grout only in the gaps with fully visible bricks.
We went for somewhere in between (slightly more over-grouted) allowing the grout to fill in the cracks and crevices of the brick.
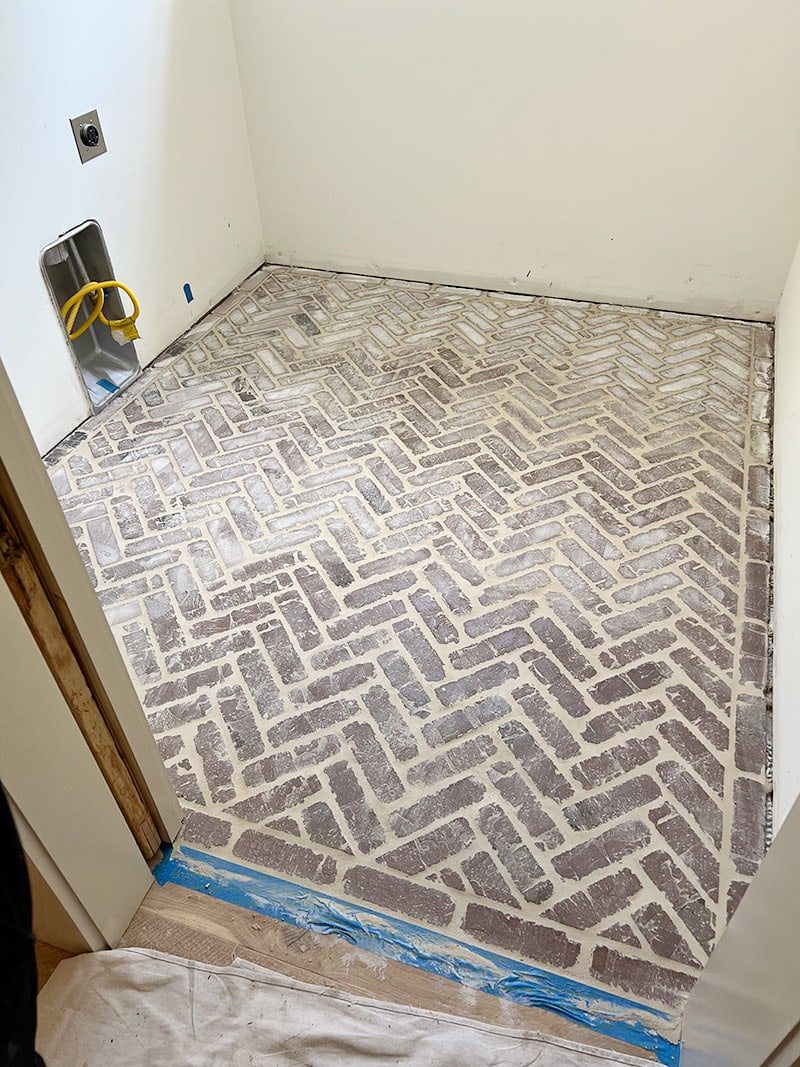
After the initial wipe-down, a white haze will form on the bricks. Because this is such a grout-heavy application, we had to sponge it down 3-4 separate times to remove all of the haze.
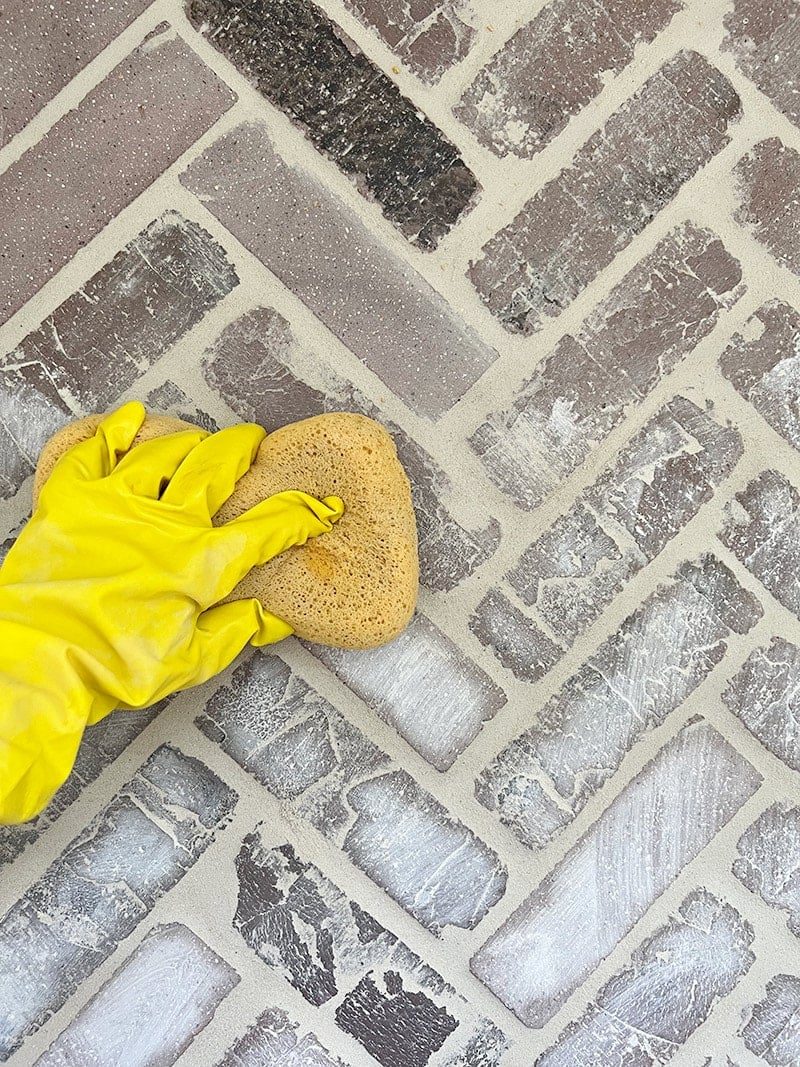
Step 6: Seal the floors
The final step is to seal the floor, which will help protect it from stains and make it easier to clean. I used the same product I applied as a grout release (511 Impregnator Sealer) after letting the grout dry for three days.

I applied the sealer by hand with a brush and once again, this part was particularly fast and easy!

The brick will darken as you brush it on, and it takes at least 24 hours to fully cure to an invisible finish.

Herringbone brick floor reveal
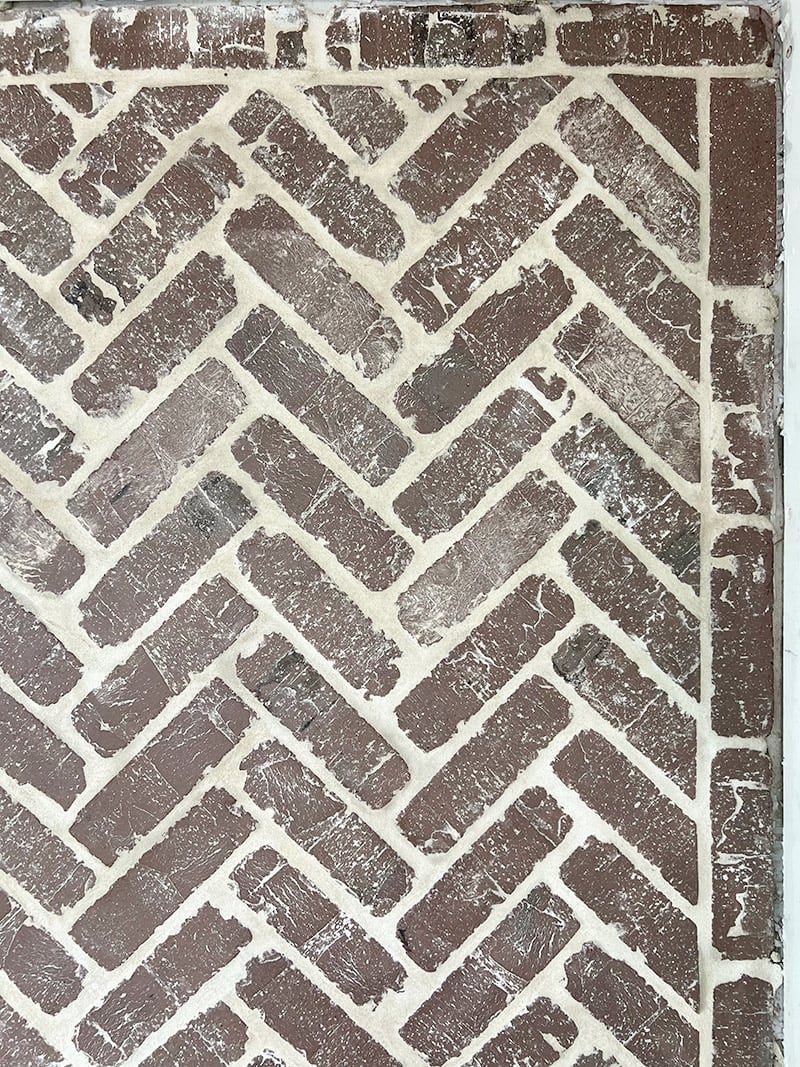
One week after starting our floor install, here is the finished result:

These bricks are easy to work with, very forgiving and the look can be customized with a variety of different brick and grout color combinations. If you are thinking about trying this DIY, learn from my experience and follow these helpful tips:
Installation tips
- Make sure there is plenty of mastic underneath the entire brick. We had to redo a few loose bricks the next day because there was not enough adhesive underneath.
- When installing the herringbone sheets, make sure to press down firmly on each brick, to ensure enough mastic comes through the mesh. If you are placing a loose brick on top of the mesh, add more mastic to the bottom before installing to be safe.
- Wipe any mastic off the bricks as you go. It is difficult to remove it once it dries!
- During installation, place a long straight edge (such as a 4' level) across the floor, to identify any raised bricks and ensure the floor is flat and even.
- When installing, measure from the wall to the edge of the brick sheets, and make sure the distance stays consistent all the way down.
- If using multiple bags of grout, mix them together first before adding water. Often times, bags of the same grout are not identical in color, and this difference may be noticeable.
- For a smoother/more even surface, do not wipe away as much of the grout and allow it to fill in the gaps. This is also known as an “over-grouted” style, and will help hide any spacing mistakes.
- For an original/authentic brick look, skip the white grout and choose a muddy gray-beige tone (it is also lower maintenance!)
Frequently Asked Questions
Our herringbone sheets were $16.80/sf, and the individual bricks ran $13.50/sf. With the mastic, grout, and tile sealer, the total came to just under $1k for our ~50 sq ft laundry room (we owned the rest of the tools/supplies).
How do the bricks feel underfoot?
Pretty much as you'd expect—they are not like walking on a rug, but they will not hurt your feet, especially after grouting and sealing to fill in the rougher edges. No different than walking barefoot on our paver patio in the backyard.
As long as they are sealed properly, they should be fine! A quick sweeping/vacuum should pick up anything visible, and It helps to keep my O'cedar spray mopfor a deeper clean. Also, the brick hides everything so it never genuinely “looks” dirty.
Thin brick and brickwebb sheets are safe to use both indoors and outdoors, on many different vertical or horizontal surfaces—including drywall, plaster walls, backer board, concrete walls or floors.