Riverside Retreat Backyard Redo
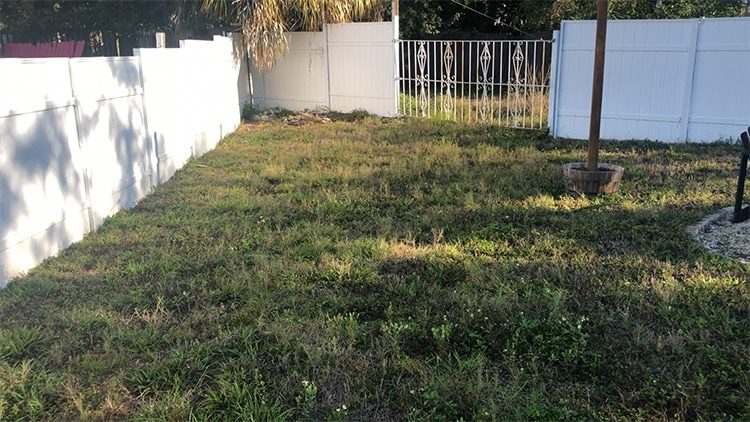
What happens to a backyard in Florida when you ignore it for months? Unfortunately, we found out the hard way. I was too horrified to even think to take a photo, but…
What happens to a backyard in Florida when you ignore it for months? Unfortunately, we found out the hard way. I was too horrified to even think to take a photo, but this is how it looked after the knee-high weeds were tamed and dead plants removed…
Remember all the work we put into it last year?
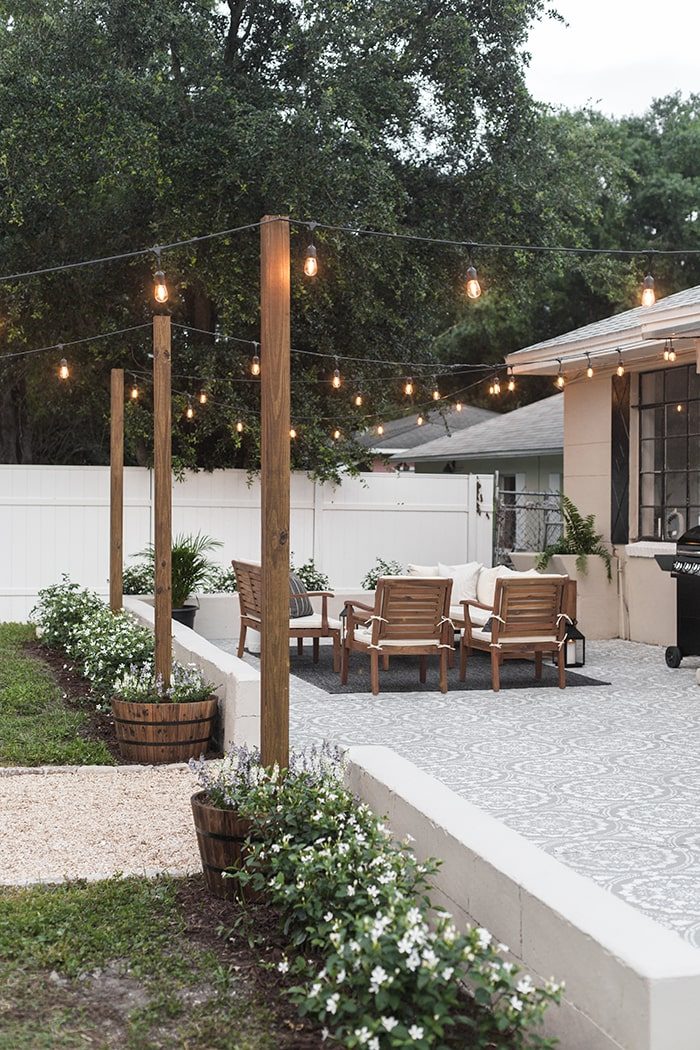
Every last plant had been left for dead.

We made an effort at first to keep everything alive and maintained, honestly. But between the arrival of a new baby and projects at this house put on hold, we rarely had the chance (or motivation) to stop by to water and mow the lawn. That, combined with a warm winter with state-wide drought, it was doomed to fail. We knew this was not sustainable, so it was time to come up with a Plan B (I'll get to that red roof later, I know it is more shocking than the weeds…)

A low maintenance “no-mow” backyard was our solution, which meant ground cover in the form of mulch (we already have pea gravel in the fire pit area, otherwise that would have been my choice). But I could not let go of my dream of a lush, tropical backyard filled with native plants for our guests to enjoy and get the full 'Florida experience.' There would have to be some plants, which meant there would have to be irrigation to keep them alive. Hiring a professional was not in the budget, so I became the landscape design manager and Lucas took on the role of irrigation installer.
First: removing all of the dead growth to create a clean slate. Lucas was able to rip out all of the dead bushes by hand, but we needed something more extreme than a shovel to clear out the entire yard (it is a pretty big area). Sod cutter to the rescue! (I see you staring at that red roof again…)

It was his first time operating a machine like this, and it was entertaining to watch him attempt to control it.

Sod cutters use a vibrating blade to cut about 3-4” below the surface and eliminate all of the grass (or in our case, grass/weed) roots.

It took around a day and a half to remove and then clean it all up with a shovel and rake.

We did end up leaving a small grassy area on the far right side of the yard behind the lemon tree, just to keep some green space (this can be trimmed with a weed wacker).
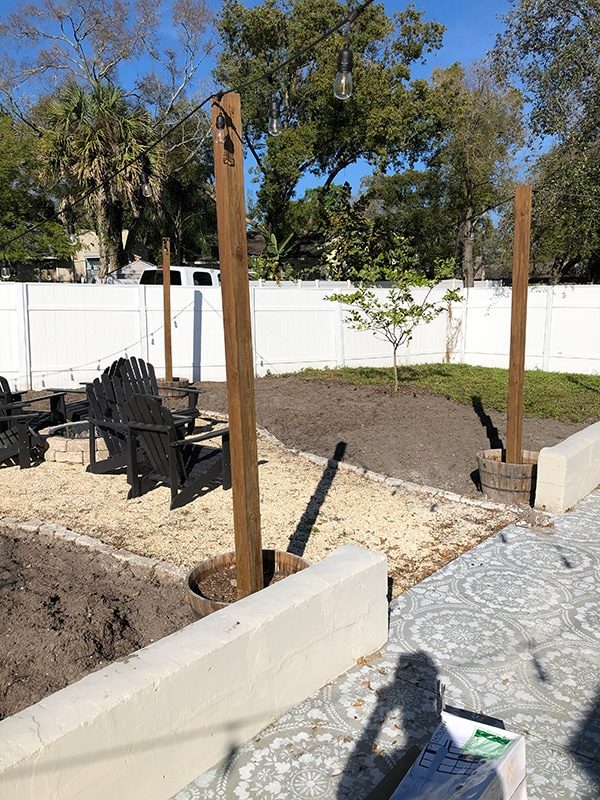

Looking better already!
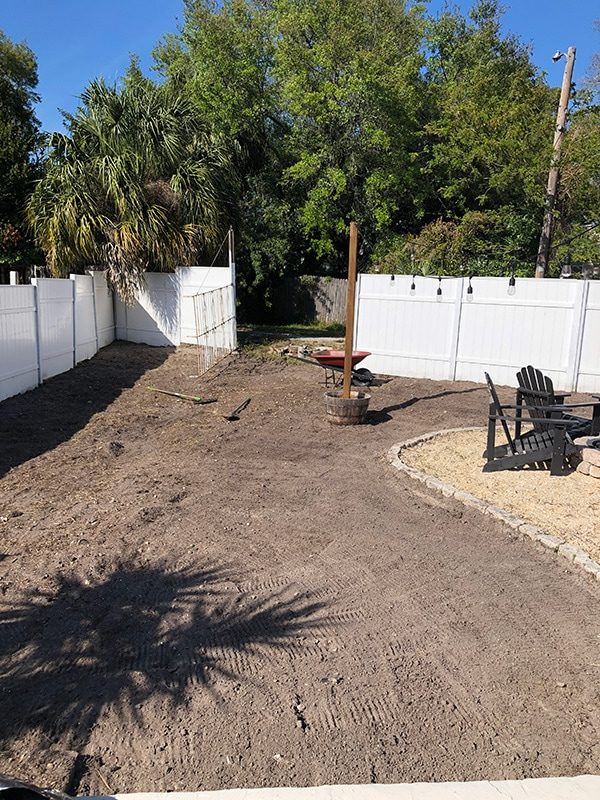
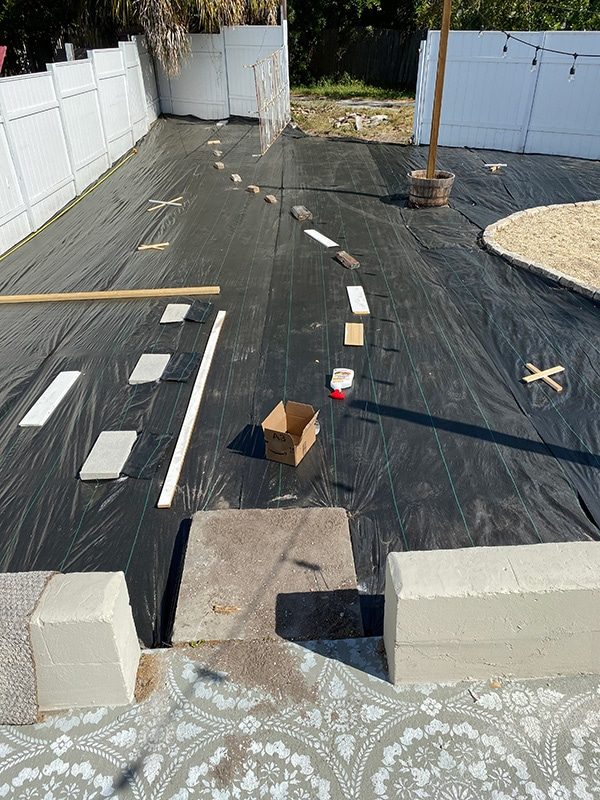
Once all the weeds were gone, the ground was leveled out in preparation for the next step: landscape fabric. There are pros and cons to using landscape fabric, but the weeds are out of control in this climate so it is the best long term solution for us. I wish we would have taken the time to install it underneath ourfire pit last year as there is now weeds popping up, but you live and learn.

We researched and found a heavy duty fabric with a woven texture, which is supposed to be a stronger barrier than the cloth versions.

Pro tip: do not use the landscape pins from the major hardware stores as they are too small and flimsy to do much. You can find larger ones off Amazon (we used these) for about the same price and they work so much better.

The cinder blocks you see on the left are for our shed—we will get to that in a second. The landscape fabric went down relatively quickly and easily for this first-timer, thankfully! We also took this time to plan out location of plants and a future stepping stone pathway.
Now it was time to choose our plants. This involved a couple trips to Lowe's to see what was available, plus plenty of research to see which species would survive out here with little to no maintenance. This part is always an intimidating process for me because I know nothing about plants, and it is frustrating to do all the research on something only to have it die for unknown reasons!
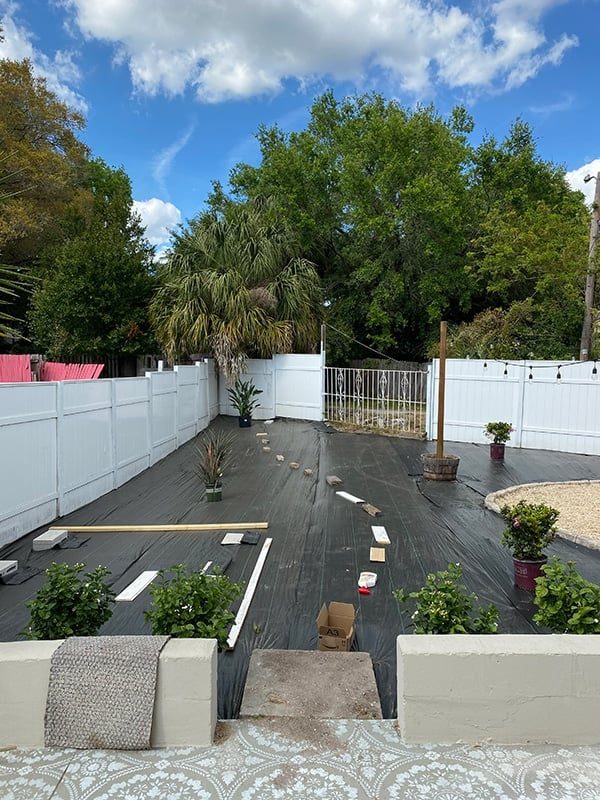
We loved the perimeter shrubs we used along the block wall last year, so we found those again. They were listed asArabian Jasmine online (even though the tags on our old plants said Arctic Snow Bush), so we bought as many of those as they had available, but were still missing a handful.
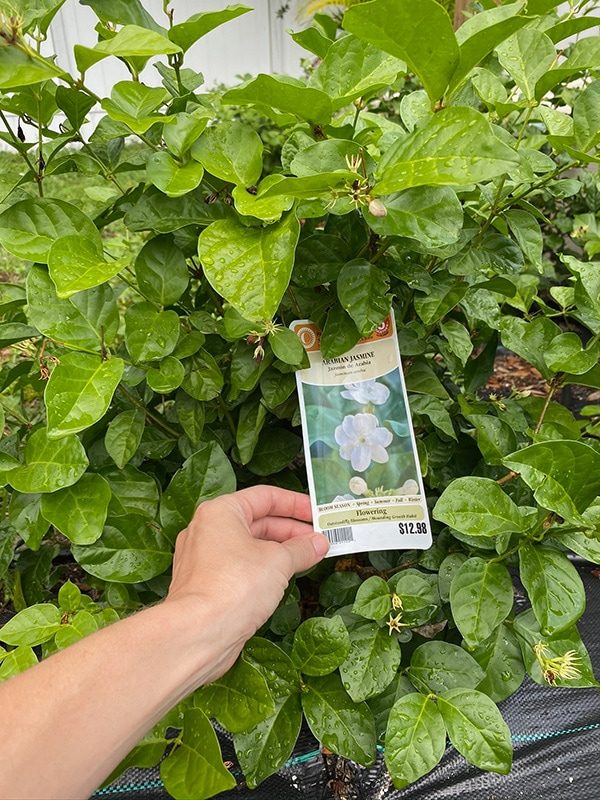
When we went back to get more, they had plants tagged as Arctic Snow Bush and we assumed they were the same, so we bought those.

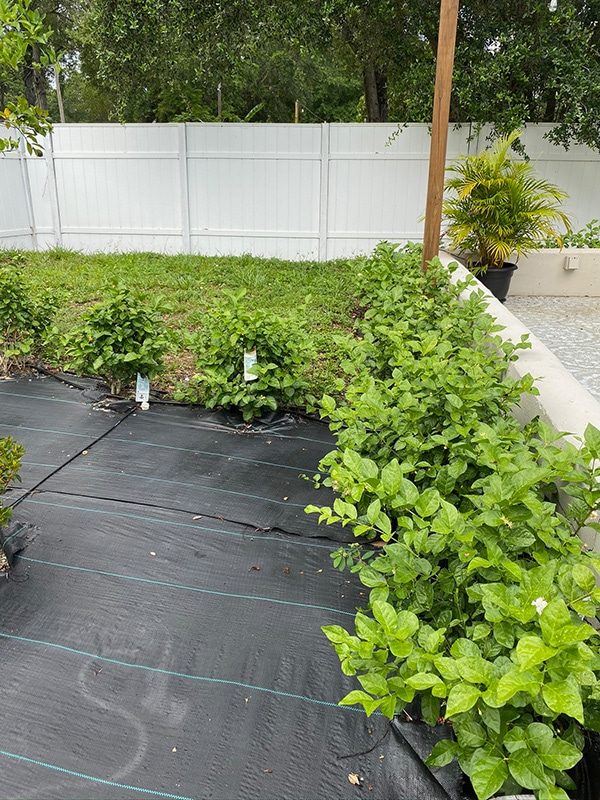
Spoiler alert: they are not the same. Our Arabian Jasmine plants have not bloomed (yet?) but our Arctic Snow Bushes have had consistent white flowers since planting them a couple months ago. At least they are on different sides of the yard so maybe it will not look like an accident…

This is how the Arabian Jasmine bushes look after a couple months in the ground. They are healthy and growing at least, but only a couple small flowers.
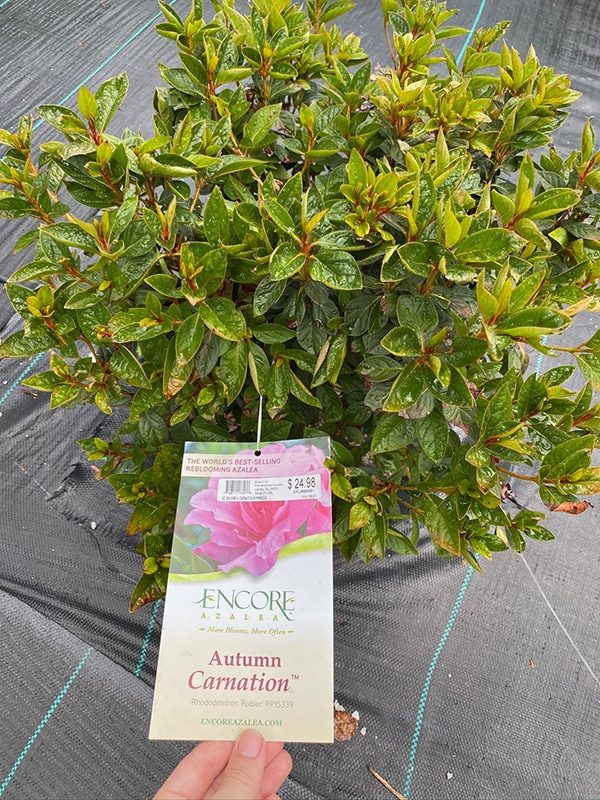
We also purchased four of these Azalea bushes, which had striking flowers when we bought them but have not bloomed (or grown in size at all) since. At least they are not dying…
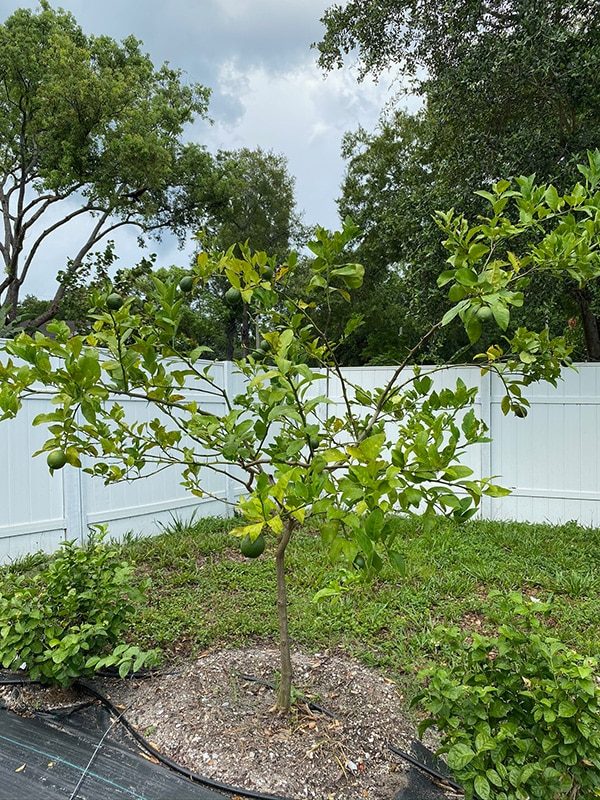
Our lemon tree is the only self sufficient plant out here, and has even produced a ton of fruit without any help from us. Look at those lemons!
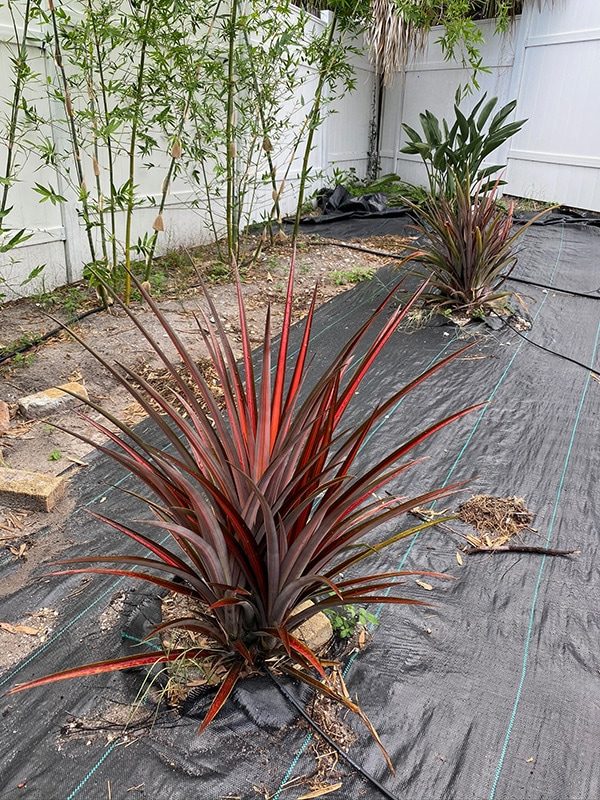
I got a little carried away at Lowe's.. why not throw a couple pineapple plants in the mix?
And every tropical backyard needs a bird of paradise.
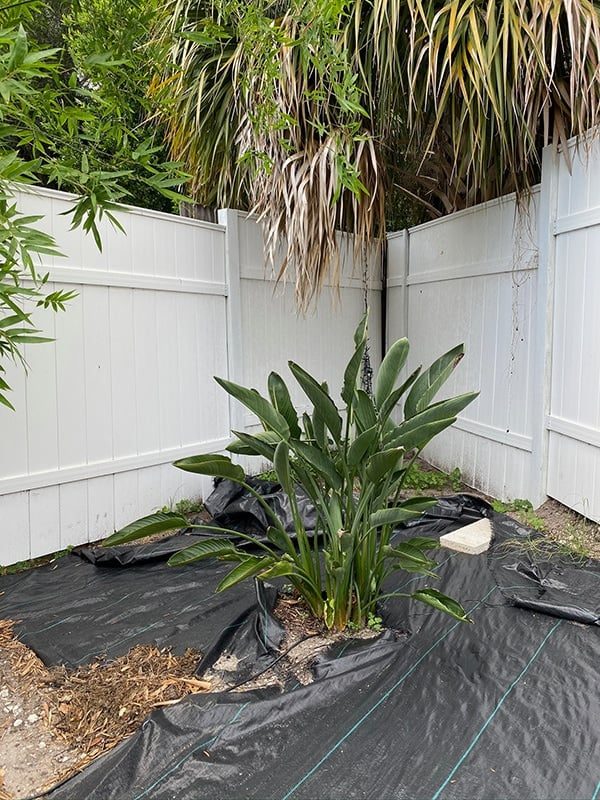
Lucas had to reign me in a bit (what happened to our low maintenance yard?!) but if these plants survive, we will be grateful we put in the time and investment now.
In case you are wondering, here is a quick demonstration on planting on top of landscape fabric. You first cut slits in the fabric at least twice as wide as the plant container…

Then pull the flaps back to give you enough room to dig the hole.

Unfussy as that!
One major component of our design plan was creating privacy and a visual barrier from the neighbors. In case you did not notice, they painted their house bright red (and by that I mean their house, roof, fascia, fence, driveway, stairs… different shades of red… just let that soak in). We still do not know whether to laugh or cry, but that was certainly not the view we wanted our guests to focus on. (Update! A few days ago they painted their roof back to brown, HALLELUJAH! Update #2, and yesterday they started repainting their fascia! Maybe all the red will be gone soon…)
After running through all of the possible privacy solutions, we landed on one that was relatively inexpensive, easy, and fast: bamboo. One of the largest bamboo suppliers in the Southeast operates out of Tampa and had these delivered and installed in about an hour at $60 per plant.

They were planted every ~2 ½ feet and look quite straggly in photos (not nearly as sparse looking in person) but since bamboo grows SO fast, we knew they'd fill in quickly. It has now been several weeks since planting, and look at the difference!
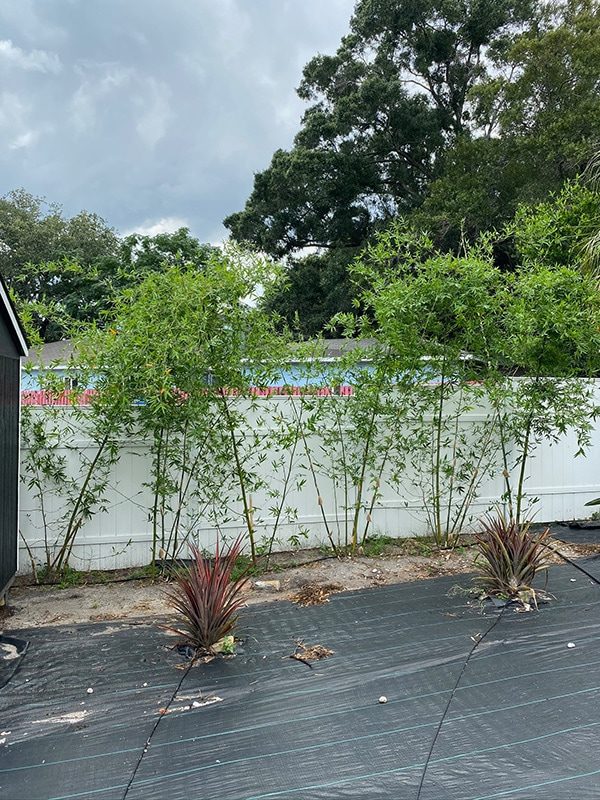
We installed them on both sides of our new shed (still getting to that part in a second). Here is the left side on the day of planting…

And today:

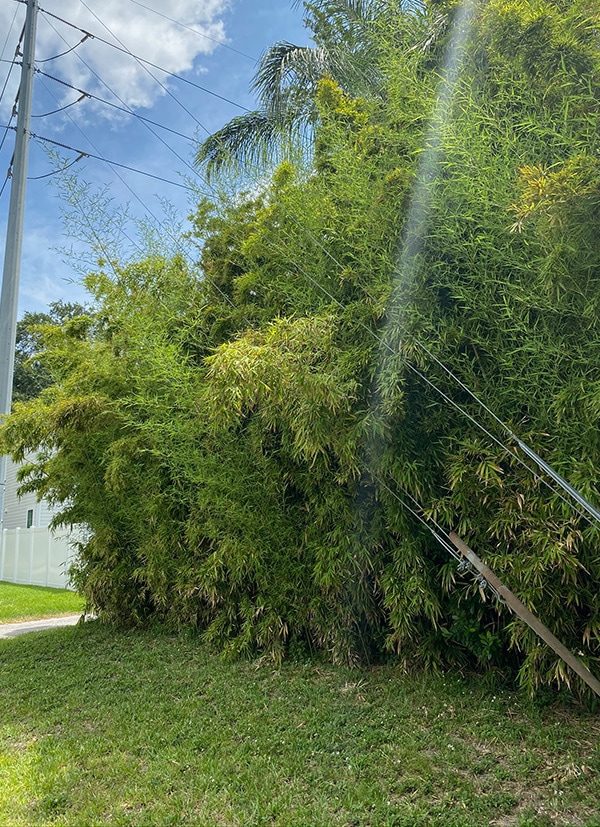
These babies will continue to multiply, eventually becoming a thick barrier from the neighbors (hopefully by the time our first guests check in!) UPDATE: this is the non-invasive clumping Seabreeze bamboo, NOT the problematic running bamboo. There is a couple informative articles about this here and here. This is how they look when you let them grow in:
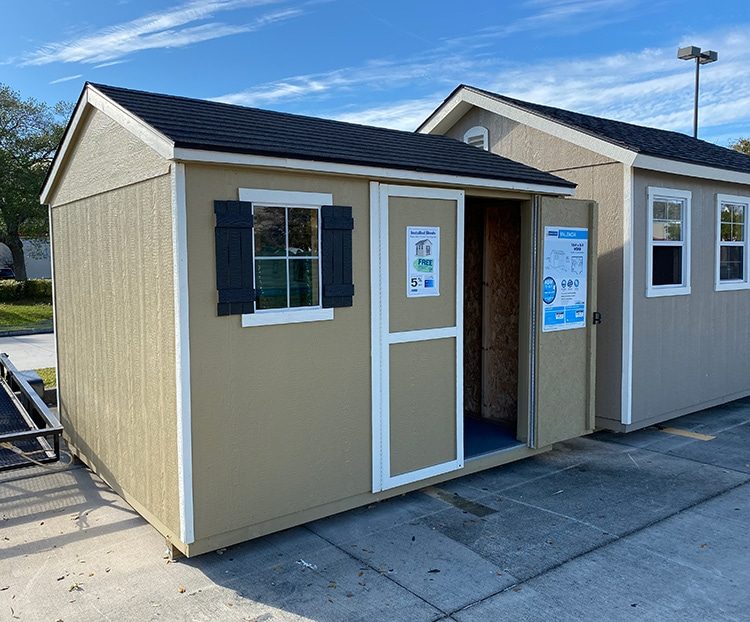
Okay, now for that shed. This is probably the biggest change back here, and a much needed addition since this house has no garage. After an exhaustive search for the right size shed that looked nice, had great reviews and fit the budget, I found the winner at Lowe's:

It is the 8'x10' Valencia shed, complete with a cute little window and shutters that match the main house. We checked it out in person to make sure we liked it, and ordered it that day. We also purchased installation through them, and had it scheduled a couple weeks later after choosing our roof and paint colors.
It took one person less than a day to install and paint (so fast I did not even have a chance to stop by and take a photo!) Easiest process ever—so glad we did not attempt to do this one ourselves. I chose SW Tricorn Black for the exterior, SW Pure White for the trim and SW Ivory Brown shutters. We also plan to add black decorative hinges to the doors.
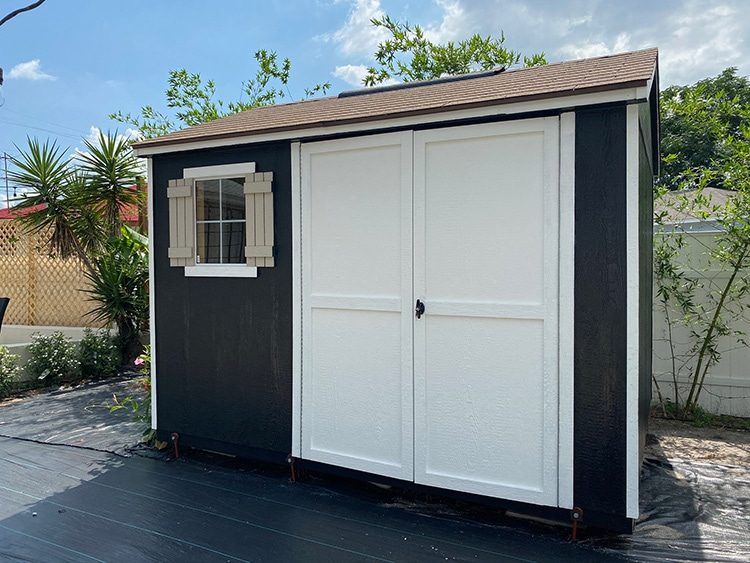
There is ample room inside which we will use to store bikes, yard games and patio cushions when not in use.

Okay, let us talk irrigation! This was another unknown territory for us, but Lucas welcomed the challenge. We did not need a full blown sprinkler system since the grass was gone, just a drip system for the plants. This next section is in Lucas' own words…
It is a rather easy DIY that anyone can do, it just involves plenty of small pieces.

We used this 4-outlet digital hose timerthat would hook right up to our outdoor hose connection and provide us with enough outputs that we could create several different watering zones.

You want to be sure to attach a pressure regulator to the timer first to ensure your drip lines do not get overloaded.
Next I ran ½” irrigation tubing from the timer all along the newly installed shrubs, staking them in place.

Where the tubing ran right against the shrub base I used a drip irrigation hole punch and a 2 GPH drip emitter.
Wherever the shrubs were not right up against the ½” tubing, I attached a piece of ¼” tubing using the same hole punch, and this coupling.


Once installed, you want to make sure to test the system and check for any leaks or loose fittings. We had a few that required some adjustments, but all easy fixes.
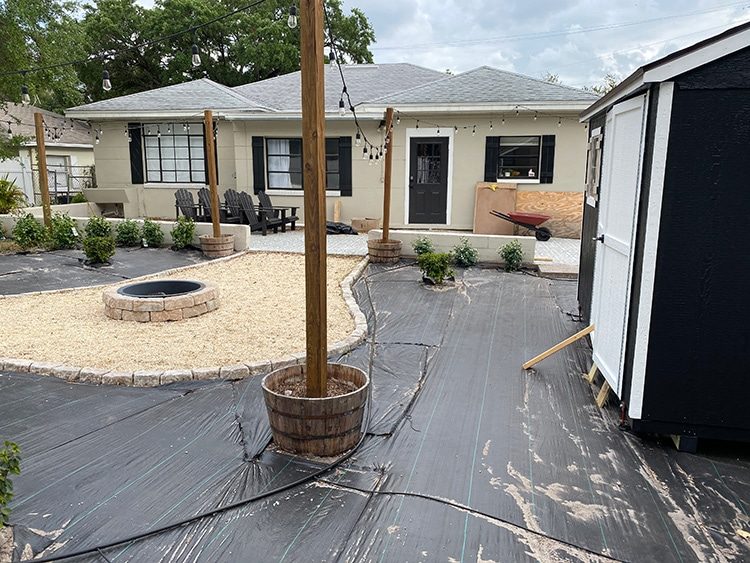
We set up two different zones—one for the bamboo and lemon tree (which need larger amounts of water less frequently) and one for everything else.
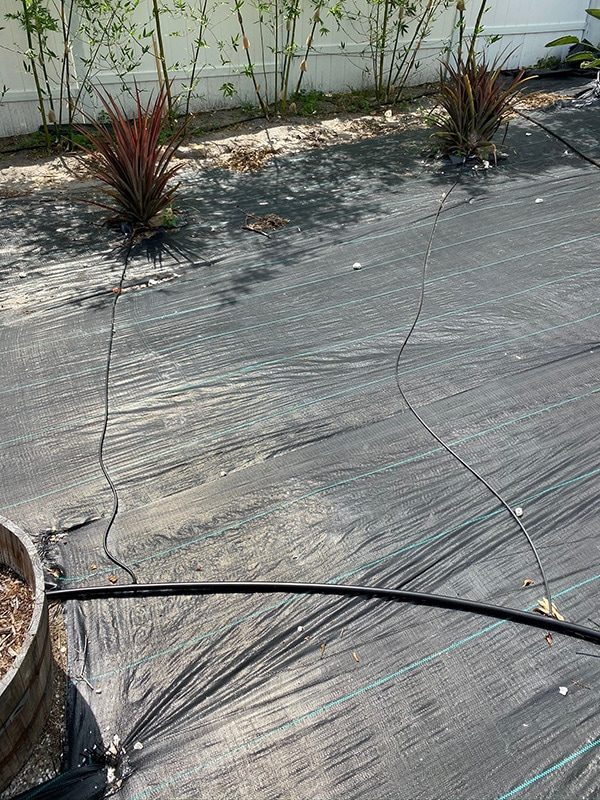
Each zone uses a 1/2″ line, with the 1/4″ tubing supplying water to the bushes that are not directly along the main line. Eventually the plants should become established and require less water, especially during the summer when it rains frequently. Side note: we also took the time to replant the potted plants in our front yardand run irrigation to those, after realizing how unfussy of a job it is. Those plants all died too (of course) but we have learned our lesson and are hopeful we can keep everything alive this time!
Can we talk about my favorite part of this yard now?! I do not remember how this came up, but we got the idea to add lattice to the side of the shed…
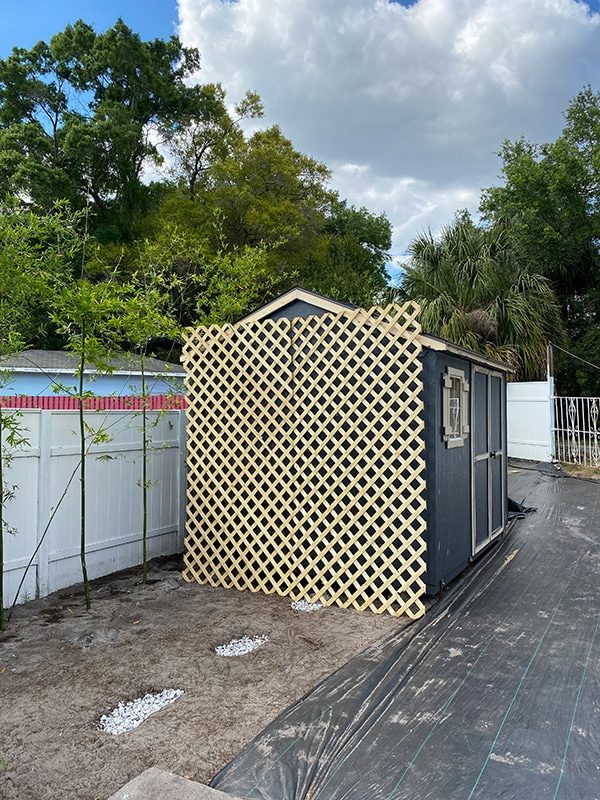
We cut down two inexpensive 4×8' sheets of wood lattice to fit (ignore the different colors, this is what happens to wood after one day of direct Florida sun!)
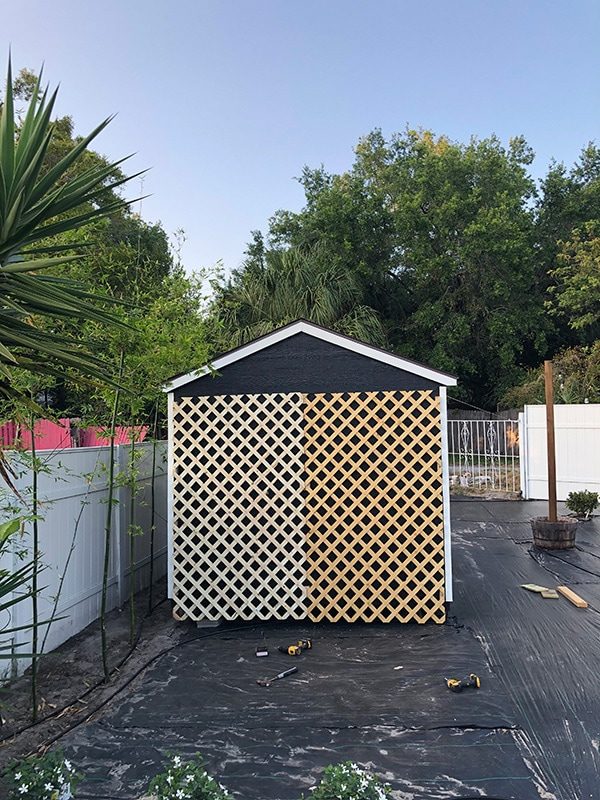
They are secured to the shed with pressure treated 2×4″ blocks:
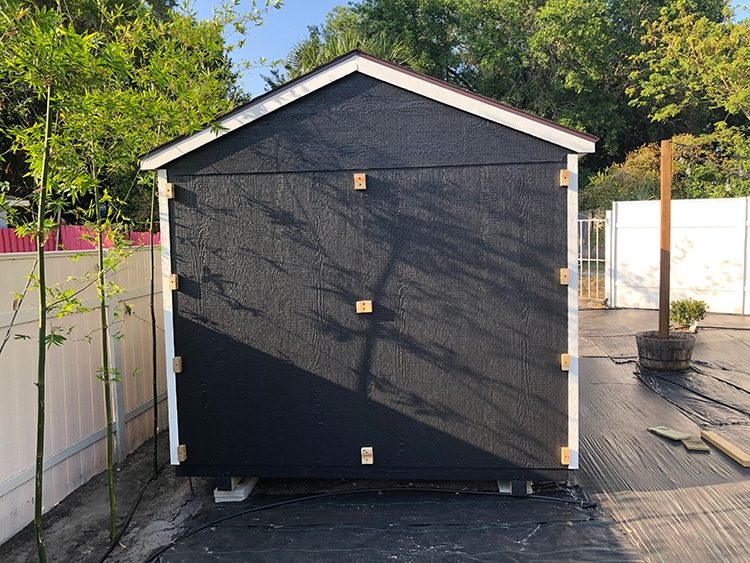
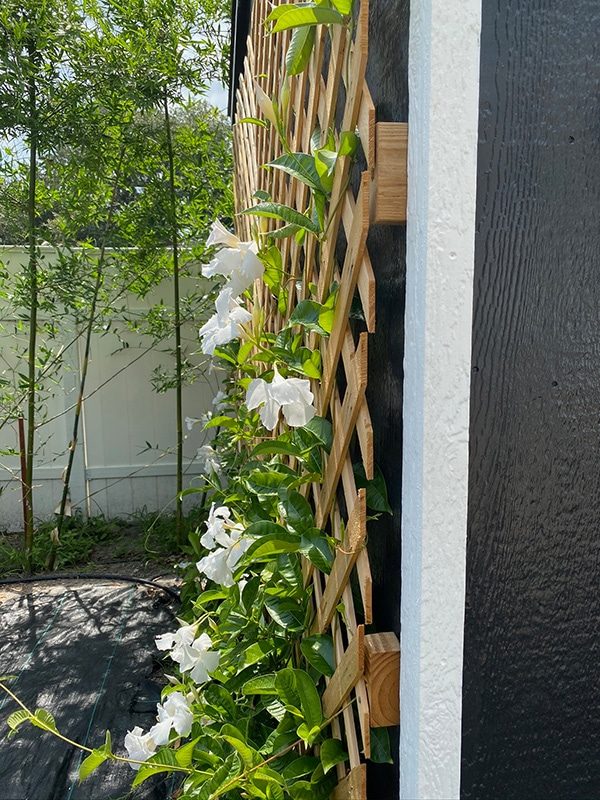
Then we bought a few mandevillas and planted them at the base.
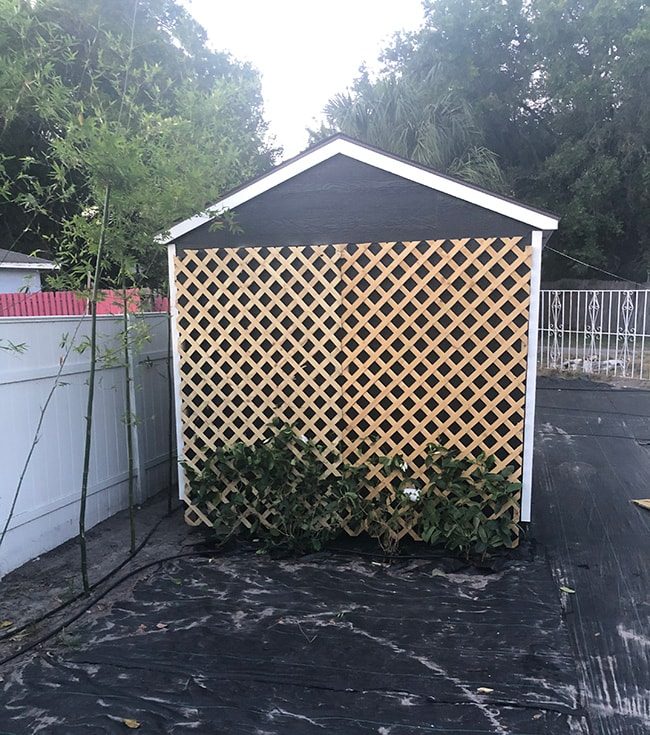
They have grown almost as fast as the bamboo, and how lovely are those blooms?

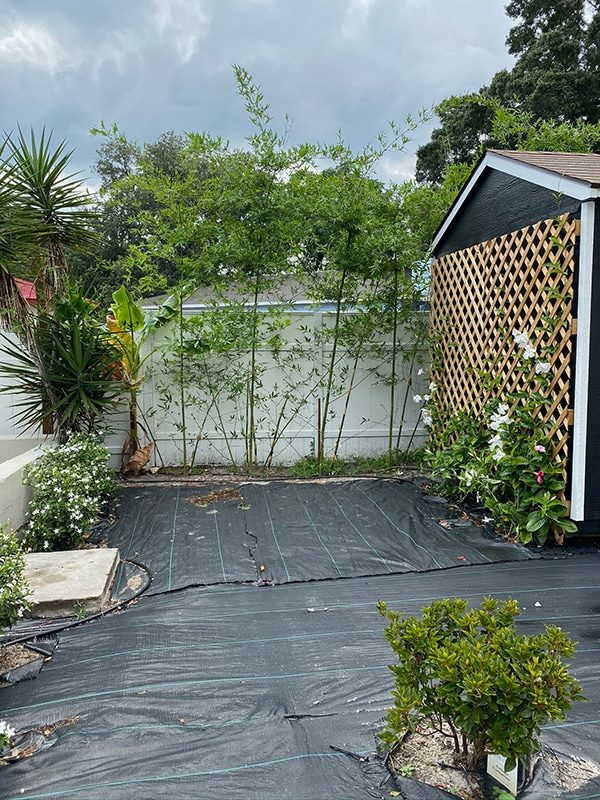
The tropical flowers are a nice touch that will provide another green backdrop, and this is now my favorite view in the yard.

Our final plans include a garden bench here in this corner, which will soon be surrounded by greenery and flowers:
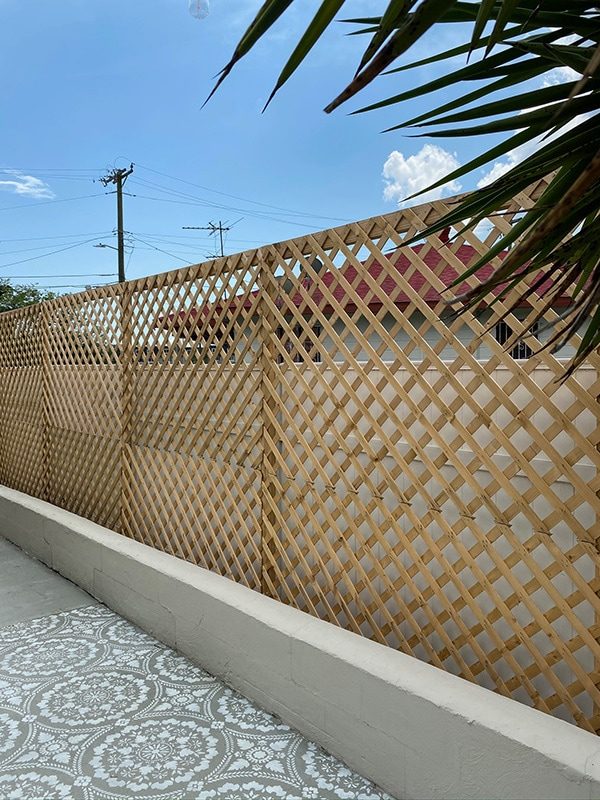
The bamboo will create a nice barrier in the backyard, but the neighbors red roof is (edit: was) still blindingly visible from the side of the house. We could not swing the cost of planting another 20 bamboo trees (or installing a taller fence), so we had to come up with a budget-friendly solution. We landed on the idea of attaching lattice to the fence posts, which would add a couple feet of height to the existing fence, bringing the total to just over 8'.

Lucas first attached pressure treated 2x4x8's vertically to the posts, then 2×4's connecting them horizontally at the top with pocket holes. The existing fence posts were not perfectly aligned, so we used shims to even them out as best as we could, but had to work with what we had.
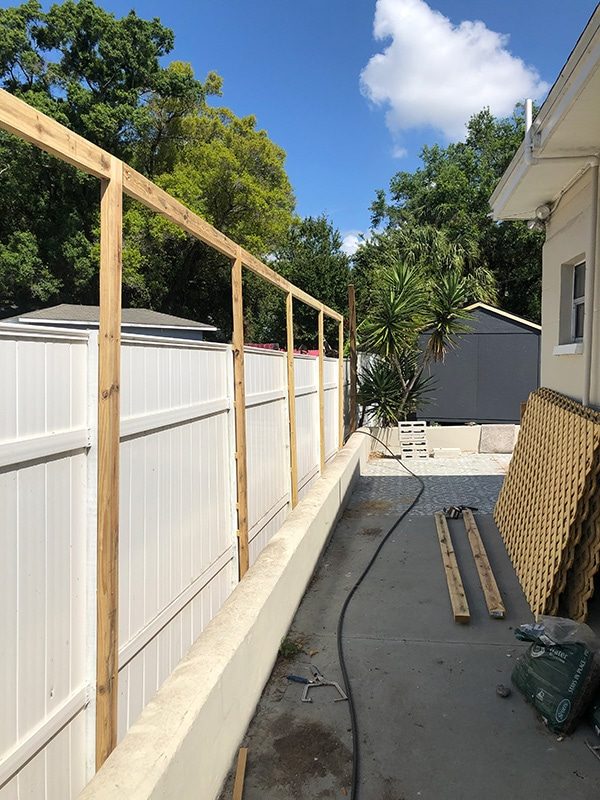
Then he ripped down 4×8' sheets of lattice to fit, and placed them side by side horizontally (two per fence section) and nailed them into the posts at every contact point.
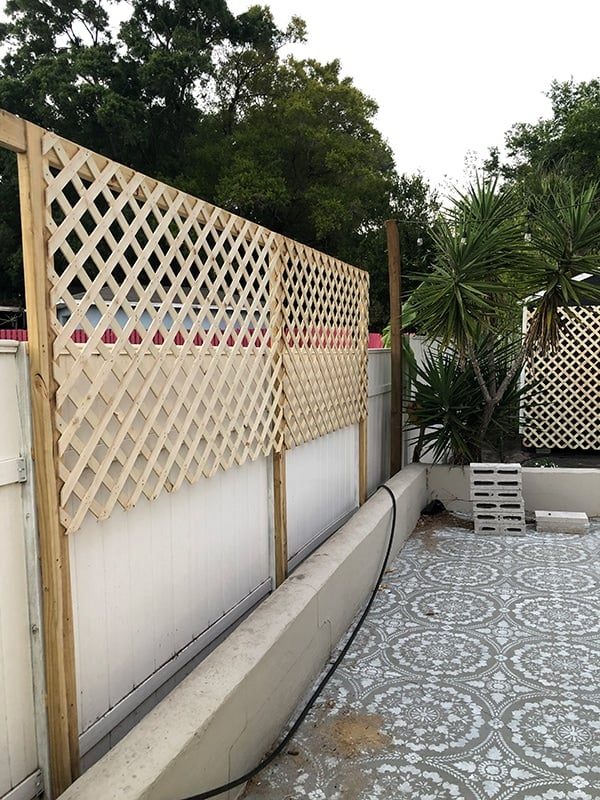
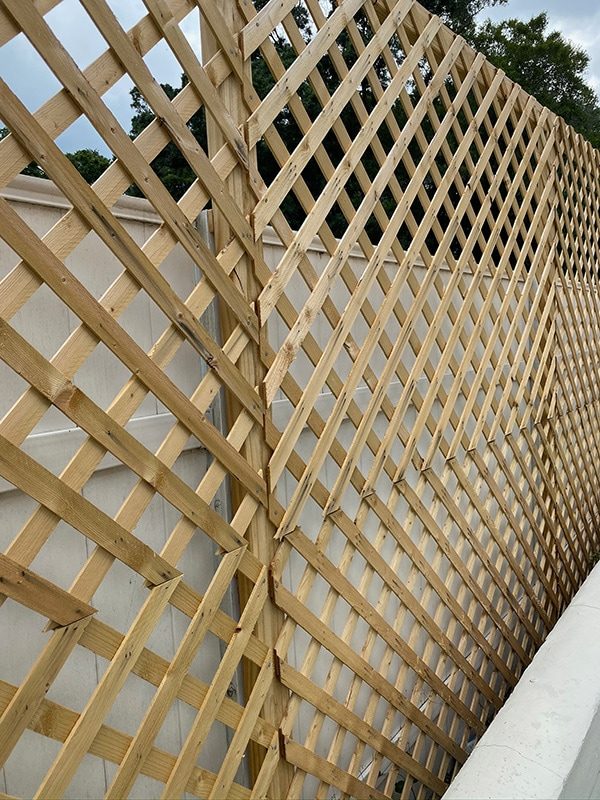
There is not a large space for plants between the concrete wall (who knows why this wall even exists?) but we will most likely plant star jasmine here to climb the trellis (you can see the drip line for them below). It grows very well here in Florida and is currently in bloom almost everywhere you turn, and smells memorable!
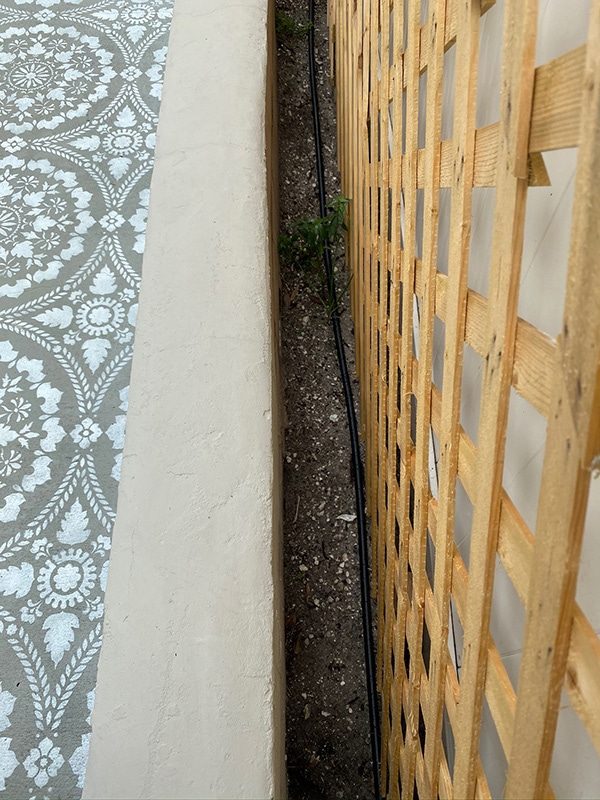
The kitchen window is on this side of the house, so there will be a much nicer view from the sink than before.
Are you overloaded with information yet? Hang in there cause we are still not done!
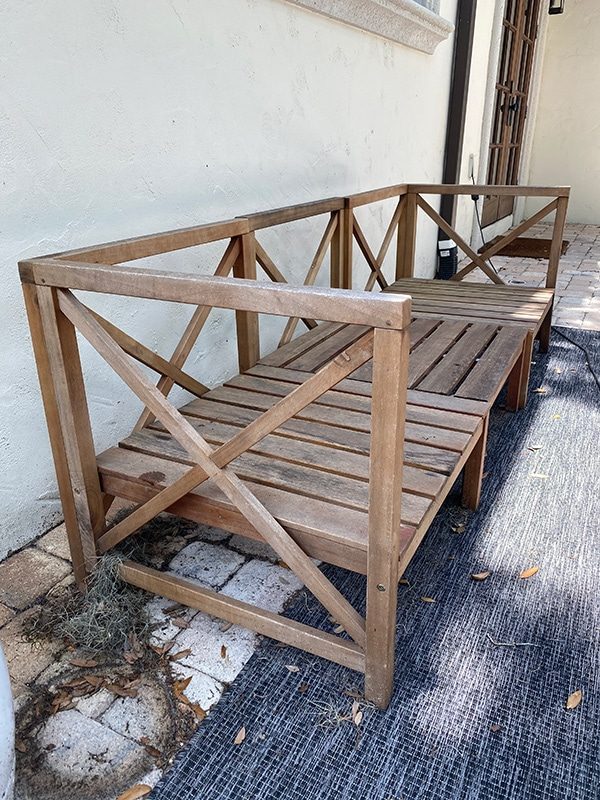
Now that we are in the home stretch, it was also time to start cleaning up and bringing our patio furniture back over. We had been keeping it at our Heights House backyard for the past year—completely uncovered and exposed to the sun. Needless to say, it took quite a beating. Here is the condition of the wood (we kept the cushions inside on this set):
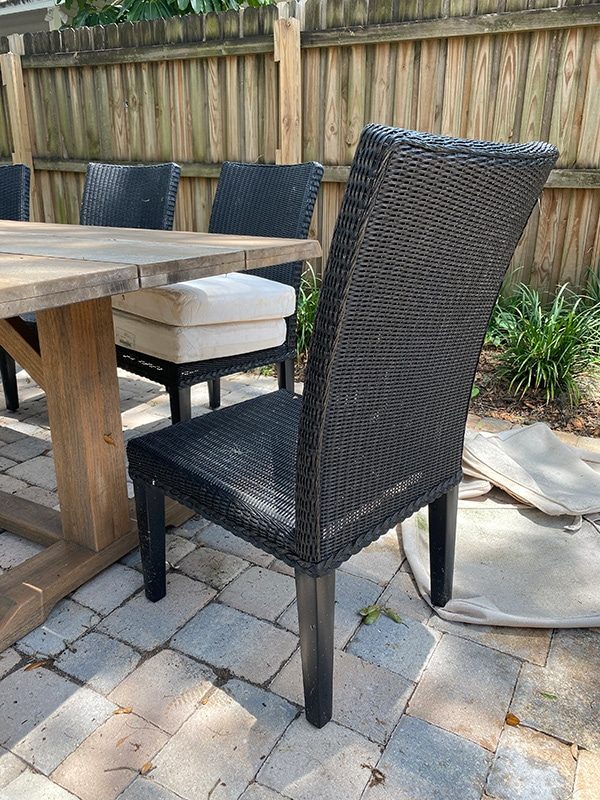
On the dining set, the chair cushions were stained with mildew and mold (and this is high quality Sunbrella outdoor fabric):

The only thing that was completely unphased were the wicker chairs. No signs of fading or wear at all… pretty memorable. The dining set is from Lloyd Flanders and you can find all the details on it in this post.
But for the wood furniture and cushions, this was a job made for a pressure washer! We finally got around to purchasing one a couple months ago, and cannot believe we have gone our whole lives without it. This one had the best combination of price, power and high ratings, and it blew us away (ha…)
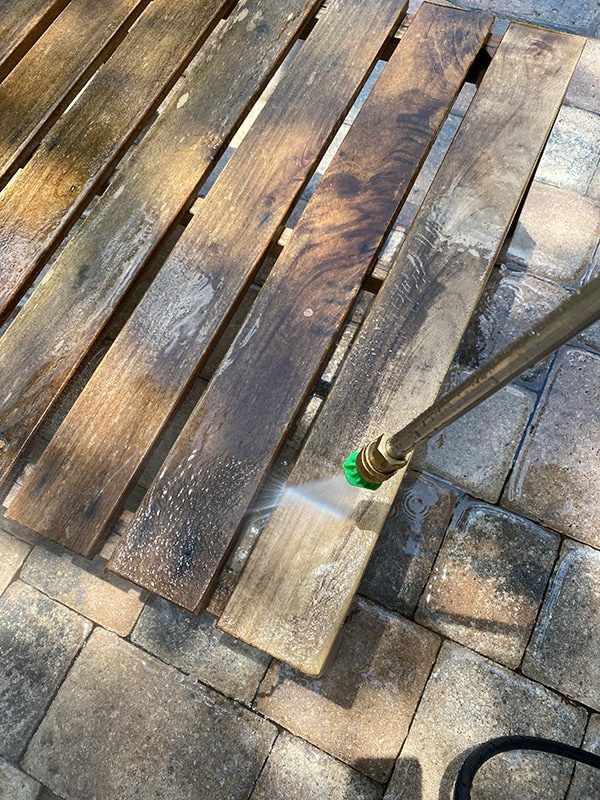
It removed the old stain from the wood, and easily cleared the mildew off the fabric (we had the nozzle set at 25°, if you are wondering).

We pressure washed the inside + outside of each cushion cover which got them 95% of the way there, then I threw them in the wash with hot water + bleach to finish the job. Pretty much like new.
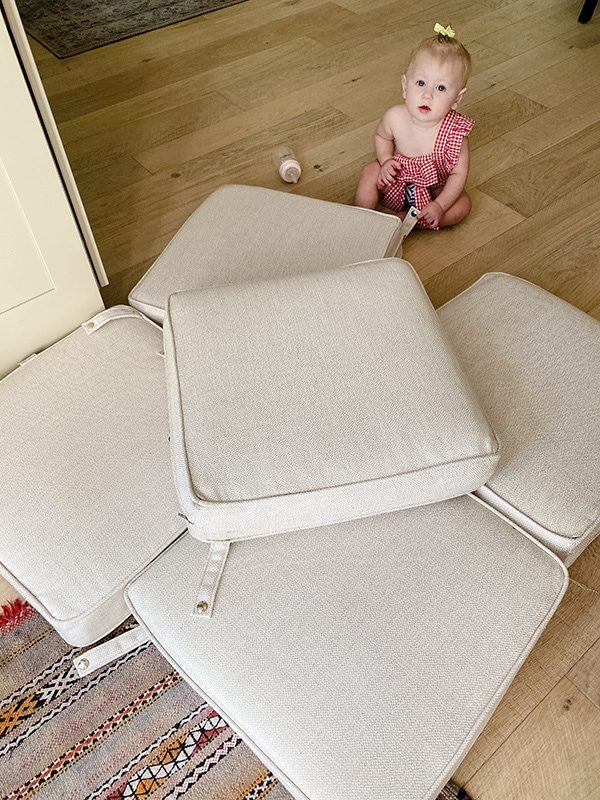
What a relief too, because those replacement covers are not cheap! And this is how the wood set turned out, post pressure washing.
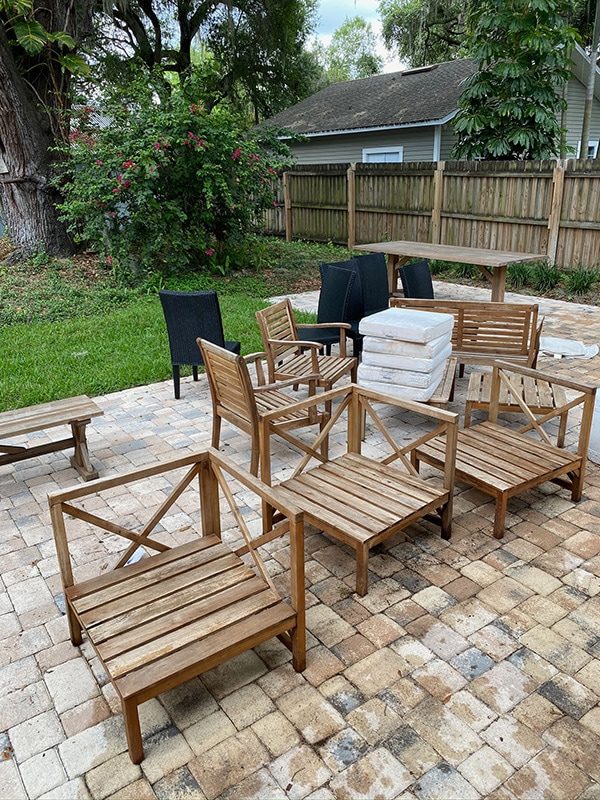
They were clean but splotchy and and uneven, so we decided to restain them with our outdoor deck stain. We bought a gallon of this stain in dark walnut for our front porch makeover last year and it has lasted forever.
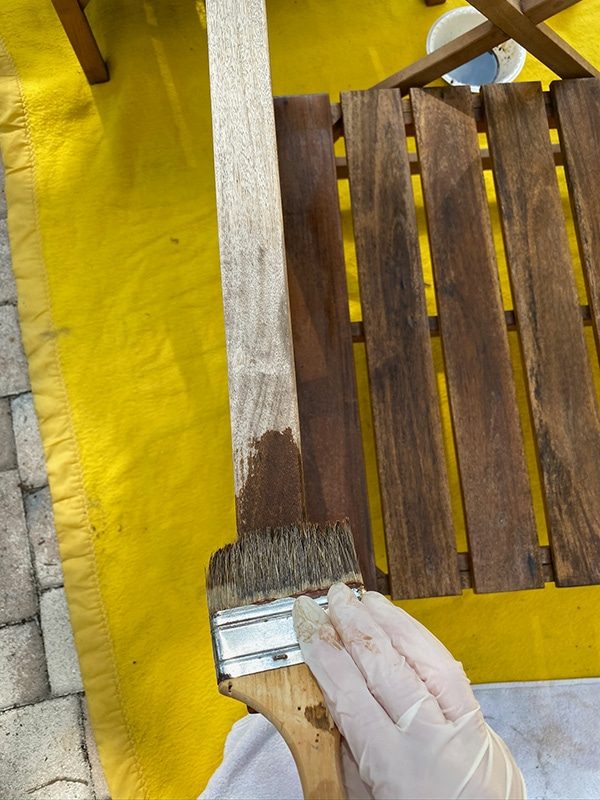
It has a built-in sealer which leaves a water resistant coating and it works great. Here is a little before and after.
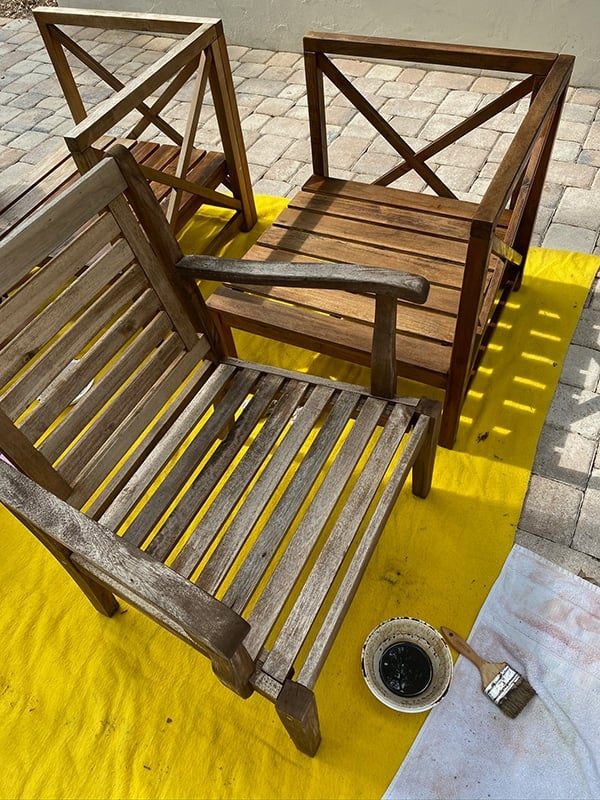
We brushed it onto the wood and since it was so dry it soaked it right up, no buffing required. It took the two of us just over an hour, which was not bad at all! The set looks like new again, but I am not sure how long it will last back out in the elements and direct sun. I am considering adding a pergola now, otherwise we will probably have to do this every year. If you live pretty much anywhere else in the US, your outdoor furniture would surely survive longer so take this as an extreme example.
Speaking of outdoor survival… let us address the million dollar question everyone keeps asking: How is your patio stencil holding up?!
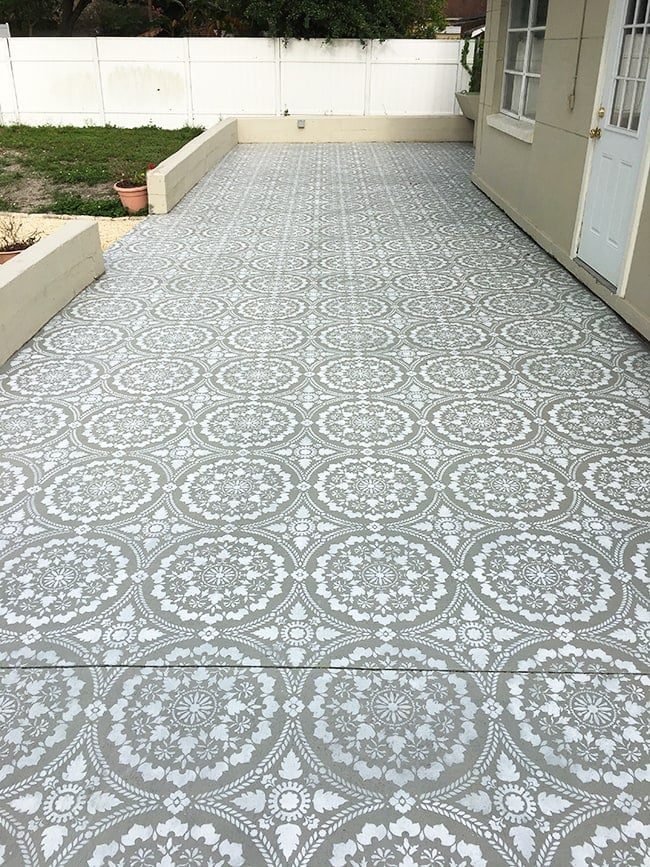
It has been almost 15 months since I embarked on one of my biggest undertakings in life—refinishing, painting and stenciling a 600+ square foot patio under the Florida sun while pregnant (you can read every single detail in this giant post). This is how it looks today:
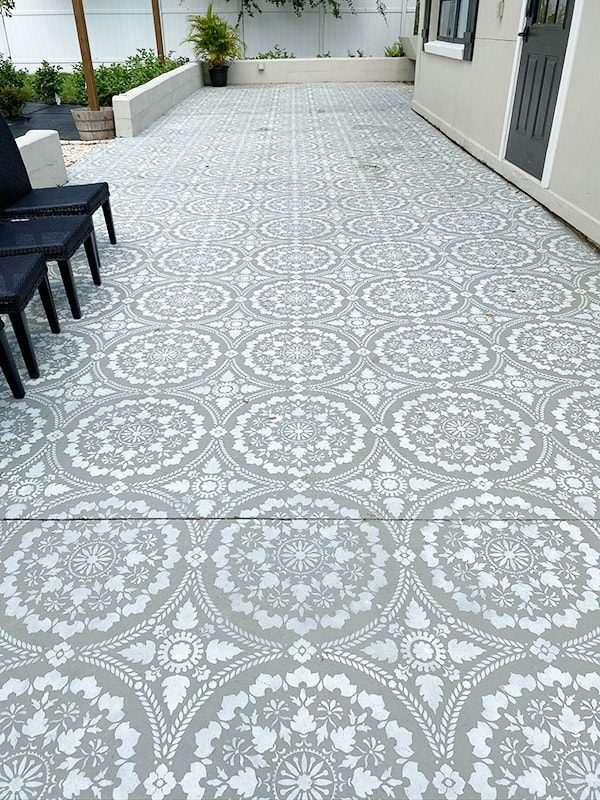
Not too bad, right? Overall I am pretty happy with it, but there is definitely problem areas up close. These problems are mostly our fault though—Exhibit A: rust stains where metal tools were left on the ground (for weeks and months at a time):
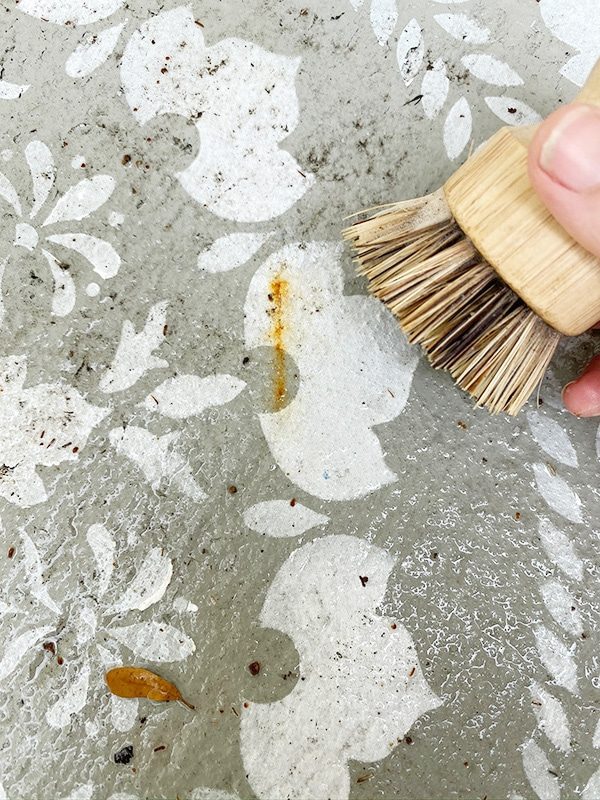
I am impressed with the concrete paint and sealer though—I scrubbed pretty hard with a coarse brush and it removed the rust without pulling up the paint.
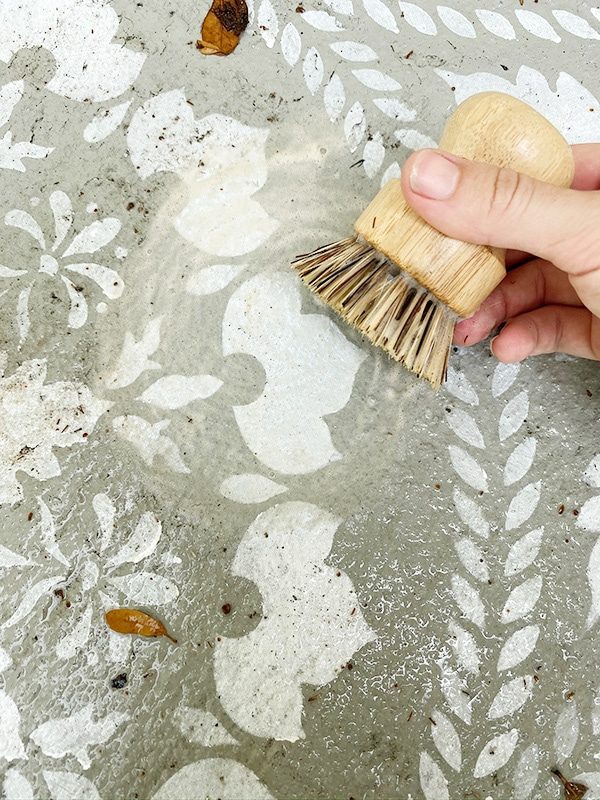
We had contractors in and out over the last year, and they dumped their tools, scrap wood and construction debris on the patio which sat there for the better part of a year (no garage = no fun). The rain must have spread the rust stains around because there is a few areas like this:
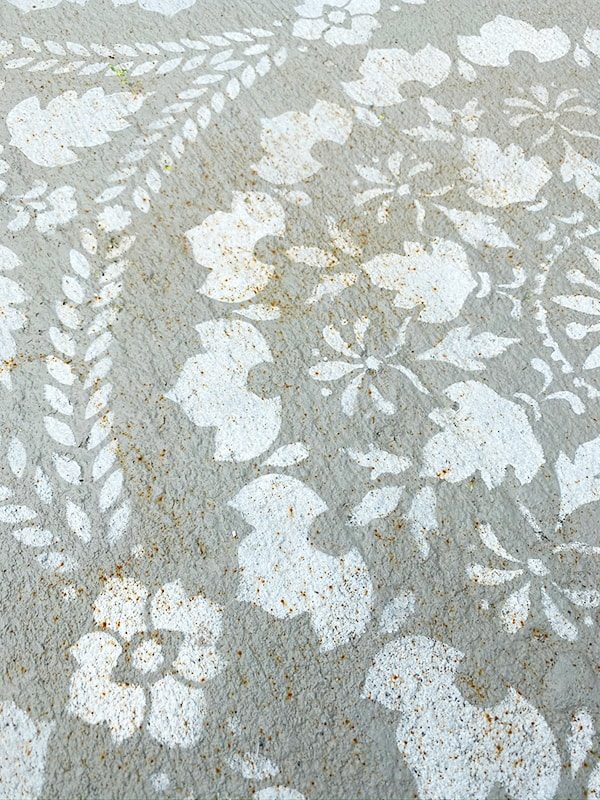
I tried scrubbing and could not get those off, because they have settled deep down into the grooves (we also tried pressure washing). If our patio was flat and smooth, I think cleaning would be a breeze and these problems would not exist. There is also areas of the patio that are uneven, so rain water sits and can pool there for days, leaving a dirty residue behind. There is nothing we can do about that, though.
The other problem are these spots where the paint is flaking up, exposing the layers of old neon green paint below…
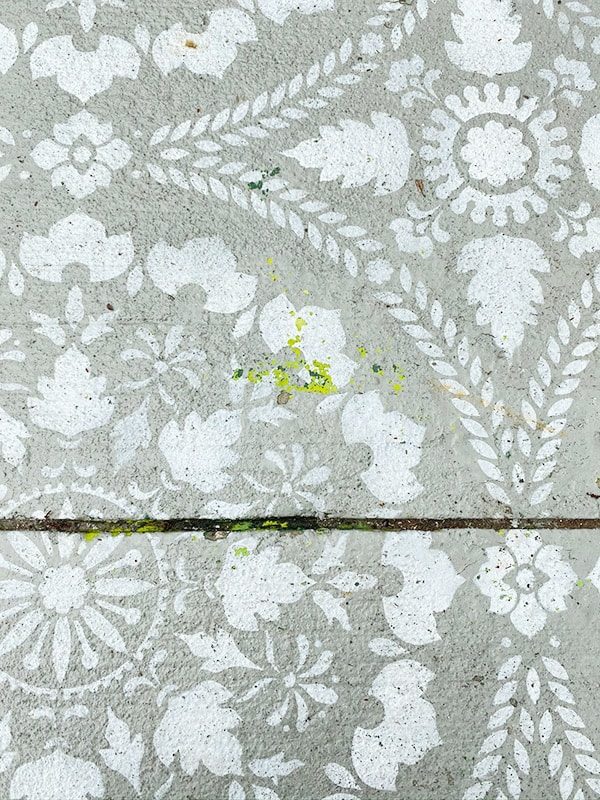
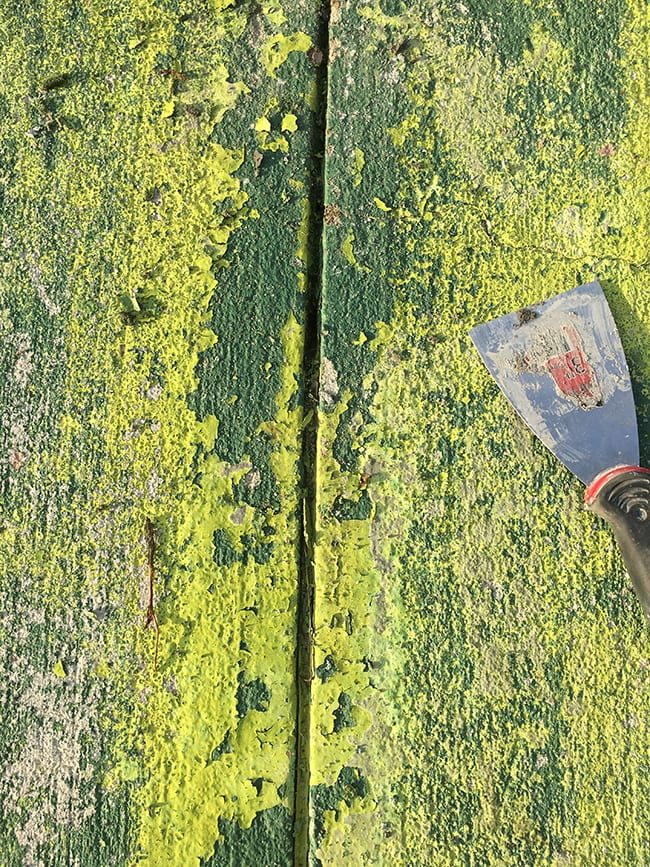
I was not at all surprised by this, since I knowingly painted over many areas where the old paint was peeling up. There were so many layers caked on, and I did my best to pressure wash and scrape it off by hand, but it was impossible to get it all (especially with the dang bumpy textured surface—I mean look at this nightmare from last year):
If you are considering stenciling your patio, do not let this deter you. As long as you prep the surface properly and do not leave rusty tools outside, you will be fine if you follow my tutorial. If you have relatively smooth concrete, you are golden and I am particularly jealous. We still have some paint and sealer leftover (along with the stencil) so this weekend I plan to touch up the worst areas. It will not be well suited up close, but I think it still looks pretty great overall and I am still so glad I did it (also glad that it is over, ha…)
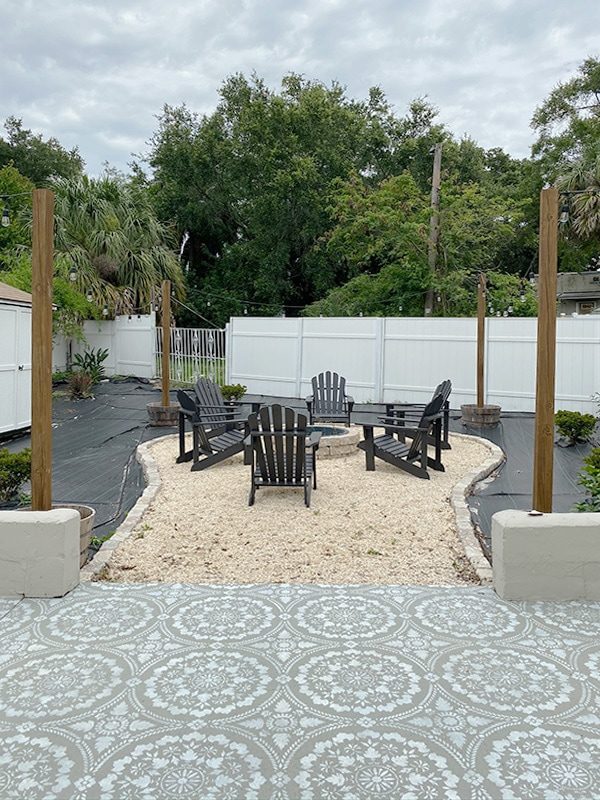
And there is months of backyard updates condensed into one post! Congrats for making it this far, I hope you've learned something new. We plan to order and install the mulch, flagstone and flowers for the string light planters this weekend, then all that is left to do is put the furniture back, clean up and take some photos for the reveal!

Our projects and schedule have been all over the place (so many pandemic-related delays) but I am aiming to reveal up before the 4th of July. As always, you can follow me on Instagram for more frequent updates.
Make sure to check back here in a couple days for our favorite Father's Day gifts!
