Riverside Retreat Backyard: Two year update
Two years ago I revealed what would become the first phase of our Riverside Retreat Backyard DIY makeover: A year later, we completed Phase 2 (and hopefully the last…
Two years ago I revealed what would become the first phase of our Riverside Retreat Backyard DIY makeover:

A year later, we completed Phase 2 (and hopefully the last major revision!) just before the house became available for rent:

Over the past year, we have had successes and failures, and a few big lessons learned as we plan our next backyard renovation. I shared a few updates last week in my Instagram stories and many of you wanted to know more, so I am breaking it all down in today's post!
I thought it would be fun to share an update on each feature/product we chose for the backyard, and give it a grade from A to F. Before I jump in, I must emphasize that our experience is completely dictated by the climate and our unique situation—subtropical, humid, wet Florida weather; and a vacation rental subject to heavy use and abuse. Everything in this backyard is exposed to the elements 24/7, so there is no protection from the sun or rain. Our circumstance is pretty extreme (compared to a non-rental in any other climate) so your results will vary!
Stenciled patio: C+
This is the million dollar question—oh how I wish I could give it an A! It was one of my most ambitious and time consuming DIYs to date and I have to say, it turned out pretty strong.
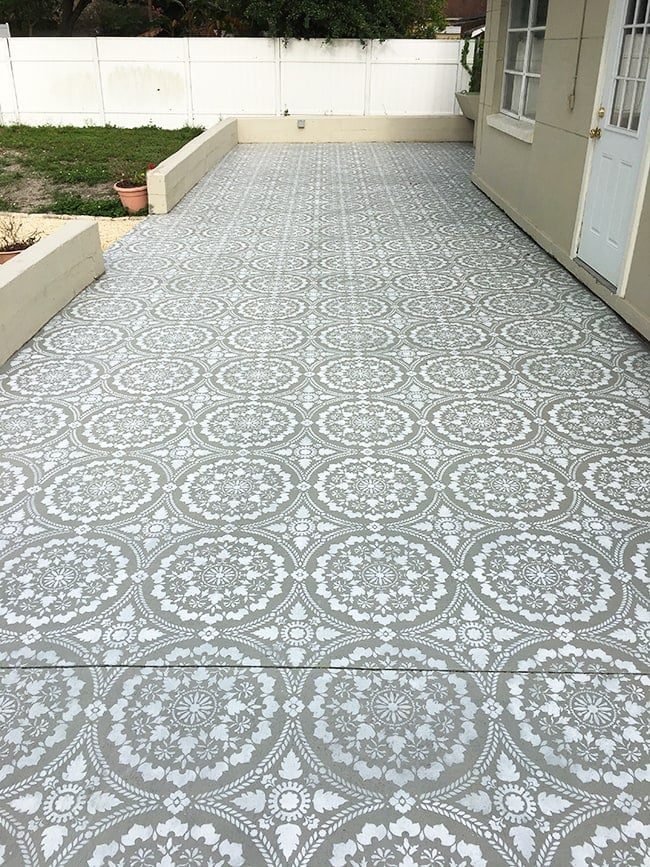
I took precautions and applied extra coats of sealer to protect the finish, but I was always concerned about the layers of paint underneath (from the previous owners) that I was unable to scrape off entirely during the prep phase.
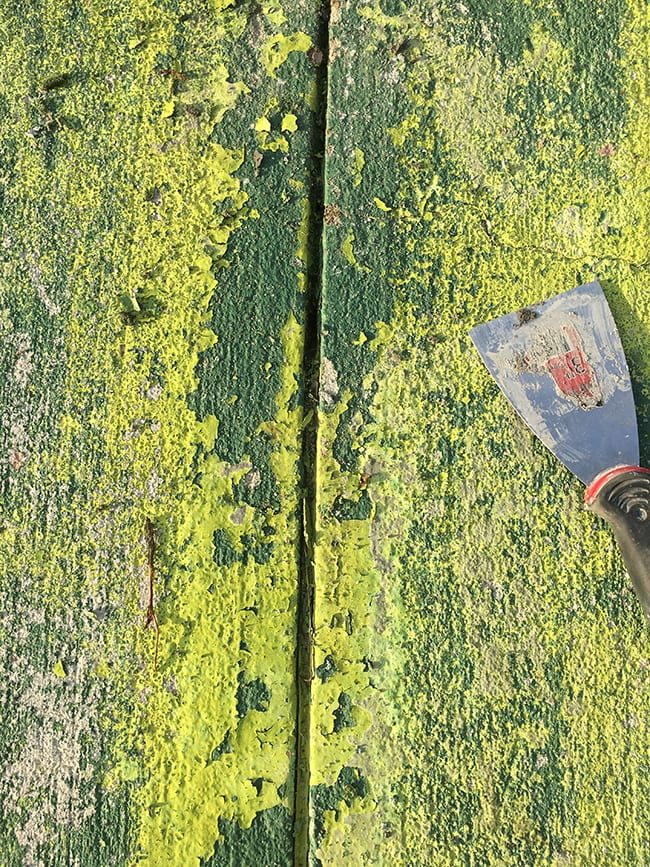
It was only a matter of time before the wear, tear and moisture made the paint chip off in some places. If you remember, I shared an update on this last year during our Phase 2 updatewhen the paint began chipping, and I ended up repainting the worst areas.
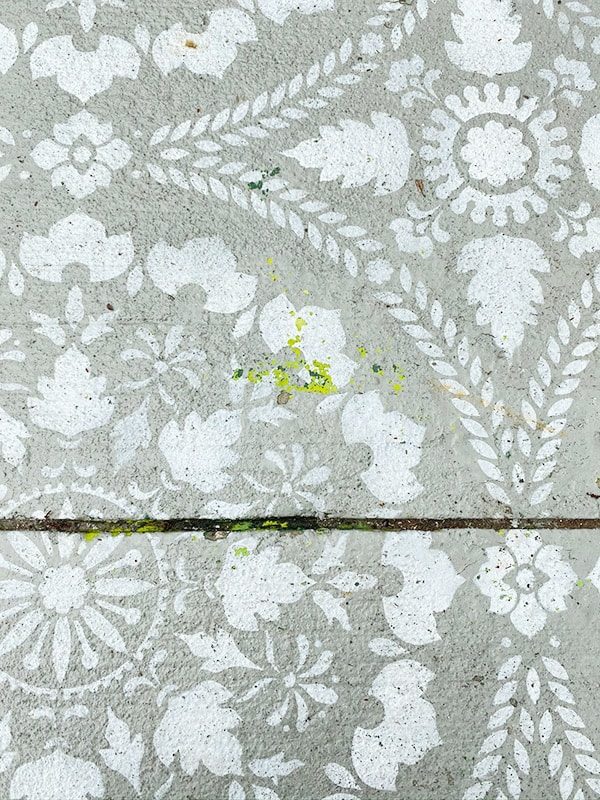
Slowly but surely, new chips continue to pop up (you can see the lovely neon + kelly green paint the last owners used).
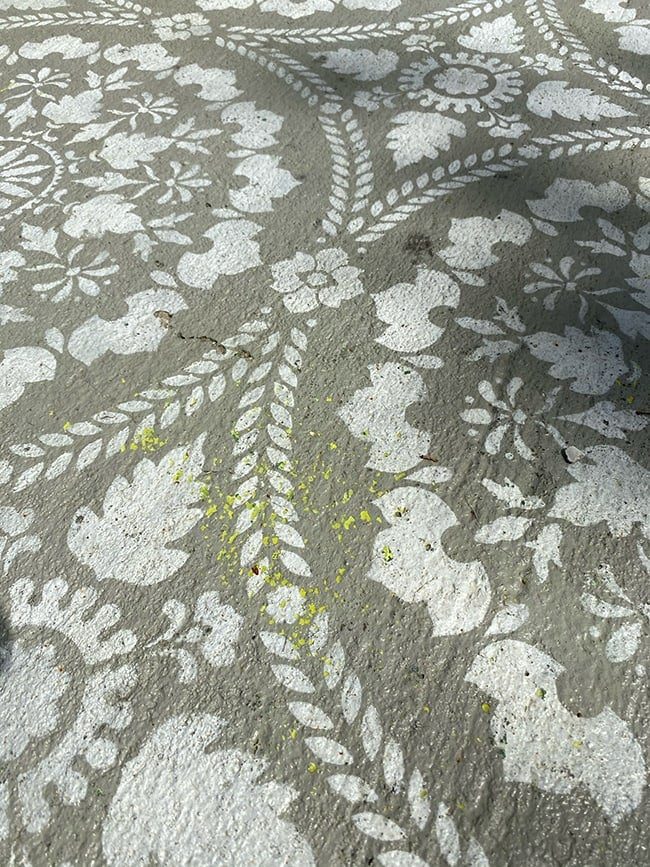
It looks pretty bad up close, but fortunately, it mostly blends in from afar and genuinely does not stand out—this is the same spot when you are standing up:
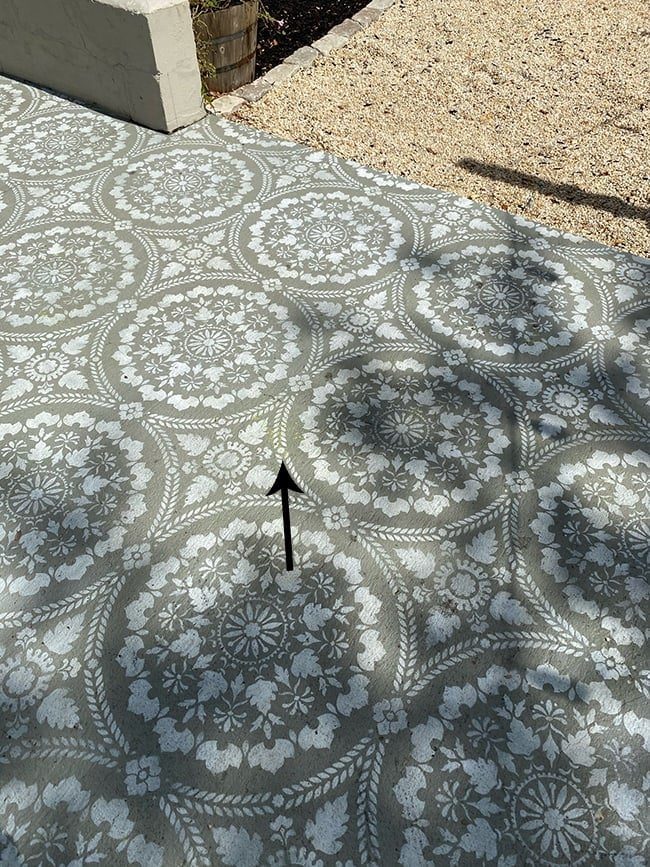
I cannot say that I regret this project, because it cost thousands less than tiling, and I would still 100% recommend it to anyone else looking to make a big impact on a budget. If you paint directly on unpainted concrete, you will have much better luck and should not have this chipping problem.
Mulch: B

There were mixed reactions to our decision to use rubber mulch instead of traditional wood mulch. Our primary goal for this rental backyard was low-maintenance, and re-mulching the yard every year was just not an option.

This shredded rubber mulchseemed to solve that problem, and while it is more than three times the cost of wood mulch, it would save us plenty of time and money in the long run (and it looked great!)

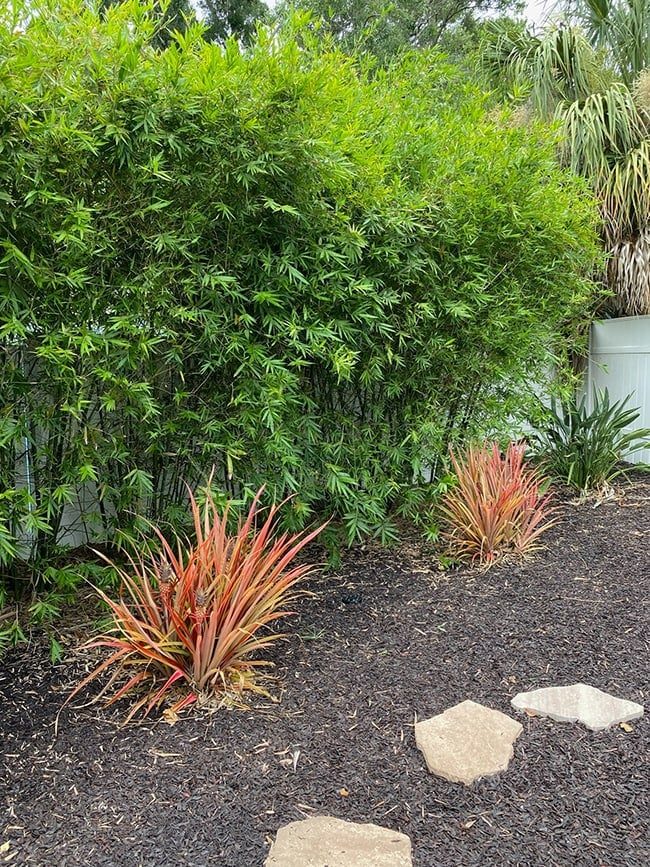
While I stand by my decision, there are a couple downsides. The main problem? It does not stay “clean.” Every leaf and flower that falls stands out like a sore thumb against the dark ground. Because we laid landscaping fabric underneath for weed control, the leaves cannot decompose into the dirt and they just stay on top of the mulch. This is how it looks today:
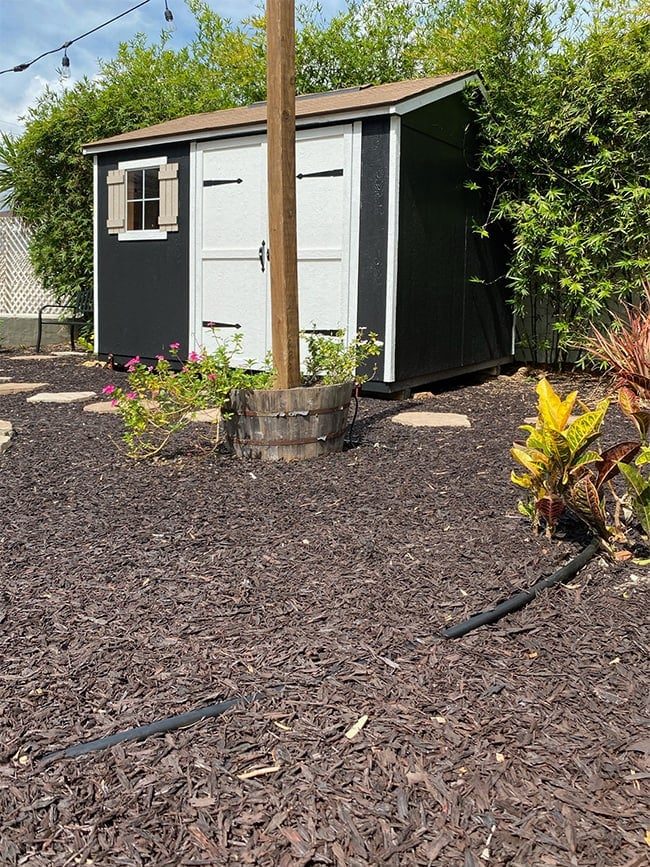
The mulch also either shifted around and/or compressed a bit over time, exposing some of our irrigation lines. Easy to fix, but we did have to buy several more bags to touch up these areas.
One year later, I am still glad we went this route, but this is also one of those questions that may have a different answer 5-10 years from now. Only time will tell!
Adirondack Chairs: D
Cannot say I am too surprised that the worst grade goes to something made entirely out of inexpensive wood with constant use and abuse. Budget was my main concern when originally sourcing these chairs, because adirondacks are strangely expensive. These$90 raw cedar wood chairs were the best deal I could find, and I thought painting them with exterior grade paint might help provide some level of protection…

But no, that is not what happened. The paint ended up wearing off in some areas after a year, but the real issue was that the wood slats had cracked and broken off on a few of the chairs, and they were all wobbly. I suspect the weight limit had been exceeded multiple times—that combined with constant direct sun and humidity for two full summers, and these chairs had become an irreparable safety hazard.

The initial cost savings did not pay off, since now I had to buy non-wood replacements for double the price. You've probably heard of Polywood, the original weatherproof Adirondack chair brand, with prices ranging from $200-$300+ per chair. That just was not in the budget, but fortunately there are several other brands who carry similar chairs with same wood-like plastic material. I wanted the new chairs to match the style/color of the old chairs as closely as possible, so I narrowed it down to these Polyteak chairs which I snagged on sale for $170/ea:
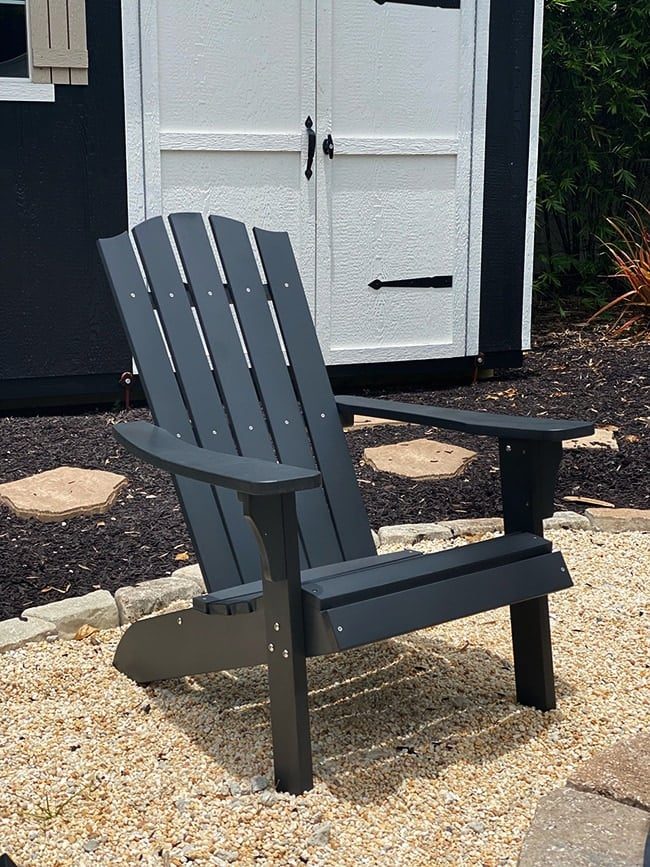
So far, I am genuinely happy with them. They feel solid and have the look and feel of smooth wood, without the cheap plastic quality. The reviews were critical for me (I do not want to be replacing these again in two years!) and these seem to be on par with the Polywood brand, so I am hopeful they will last.
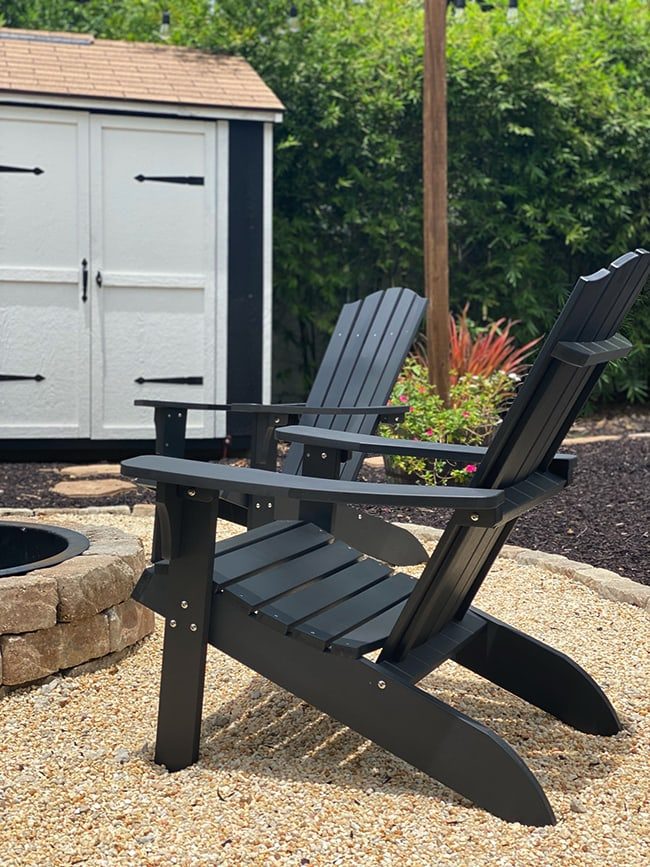
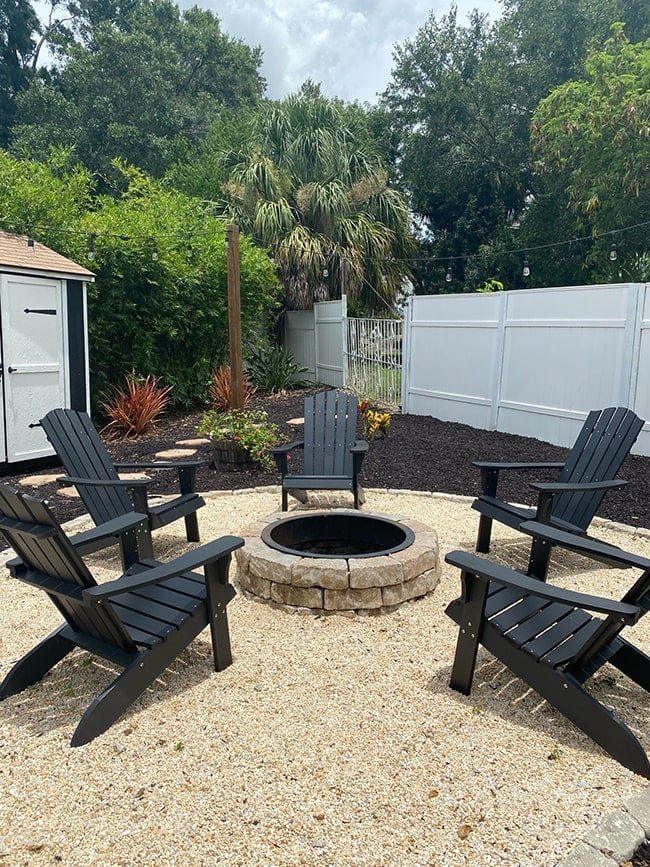
The chairs are in high demand right now and on backorder, so I am still waiting on one more to complete our set of six, expected to arrive in 4-5 weeks.
Bamboo: A
The hero of this backyard is this wall of bamboo that has transformed incredibly before our eyes. Remember how they looked when we planted them last spring?

Our babies are all grown up now! I knew bamboo grew fast, but I was not expecting this…
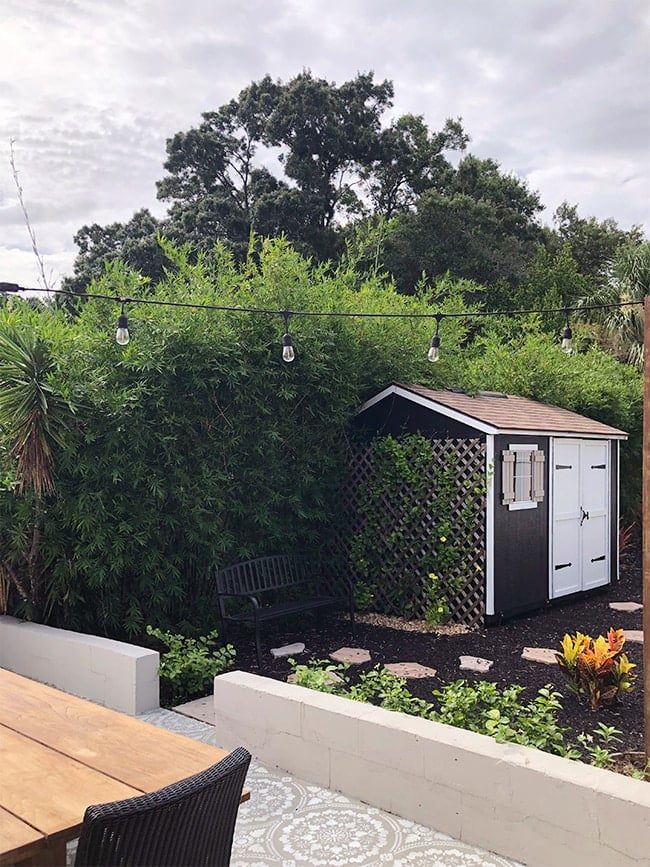
I have to mention again that this is Seabreeze bamboo, which is a non-invasive, clumping species. It does not produce runners that will spread across the yard or into the neighbors yard. It makes for the well suited privacy wall, and we will be planting these at the Hacienda Hideawayas well.

The only drawback is that it does require some trimming due to how fast it grows, but that is a price we are willing to pay. I honestly did not know what to expect when we decided to go this route, but it was one of the best decisions made in this entire backyard and I would recommend it a million times over.
String Light Planters: A
This DIY has become my most popular, most viewed postof all time. I am thrilled to say that they are still going strong more than two years later!
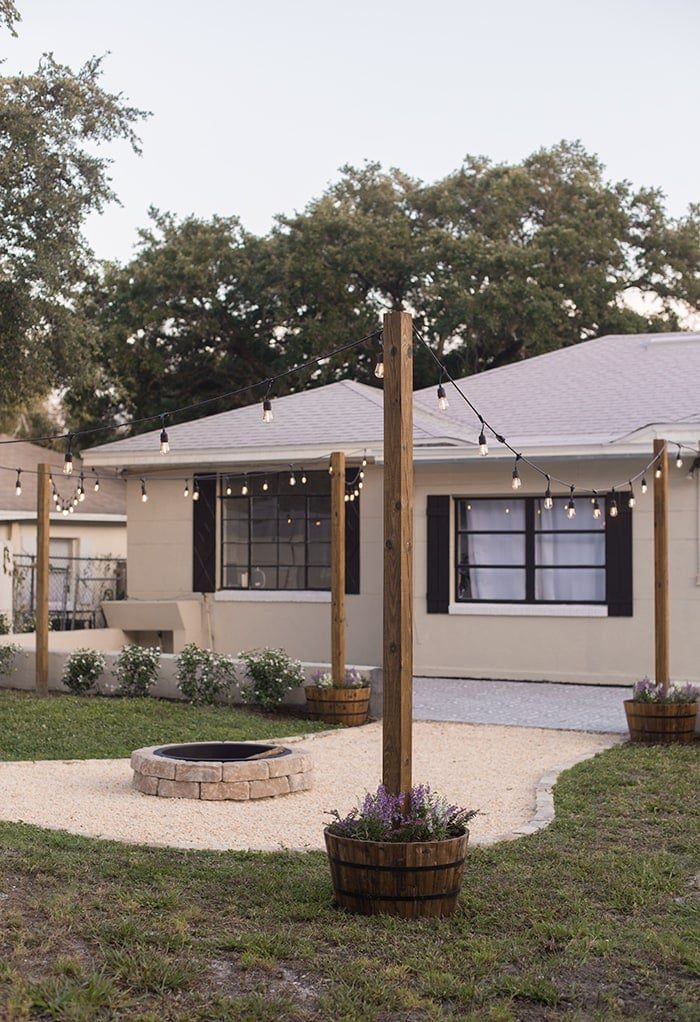
This project was undoubtedly the biggest bang for our buck in the backyard, and I can see why my tutorialwas a hit. I am also pleasantly surprised that the string lights have not fallen off once (to our knowledge) despite all of the storms we get. We did wrap a small section of wire at each light connection point for reinforcement, and that seems to have done the trick. Also very happy with our LED string lightsthat have lasted 2+ years without issue.
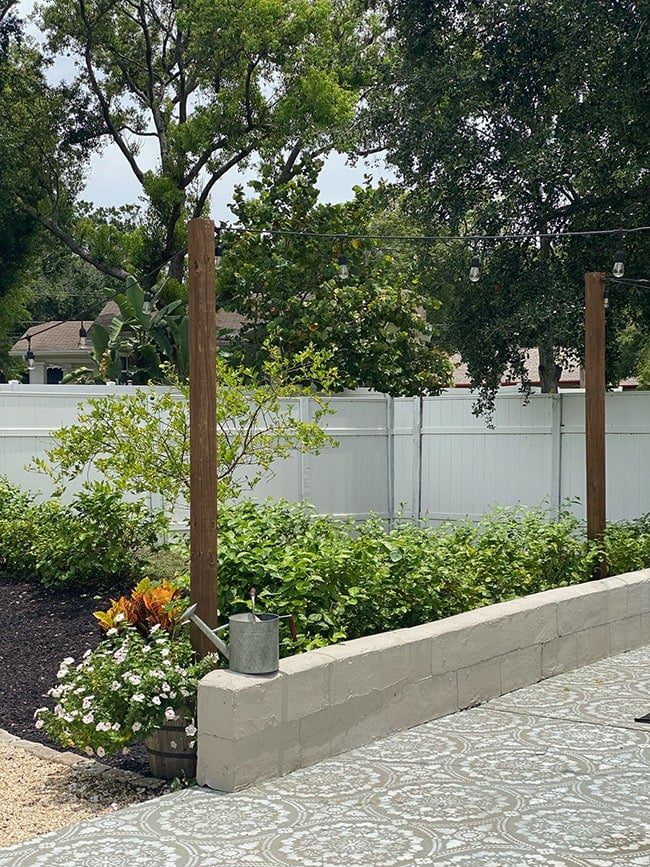
If you have an open space in your yard with no lighting, I highly recommend trying this tutorial!
Fire Pit: B+
This was another DIY we tackled duringPhase 1 of our backyard renovation.
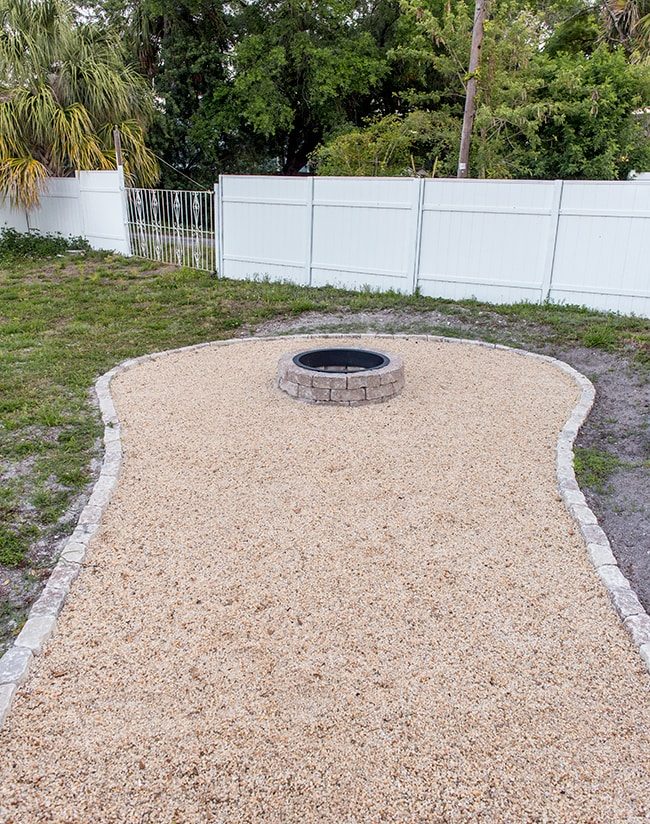
It helps to keep the idea of low-maintenance gravel, and a fire pit is always a nice spot to gather around (even though it does not get used here in FL!)

The only annoying part of it all is that gravel gets kicked around and spills over into the mulch and patio. It ends up everywhere. Not much we can do about that, though. And because we did not use a layer of landscape cloth underneath, we also experience weeds that poke through (especially in the summer). They are easy to get rid of though, so again, not the end of the world.
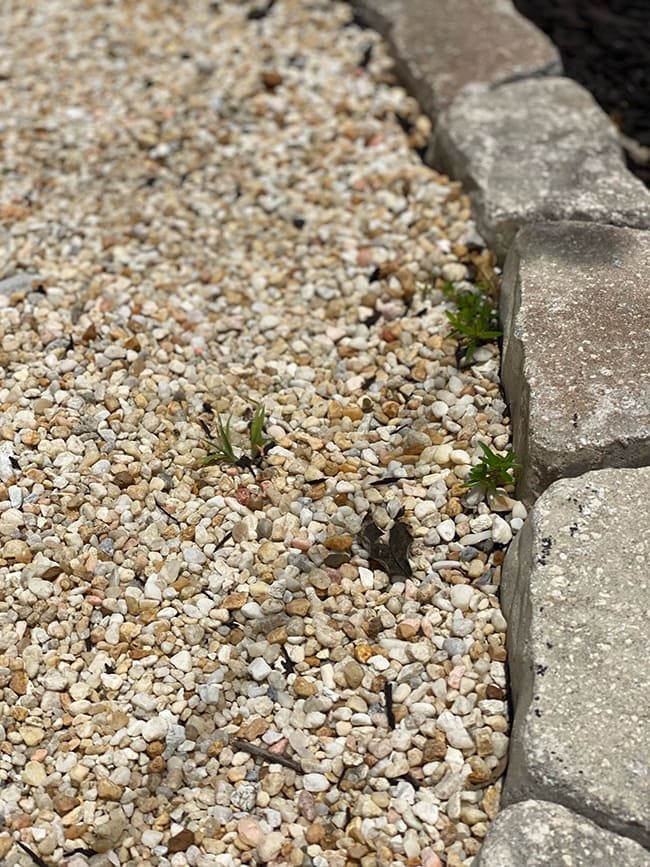
Any outdoor ground cover is going to have its pros and cons (as we have experienced) and pea gravel is certainly easier to maintain than mulch or a stenciled patio.
Dining Set: B+
I almost gave this one an A, because honestly, nothing would stay looking new after two years in our climate.
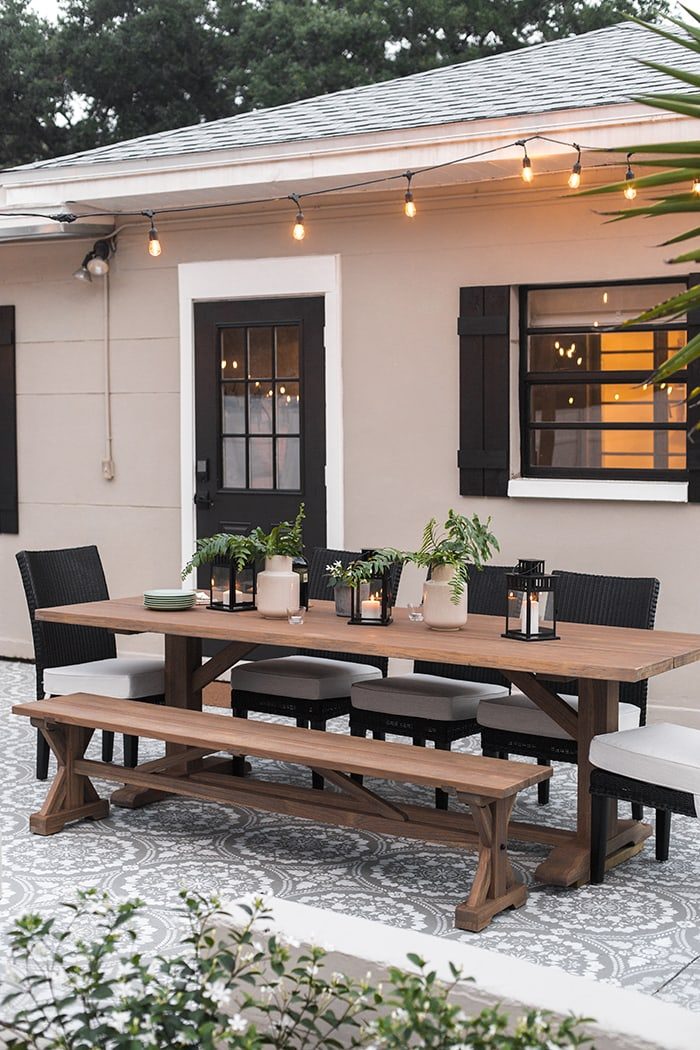
This set is the most expensive thing in our backyard and the wood is high quality teak, which is supposed to be the best weather-resistant species for tropical climates. The finish looked great for a while, but over time it greyed in the sun (which is normal and expected). The only problem is—the wood surface is unprotected, so it stains easily. Guests have also left candles out in the sun, which melted into the wood and could only be removed with an electric planer.
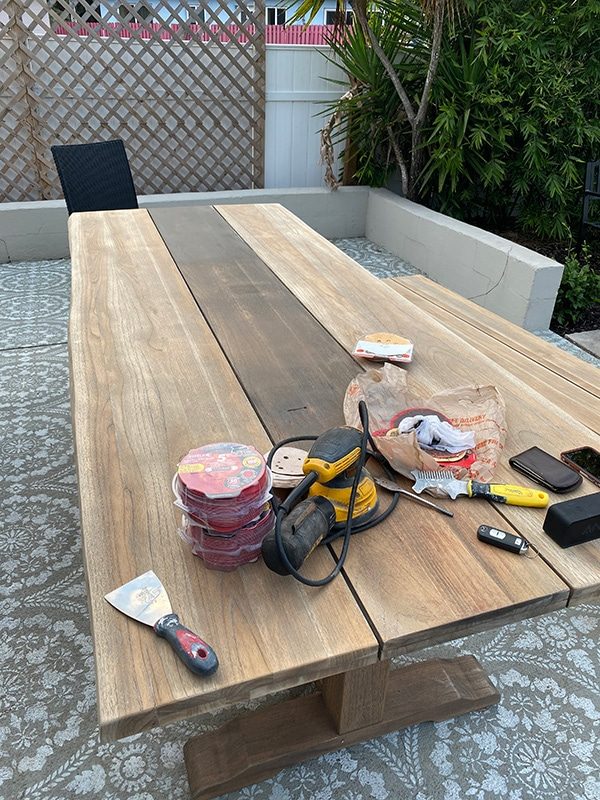
Lucas spent hours refinishing the table before our Better Homes and Gardens shoot a few months ago—and it looked like this just weeks later:
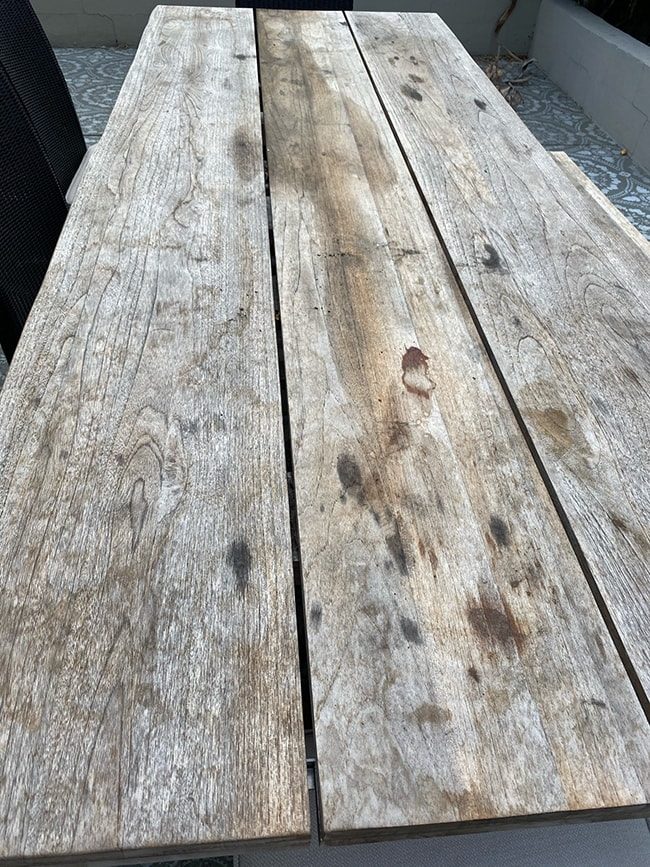
As a temporary fix, he stained it once again with our deck stain/sealer, but I think we need to bring out the big guns and use this matte marine varnish. This was recommended to us to use on our mahogany front door (which is cracking/warping due to constant sun exposure) and so far it seems to be the only thing that has worked.
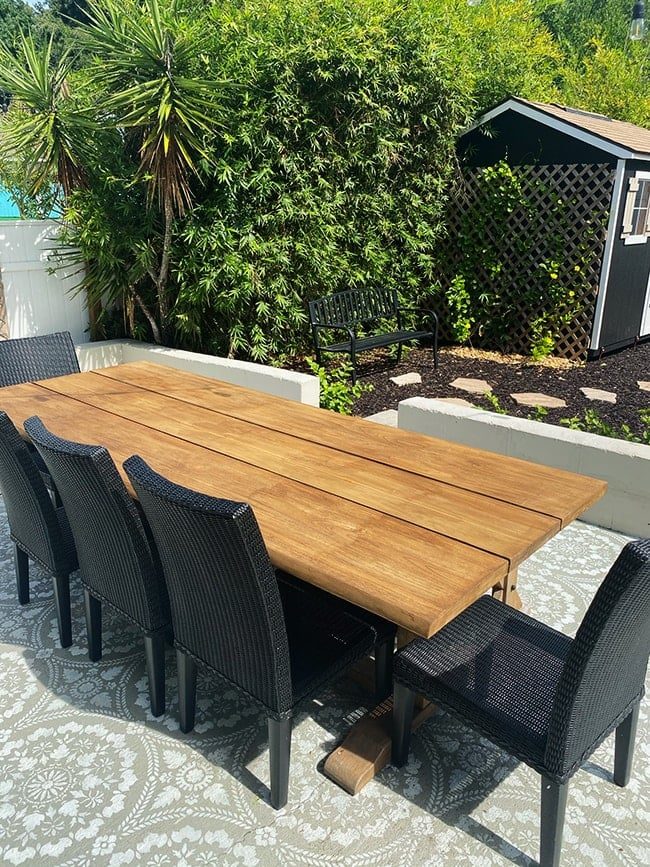
Someone else recommended teak oil, but I cannot see that providing stain protection and I am sure it would need to be re-oiled weekly. Right now we are waiting on a long enough vacancy to tackle this table so the finish will hopefully last for a while!
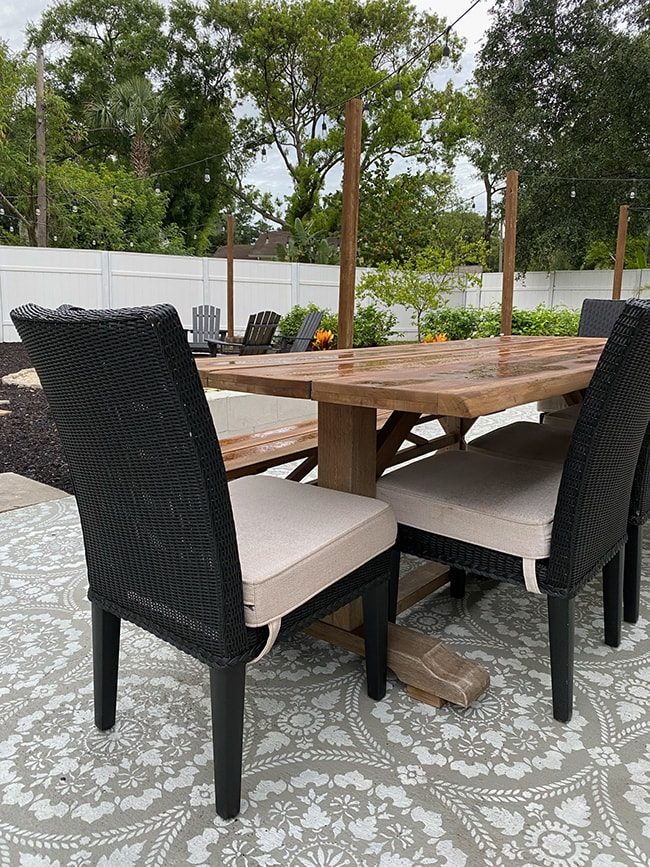
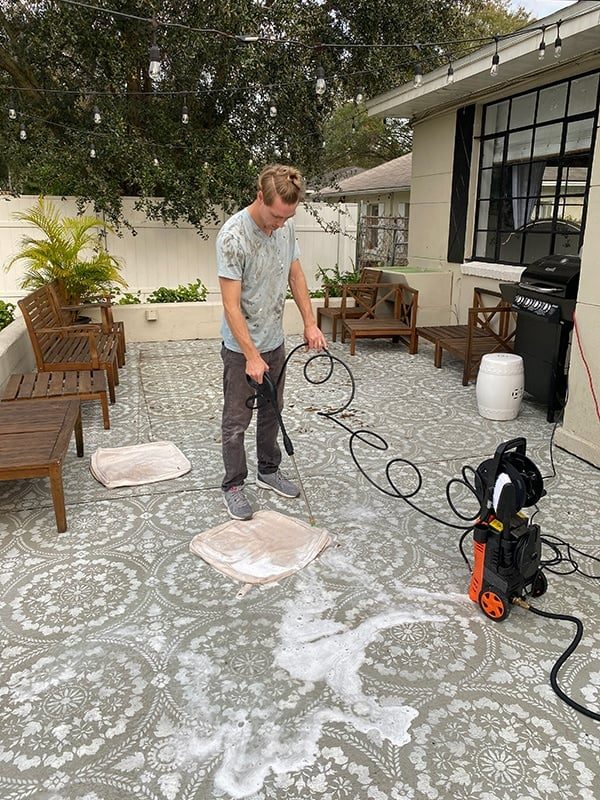
The chairs have weathered quite well, though. The cushions have Sunbrella fabric and power washing does a good job of removing dirt and stains.
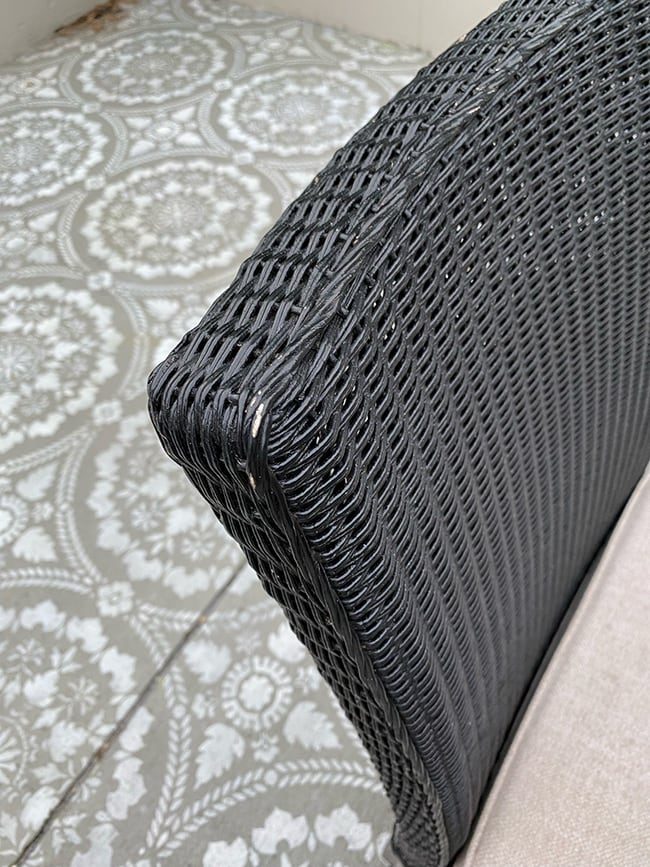
The wicker itself is also holding up nicely. There are a few small areas where the black finish has rubbed off, but it is not too noticeable.
Conversation Set: C–

This one is a real bummer. I genuinely lovethis setand had no desire to replace it anytime soon. In my One year update, you may recall that we re-stained the wood after the finish had become weathered.
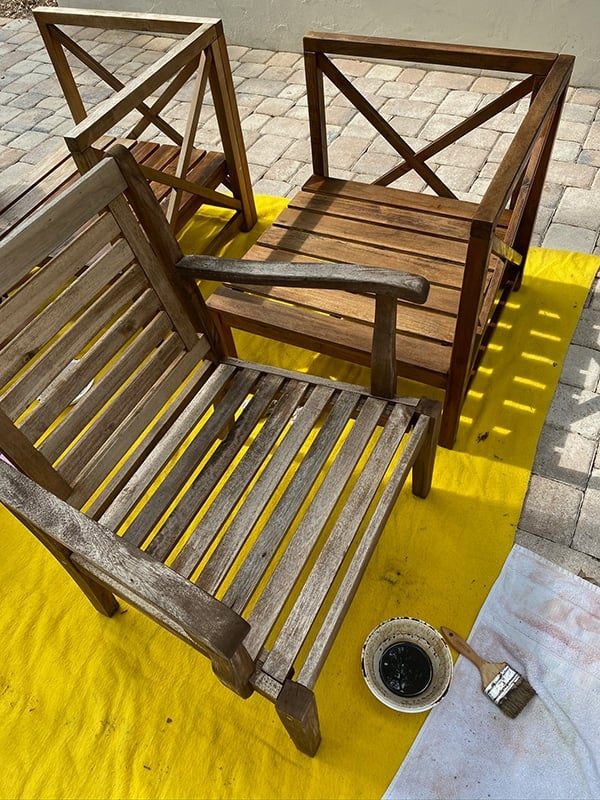
Not a chore we wanted to repeat every year, but it was worth it to keep the furniture. Now that another year has passed, the lightweight acacia woodhas sadly met the same fate as our Adirondack chairs, and a few boards have begun cracking/warping.
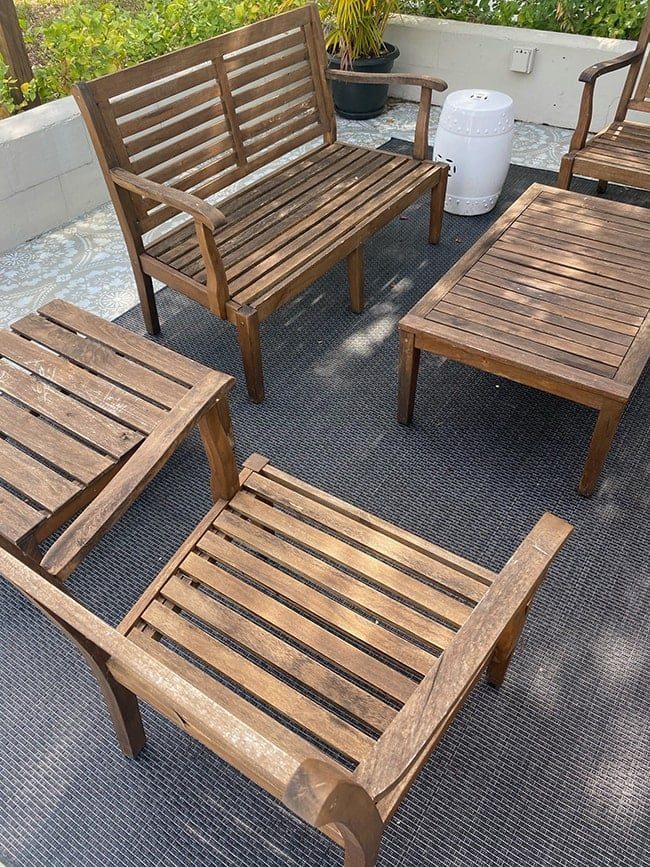
Lucas had to reinforce the love seat after one of the legs broke off, and most of the pieces are wobbly (again, vacation rentals are subject to wear and tear beyond normal use). I am sad to say this set has reached its useful lifespan, and now I am trying to figure out what I can replace it with that will last more than a few years (but still be low-maintenance, stylish and budget-friendly). I think this may be an impossible mission, but such is life when you have an uncovered patio in Florida, I suppose.
Just a couple updates to share on the rest of the landscaping—without any prior gardening/landscaping experience, we have had mixed results with our plant choices. The mandevillas we originally planted on the shed trellis were wonderful for a while…
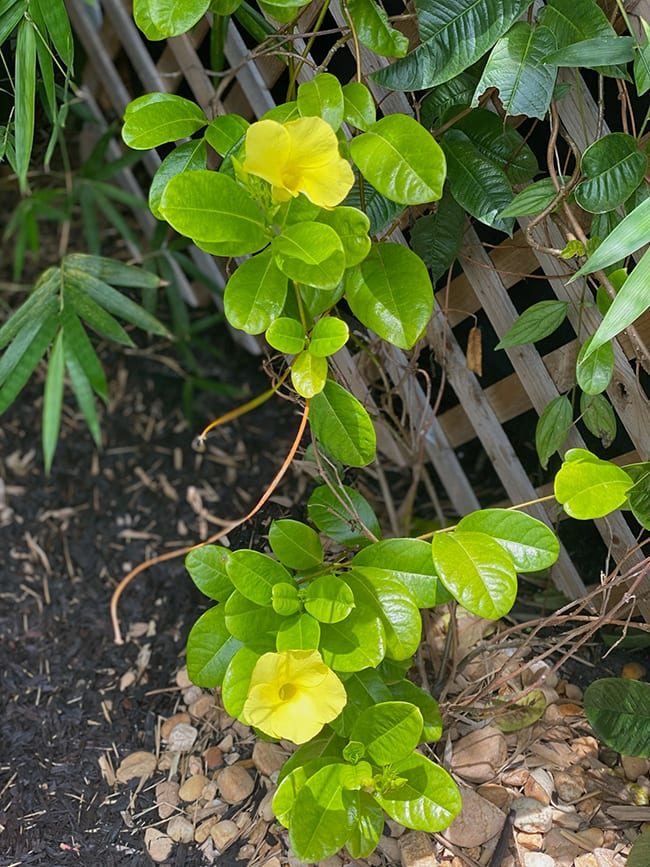
Then, this past winter they all died one by one. A few people told us they were not getting enough water and the mulch was hurting the roots, so we cranked up the irrigation, added a rock base and planted a few new mandevillas.
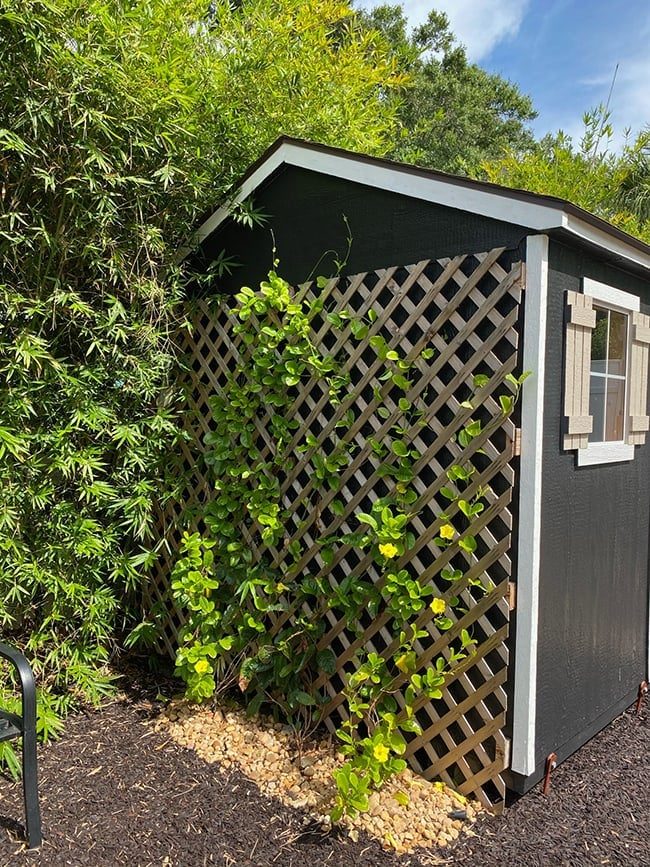
This new batch has been thriving and blossoming for several months.
Our azalea bushes were another casualty (you can see one of them below in the foreground—they all died a few months later):

Anything with small, fragile leaves turns into a sloppy mess on our dark mulch, so I went in a very different direction and replaced them with colorful native Croton plants (you can see two of them below). I do not think they have grown much, but they are still alive so I am calling that a win.
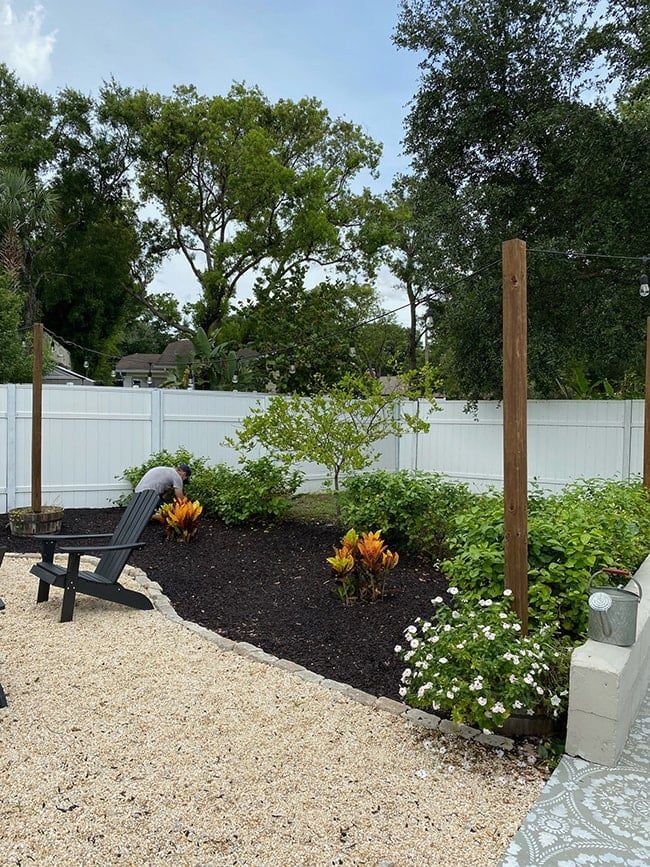
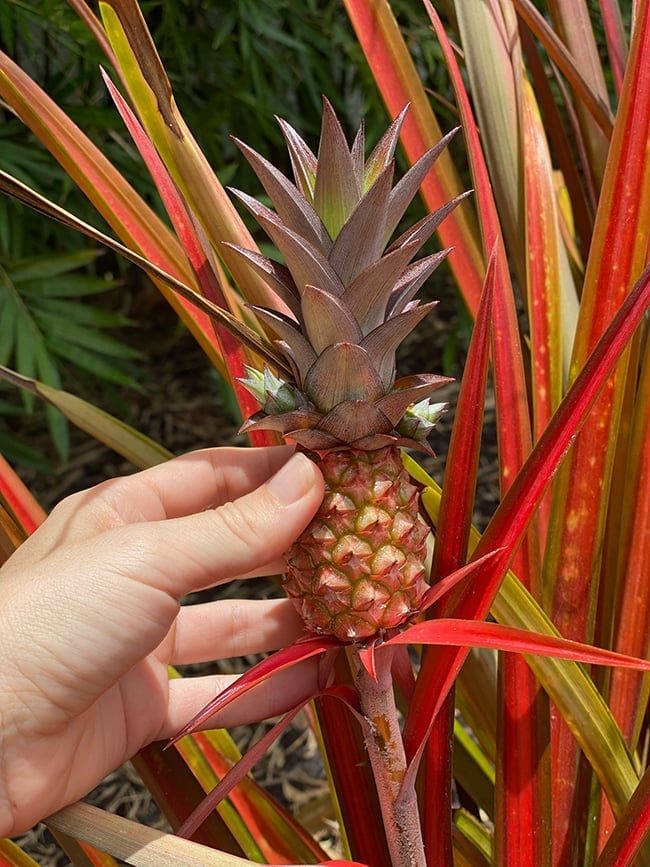
The lemon tree and shrubs have also filled in nicely. Our climate is horrible for furniture, but great for plants. Look at these adorable baby pineapples!
There is one new feature I just added that I wish I would have done from the beginning—solar lights!
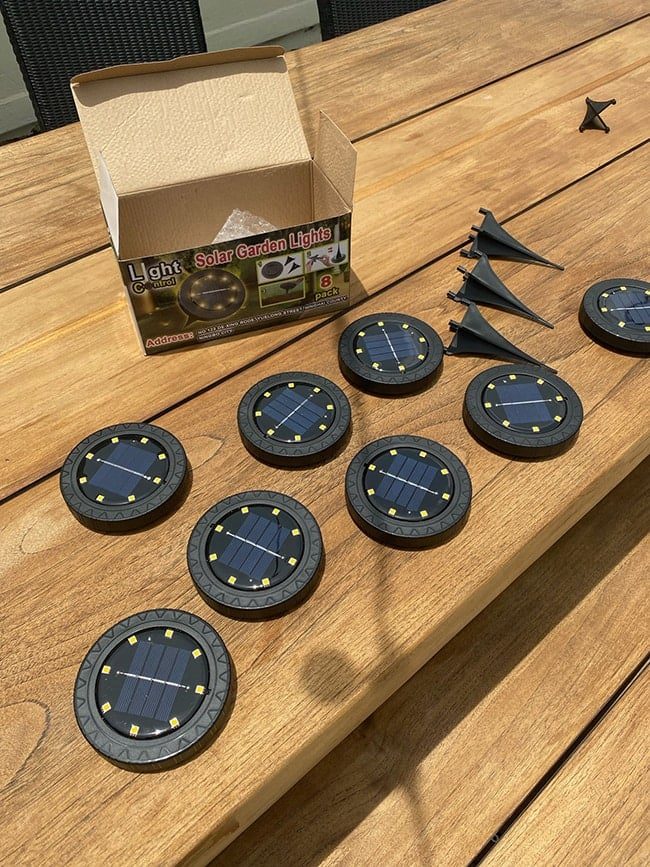
Our string lights are strong and all, but just like the rule for interior rooms, every space needs multiple sources of light. I was distracted by too many other things to prioritize this before, but then I spotted these low profile puck lightson Amazon and could not pass them up for under $30.
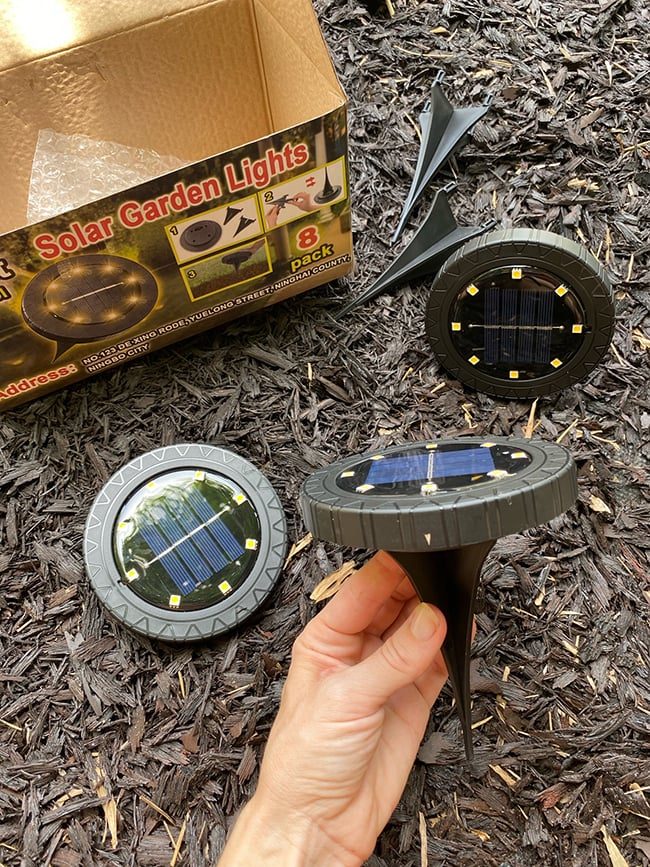
The lights come in a set of 8, and include stakes to secure them into the ground. The biggest selling point for me was the fact that they sit flush with the ground and could not be kicked over/broken (which would inevitably happen with traditional solar lights), and the black blends in nicely with our dark mulch.
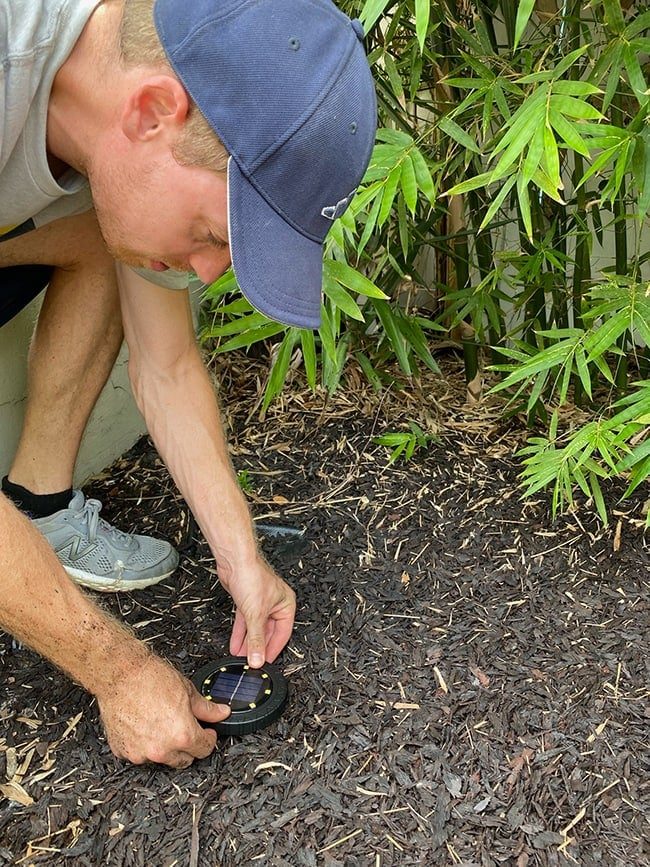
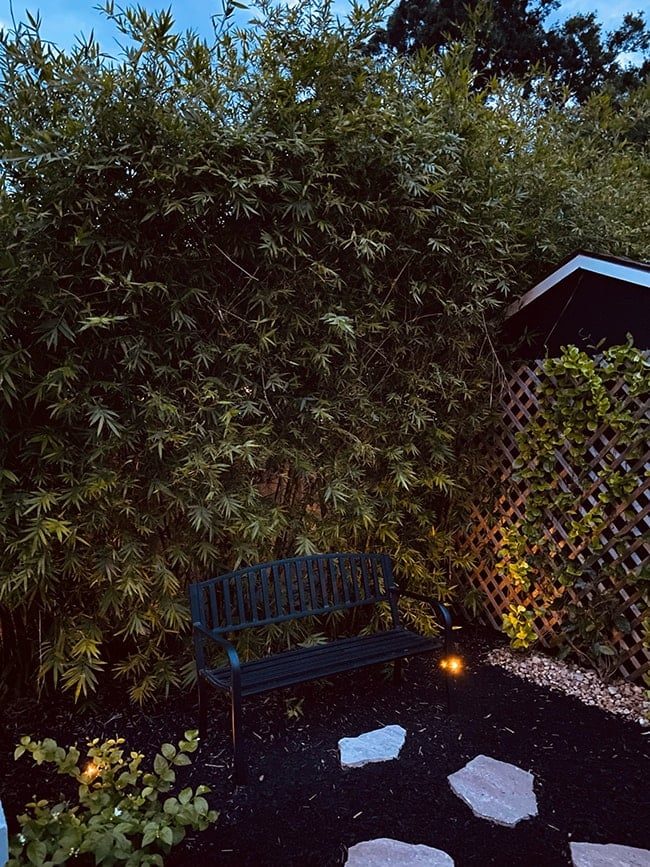
These need 4-8 hours of sunlight during the day to charge, and claim to stay illuminated for 8-12 hours at night. We placed them along the bamboo wall, and around the perimeter of the mulched area along the shrubs.
I went over before dusk to watch them in action, and they all came on automatically within a few minutes of each other, less than ten minutes after sunset.

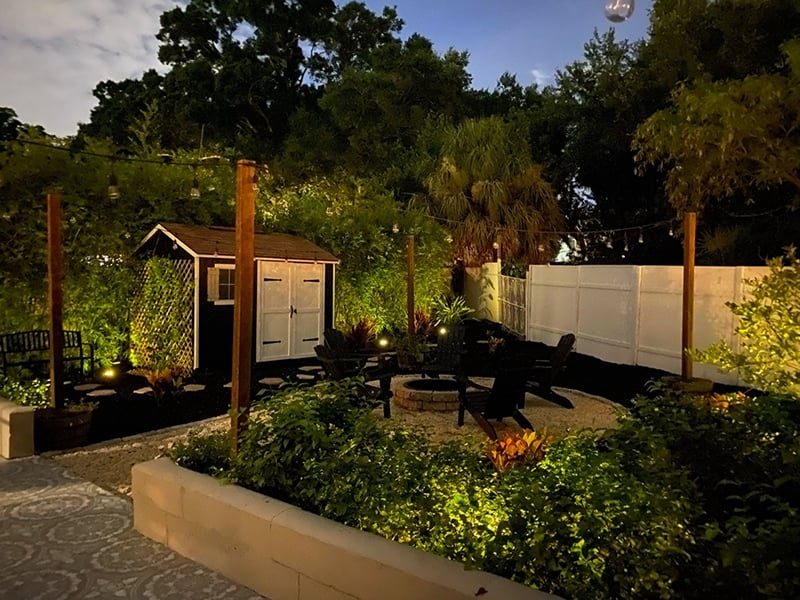
It is genuinely difficult to capture in photos—the longer exposure required in low light makes everything appear brighter than it is in real life. Here is another shot after it got darker outside:

Here is one taken with my iphone that is probably the closest real-life representation:
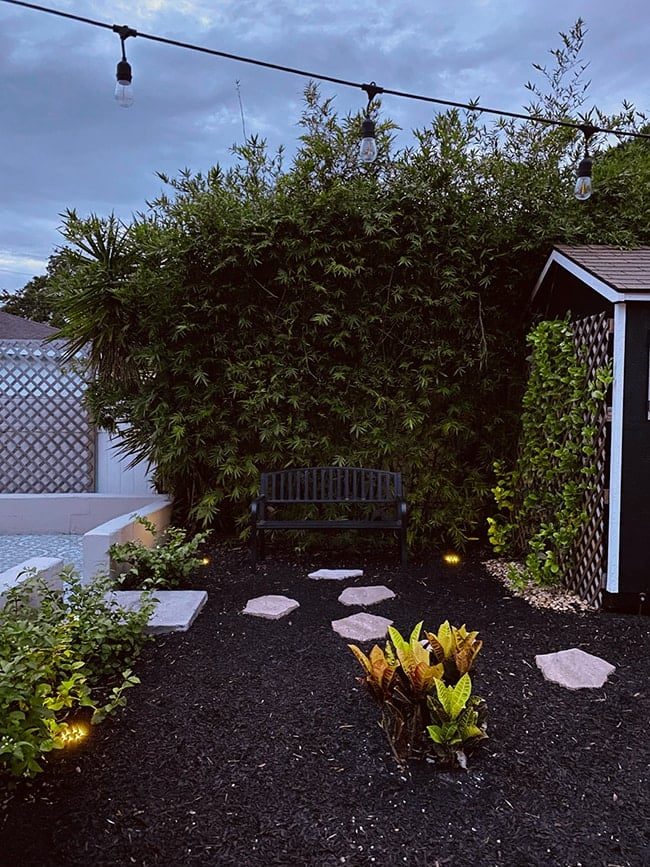
The lights give off a soft, warm, ambient glow (these are warm light, which are critical for LEDs—never get cool light!). Of course, they are not bright like hard-wired lights, and these also do not give out as much light as thesolar spotlightswe have in our own front yard (those are also 4x the cost).

Think of them as accent lighting to highlight features in the yard—landscaping, walls/fences, pathways, etc. I find that they are much more effective when placed directly below an object to illuminate it. The two lights we positioned on the far side of the bamboo were not close enough to the plants, so the lights were essentially just glowing orbs (fortunately, they can be moved easily!)
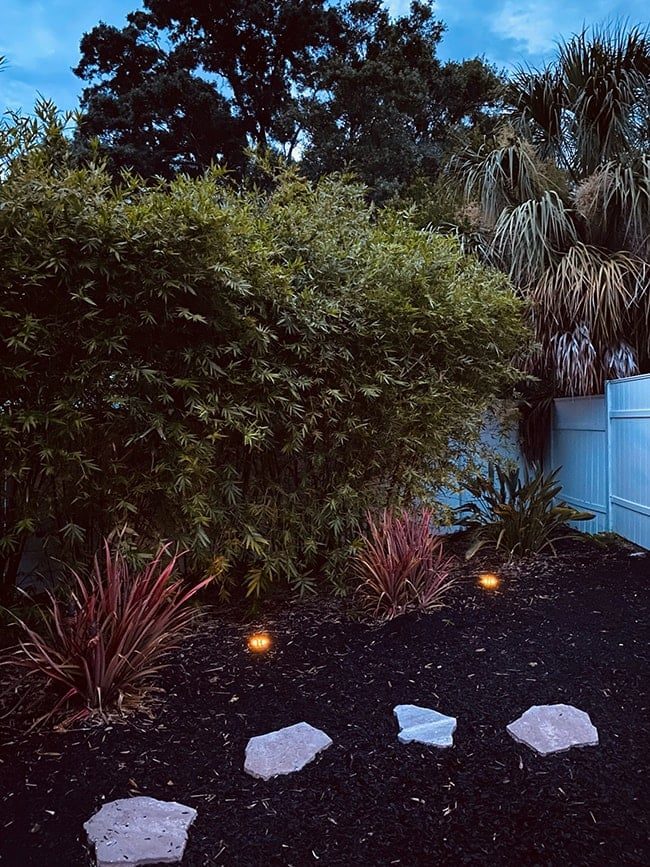
The lights placed below the shrubs and lemon tree definitely made the biggest impact.

I was curious if the string lights would affect the solar light sensor at all, but I am happy to report, it made no difference! The solar lights did not dim them at all. This is how they look turned on at the same time:
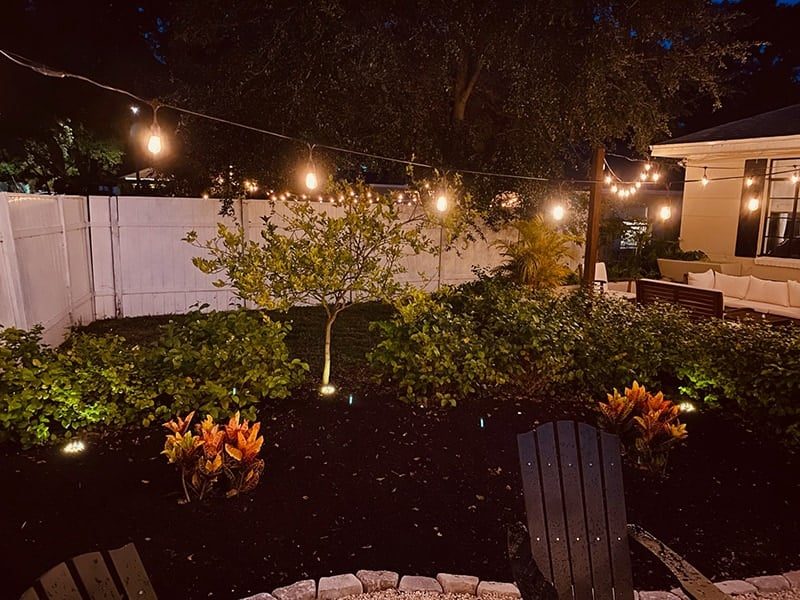
You can genuinely see the difference in brightness side by side:
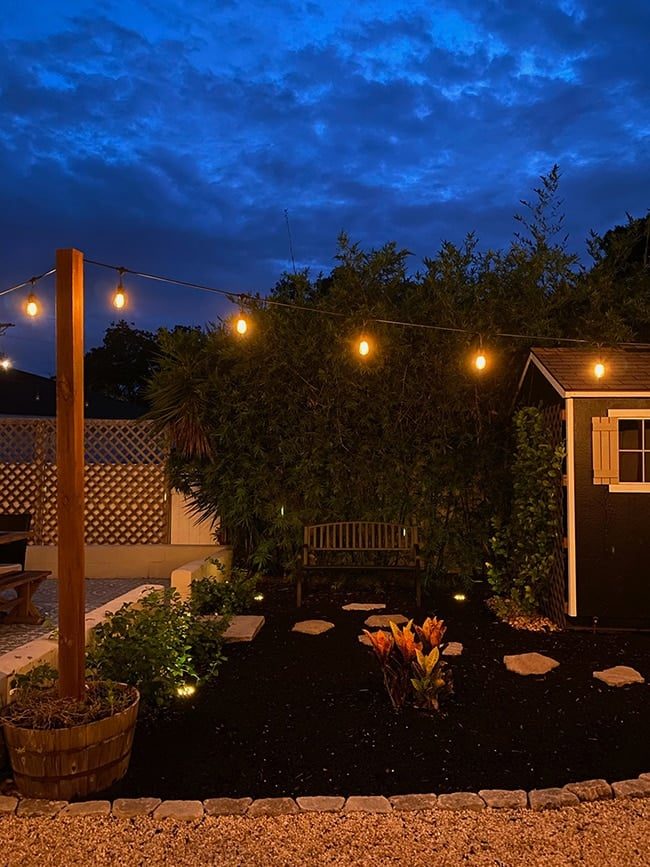
The biggest benefit of these lights is that they'll turn on automatically each evening, so our backyard will never be pitch black. This will be helpful if guests are arriving at night or cannot immediately find the switch for the string lights, or just do not want bright lights on in the backyard.
I wish we would have done this sooner! I bought another set yesterday for the front walkway at our own house and I am anxious to get those in. Do you have lighting in your backyard? I cannot stress enough how important the right lighting is (both indoors and out).
I'll be sharing a few videos today in my Instagram stories of the installation and how they look at night. Make sure to check those out if you want to see them in more detail!
If you are looking for more information on any of the backyard projects/updates, you can find every post below:
- DIY Fire pit
- DIY Stenciled patio
- DIY String Light planters
- Backyard Reveal (Phase 1)
- Dining area reveal
- One year update + new landscape design
- The Final Reveal
Did I miss anything in this update? Let me know and I'll be happy to answer your questions. Outdoor spaces are living, breathing rooms and always evolving so I might have to report back with an annual update. Let us see how much $$$ we will have to continue to dump into this place, ha!
Next week I am thinking about sharing a little Evening Home Tour at the Heights House—would you be interested to see that? Night photography is an entirely different world but I am up for the challenge!