Playroom Wall Mural Installation
This weekend we checked off one more phase of our Work + Play Room renovation—the mural wall! Progress has been a bit slow/sporadic on this room lately, as we have…
This weekend we checked off one more phase of our Work + Play Roomrenovation—the mural wall!

Progress has been a bit slow/sporadic on this room lately, as we have experienced product delays (I am looking at you again, Ikea) and have been pre-occupied with other projects. We had planned to install the mural towards the end of this renovation, but decided there is no reason to wait and set aside Sunday afternoon to put it up.
This mural was one of the first things I chose when dreaming up this room, and it set the tone for the entire design concept. I shared all those details in this post, but the plan was to place the mural on the long back wall, so it is the first thing you see when you walk into the space:

I sourced the most well composed, whimsical mural from Walls Republic (sponsored). I knew I would found the one from the moment I saw it—it is the well suited balance of elegant yet playful (ideal for a work + play room that will grow with our family over time) and feels as if you are walking into a fairy tale. I could not love it more.

The image is actually scanned in from a vintage painting, complete with a woven canvas texture and all the aged imperfections which are visible up close.

It helps to keep the worn-in character it adds—it feels authentic and one of a kind. It can be ordered in any size to fit your wall(s)—you just give them your dimensions, and they'll send you a preview before creating it. Okay, onto the installation!
This is not our first wallpaper/mural rodeo—in fact we have done six prior installs between the Heights House and Riverside Retreat, so there were no surprises. I shared some tips in this postbut I'll walk through our process again (make sure to watch my IG story highlights to see this in action!)

Supplies needed
Wallpaper adhesive
Smoothing tool
Paint tray
Paint roller (any type of nap cover is fine, we also used a brush)
Large sponge
Utility knifewith a new blade
Ruler
Scissors
Water bucket and rags for cleanup
First, you need to prep the wall. Smooth drywall (that has been primed/painted) is recommended for wallpaper install, but if you do not mind bumps showing through underneath, you can get away with a light texture (our Riverside Retreat living roomhad light orange peel which is not ideal, but the busy pattern camouflaged plenty of it).

The walls in this house are completely smooth (perks of building new!) but there are still imperfections, so I did a quick pass with a sanding block to smooth out any rogue bumps.

Wallpaper should be applied to a clean surface free of dust/debris for proper adhesion, so after sanding I wiped the wall down with a damp sponge.

Before putting up your first panel, it is a good idea to lay everything out to make sure nothing is missing or damaged. Our mural came in one single roll with 12 panels (each just under 20″ wide and 88″ long) and a cut line to separate the panels.

They are clearly labeled at the top, which made it easy to identify the top/bottom and stack them in the order they would be installed.

Once the panels are separated and stacked, it is time to start putting them up! There are different ways to go about this depending on your wall configuration, mural design and personal preference. If there are major obstacles (like windows, doors, corners, edges or multiple walls in a room) it is important to lay your panels out prior to installation to figure out the best place to start.

In this situation, we had none of those considerations—it was as unfussy as you could get with one plain empty wall. It did not matter where we started, so we opted for the far right corner. We thought we could save some work by lining up the edge of the panel along the corner of the wall, but the trim was not 100% straight and even, so we painted the wall green to conceal any visible part peeking through.

That would have worked… except once we hung the panel, we realized the wall was nowhere near level, so we ended up having to cut the right edge anyway. Oh well, no big deal!

It is good practice anyway to use a level (or laser level) and draw a plumb vertical line for your first panel. This will ensure your wallpaper design stays level across the whole wall. For our mural it genuinely did not matter much, since there is no repeating pattern or lines to indicate if the paper is level or not.

The first panel is always the most difficult, but extremely important because it determines placement for every other panel. Before hanging it up, we liberally applied adhesive to the wall with a foam roller and brush—it does not matter what you use, as long as you cover the wall completely and lay it on thick! Excuse the blurry video screen shot from my stories:

Tip: two people make this job significantly easier and faster. It is possible to do it with one, but there will be plenty of adjusting/readjusting to get everything well suited—precision is key for this project! We pasted an entire section of wall at once (extending a few inches wider than the panel) without it drying out. The more adhesive you use, the longer it will take to dry, and it wipes away easily with a sponge so you do not have to worry about using too much.
Since there were two of us, we found it most efficient to each work on one section (Lucas stood on the ladder and took the top half while I worked on the bottom). We first lined up the right edge of the panel, and once it was in place, we each used a smoothing tool to release the air pockets from right to left. Make sure to finish by applying enough pressure and smoothing in all different directions for a solid, bubble-free bond.
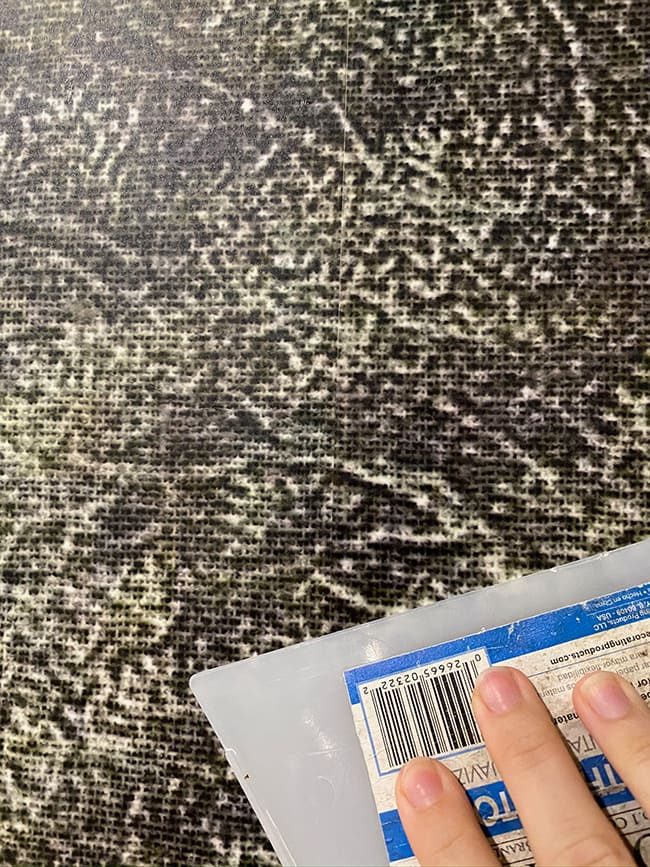
I had my mural made slightly taller and wider than our wall (you always want some overlap to be safe!) so we placed the first panel somewhere in the center vertically (again, it does not genuinely matter with our design since there is no pattern/geometric lines).

We decided to trim the excess off each panel as we went, using a steel ruler and utility knife. A sharp blade is absolutely critical! The paper will tear easily with a dull knife and this step can take some getting used to for a nice, clean cut.

It can also be a bit tricky when you are not cutting along a perfectly straight line (like our ceiling which is a little wavy in some spots) but a sharp knife held at the right angle will make your life much easier.

Even if the cut is not well suited, it is genuinely hard to tell once you stand back.

Woohoo, hardest part over! Before moving onto the next panel, you will want to wipe it all down with a damp sponge to remove any adhesive. This paper is durable (and washable!) so water will not hurt it.

It took a few tries to get the first panel well suited, but the rest were smooth sailing. All you need to worry about is lining up the pattern and making sure the seams are as close as possible without overlapping. Here you can see it overlapping slightly, which will be visible when the light catches it…

As long as there is enough adhesive on the wall, you can pretty easily slide and reposition the paper until it lines up perfectly (that is the biggest advantage of this paper compared to peel and stick wallpaper). You will want to use pressure to push the panel over to meet the next one so the seams butt up.

It takes a few panels to get the hang of it, but then it goes by quick (as long as there are no major obstacles). Outlets are particularly easy to work around—just cut the paper out around the box. You can fine tune the cut later.

With two people, each panel only took us around 10-15 minutes.

Have a fresh water bucket on hand and replenish it often. You do not want any glue residue leftover!

Once we got to the left side, we simply tucked the paper in behind the cabinet which will be hidden by trim (these built-ins are still in progress, more details in a future post!)

And just like that, our enchanted forest was brought to life!

In total it took us around 2.5 hours, including stopping to document and post to my IG stories.

The colors in this room are so tricky to capture, especially with an iPhone. They look much warmer on screen with the lights on…

Here is a more accurate depiction, lights off with my SLR.

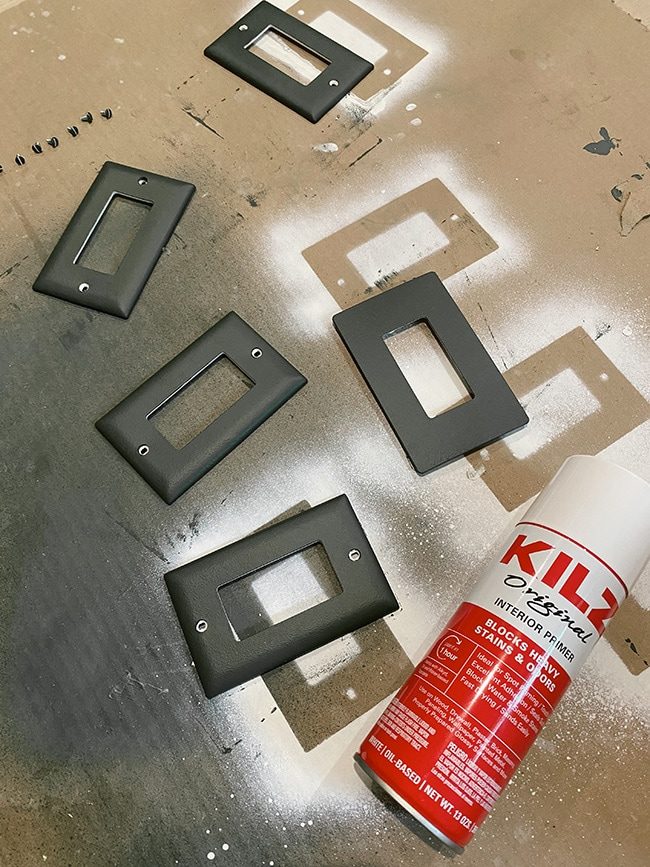
We painted the outlets and covers to blend in more, using a spray primer on the covers + foam roller:
And we also installed our sconces on the TV wall! I chose these lights from HVL Group (sponsored) and love how unfussy and elegant they are.

Ignore the mess peeking through in the background…

I am obsessed with the dark green (SW Ripe Olive) next to this mural.

Even Susie could not resist coming upstairs to go for a stroll in the woods.

If you are considering this mural (or any other) to update your space, you can use the code jenna10 for 10% off your order at Walls Republic!

Normally It helps to keep a good interesting roofline, but this ceiling situation has been quite the puzzle.

I have gone back and forth about where/what to paint, how far up to wallpaper, and what to do about that crazy corner with several different angles. We are currently working out our plan to extend the built-ins to the ceiling, but this is an expert level 100 scenario.

I have a couple fun ideas up my sleeve to combat some of the angle awkwardness, and I think it will all come together in the end.

Or who knows, maybe I'll end up painting the whole ceiling green too!

Here is what we are dealing with on the other side of the room at the moment…

We are at the mercy of Ikea to restock something we need for the next phase, so unfortunately I cannot provide an accurate timeline for the next update. I am hoping we can get it done in October though. In the meantime… get ready for more fall (and Halloween! ?) posts, coming up next!