How to Add Decorative Toe Kicks to your Kitchen Cabinets
Follow this unfussy step-by-step DIY tutorial to make your own decorative toe kick valances. Elevate your kitchen cabinets with furniture feet!
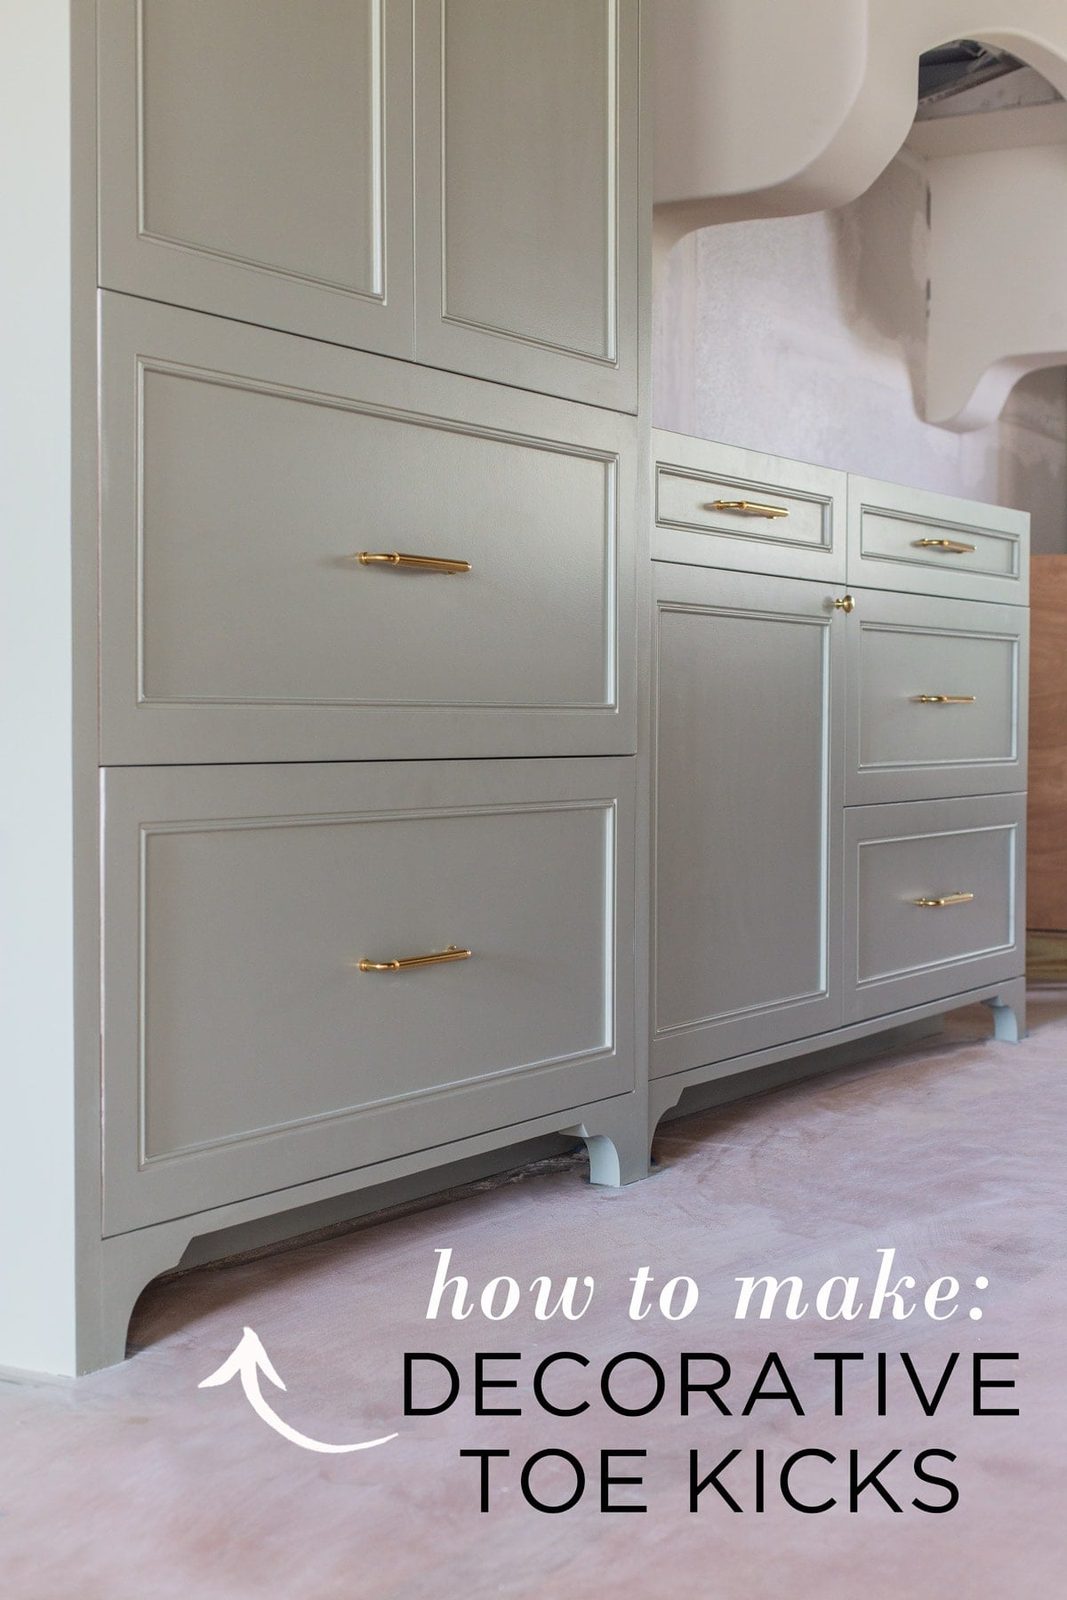
Want to learn how to elevate the look of your kitchen cabinets with decorative toe kicks? It is easier than you might think, and requires just a few basic tools and materials!
Out of all the features we have added to the Hacienda Hideaway kitchen, the decorative toe kick valance might just be my favorite. Typically you will find these on inset cabinetry—where a face frame surrounds the doors and everything is flush, like so:

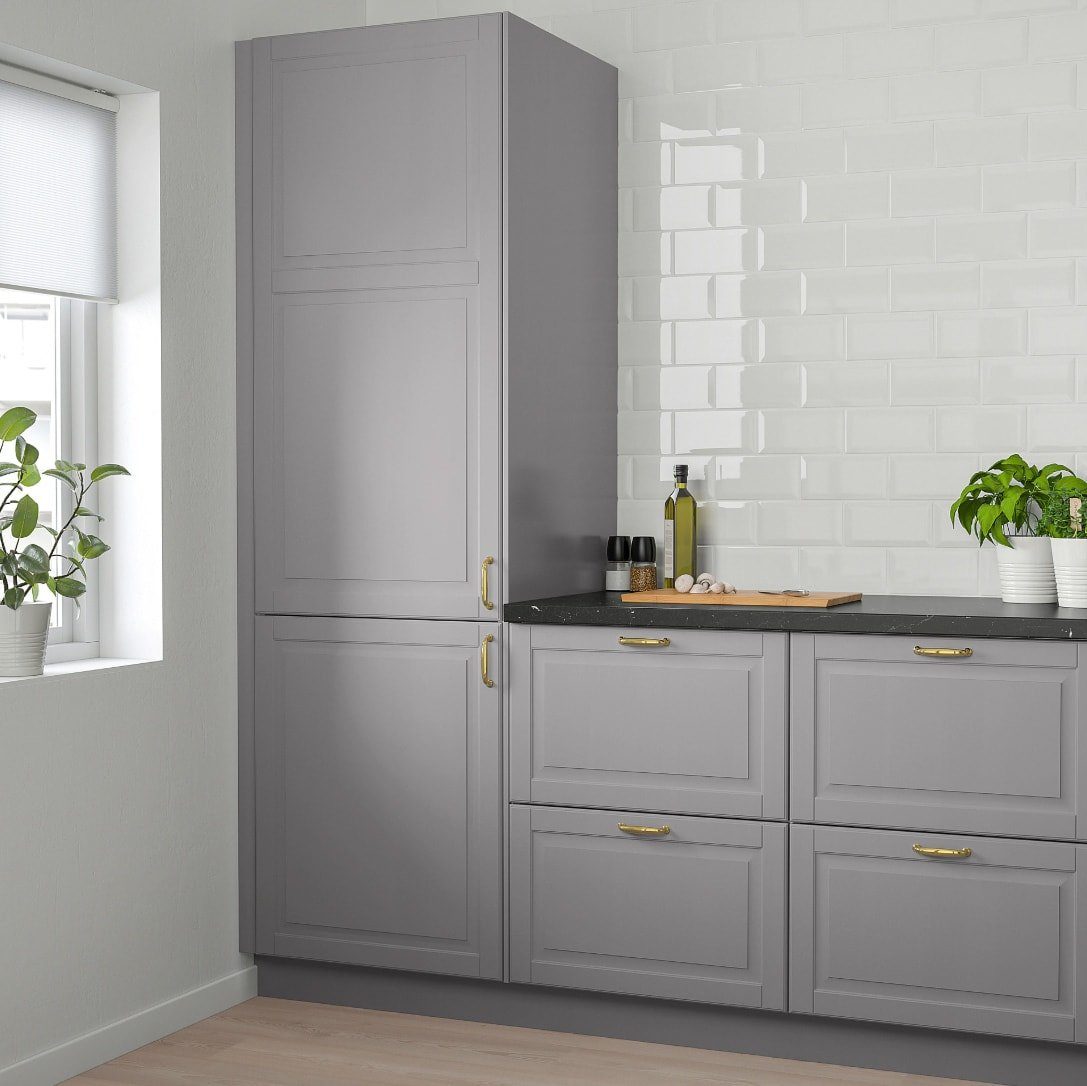
However, with full overlay cabinets (more common, especially here in the US), the doors sit in front of the cabinet box which makes it tricky to get that same flush, clean look:
We realized this after we special ordered furniture feet (from Kraftmaid) in our own kitchen, and they did not turn out quite as expected. They are just wedged underneath the cabinet box now—not ideal, but better than nothing.

In our Hacienda Hideaway kitchen, I was determined to figure out a better way. We had originally planned to build inset cabinetry, but you guys talked us out of it after pointing out all of the challenges (precision required, shifts from temperature changes, rental wear & tear, etc).
How to add toe kicks to cabinets
Instead, we came up with a way to replicate the clean look of inset cabinets with the practicality and ease of overlay doors—the best of both worlds!

This is how you can add decorative furniture feet to your own kitchen cabinets:
Supplies
- Wood (we used 1x6x8' poplar for the feet, and1x2x8'poplar for the valance)
- Wood glue
- Wood filler
- Paint & primer
Tools
- Miter saworcircular saw
- Jigsawor band saw
- Electric sander
- Clamps
Step 1: Draw your shape onto wood
Look around on Pinterest for inspiration and decide on a shape for your cabinet feet. Once you narrow it down, draw it onto a piece of smooth wood. We used 1×6″ poplar wood, and found a round object to trace for a well suited curve.

The height will need to be an exact match to your toe kick gap, so measure carefully!
Step 2: Cut out your shape
Clamp your board to your work table and use a jigsaw cut along the curved line. A fresh wood blade is recommended. Note: a band saw or scroll saw would allow you to cut two pieces at once, but we did not have one, so we made it work with a jigsaw.

For best results, use a miter saw or circular saw to cut the straight edge. If you plan to add a valance piece across the center, make sure to account for this in your design and leave a straight edge to connect to.
Step 3: Trace shape onto second piece and cut
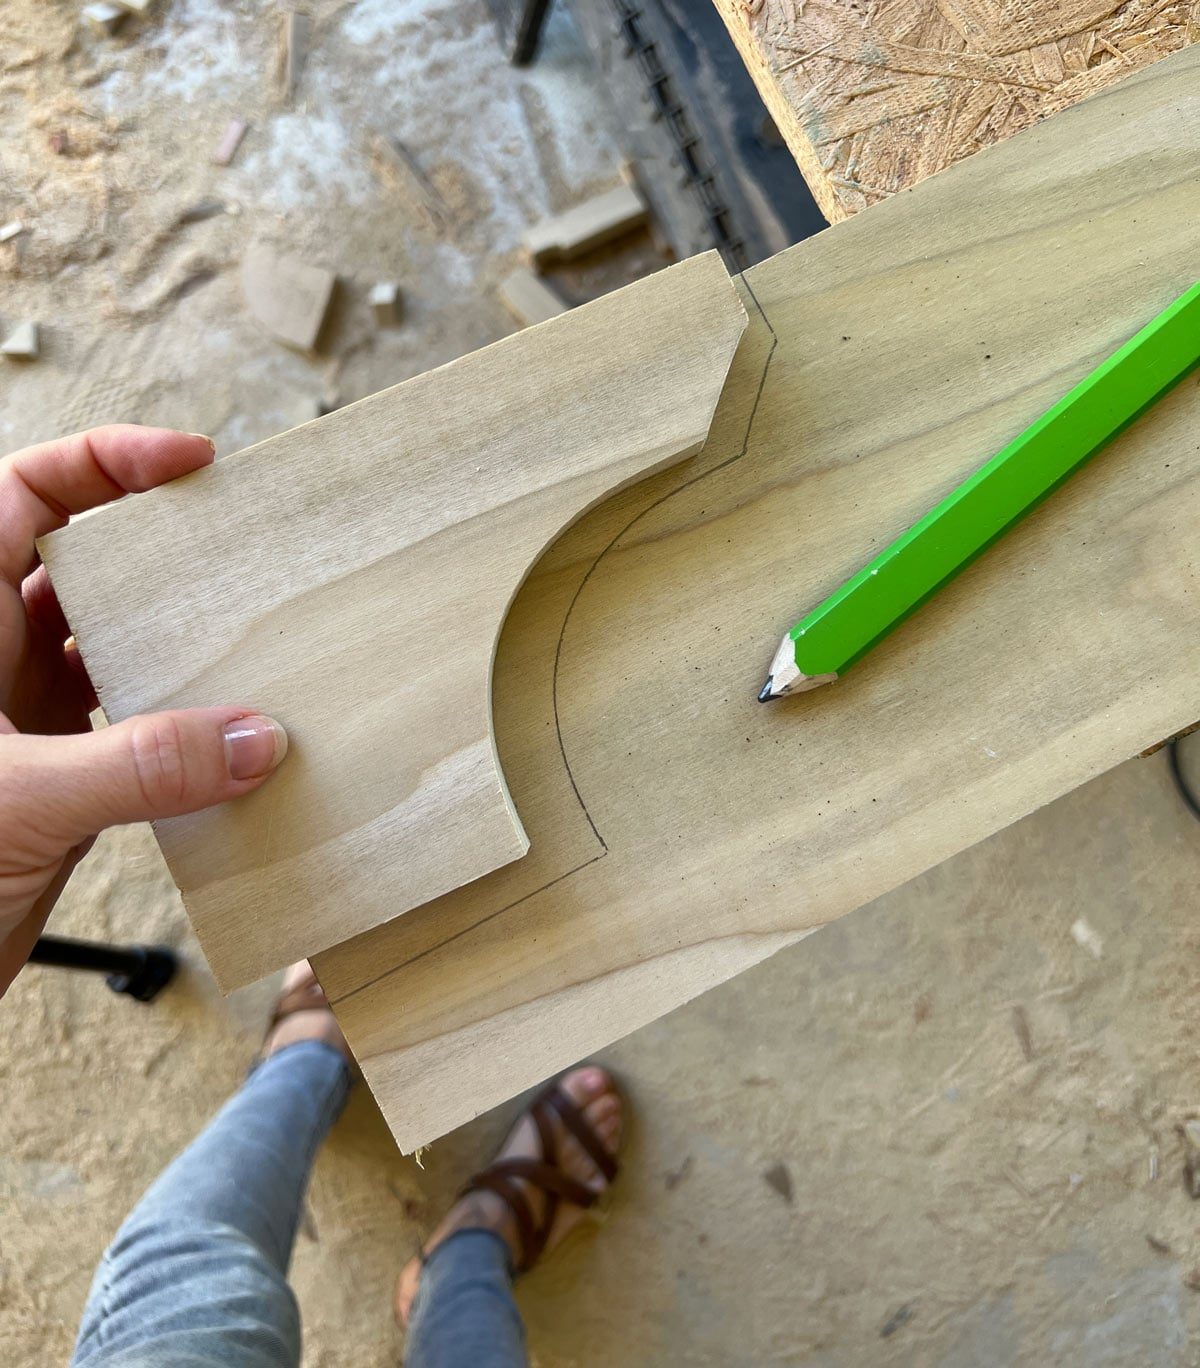
Now that you have your template piece, line it up to the end of another board, trace it and repeat the cutting process. The feet need to be double thickness in order to attach to the bottom of the cabinet, and also line up flush with the doors. It also just looks nicer and more substantial this way.
Step 4: Clamp and glue pieces together
Once both pieces are cut, line them up carefully along the straight edges, apply a generous amount of wood glue, and clamp them together. They probably will not match up 100% perfectly, but that is okay—sanding will fix everything!
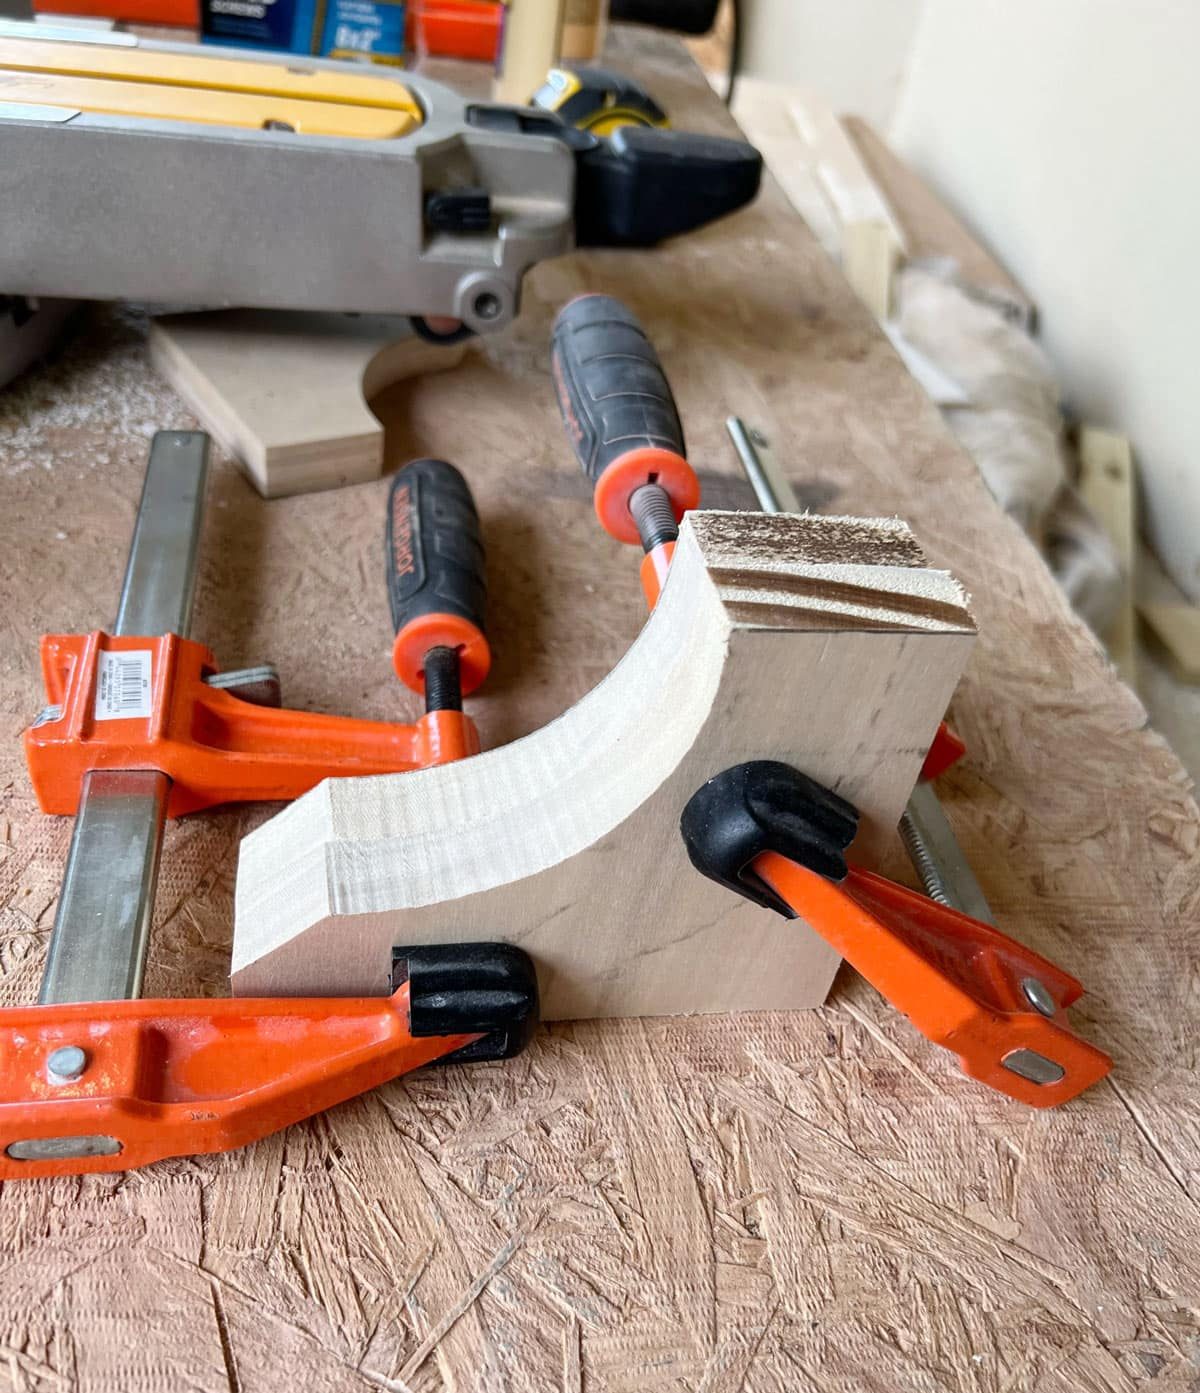
Step 5: Fill seam and sand
After the wood glue has dried for an hour or so, unclamp the pieces. Now you want to make it look like one solid piece of wood. Use a miter saw to shave off any uneven spots on the straight edges, and an electric sander to refine the curves.

Once the wood is nice and even, apply wood filler along the seam, allow to dry and sand one final time.

Step 6: Glue and clamp to cabinet base
Apply wood glue along the top of the cabinet foot, on the back edge only (where it will touch the cabinet box).

Line it up to the edge of the cabinet, and adjust it forward until it lines up flush with your cabinet doors (our doors were not installed yet, so we just measured).
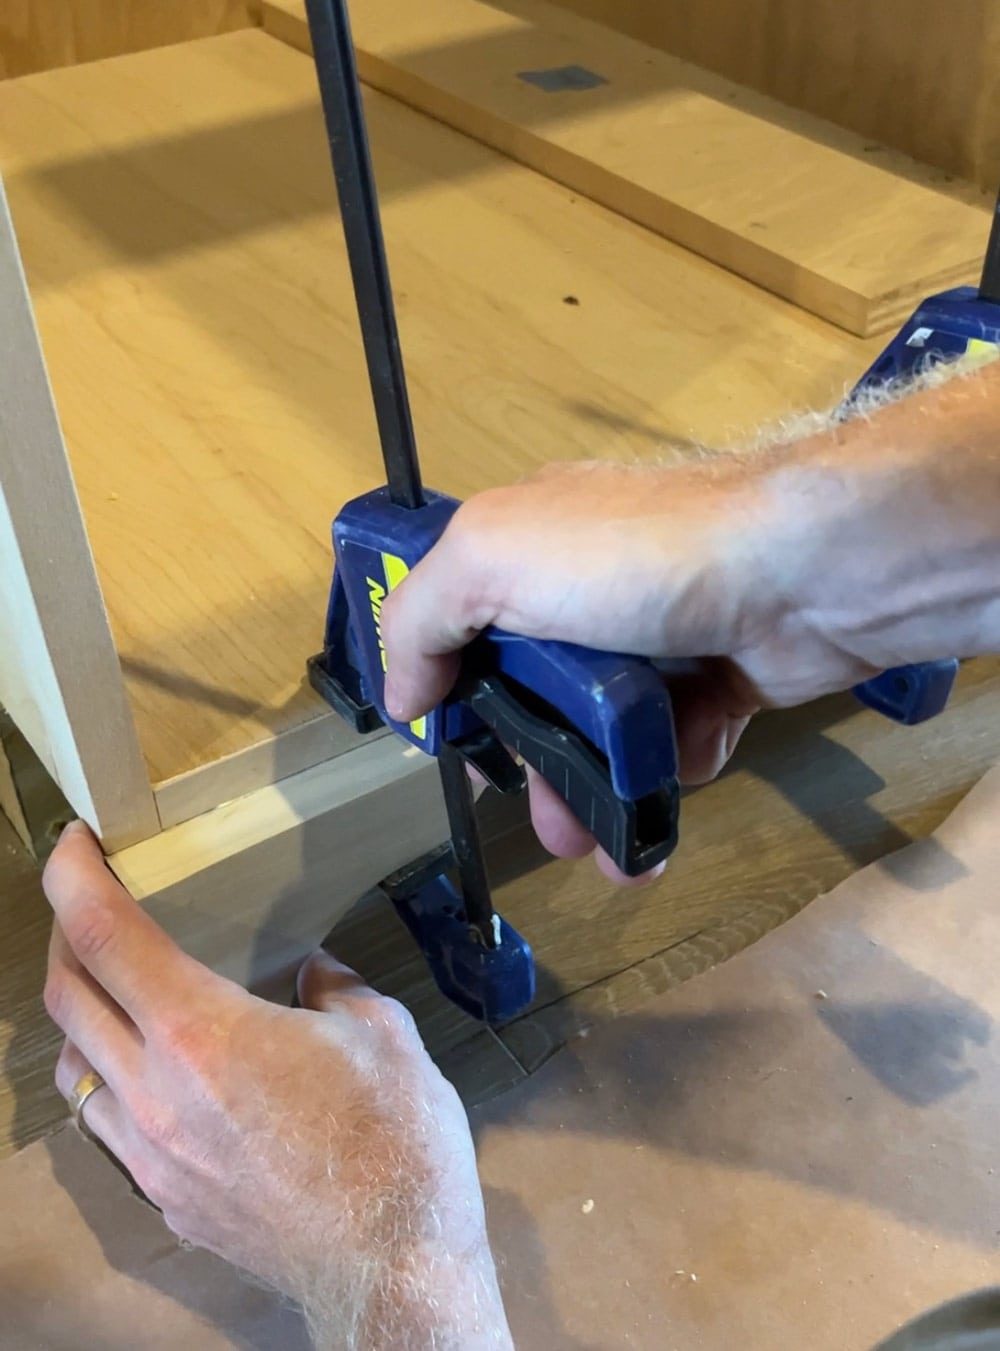
Once the foot is in place, clamp it down, and repeat with the opposite foot. Measure the distance between the two feet, and cut down a 1×2″ board to connect the feet (this is your valance). Apply wood glue, line up the valance board flush to the feet, and clamp down.
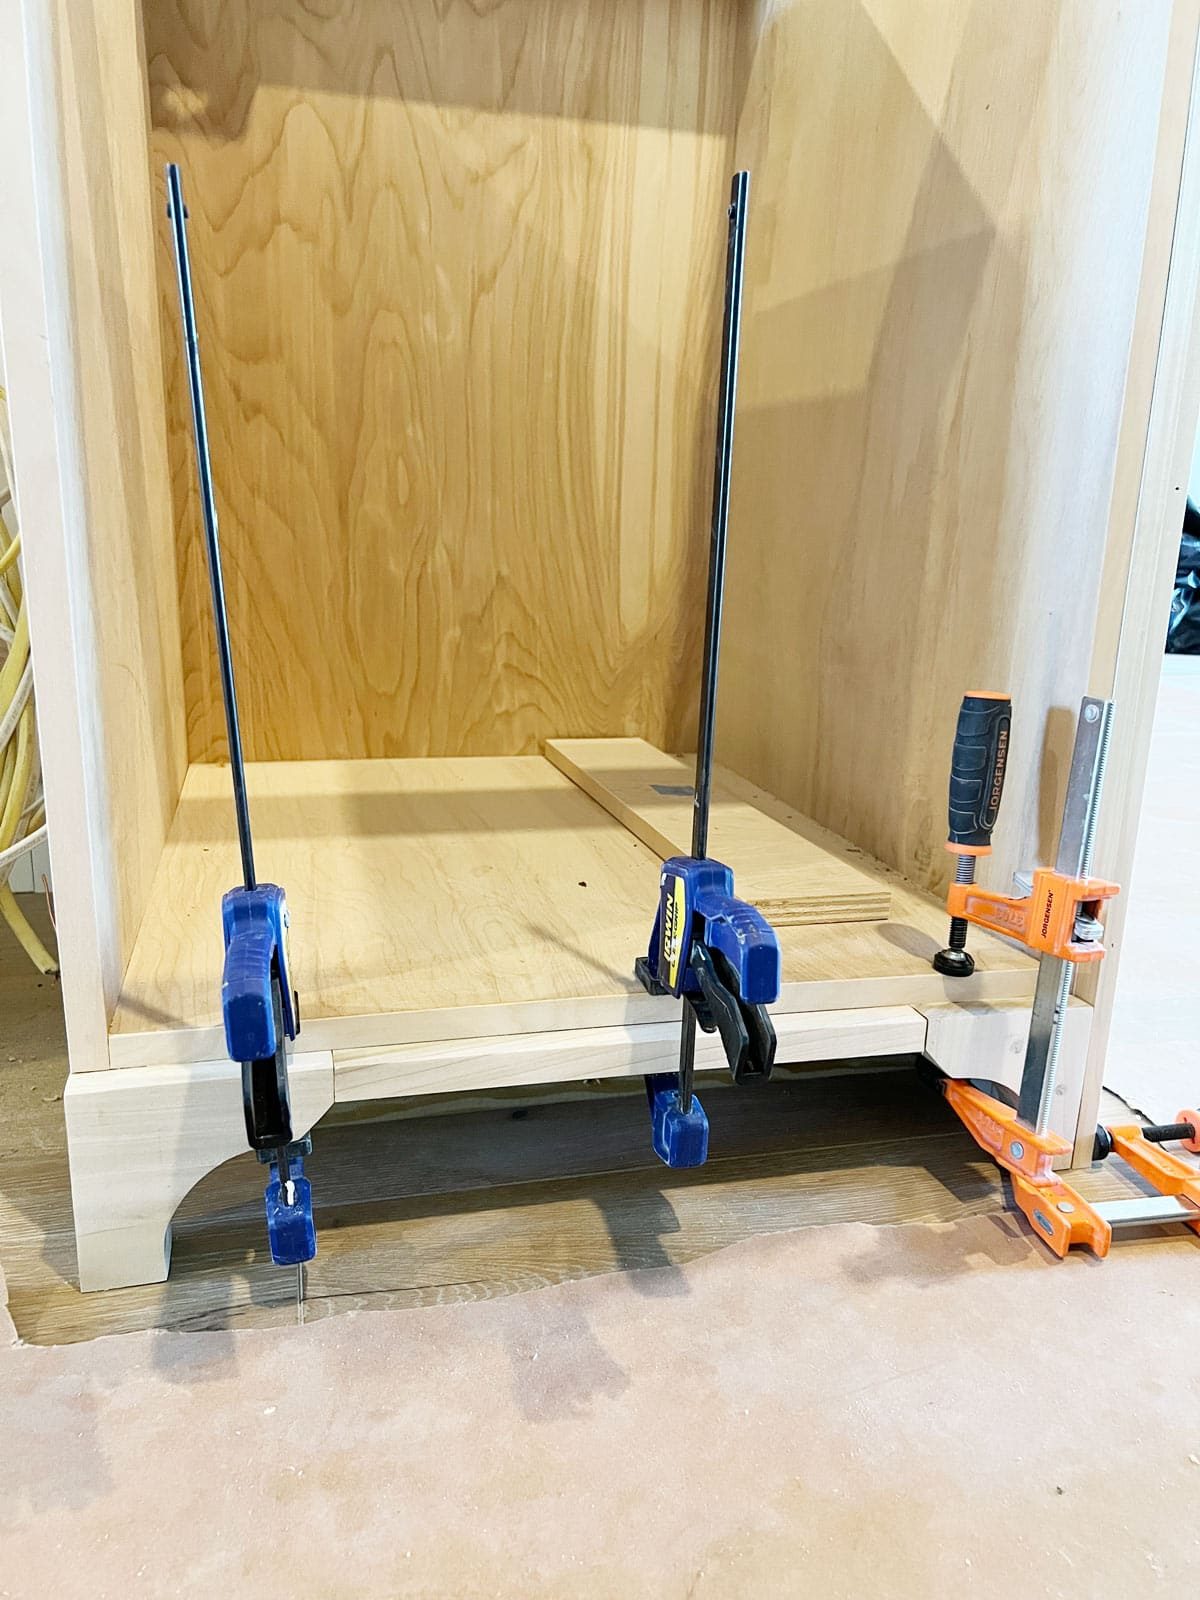
Note: If you only want to add the furniture feet, you can skip the extra step of adding a valance across the center. However, I highly recommend this step, as it makes the end result look more finished—especially with overlay cabinet doors!
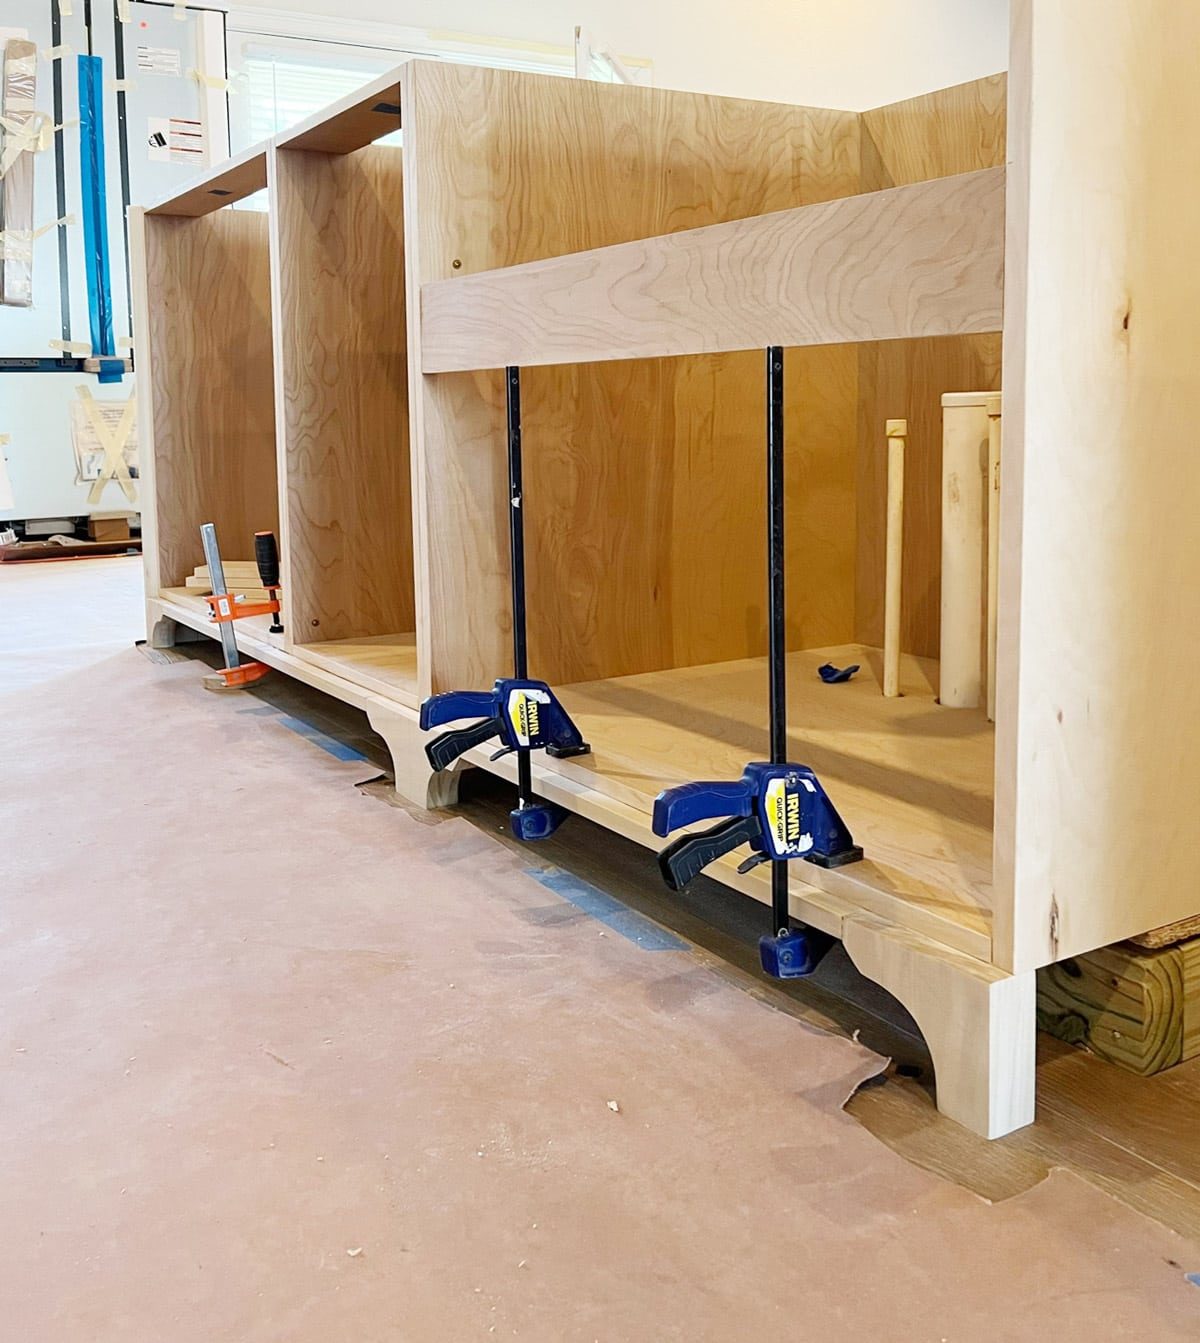
Step 7: Patch seams and sand
Once the glue has had enough time to dry (at least one hour), unclamp your pieces and apply wood filler to the two seams around the valance piece. Allow the filler to dry, then sand down until smooth. No nails required!
Step 8: Prime and paint
Paint with a quality primer and cabinet paint to match the color of your cabinets (It helps to keep BM Advance and SW Urethane Enamel). Use a short angle brushto get into the corners, and finish with a high quality roller (look at my favorite paint rollers in this post!)
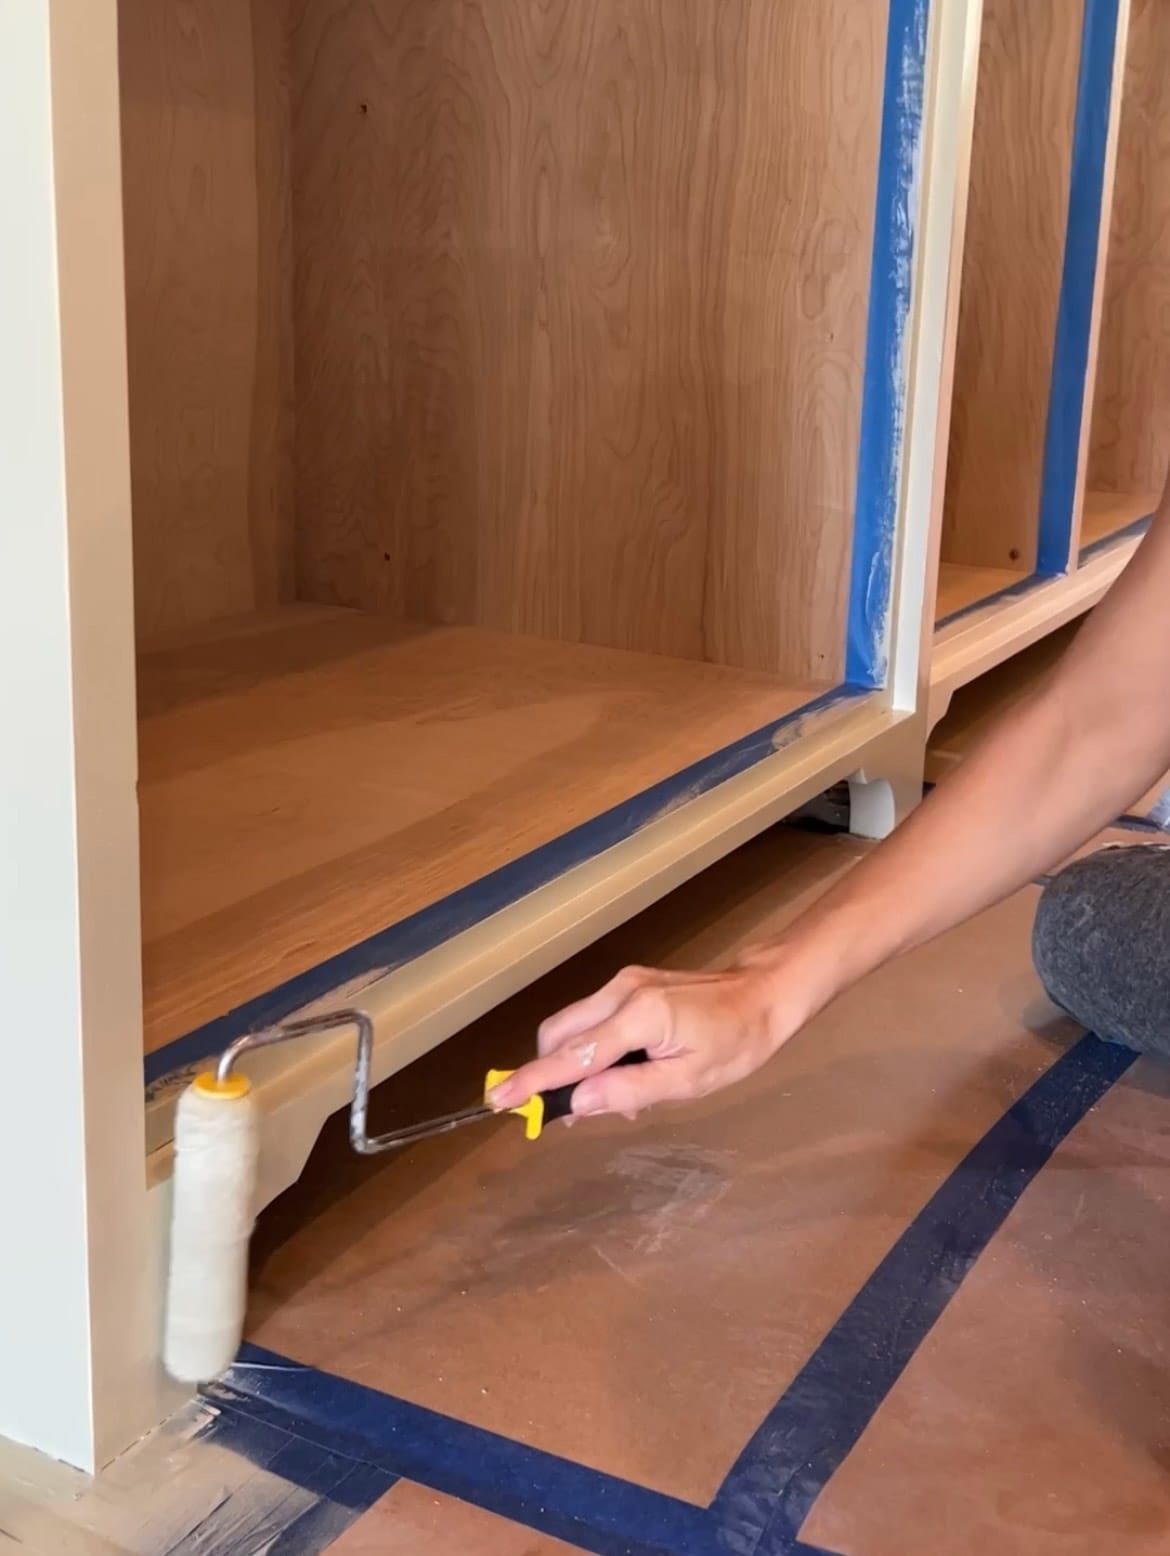
The difference is memorable, is not it? This small detail will make any plain/stock cabinets look custom and high-end. And it costs very little—around $75 for our entire kitchen!
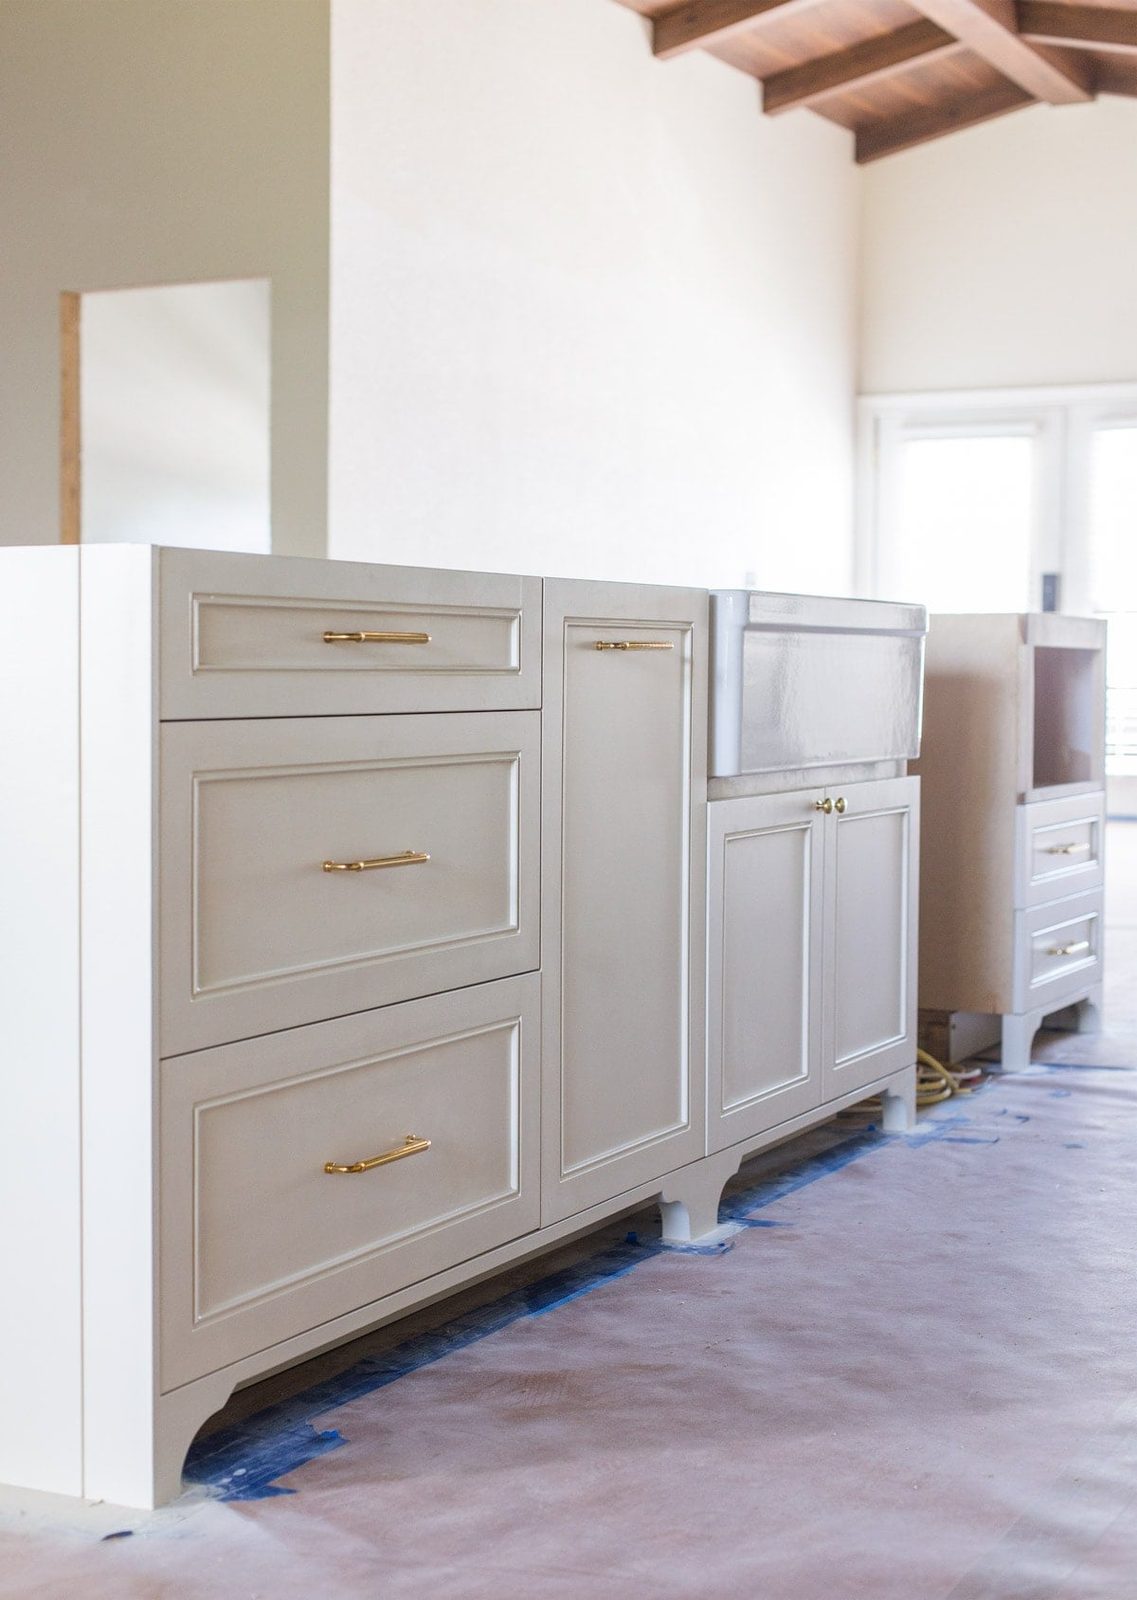
Can you see why this was my favorite idea from my 10 unfussy ways to update your cabinetspost?

FAQ
What is a toe kick?
A standard toe kick is a recessed area at the base of floor cabinets. It is an ergonomic feature, allowing you to get closer to the countertop without having to hunch over. It typically measures 3–4 inches in height and approximately 3.5–4 inches deep.
What are the different design options for toe kicks?
The most common styles are standard (recessed), flush mount, arched valance, or furniture feet. Really, anything goes, and any design you can think of is possible. Pinterest is a great source of inspiration to help narrow down the style you like.
Are recessed toe kicks necessary?
Although most would agree that recessed toe kicks are the most practical option, it is ultimately a personal preference. Flush mount toe kicks are easier to clean, and decorative toe kicks provide an elevated and streamlined look. I personally think an arched valance design is the best of both worlds—they give cabinets a furniture feel, and still have a recessed area for your feet.
What's the easiest way to add furniture feet?
If you do not want to build your own from scratch, you can purchase furniture feet online through places like Kitchen Sourceor Cabinetparts.com. As an alternative, you could buy wood corbels or brackets, and modify them to fit (like the Thrifty Decor Chick did in this post).
Like this post? Look at more DIY kitchen ideas:
- 10 unfussy ways to upgrade cabinets
- DIY Range Hood
- DIY floating shelves
- DIY subway tile install