Custom built in bathroom vanity with microcement
How to build a minimalist custom bathroom vanity with microcement. A great affordable alternative to standard bathroom vanities!
If you are looking for a unique, minimalist and low cost alternative to a typical bathroom vanity, I have got a tutorial for you! Keep reading to find out how to DIY your own custom 'Modern Mediterranean' style vanity for a fraction of the cost:

A vanity is typically one of the most expensive purchases in a bathroom renovation, and it can be a challenge to find the exact style and size you want. For our Minimalist Mediterranean bathroommakeover, I wanted something different—unfussy, high-end and budget-friendly.

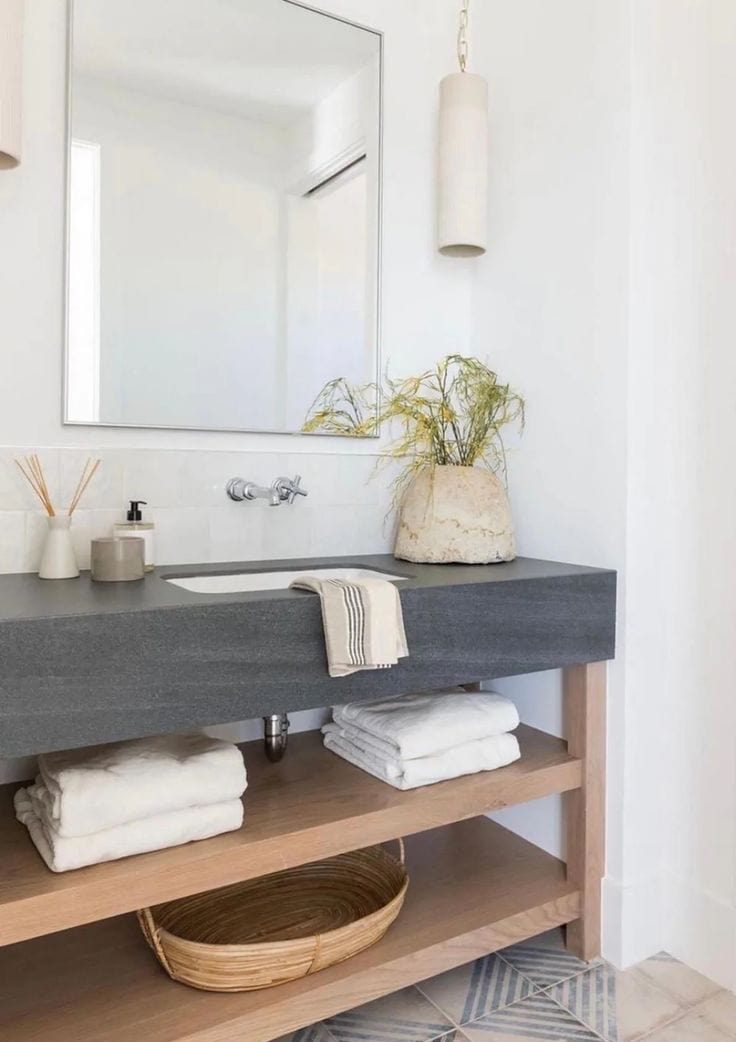
I found a couple inspiration photos online, and came up with a design and build plan with Lucas. Here is what you will need for this project:
Microcement vanity materials
- 2x4x8's
- 2x8x8'(optional)
- 1/2″ cement board
- Joint tape
- Waterproofing membrane
- Microcement
- Concrete sealer
Step 1: Build the frame
First, you will want to measure and decide on the size of your vanity. We wanted to fit two sinks into our design, so we made it as wide as possible—55″ total. Before starting, Lucas reinforced the right wall with blocking to support the weight of the countertop.
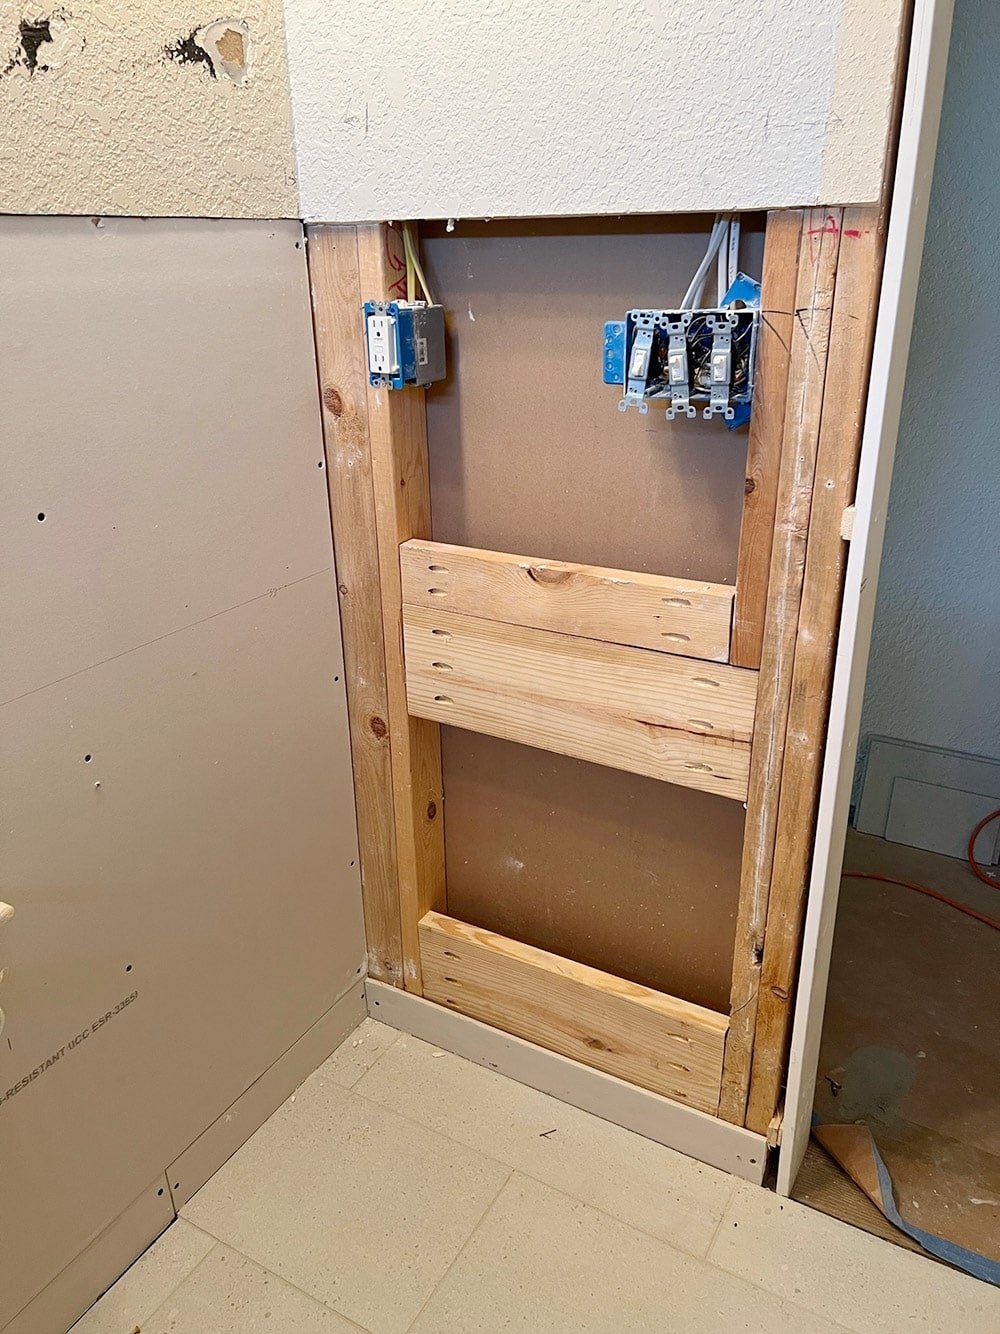
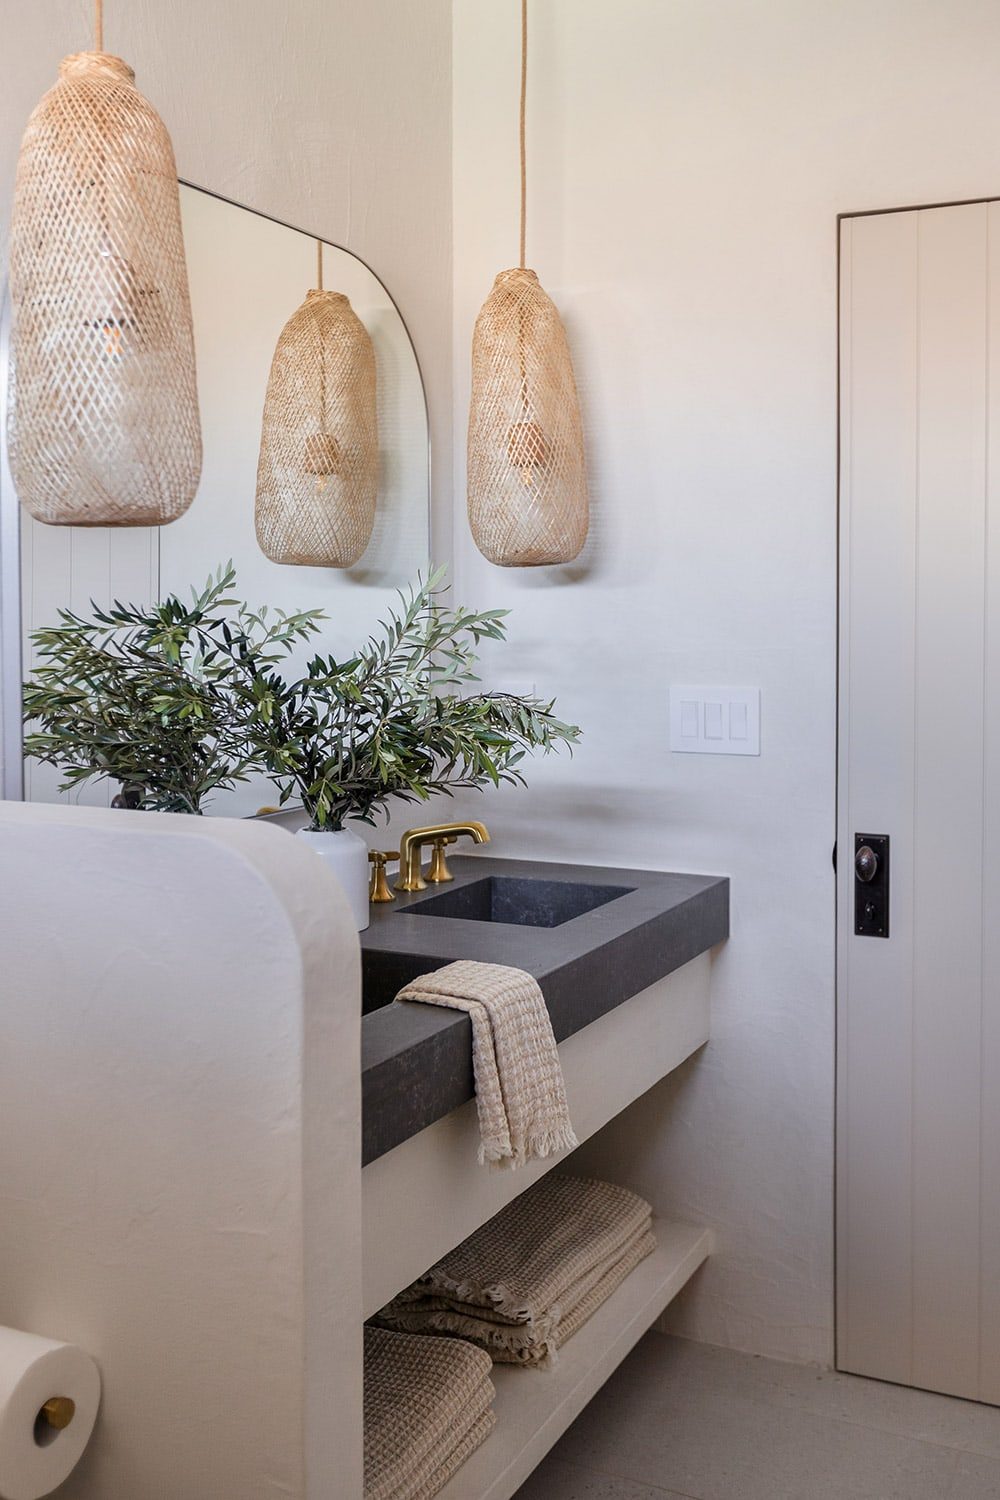
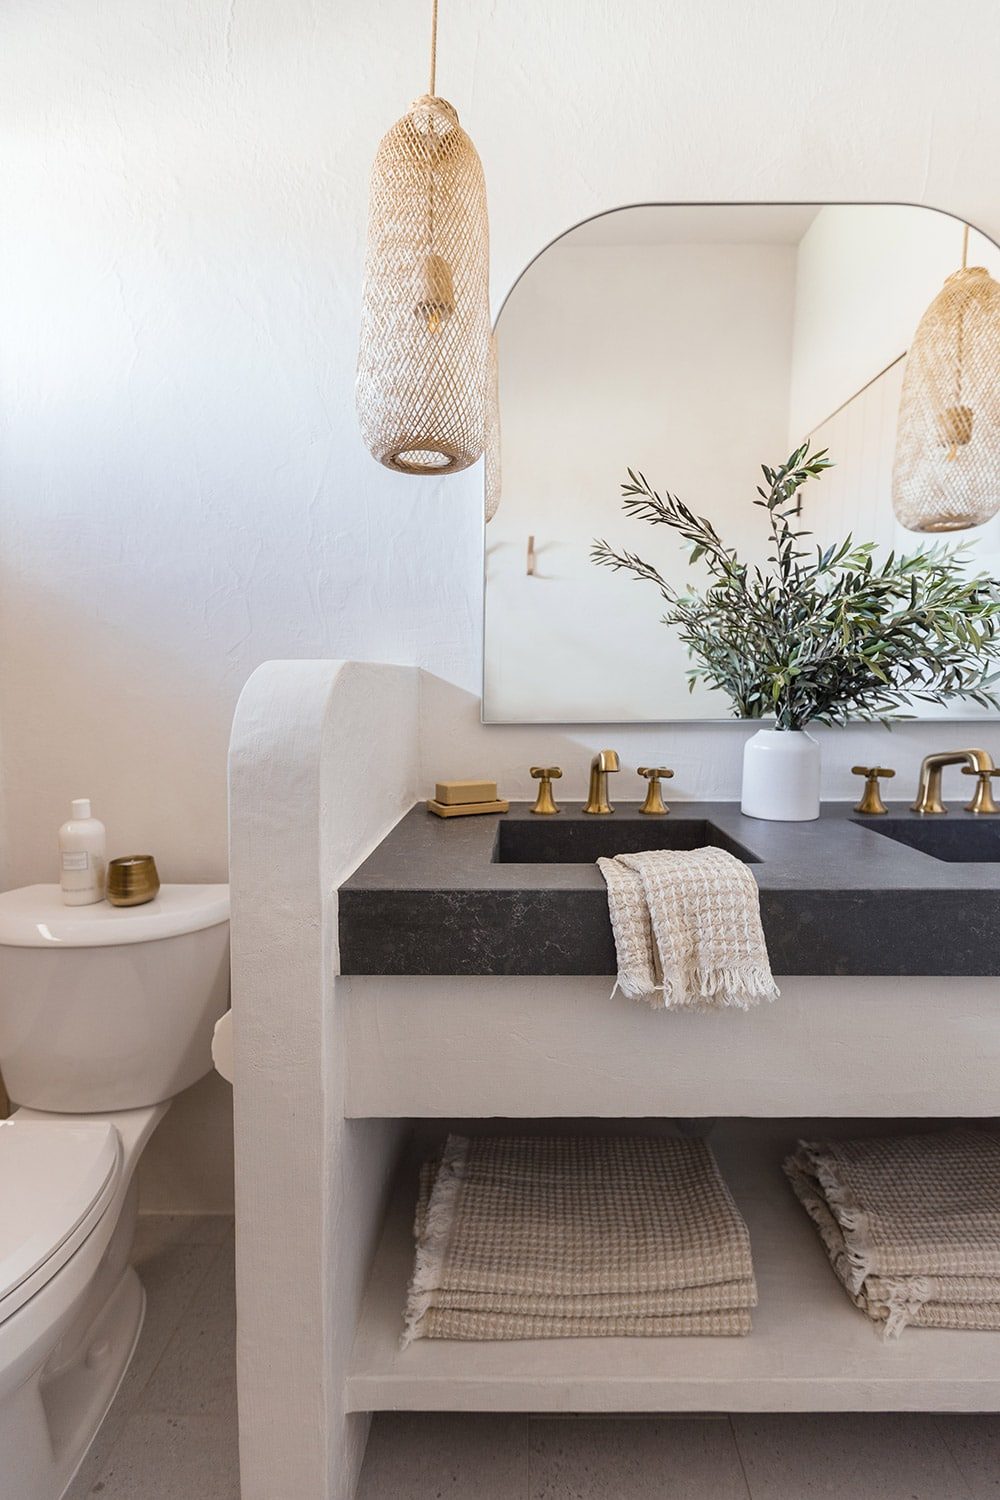
The overall design is also completely customizable. Adding a partial wall on the left side is a great way to create privacy and make the vanity feel more custom and built-in.
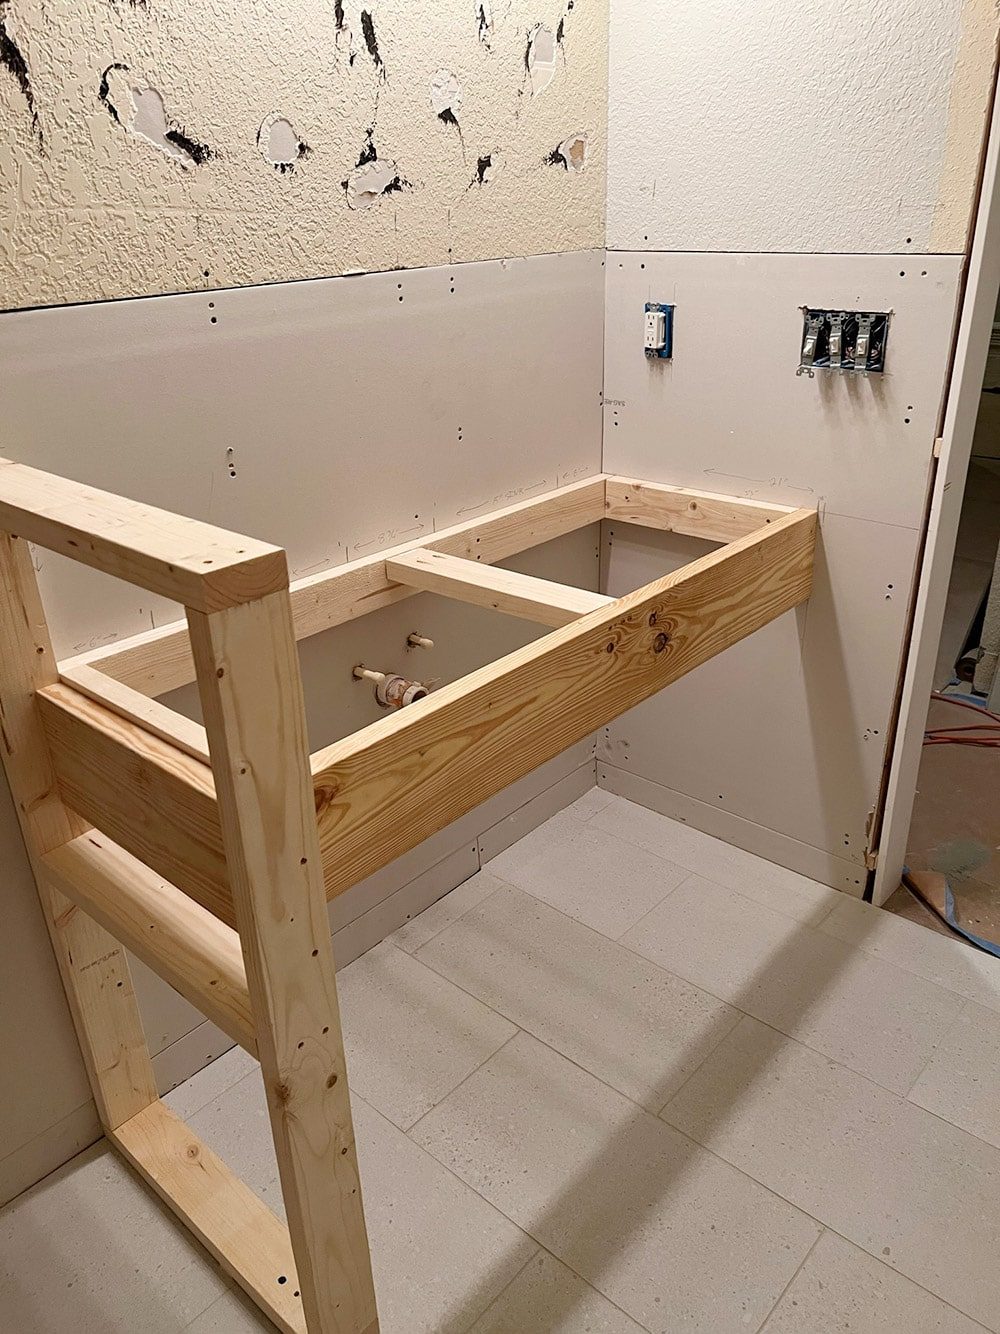
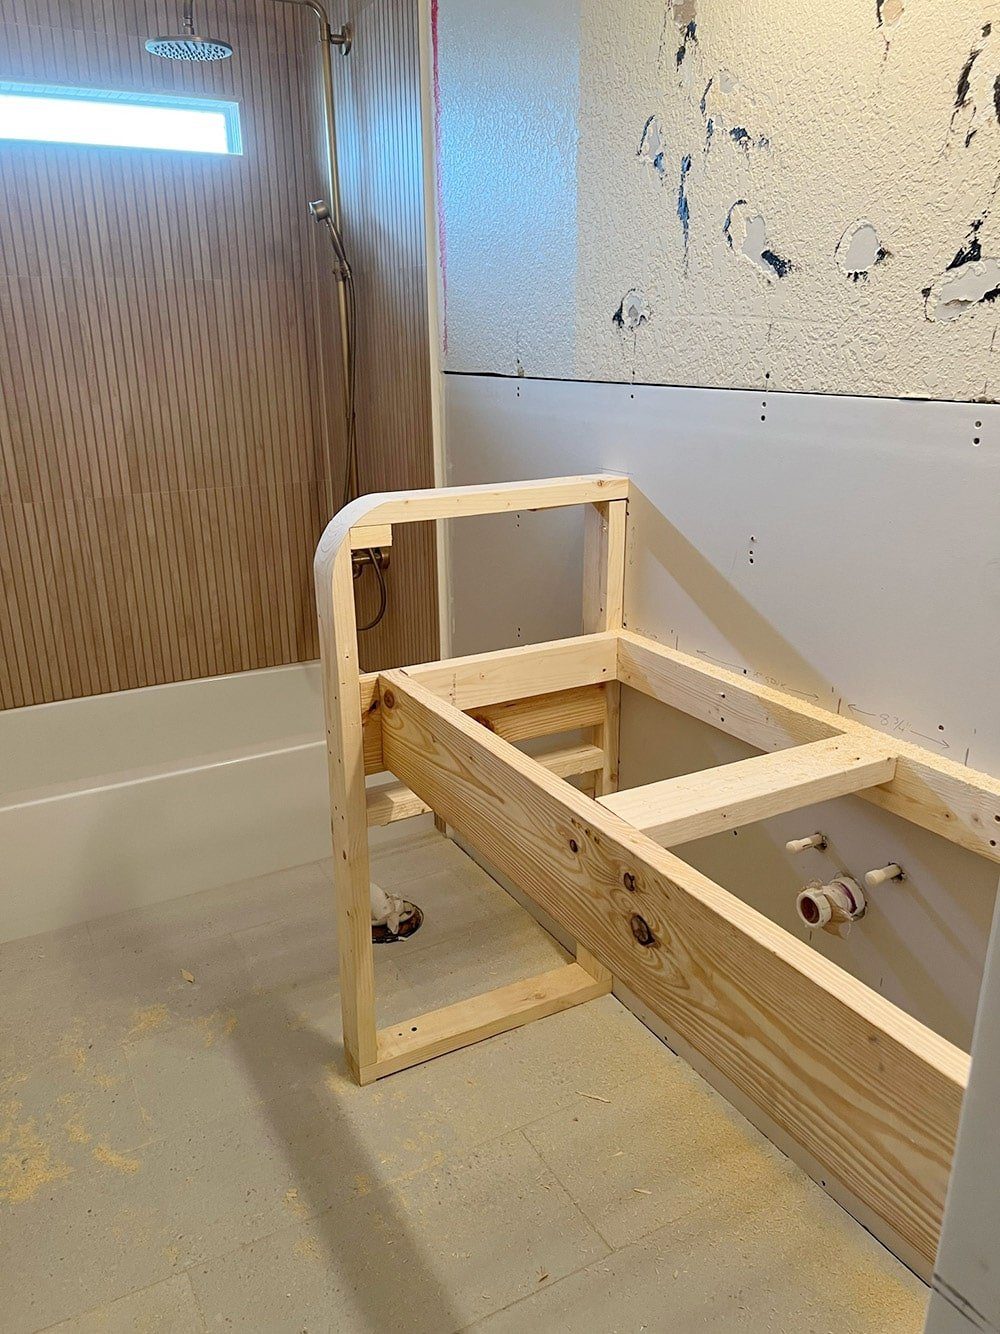
The frame was a unfussy 2×4' construction, with a 2×8' along the front and left side (you could also just stack multiple 2×4's to get your desired height). The boards were secured to the studs on the back and right wall, and the left wall secured into the floor for stability.
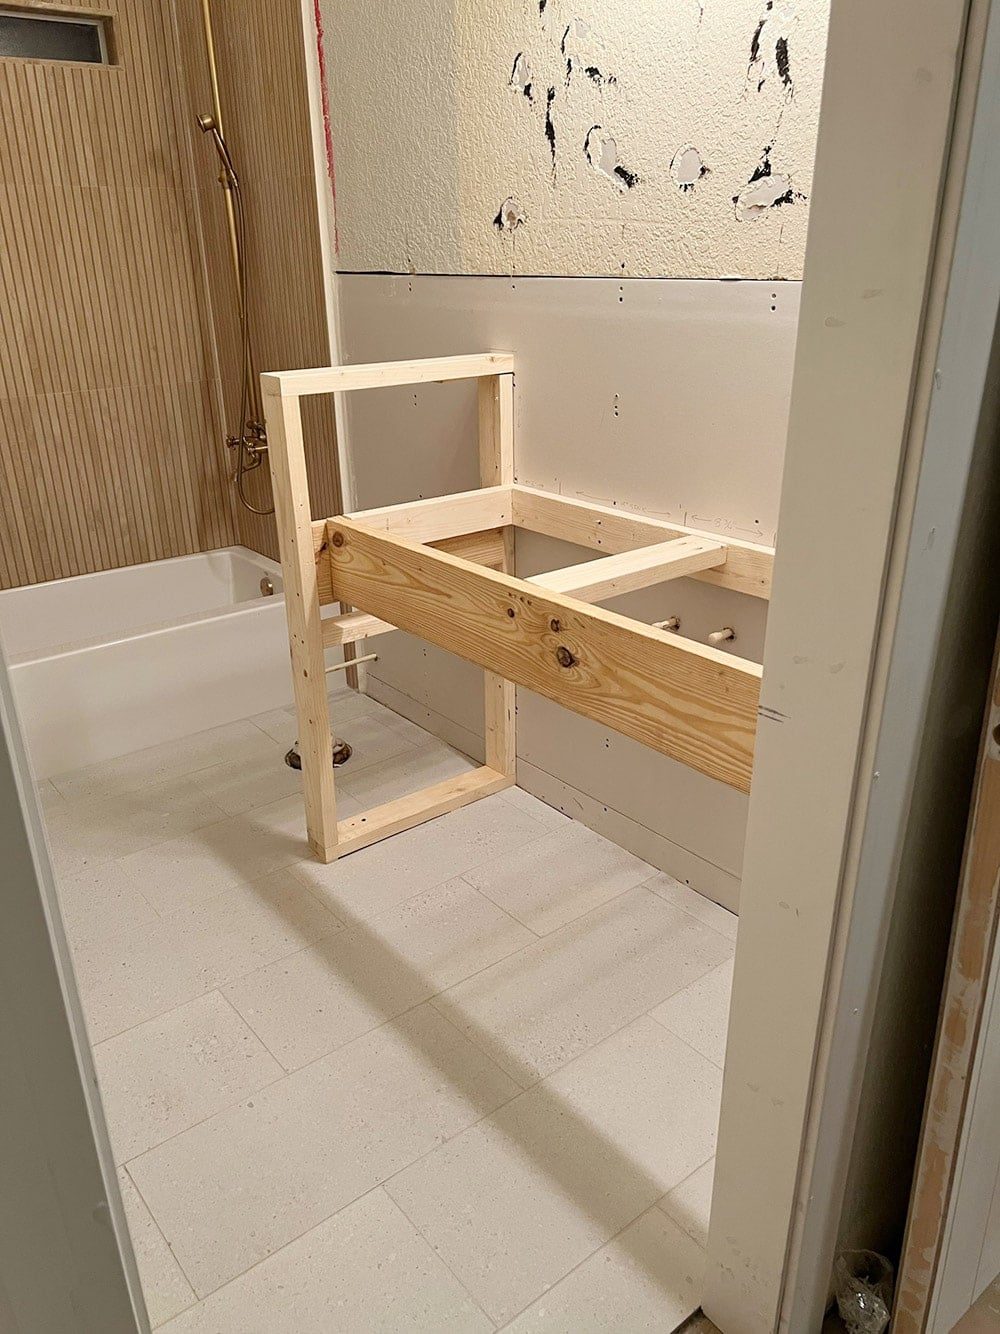
We used scrap wood leftover from previous projects, and ended up using — and — boards in total.
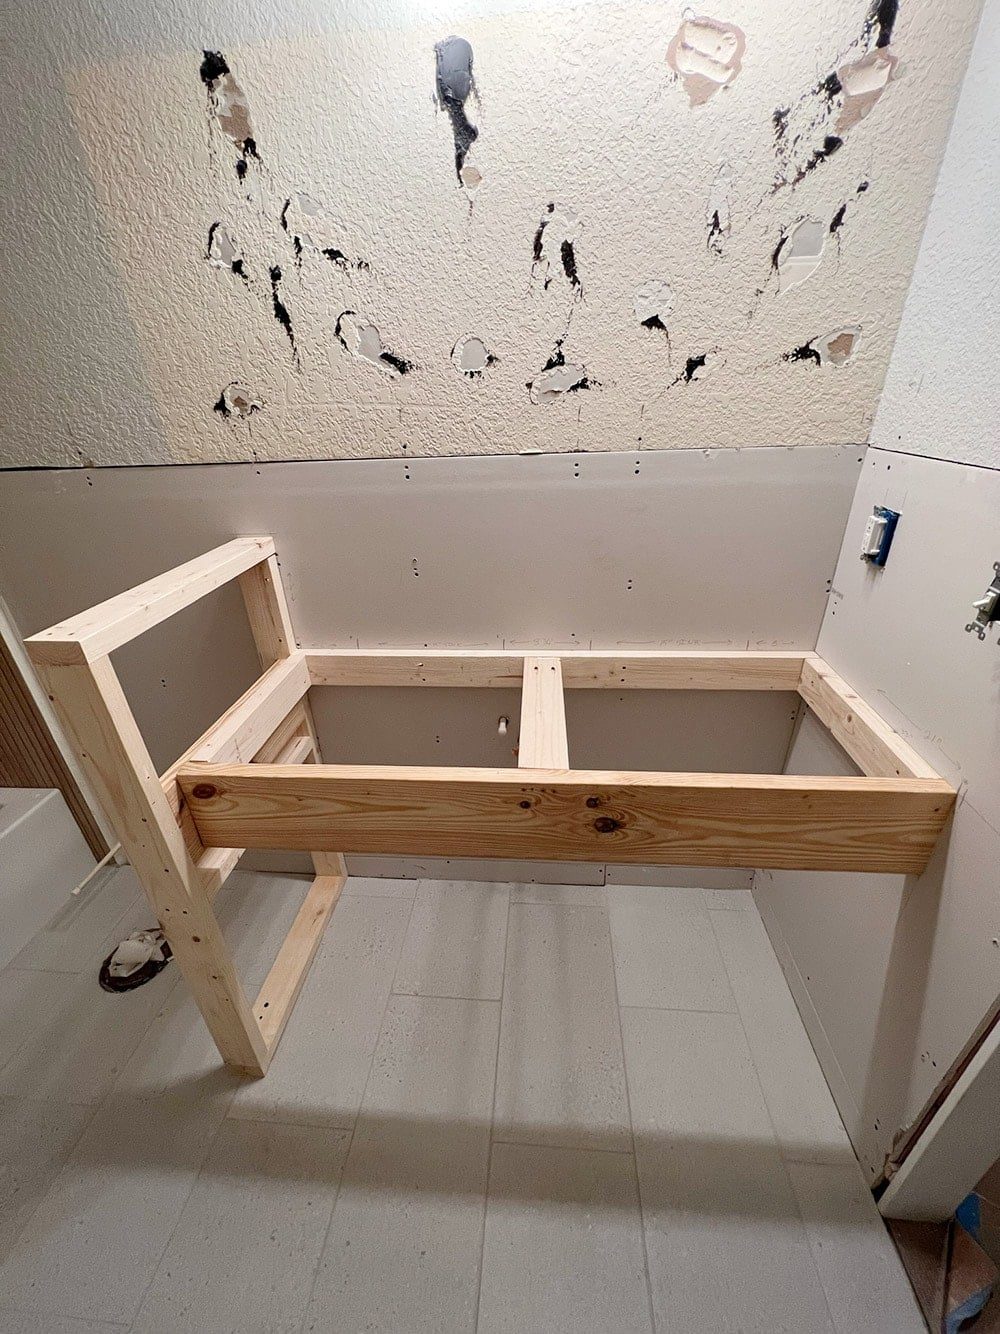
To create the rounded edge of the wall, Lucas added a support block in the corner and traced a round object along our desired curve. The block was attached using wood glue and clamps (no screws) and the screws removed from the two corner pieces before moving onto the next step. Lots of wood glue is key here for a solid bond!
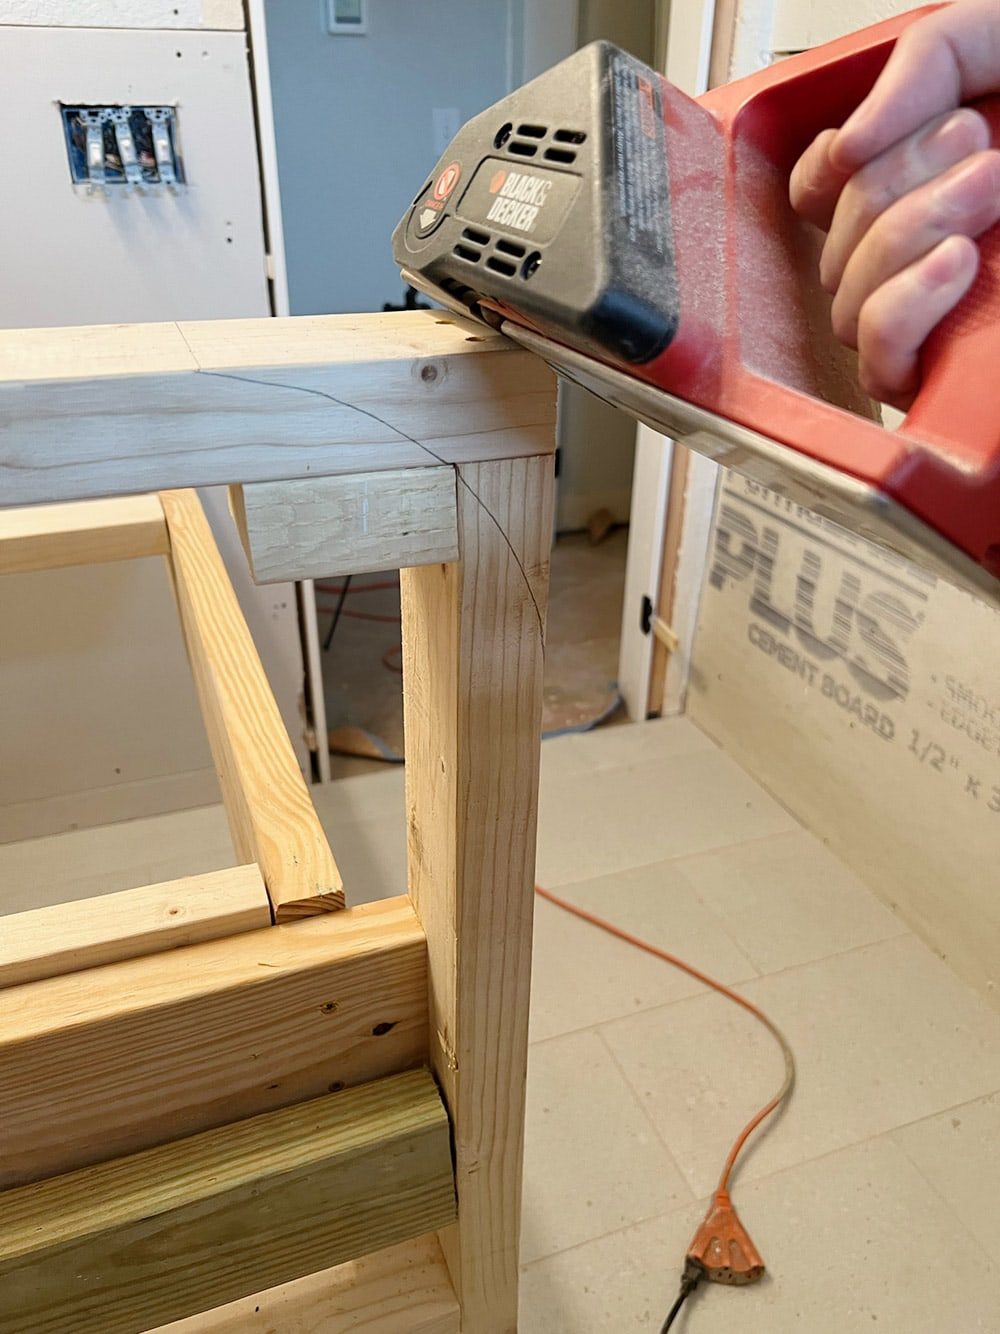
A hand planer is a quick and easy way to carve the wood down—it is also an inexpensive tool that every woodworker should have in their arsenal! After the rough cuts are made, an orbital sanderwill smooth it all out nicely.
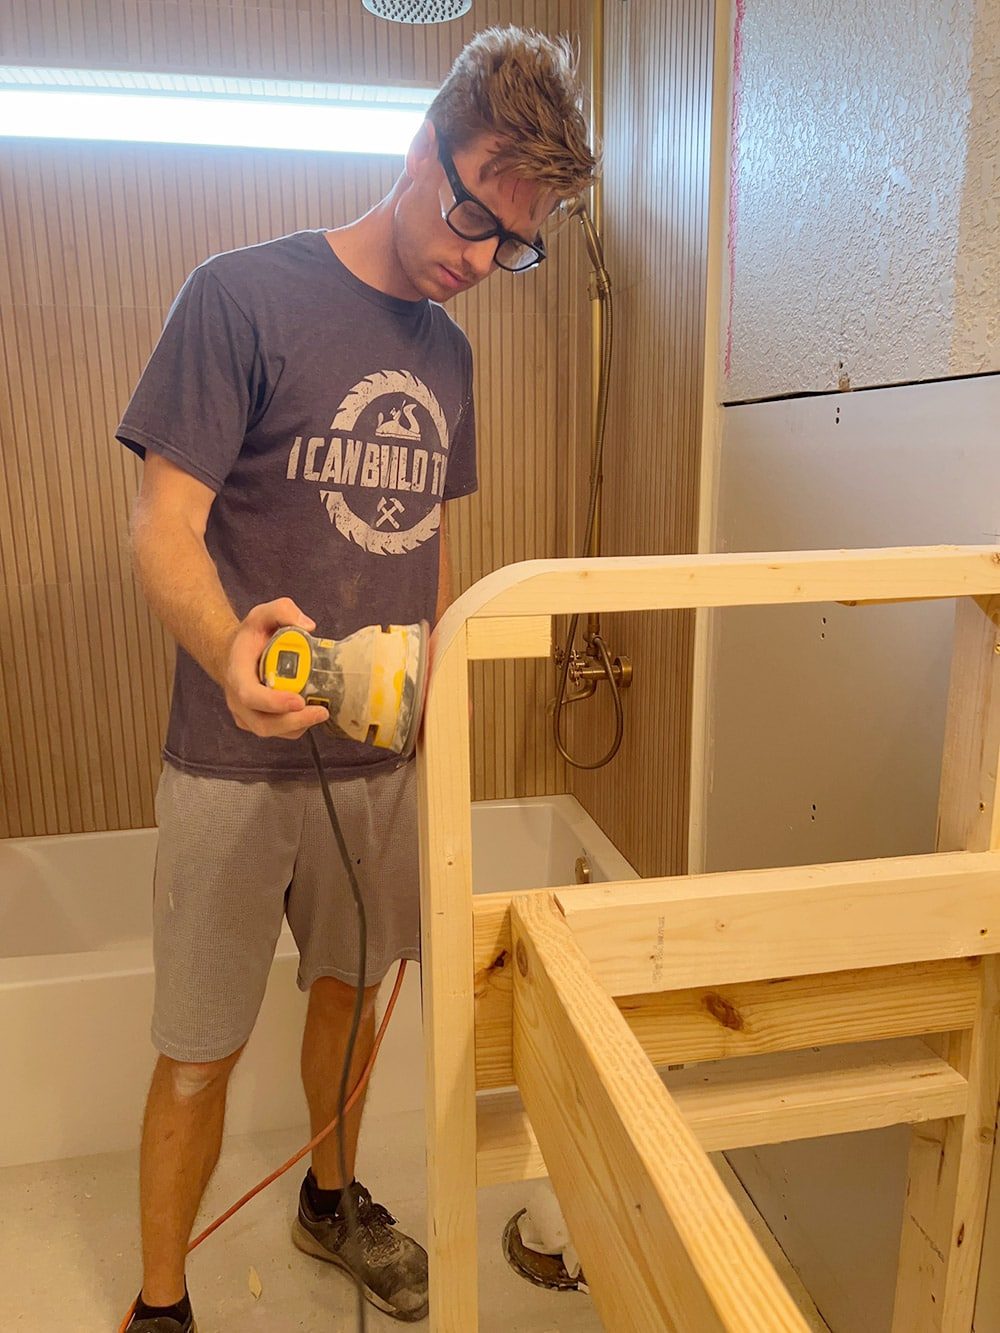
After the rough cuts are made, an orbital sanderwill smooth it all out nicely.
Step 2: Add cement board, tape and waterproof
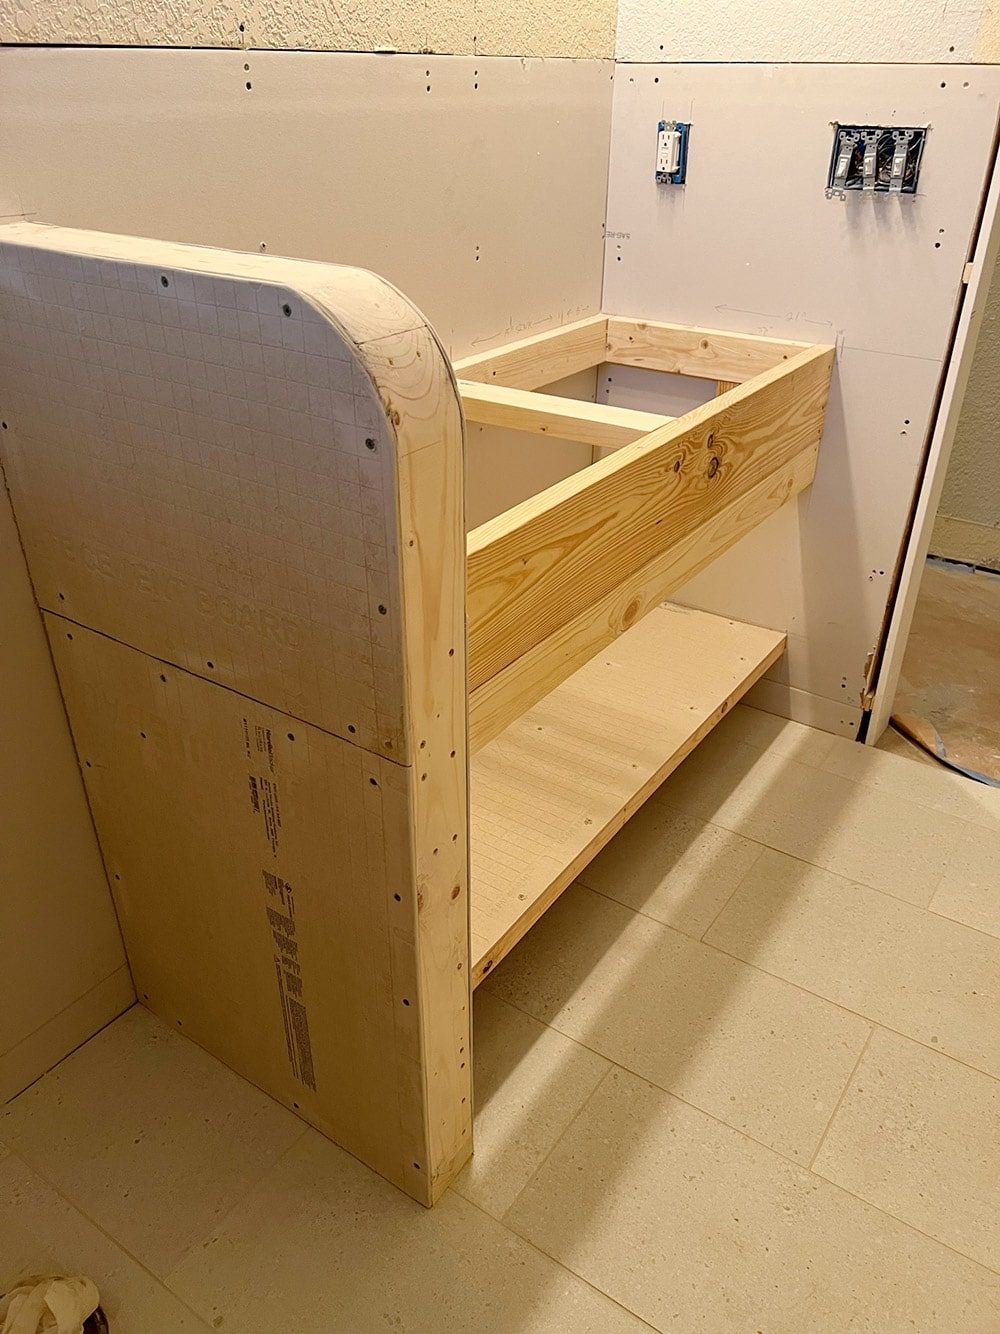
With a basic skeleton built, it was onto phase two of the framing. For the sides of the wall, we used 1/2″ cement board.
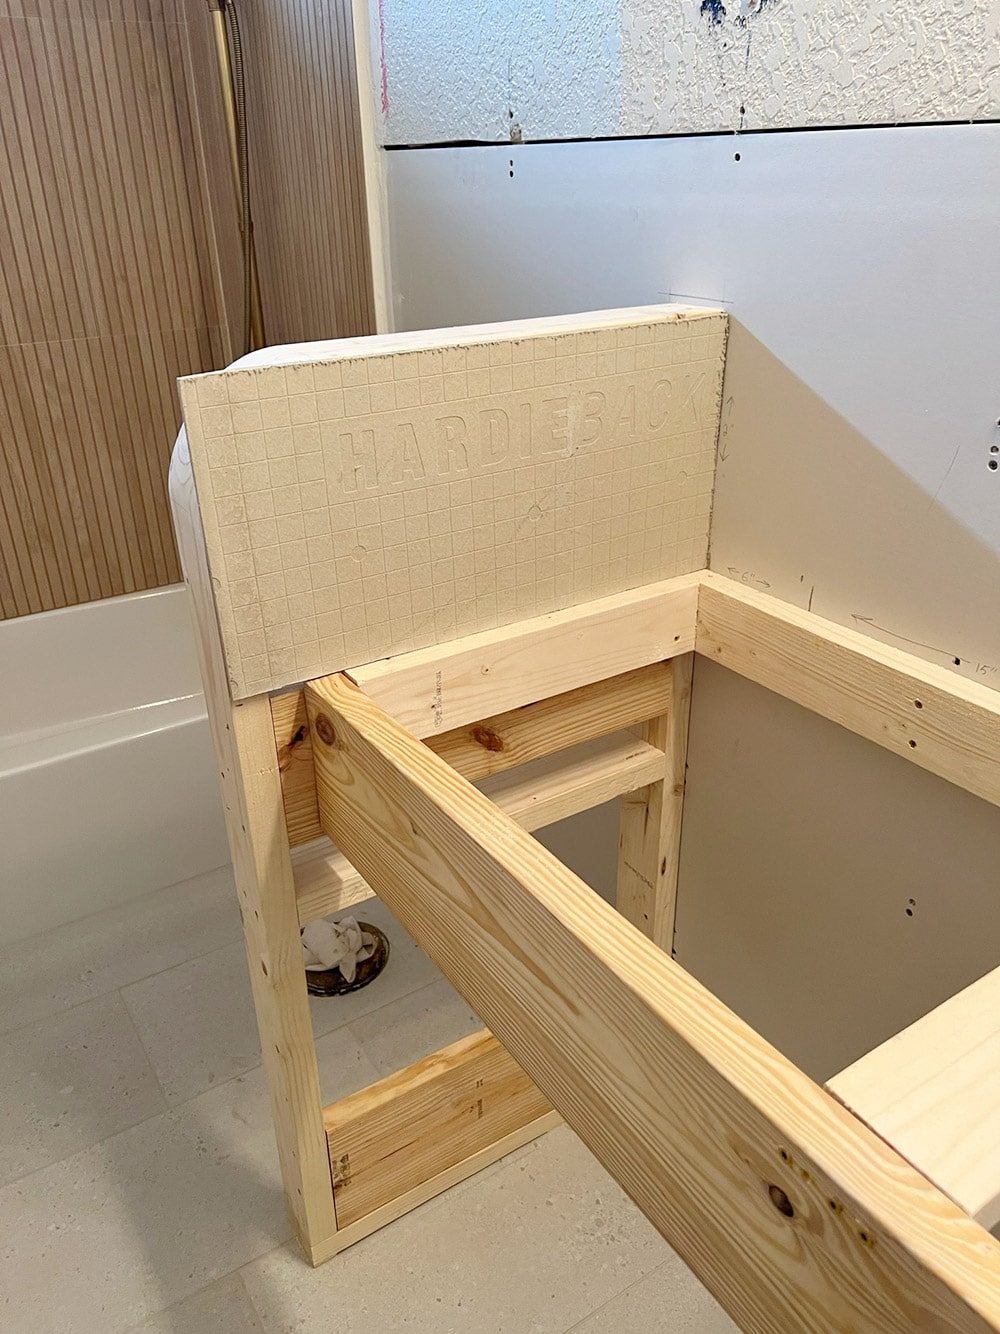
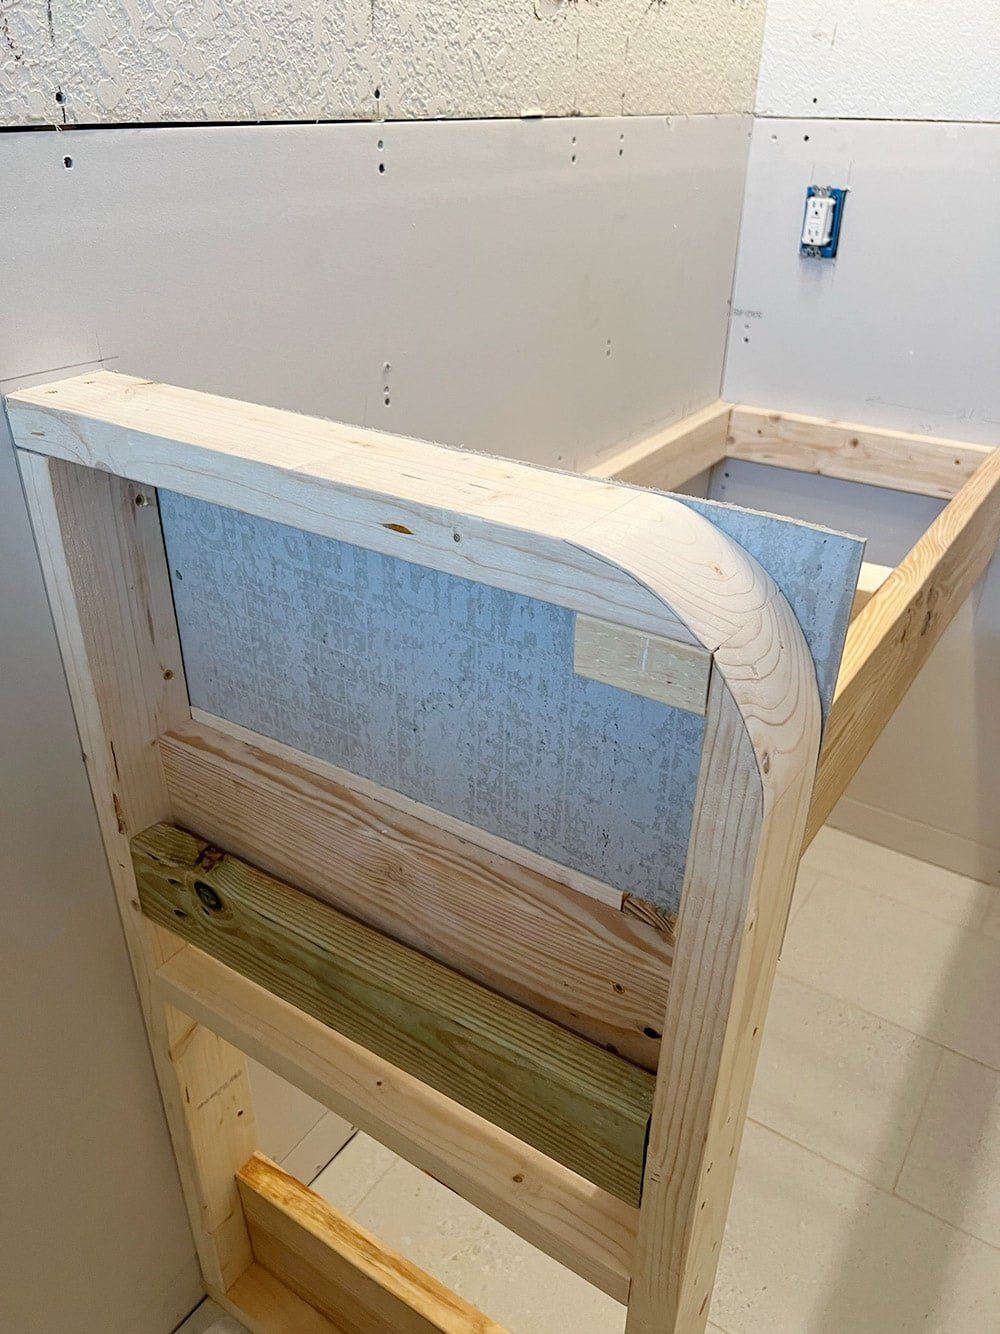
Each section was cut down to fit the wall (including the curve) using an angle grinder. Cutting cement board is a very dusty job, so make sure to wear safety glasses and a mask!
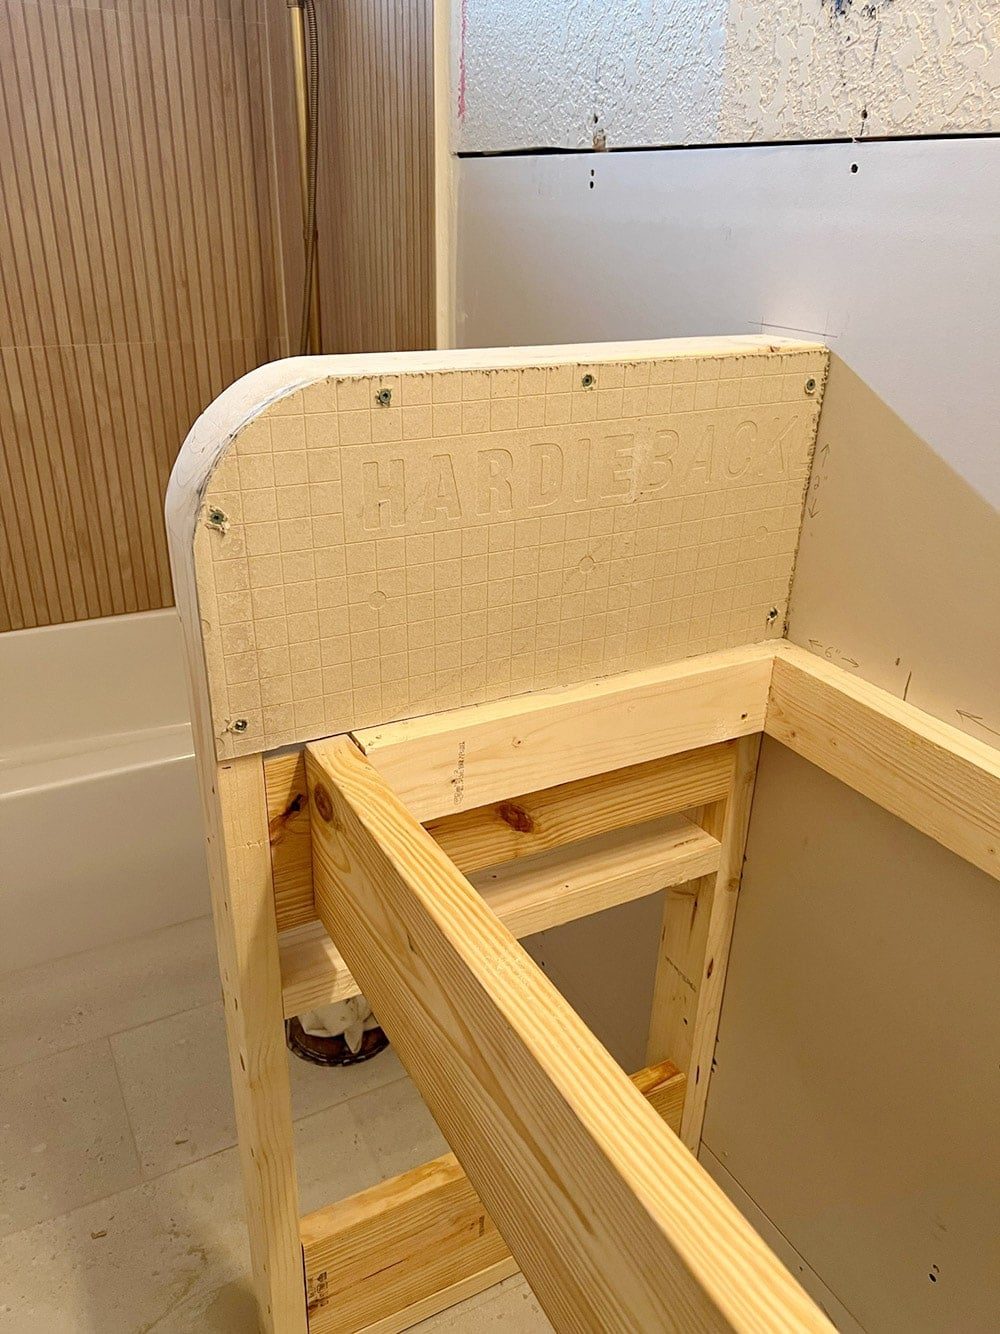
We decided to add a shelf near the bottom, constructed with 2×4's and pocket holes. Lucas also added an additional 2×4' along the front to make the apron taller.
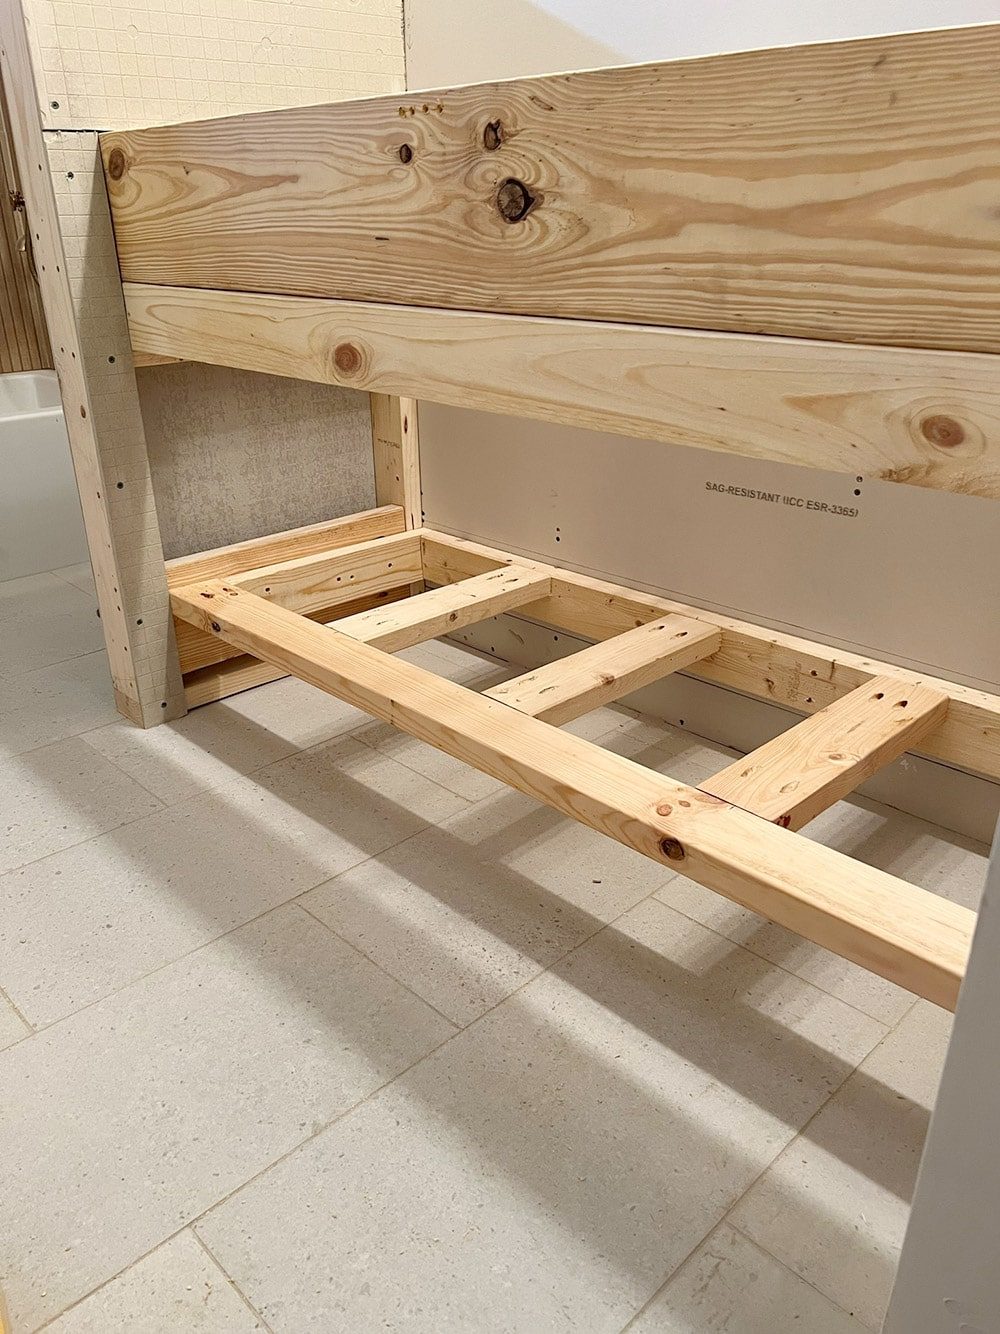
The shelf was topped with 1/2″ cement board, along with the remaining open areas of the wall.
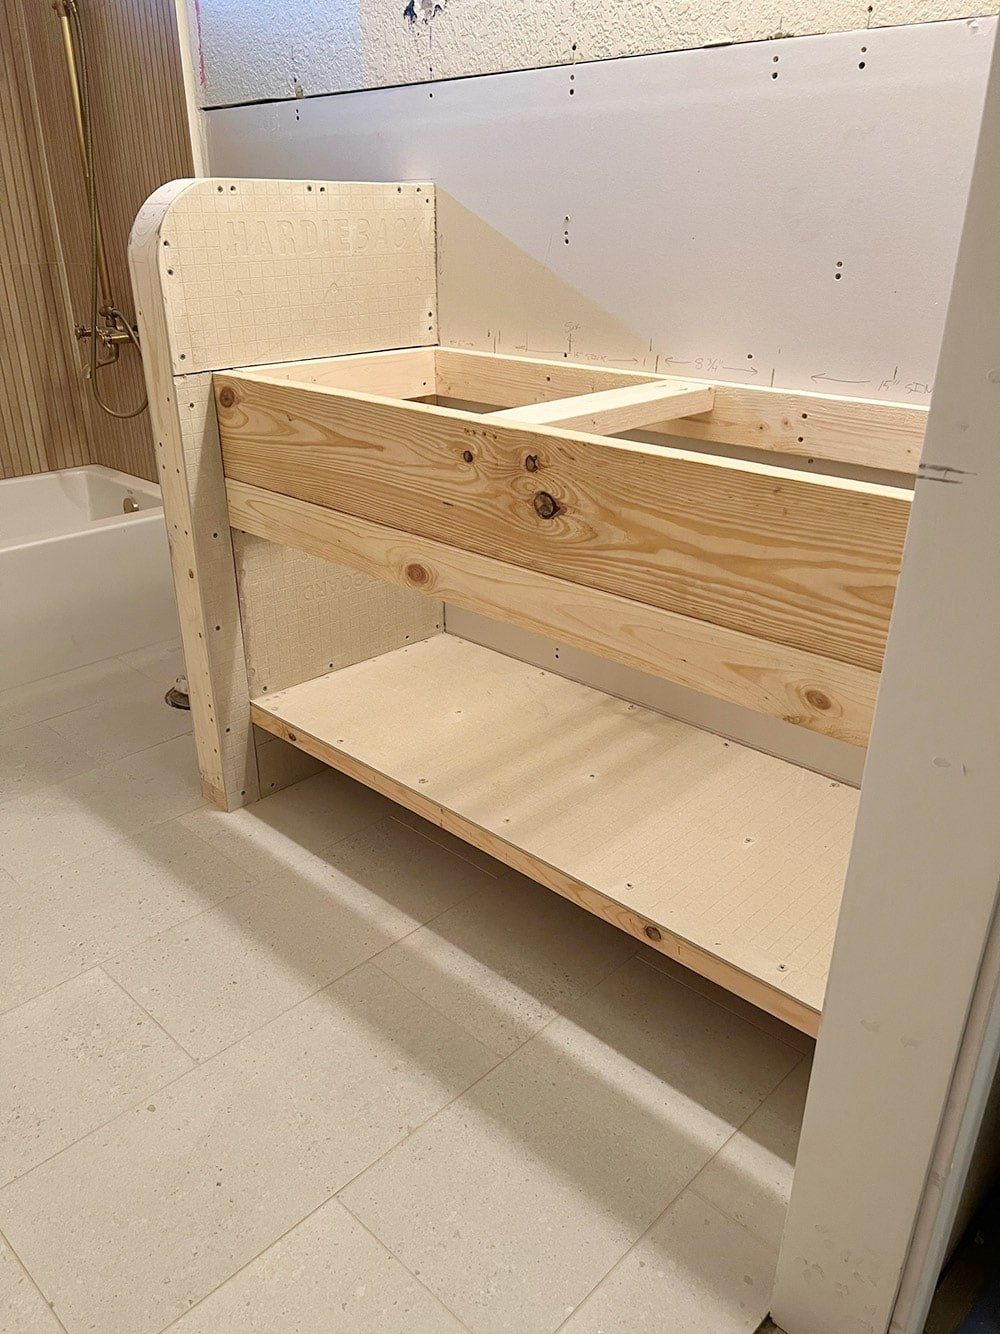
And the construction of the frame was complete!
Cement board tape was applied along all of the seams, including the 2×8 and 2×4' seam before coating everything in waterproofing membrane. We used our leftover Elastoshield for this, but you could also use the more popular version RedGard.
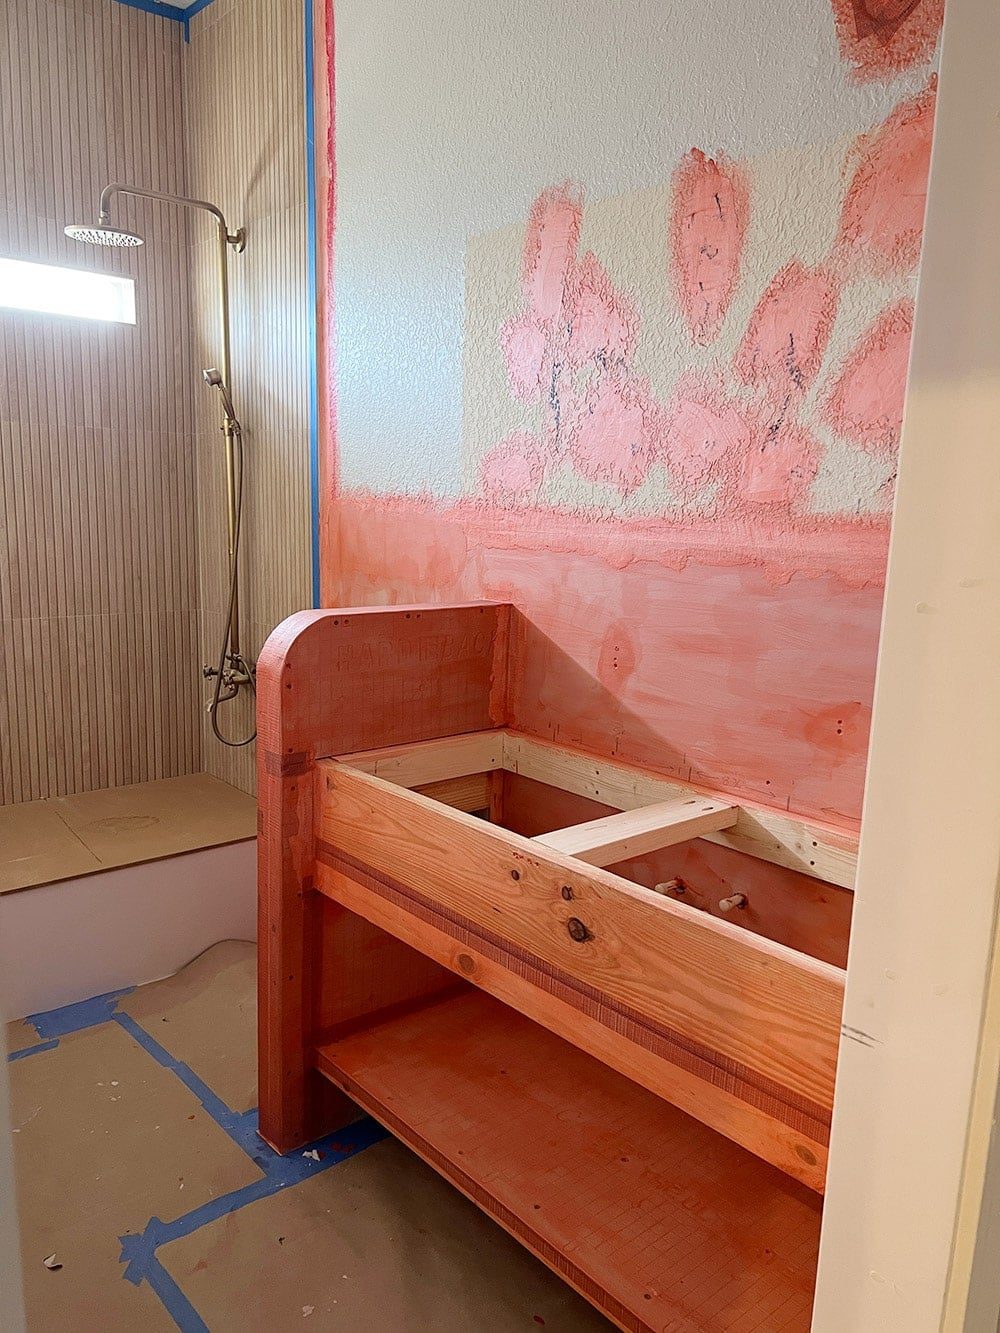
A waterproofing membrane is a rubbery coating applied with a roller or brush, that dries to a hard finish. It is required over wood and cement board before applying microcement, and protects the material from moisture.
Step 3: Install countertop
For the countertop, I chose Hanstone matte river washed gray quartz in Storm, and found a local fabricator to create integrated sinks. Labor cost a pretty penny (over $2k) so you certainly do not have to go this route—I just had my heart set on it!

If you are more budget-minded, you should be able to find an inexpensive slab or remnant, and have two undermount sinks installed for well under $1k total.
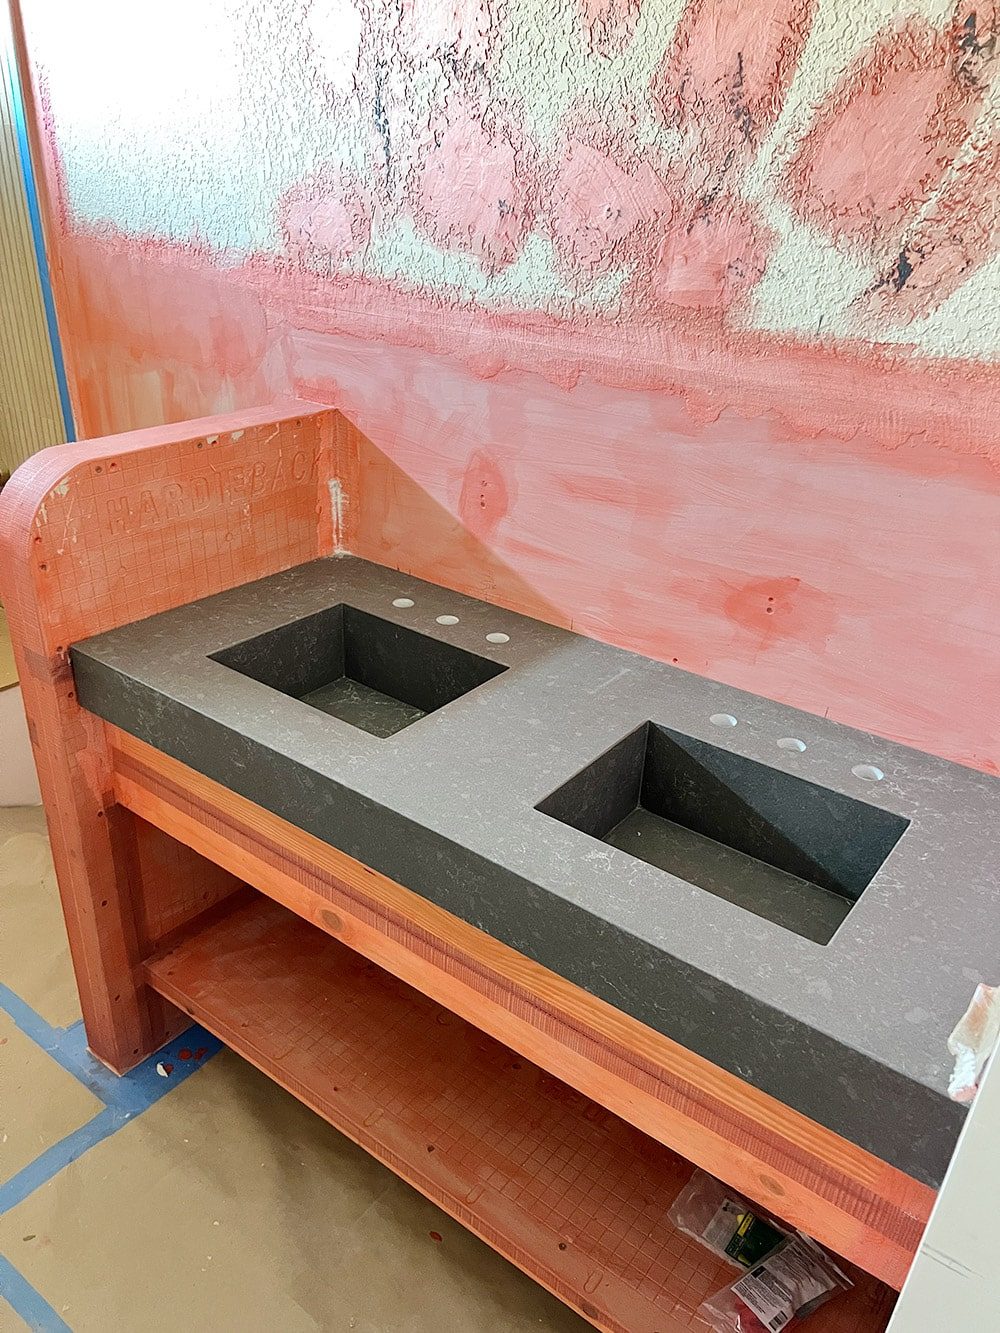
We opted to have the counter installed before microcement, knowing that it would not be a well suited fit (it never is!) and we could fill in any uneven gaps with the microcement.
Step 4: Apply microcement
Here is where the magic happens! If you are not familiar with microcement, make sure to look at my DIY Microcement Bathroompost for everything you need to know. We were sold after our first experience with it, and decided it would be the well suited cost-effective material to use for this built-in minimalist vanity.

This time, we used untinted Microtek microcementwhich dries to an off-white. The entire bathroom was covered in two coats over the course of two days—walls, ceiling and vanity.
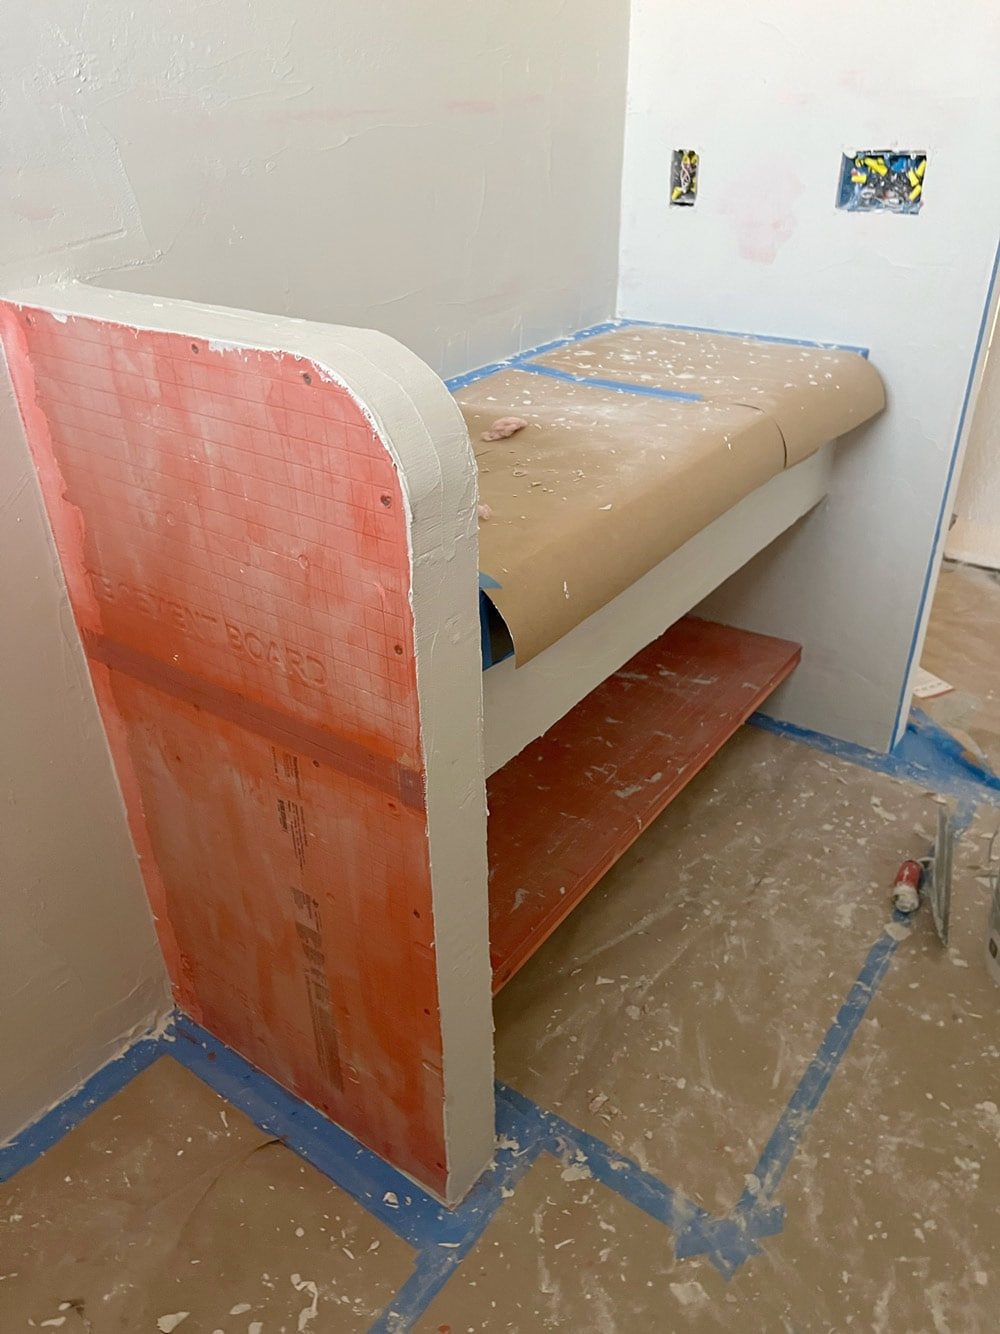
It is applied with a trowel, and can be smoothed down depending on your preference with various tools like squeeges and sponges.

There is a bit of a learning curve and it takes some practice to get your desired technique down. A concrete sanding stone is key to making it look finished—especially around tricky corners and edges.
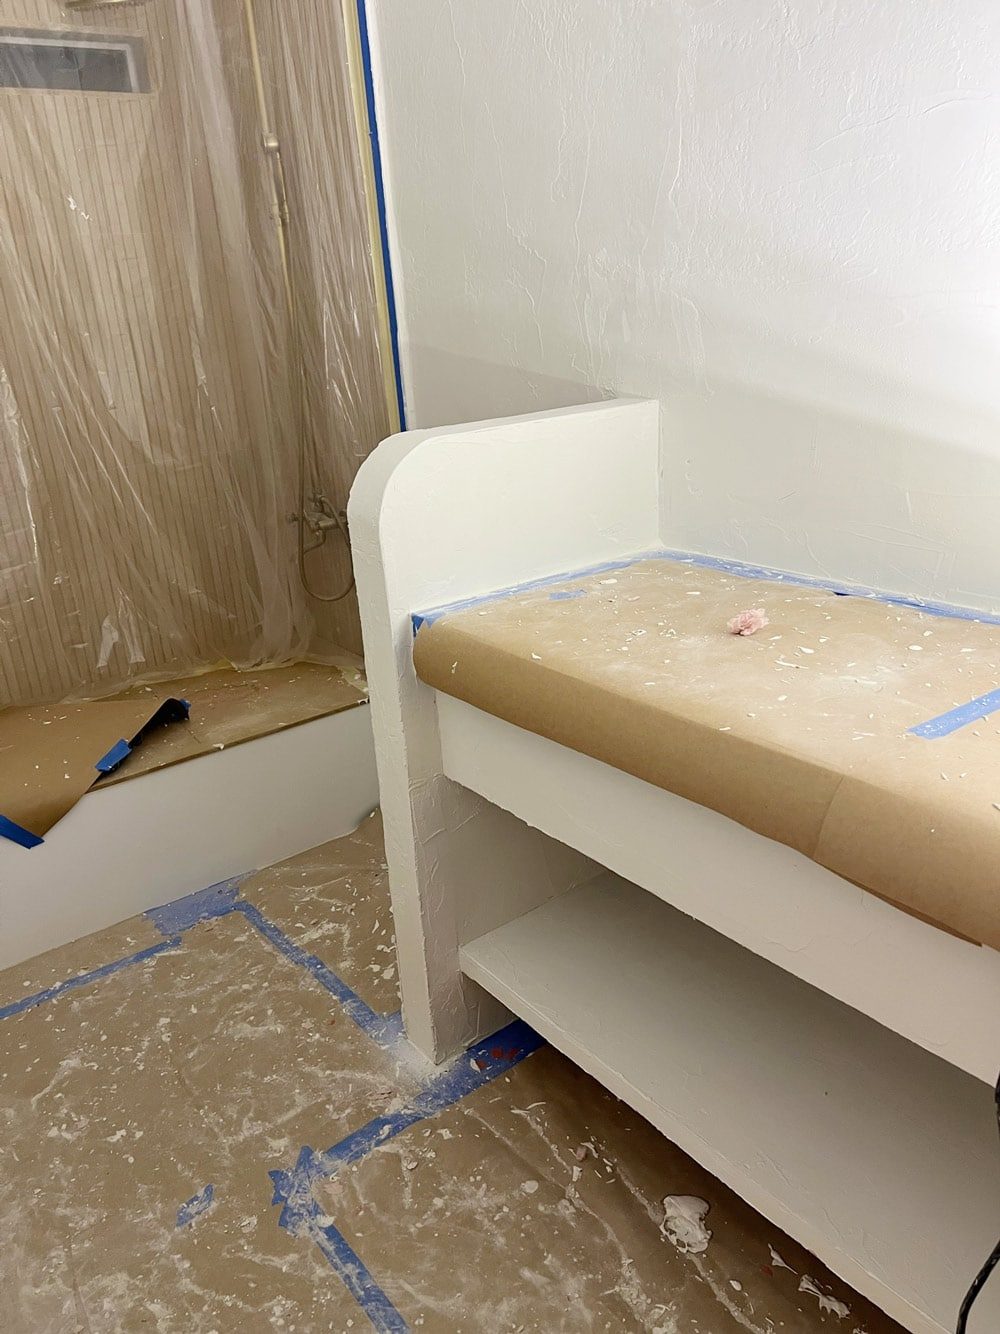
But the result is well worth it! Note that you could also finish the vanity with drywall, mud and paint rather than microcement. You could even experiment with venetian plaster as an alternative, but microcement is an ideal option for wet areas like bathrooms.
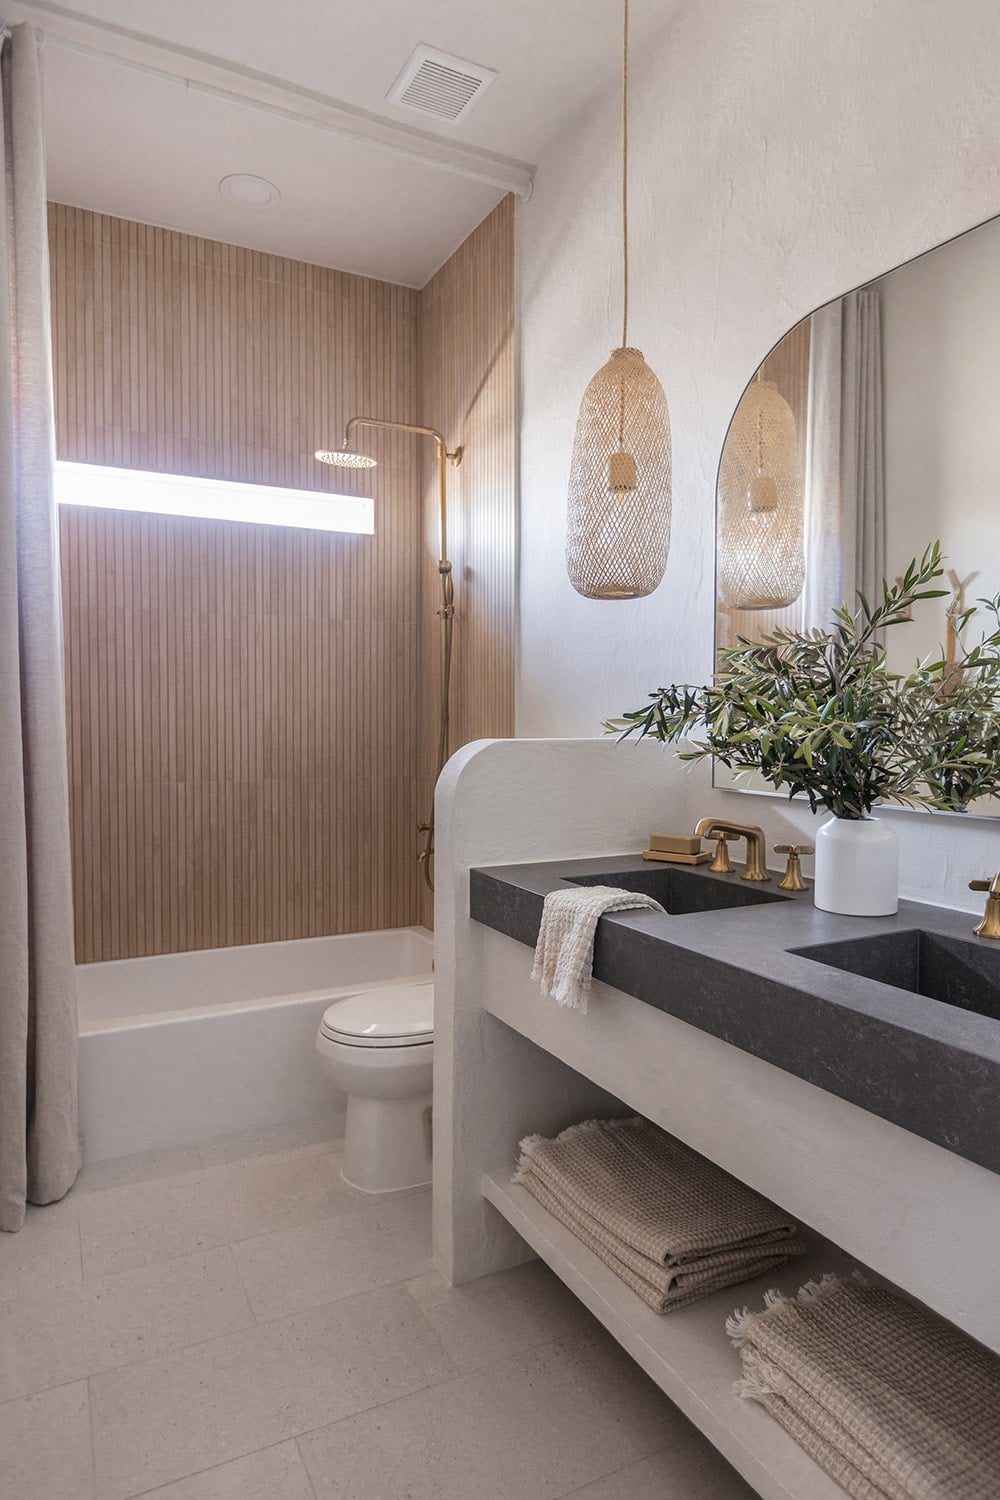
To protect the finish, you will want to use a matte sealer over the entire surface (we coated our walls as well).
Total cost
The cost will vary depending on the size of your vanity, and does not include the countertop as that will entirely depend on what you choose. Here is a breakdown of what we used:
| Lumber | $30 |
| Cement board, tape | $25 |
| Waterproofing membrane | $60 |
| Microcement | $35 |
| Sealer | $30 |
| Total | $180 |
We already had the lumber, waterproofing, some cement board and sealer leftover from previous projects so our actual total was around $50. Even with the cost of the custom countertop fabrication, this vanity cost less than a typical double vanity this size—and we have something completely one-of-a-kind and high end!
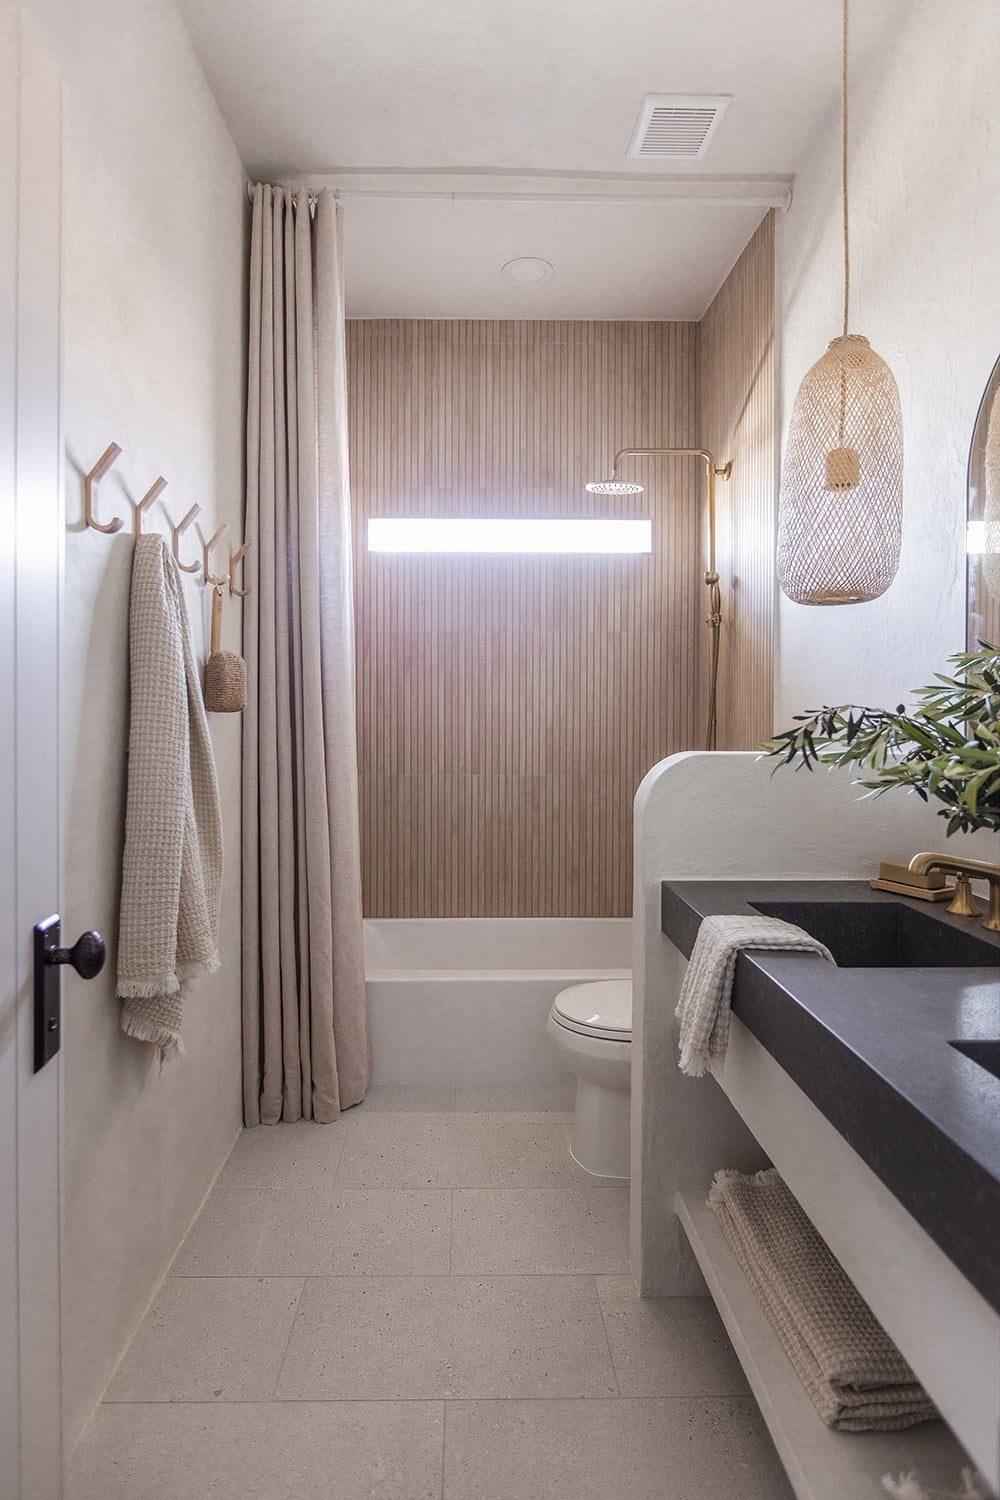
If you are looking for a cost-effective alternative to a standard bathroom vanity and love the clean, minimalistic aesthetic, I would highly recommend this as an option. Let me know if you enjoyed this project or if you have any questions about the build. Happy to answer in the comments or over on my Instagram!
Next week, I'll be sharing my top free online vintage art sources by popular demand. It is going to be packed with helpful info, so stay tuned!