DIY Fluted Dresser
The dresser is done! So many of you have been following this project from the beginning on my Instagram stories, and now the wait is over. For those of you who are just…
The dresser is done!

So many of you have been following this project from the beginning on my Instagram stories, and now the wait is over. For those of you who are just joining, it all started with this inspiration…

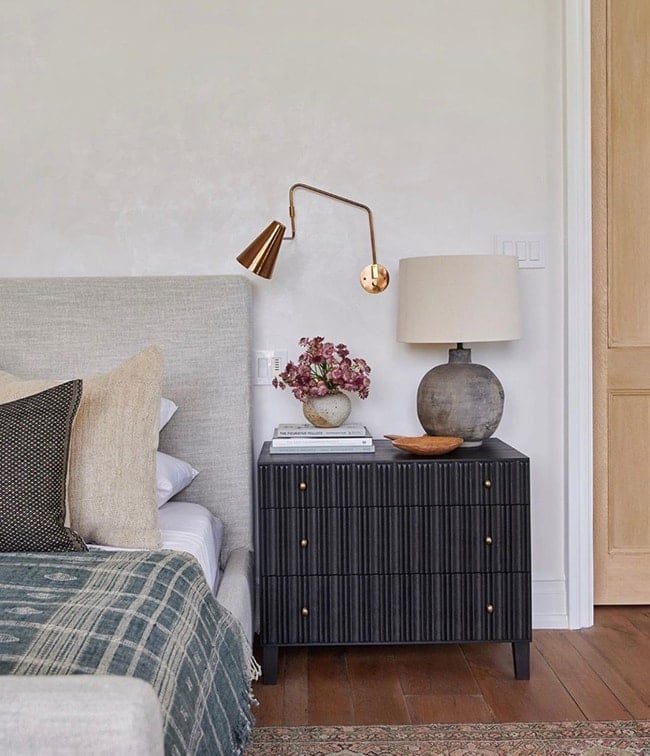
I have been noticing this fluted/reeded furniture trend in high-end design for a while and I am here for it. However, I am not here for the insane price tag. Like $2700 for this dresser(It helps to keep you McGee and Co, but jeeeez!) and $1950 for this chest. These pieces are not out there in the mainstream market so they are ultra expensive and exclusive.
Until now…*dun dun dunnnnn*
On my latest quest to get the look for less, I went dresser hunting at my favorite place to shop: Facebook Marketplace, of course (you already know the deal if you've read this post). I was looking for a solid wood chest with full overlay flat drawer fronts, with the goal of recreating my inspiration photo:
Lucky for me (or thanks to my sleuth skills) this shabby little Ikea Tarva dresser popped up, and it was well suited in all its' sloppily-stained glory:
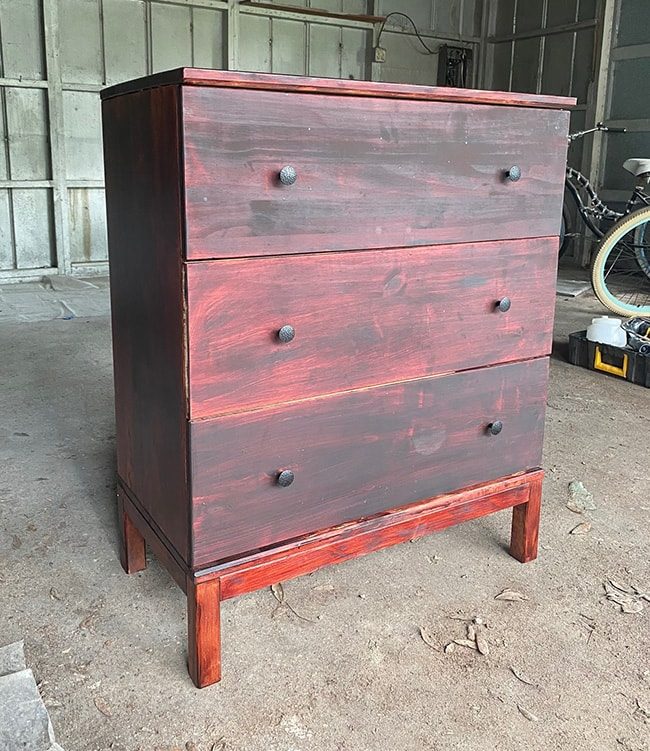
The asking price was $40 but they accepted my offer of $30, and that afternoon Miss Tarva was home safe in my garage, ready for her Extreme Makeover. Here is what you will need for this project:
Materials
- A dresser with a flat front
- Fluted trim
- Strong adhesive
- Caulk
- Paint
- Varnish
Tools
- Miter saw
- Table saw
- Drill
- Electric sander
- Clamps
- Velour roller(or sprayer)
- Paint brush (or sprayer)
I have been around plenty of trim in my day, and knew there was a variety of fluted trim that could create the look I was after. I reached out to my friends at Ekena Millwork (I use them for all my fancy trim projects) and requested three different products to try out:
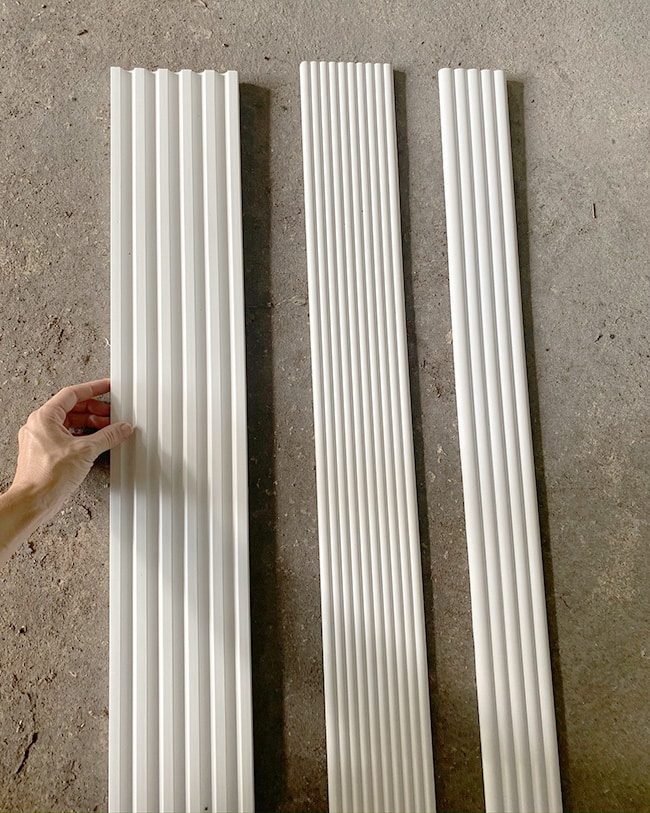
Any of these could have worked, but the left was a little thicker than I wanted, and the smaller pattern on the middle was a bit too subtle. The right oneseemed well suited!

The trim comes in 94.5″ lengths and each drawer required almost exactly one piece. Three pieces at $16/ea = $48 in materials, not too bad. A couple of you suggested using tambour panels (which is probably what furniture makers use) but they are particularly expensive! If you know of an affordable source for these, please do share.
Step 1: Sand
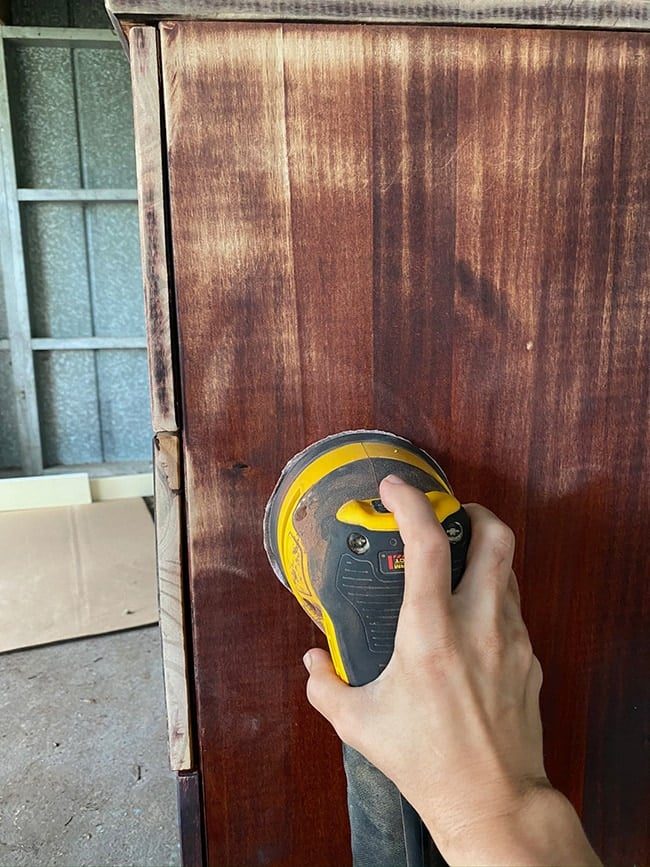
This is my least favorite part of furniture refinishing, but an important step for best results. The furniture paint I am using is technically “no-prep” which means no sanding, however paint always adheres better to bare wood, so I think it is worth taking the extra time. I used 80 grit paper on my orbital sanderand spent maybe 15-20 minutes roughing up the surface.

I did not need to eliminate the stain completely—just enough to remove the shiny varnish layer on the surface. If your piece is painted, you can use a paint stripper (I like Citristrip)… or just say screw it and paint right over with a good furniture paint. I did that with our living room buffet and powder bath vanity and they have held up well so far. Any experienced furniture refinishers care to weigh in on the best practices?
Step 2: Cut the trim
Next it is time to start cutting. This measurement had to be precise—our drawer height was 9 7⁄8” (fortunately all three drawers were all the same!)
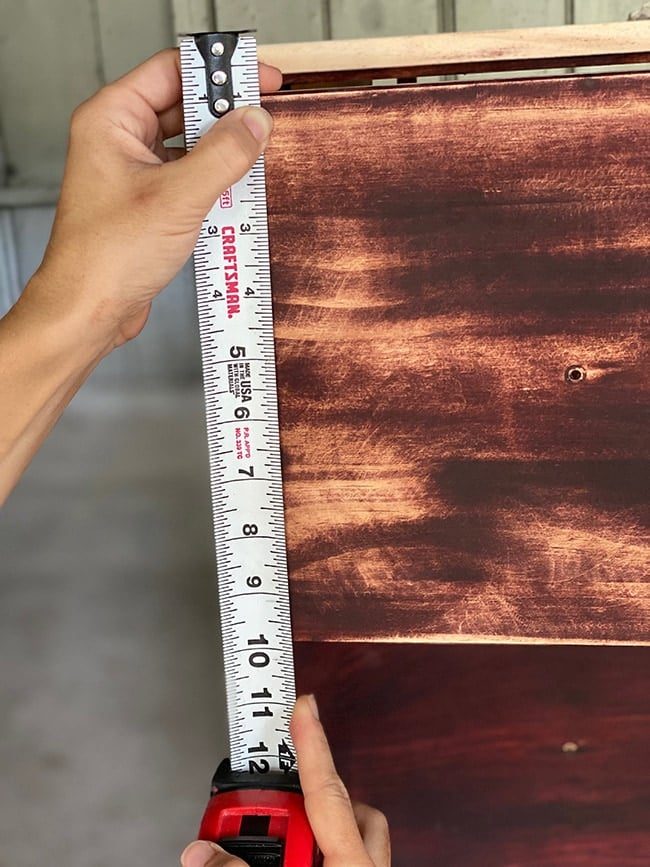
Most importantly, each piece had to be cut to exactly the same size. Here is a neat trick to do this: make a stop block on your miter saw, using a scrap piece of wood and a clamp (the clamp came with our saw):
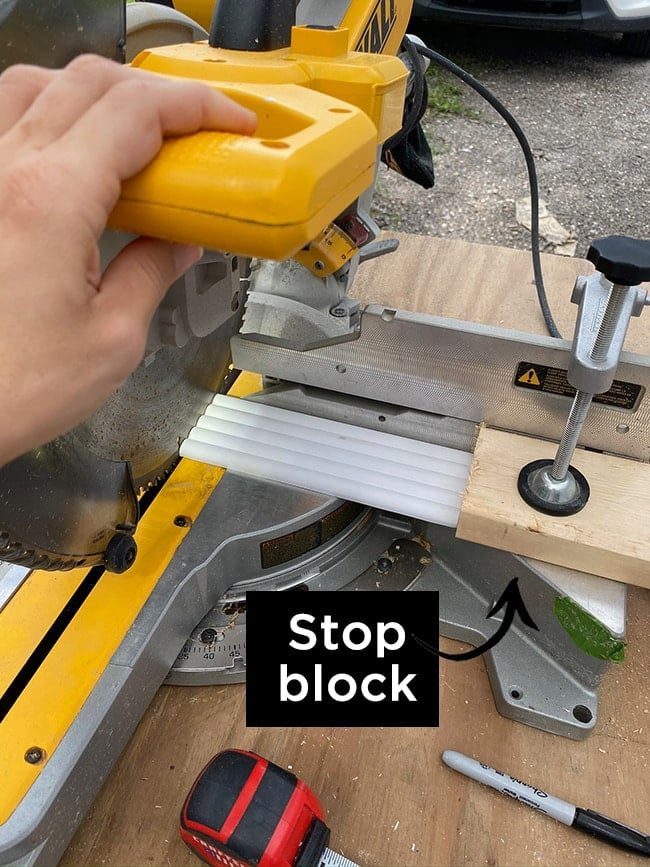
This eliminates the need to measure each time and will ensure they are all exactly the same length—pretty cool, huh? It only took a few minutes to cut them all (each drawer required 10 cuts/1 full piece of trim).

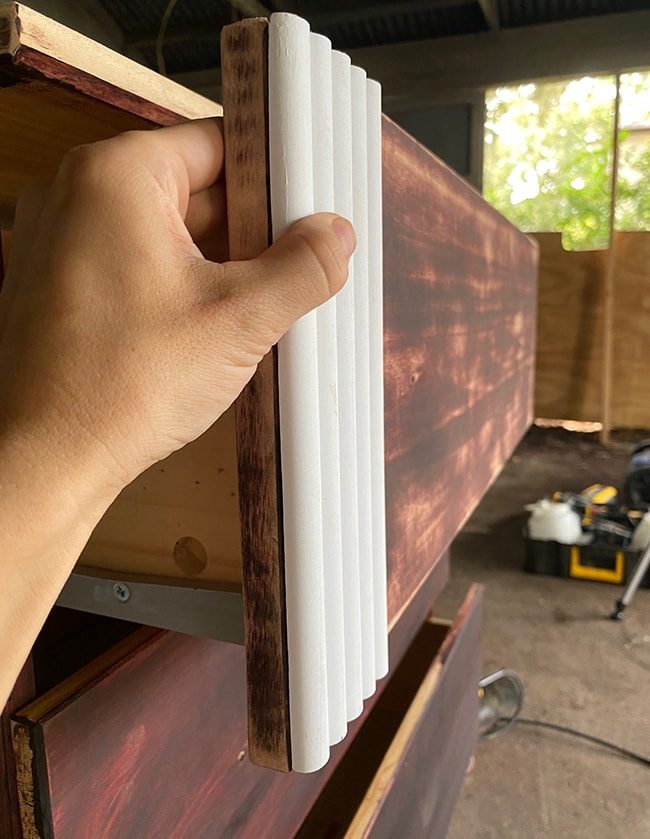
This is how it looks from the side:
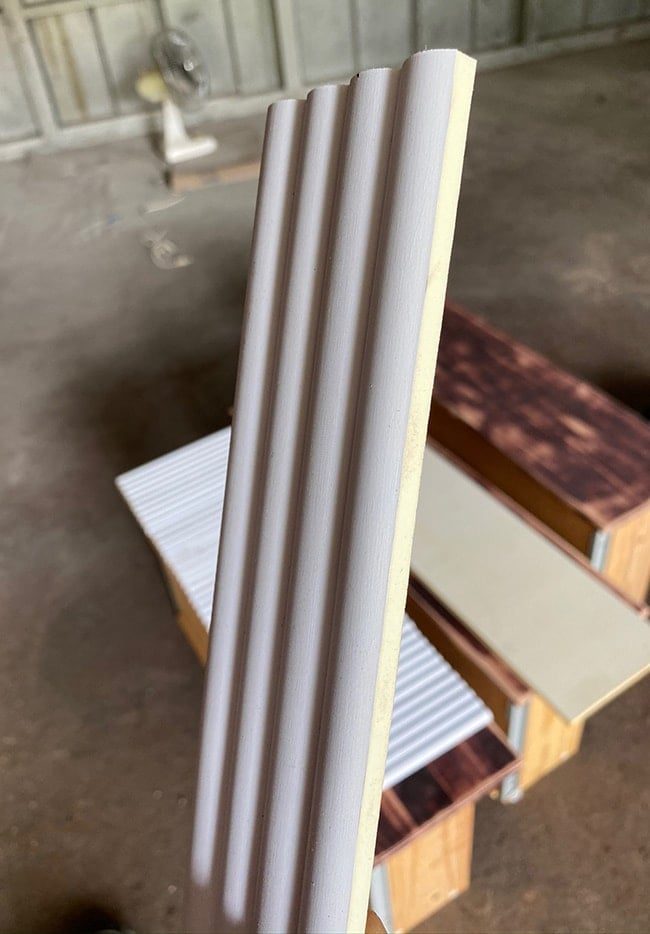
Step 3: Rip down the end piece
Chances are the last piece is not going to line up exactly with the edge of your drawer. In our case, it worked out surprisingly well with the edge of the drawer lining up with the last groove:

To get a nice even cut, we ran it through our table saw…

And voila!
Step 4: Glue and clamp the trim
Now we are getting to the fun part. Because this trim is made of urethane (essentially hardened foam) it is particularly lightweight and can be glued on—no nails required! You should be able to use any heavy duty glue, and we opted for Liquid Nails since we always have it on hand:

We applied it generously to make sure the trim would not ever budge, and lined each piece up one at a time.

Liquid nails takes hours to harden completely, so you can go back and make adjustments after getting everything in place.

We cut a piece of scrap plywood to clamp everything down securely without damaging the trim, and bought this pack of spring clamps in advance, knowing we'd need a lot for this project.
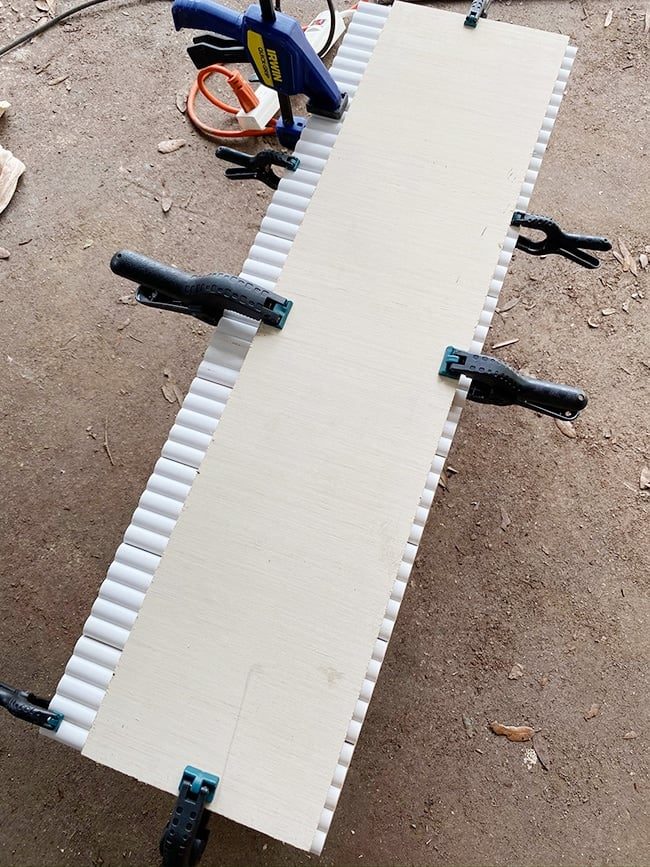
The plywood helped to keep everything in place, but the edges of the trim were still lifting up a bit so we had to use small clamps directly on all of the problem areas. We ended up running out of clamps and had to get creative with whatever tools we had on hand…
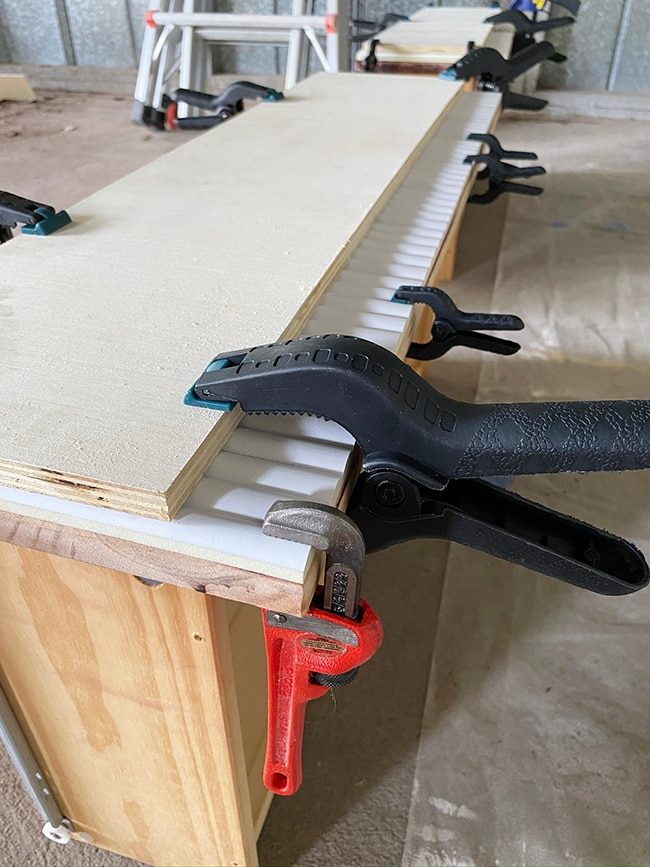
I realized later that chip clips would also be a good solution!
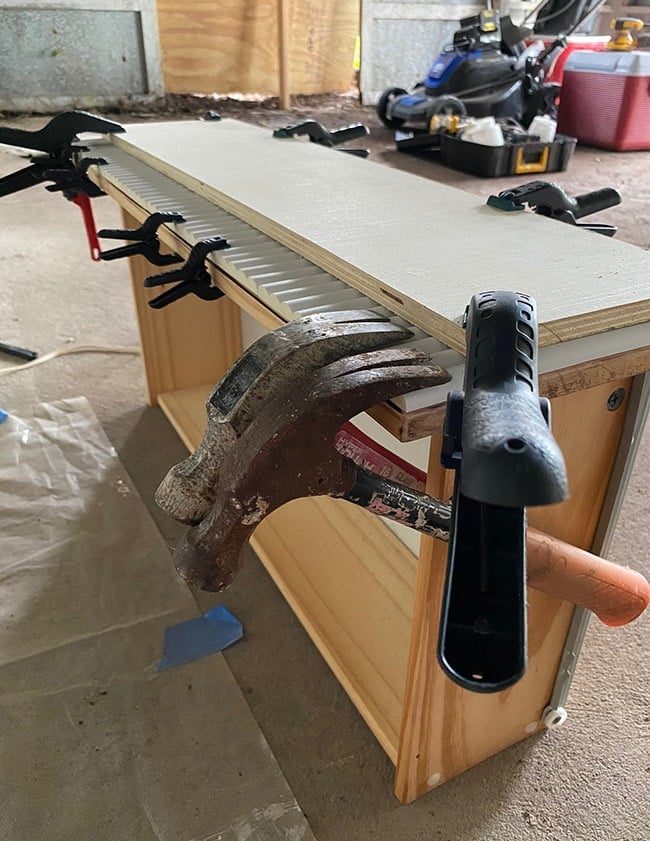
If you do this project, make sure to have enough clamps for each piece of trim just in case. If the trim does not line up evenly, it will be noticeable in the end.
While the trim was drying, we flipped the dresser upside down to remove the legs. This part is completely optional, but The aim was to be able to use this as a night stand, and it was too tall with the legs (36″).
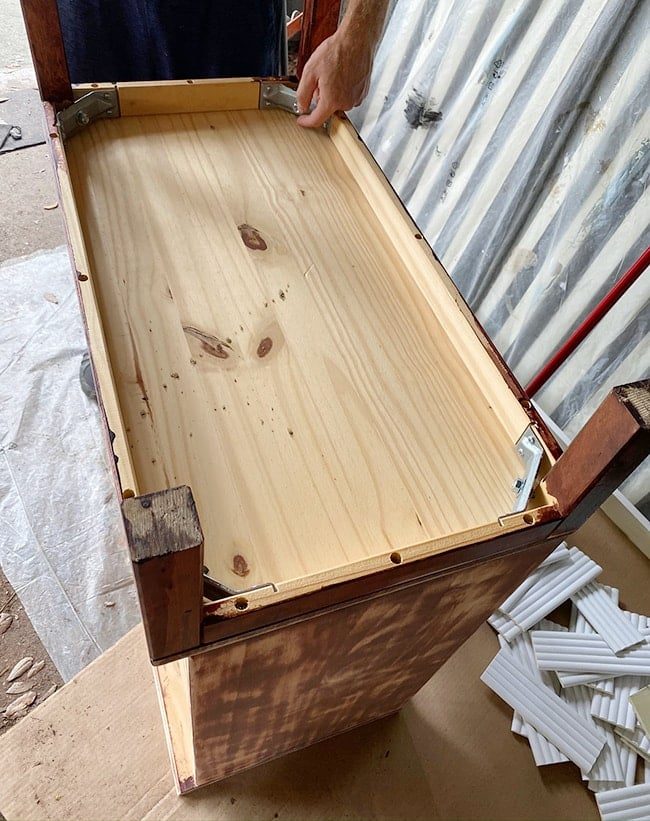
Fortunately, the legs were attached with brackets and easily removable. We picked up a set of these nail-on furniture glides to protect the bottom of the dresser and the floor:

You simply drill a small pilot hole then nail them in. Easy peasy!

Then it was time to address the hardware. A reader pointed out that these are actually not the original Tarva knobs (which are wood) but these $1 knobs from Home Depot. I liked them, but wanted gold instead of black.

Unfussy fix: I gave them a quick makeover using my Rub n Buff technique in European Gold (I did not spray paint them first since they were already black, we will see how they hold up…)

If you have the original wood Tarva knobs, you can use this same technique! Just make sure to spray paint them black first (look at my Rub n buff tutorial above).
Step 5: Drill hardware holes
We let the liquid nails dry overnight, then drilled through the existing hardware holes from the inside of each drawer. The problem was, the knob was hitting the drawer at an angle…

That was not going to work, so we used a large drill bit the same size as the knob to bore out a hole:
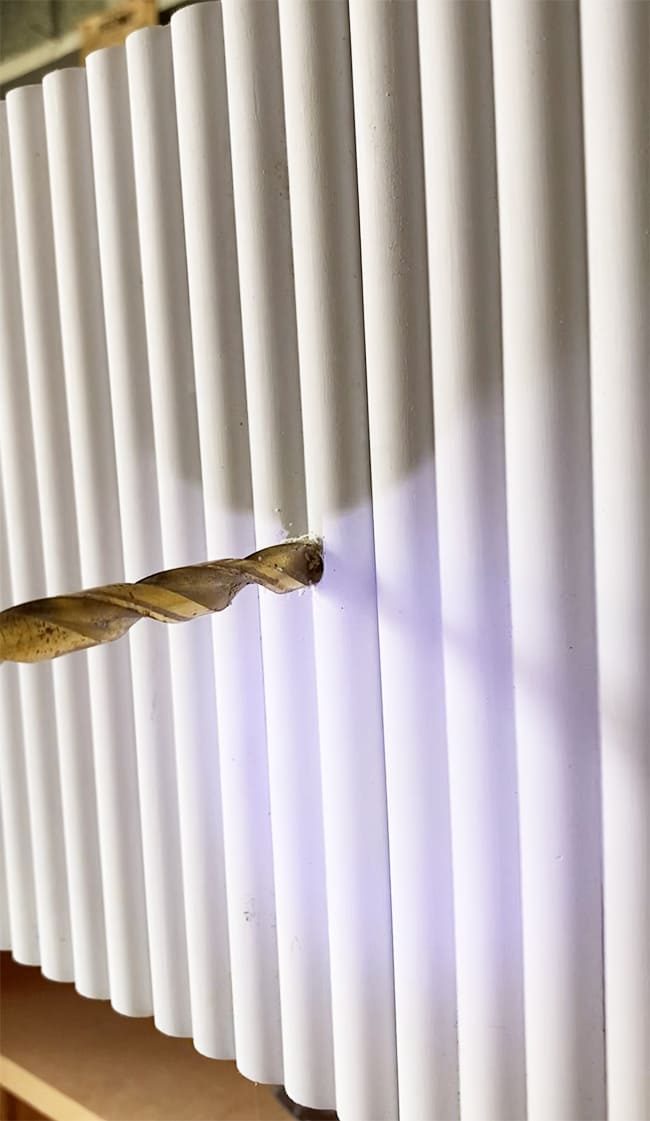
We drilled through just enough until there was a flat surface for the knob to sit against:

Step 6: Sand/clean the drawer fronts
On the right edge of each drawer, there was a small ridge where the table saw cut the trim. I wanted this edge to be rounded to match the left side, so I gave it a quick pass by hand with 120 grit paper:

And then a 220 sanding sponge to smooth it down nicely. This is how it looks before and after:
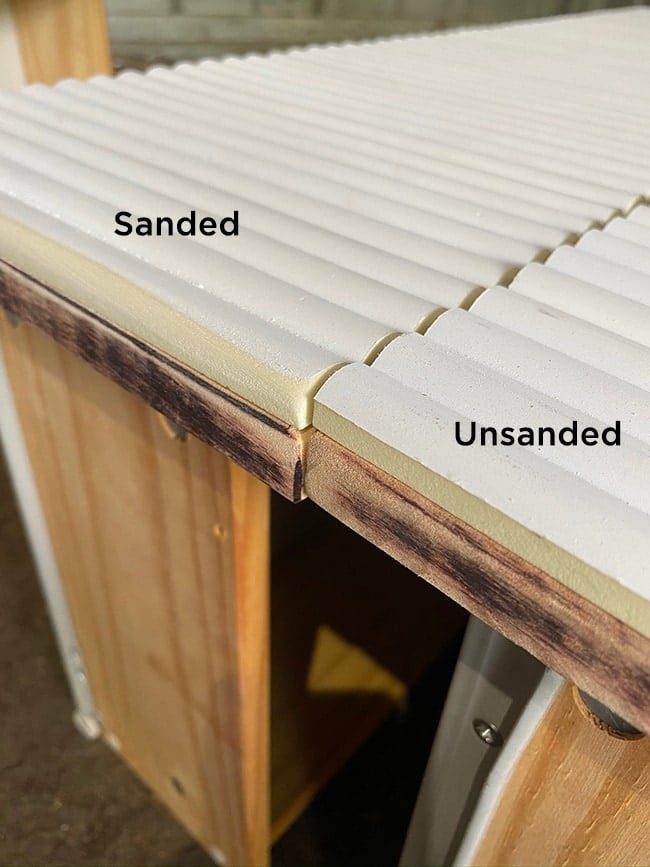
You can also take this time to sand down any imperfections you find on the surface. Make sure to thoroughly clean off all the dust before the next step, either with a dry paint brush or an air gun:

Step 7: Caulk the seams
There is a noticeable seam where the trim pieces meet:
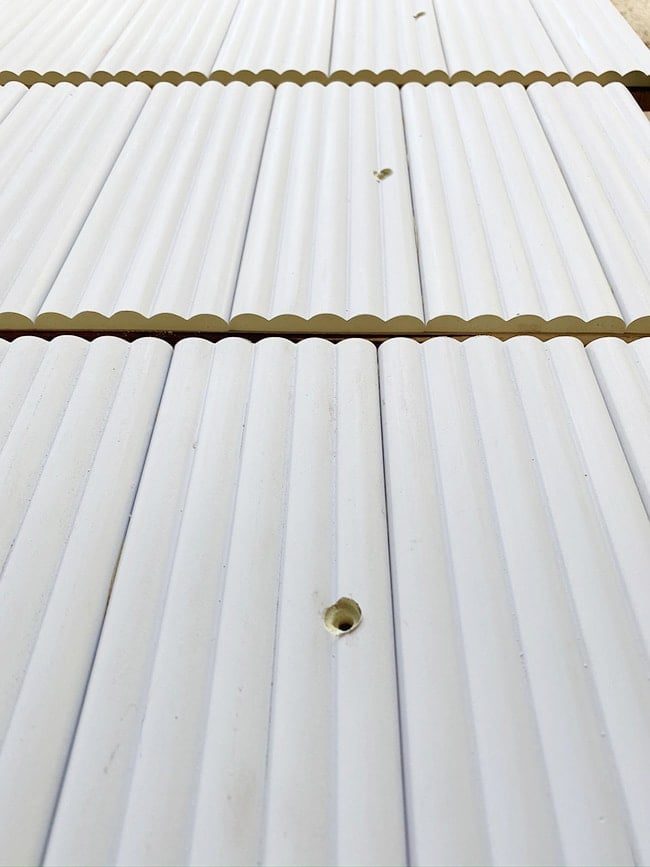
Paint alone will not fill this in, so you will need to run a bead of caulk down the groove. I do it the good old fashioned way with my finger and a wet sponge:

Magic!

Heads up: if you want the seams to be completely undetectable, make sure to fill them so they match the other grooves exactly. My grooves were a bit deeper because I did not use enough caulk, and it was noticeable after painting. It does not genuinely bother me—it looks like it was on purpose because the pattern is uniform (it kinda resembles my inspiration photo) but it is pretty tough to get every seam to match exactly. If you try it, let me know!
Once the caulk is completely dry (I would give it at least a few hours to be safe, even the fast-drying caulk) it is time to paint!
Step 8: Paint
There is all kinds of products you can use and techniques to do these next steps, so do not feel like you have to follow my steps exactly. I use Maison Blanche specialty furniture paints because It helps to keep the result, I always have their paint on hand and I am an affiliate. I do not use regular latex paint for these types of projects and would recommend a paint made for furniture (any chalk paint) or specialty paint made for cabinets (like SW Emerald or BM Advance). I do not have experience with any other chalk paints so I cannot give a different recommendation, unfortunately. If anyone else has a furniture paint they love, please share so I can pass the info along!
Tip: for a clean paint line, use painter's tape along the inside edges of the drawers:

For this project, I use Maison Blanche in Wrought Iron (which I end up using for 3 out of 4 furniture projects, I am addicted!)

I used a foam roller for a smooth and even application on the flat surfaces, like the dresser frame:

And my favorite angled paint brushon the drawer fronts. Smooth, even coats are key:

Coat 1:

The wood dresser soaked the paint right up and provided full coverage after 2 coats, but the coated urethane trim needed a few coats. Here is after one coat on the left and two on the right:
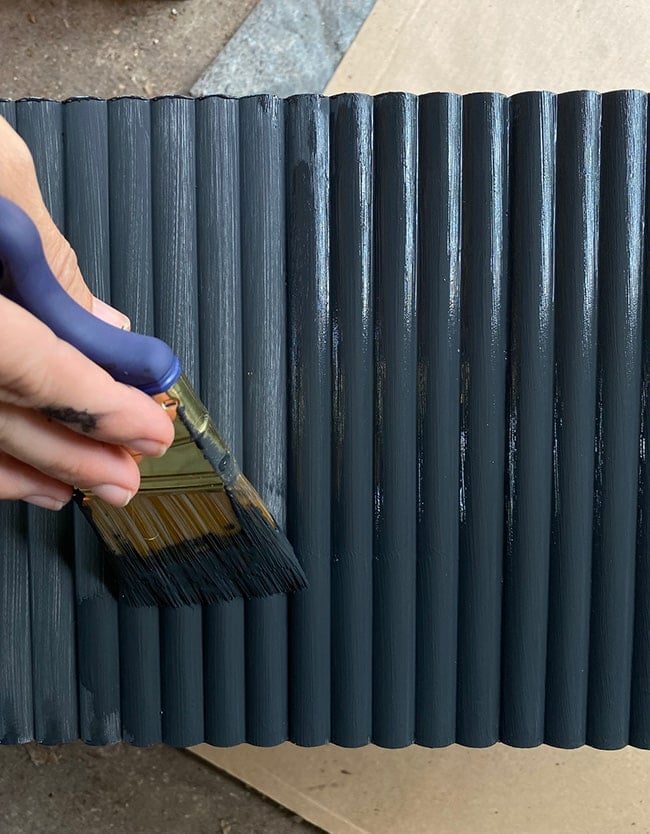
I thought two coats was all it needed, but when I came back the next morning I noticed a few light areas peeking through:

This is how two coats look after drying on the wood (so rich!)
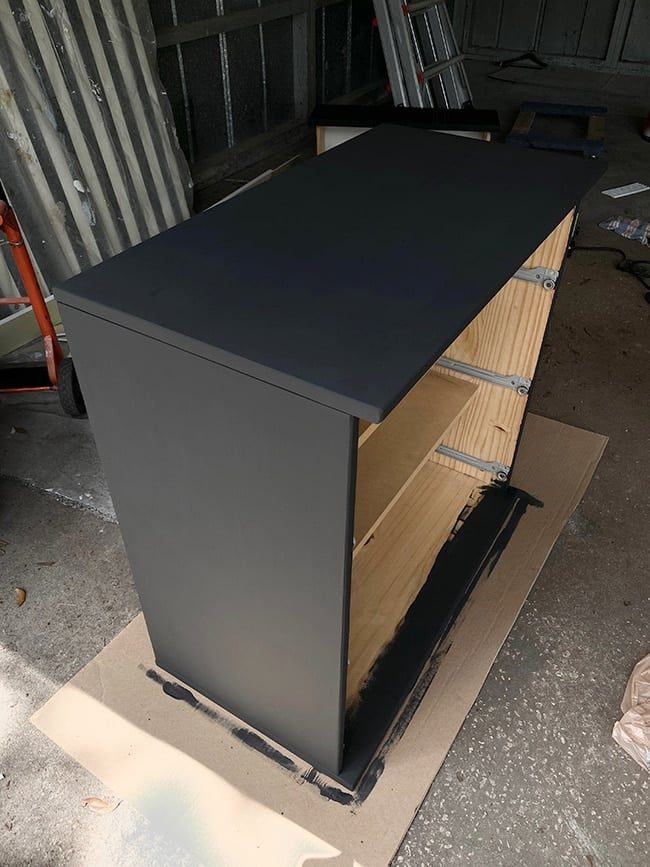
The paint dries fast, but you are supposed to wait at least 24 hours until applying varnish, so I waited patiently while they dried in the garage…

Step 9: Varnish
This is another step that you can do many different ways. I stick to brush-on water based varnish since that is what I have experience with, but if you have suggestions for something else to try, I am all ears!
For this project, I used Minwax Polycrylic sealer in satin. Normally It helps to keep the matte look on furniture, but for this dresser I wanted a slight sheen:

Before applying, I lightly sanded the dresser frame with my 220 sanding sponge to make the surface as smooth as possible. One reason chalk paint is preferred for furniture is because it offers a velvety smooth finish after sanding, something a latex paint cannot replicate.

I could have sanded the drawers to get the same finish, but the paint was pretty smooth already and I did not think it would make a noticeable difference after varnishing. Totally up to you! Here is the full instructions on the can:

After wiping the dresser down, the first coat went on nice and smooth with my foam roller (it goes on cloudy and dries clear):

After drying:
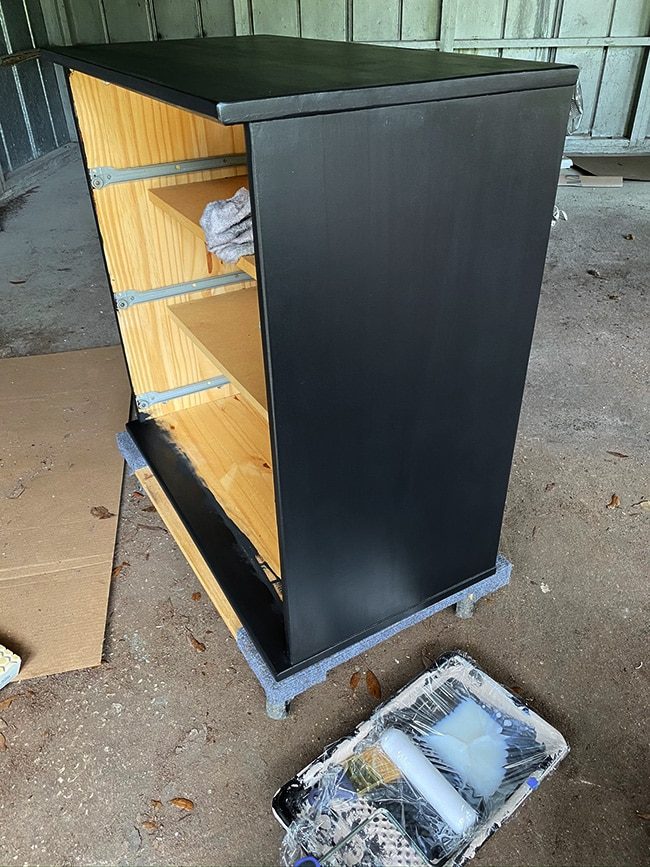
On the second coat, the air bubbles did not evaporate fully and I had to brush them out (I think the wood just absorbed them on the first coat). I then remembered having the same experience with a foam roller and varnish years ago, so for the third coat I stuck with my brush, which worked just as well. Skip the foam roller! Tip: an experienced reader told me she uses velour mini rollers from Sherwin Williams, which provide a smooth bubble-free finish. Give those a try!

Varnish not only protects the finish, it also deepens the paint color. The top drawer is before varnish and the bottom is after (one coat, still wet):
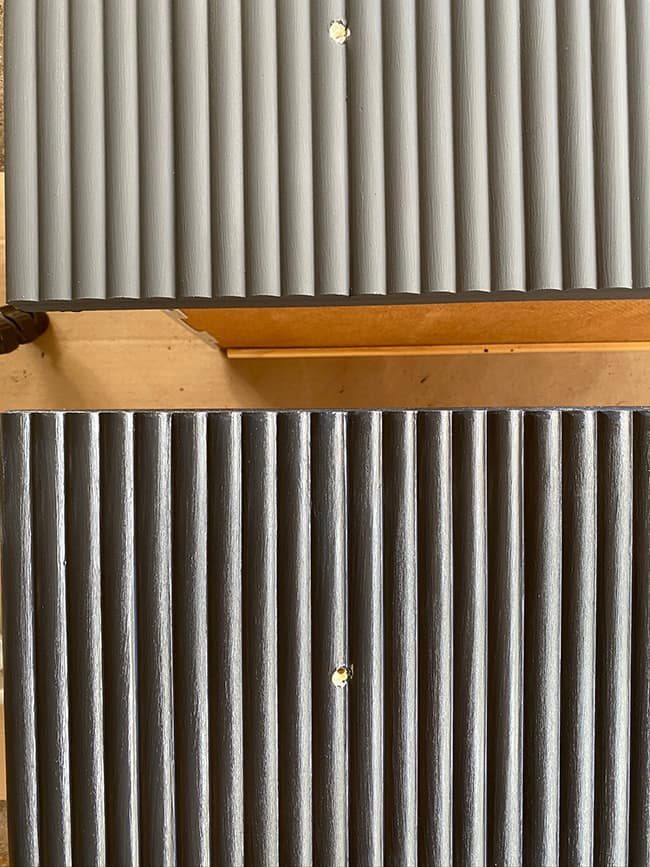
The most IMPORTANT advice I can give you: be careful of drips! They pop up everywhere, even after you think you got them all…
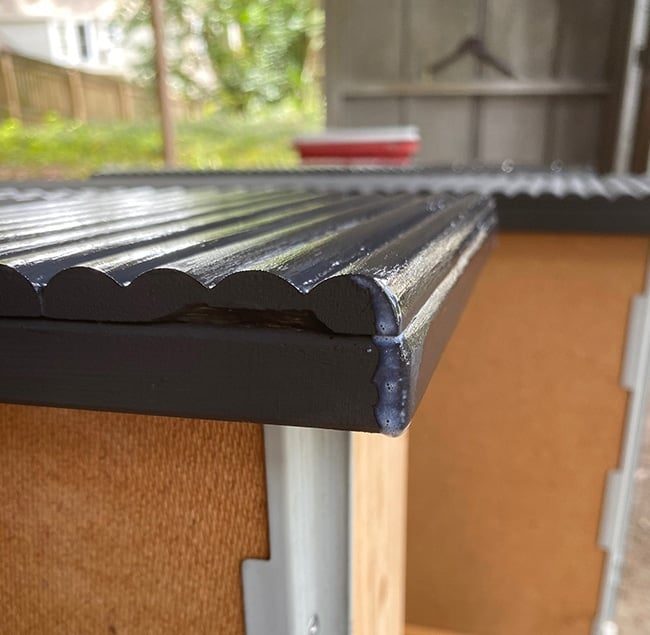
These will dry cloudy white and you cannot sand them down easily, and they start to harden in minutes. These drips are a refinisher's biggest enemy! Unfortunately, I missed a few…
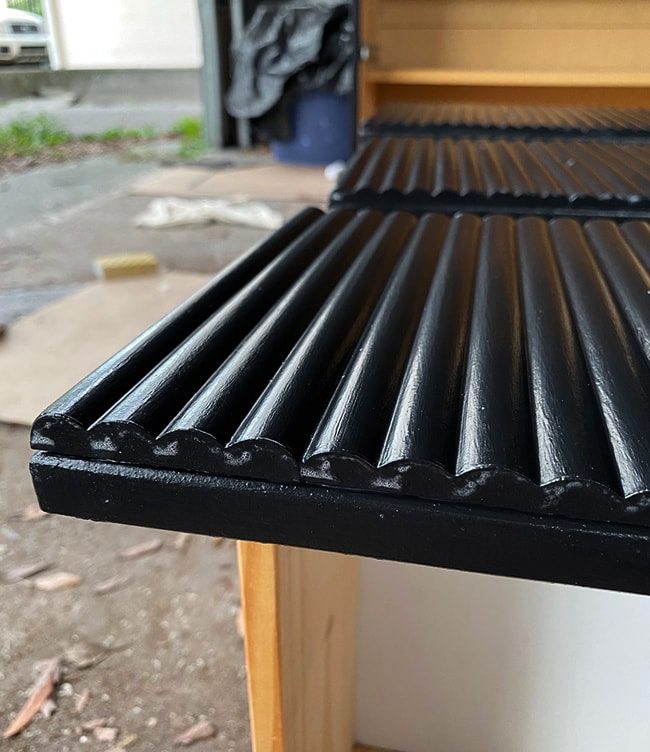
I am going to have to touch up these spots with paint and re-varnish them. Sneaky little buggers!
I gave everything three coats of varnish (waiting 2 hours and lightly sanding in between each coat, except on the drawers) and added a fourth coat only on the top of the dresser since that gets the most wear and tear. Even though the varnish is fully dry and ready to handle in 1-2 days, I find that it becomes more durable over time, and try to wait at least 1-2 weeks before regular use (like setting heavy objects on it). Maybe it is in my head, but that has been my experience. Anyone else?
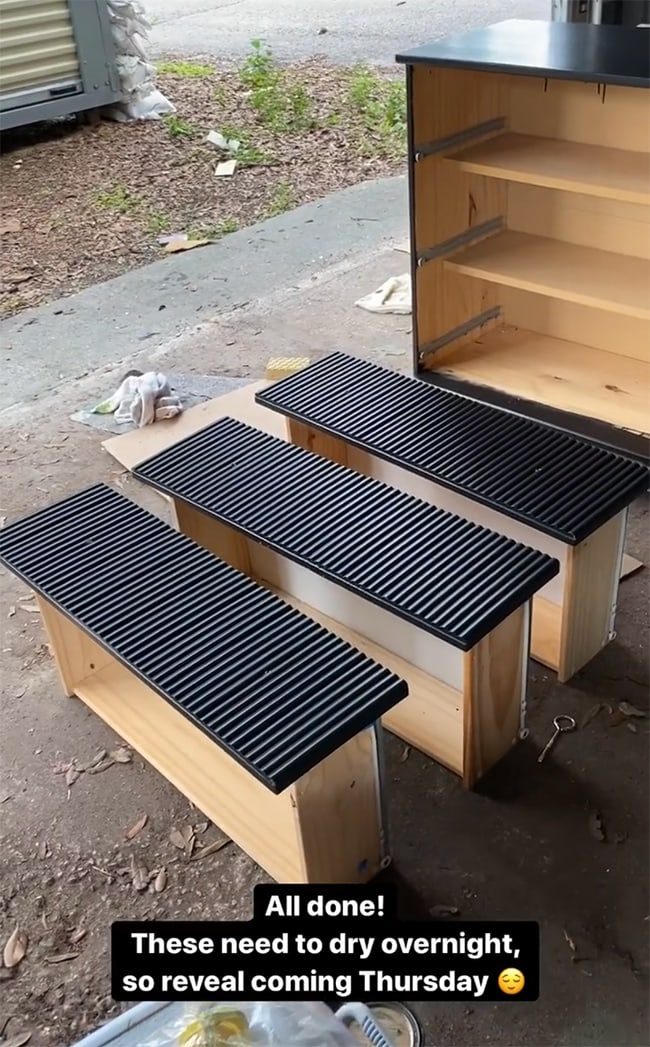
Okay, who is ready to see this finished fluted dresser already?! Here she is…

How about a comparison with my $2,109 inspo:
I like mine just as much 🙂

After four days of work (well, genuinely only maybe five hours of actual “work”… the rest was waiting) I feel like I created and birthed this baby from my own body.

So yes, I am a little attached… but I have to set this baby free. This was a #furnitureflipfridayproject and soon she'll be for sale.

Now the question is… what is she worth? The dresser cost me $30, the trim was $48 (it was sponsored but I am including it in the cost to be realistic) and $4 for the drawer glides. The paint and varnish I already had on hand. An $82 investment plus 5-ish hours over a weekend project—what do you think?

It is still an Ikea dresser under the façade, and the bottom two drawers do not glide as smoothly as they should.

But it sure is one of a kind! And it totally matches Susie ?

If you decide to try this at home, I would highly recommend tracking down an Ikea Tarva dresser for these reasons:
- It is solid wood
- It has full overlay drawers with an overhang at the top
- It is mass produced and should be easy to find online secondhand inexpensively (patience!)
- The feet are removable so it can work as a dresser or night stand
- The width is ideal for this fluted trim (if you use the same kind)
- The drawers are all the same size so it makes cutting easier
- You can use the existing hardware (Rub n Buff makeover!)
You can bet I'll be keeping my eye out for more of these dressers on FB marketplace to do it again. It makes for an enjoyable and easy weekend project (the worst part was sanding, which is not that bad). If you make one, please let me know! I would love to show it off (do not forget to pin thistutorial for later!)
If you like this project, look at these popular Ikea hacks from my Project Library!
- Built-in custom Pax wardrobes
- The ultimate Ikea Dream Closet
- Custom Ikea Pax Pantry
- Painted Ikea Kitchen
- Custom Ikea office built-ins