DIY Wood Porch Railing
Update: Make sure to look at the DIY wood steps tutorial, and the full porch reveal! Today was going to be the big reveal of our front porch at the Riverside Retreat—a…
Update: Make sure to look at the DIY wood steps tutorial, and the full porch reveal!

Today was going to be the big reveal of our front porch at the Riverside Retreat—a project we started working on back in January—but then life happened. If you missed last week's vlog (and gender reveal!) check it out to see what we have been up to:
Our intention was to finish both the backyard and front porch by March, but after a few setbacks (and spending plenty of our time trying to turn over/rent 3 of our Bungalow units) we are maybe halfway done with the exterior. Who's as excited as I am about that extra hour of daylight starting this weekend?!
Even though this post does not follow the typical Before + After happy ending, this blog is more about the journey, right? So let us recap the adventure from Day 1…

Background story for those of you new on the scene: we went under contract (lease to own) and moved into this property last July, and we have been renovating it room-by-room with plans to turn it into a vacation rental after we move out. The goal was to finish shortly after moving into our Heights House, which is expected to be completed in the next 6-8 weeks. At this point, the Riverside Retreat renovation timeline is looking closer to mid-summer (it has to be done before the baby arrives!) so the pressure is on.
Because our first priority is our new build (the Heights House) and the majority of our resources have been allocated there, we have a limited budget for the Riverside Retreat. We also would not get every dollar back into an expensive renovation if we decide to sell someday, so we are focusing on “bang for your buck” projects that maximize the outcome at a relatively low cost. And, that also means a LOT of sweat equity + DIY (which I have not been able to contribute as much lately with this pregnancy).

The exterior facade is where I knew we'd be the most limited on—we cannot change the house color, windows, roofline, or any major structural/costly components. But we could update the porch!

We actually did add a window on the left side of the house when we did the reading nook, which we deemed absolutely necessary (we DIY'd and used stock windows so the cost was not bad at all!)
But this old metal railing… I could not help but cringe every time I pulled into the driveway. Much to my surprise, it turns out plenty of people love this stuff, so I happily donated it to a fellow Instagrammer to repurpose in her home.
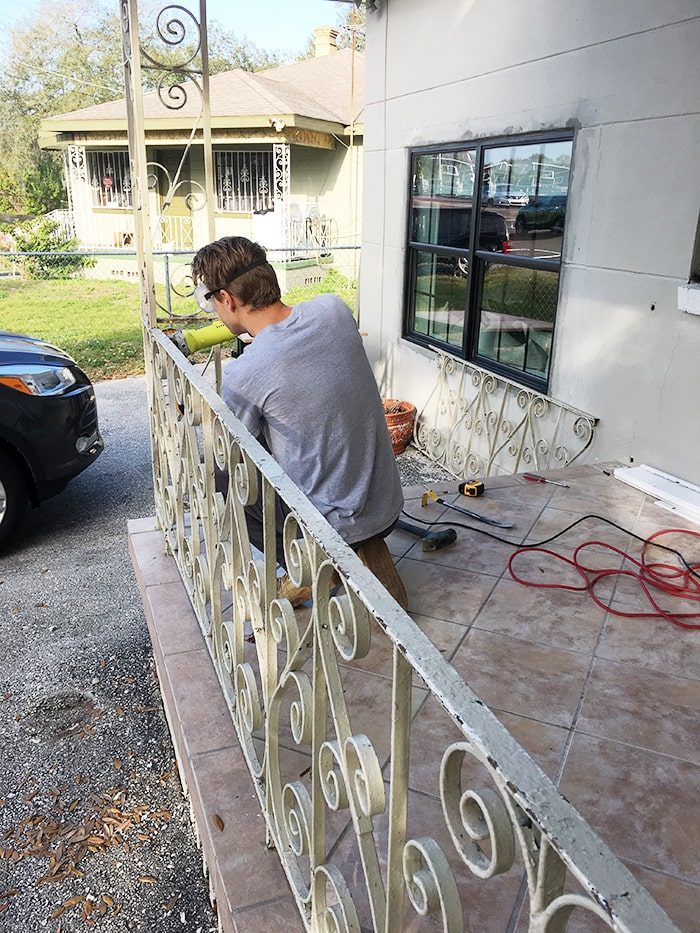
Lucas made quick work of the removal with his grinder (we just got it last fall and have used it more times than we can count) and soon enough, the house was free from its swirly metal jail.
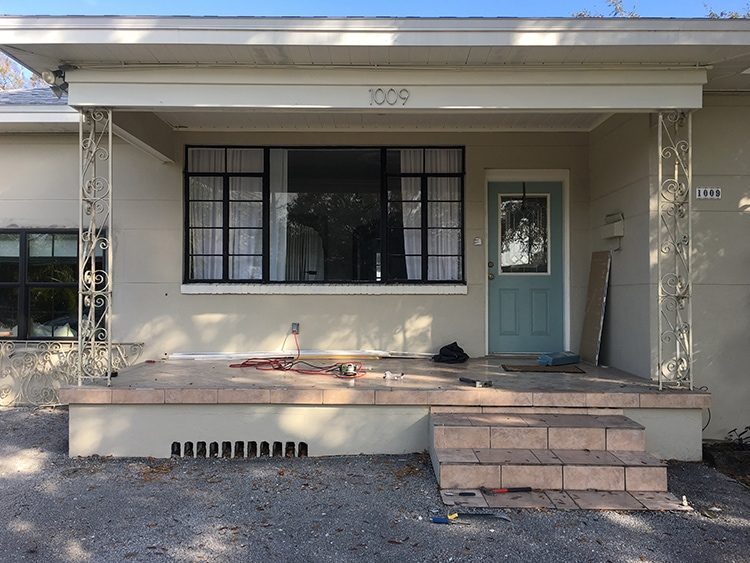
Now it was time to figure out what to do with the columns. We considered leaving the existing metal supports and wrapping them in wood, but decided they'd end up too large and it would not look balanced. Plus, it'd be just as easy to start from scratch.
Down the columns went, and up went temporary 2×4's for support.
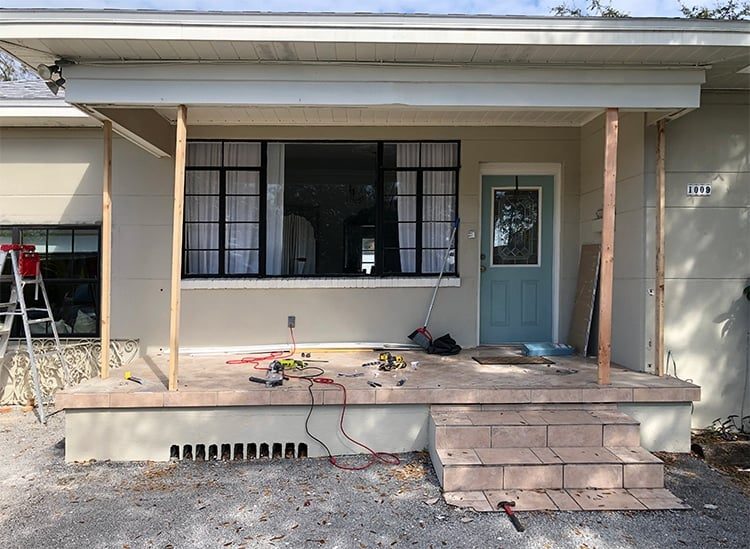
For the columns, we decided on pressure treated 4×4″ posts with treated 2×4's as spacers, wrapped in 1x's on the outside. But we could not just wedge the 4×4's into place, of course—they had to be secured to the concrete floor.
Our online research showed that the best (easiest?) way to do this was to drive a rod into the concrete, and attach that with a bracket to the wood posts. We found these brackets and threaded rods, which we secured with a washer and nut. (They do make special post bases for this but they were twice the cost and we figured our solution was the same)
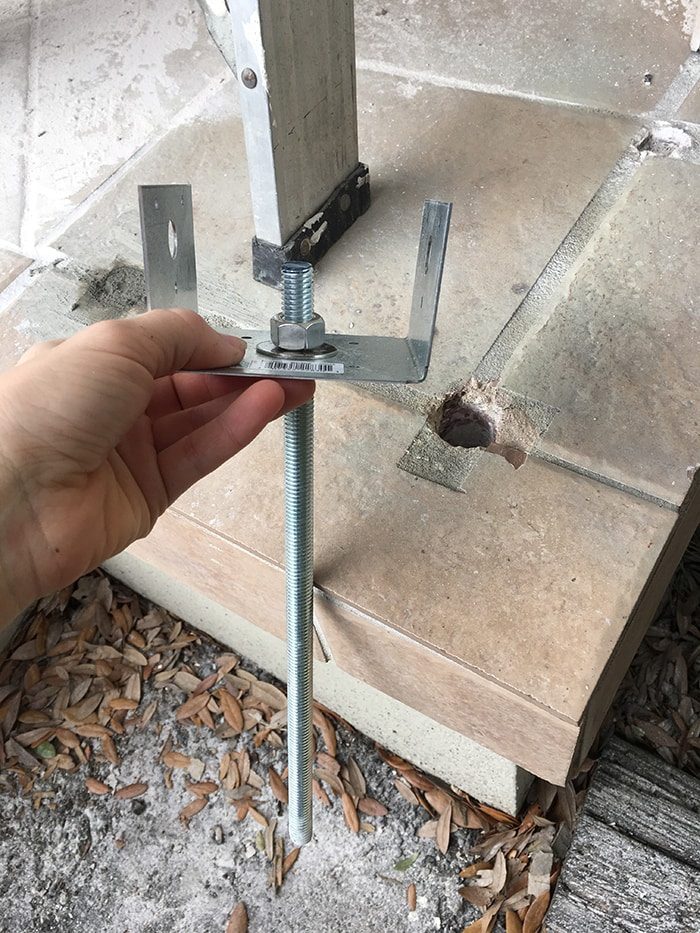
To drill a hole large enough for the rods plus concrete, we used a 1″ carbide bit and hammer drill.

Sidenote: this shirt was a Christmas gift and I think it is the best thing ever ?
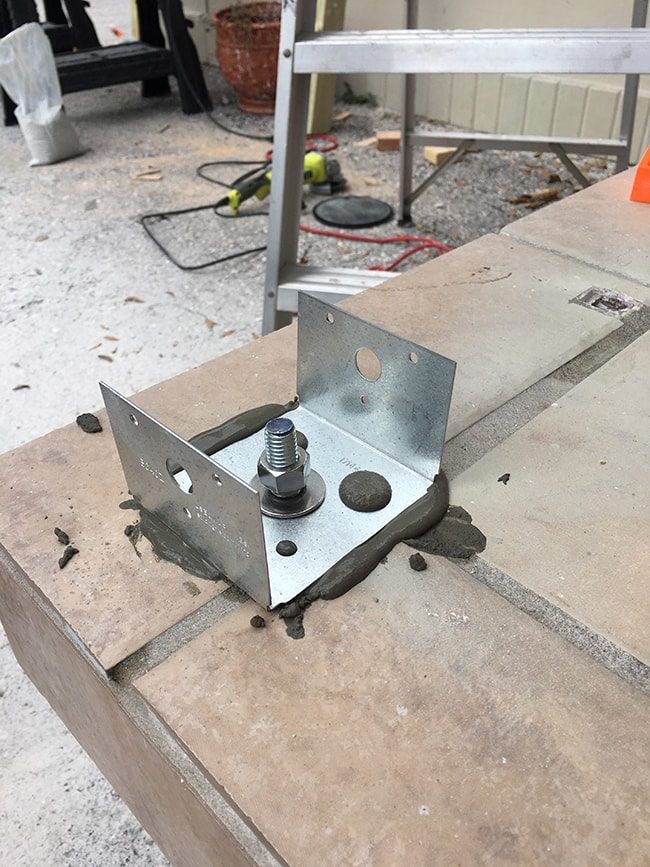
After the hole was drilled, we poured in some concrete and set our makeshift rod + bracket contraption in, letting it cure overnight.
Everything was good to go the next day, so the 4×4's were cut snugly to fit and wedge in place (Lucas drilled out a hole at the bottom for the top of the rod to fit into).
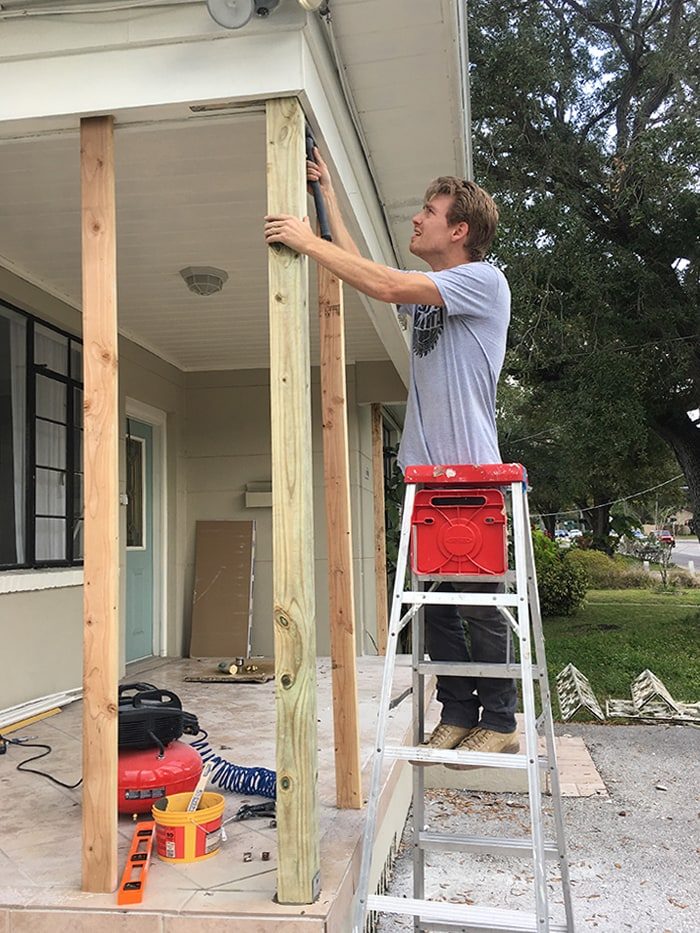
Checking level to make sure we are straight…
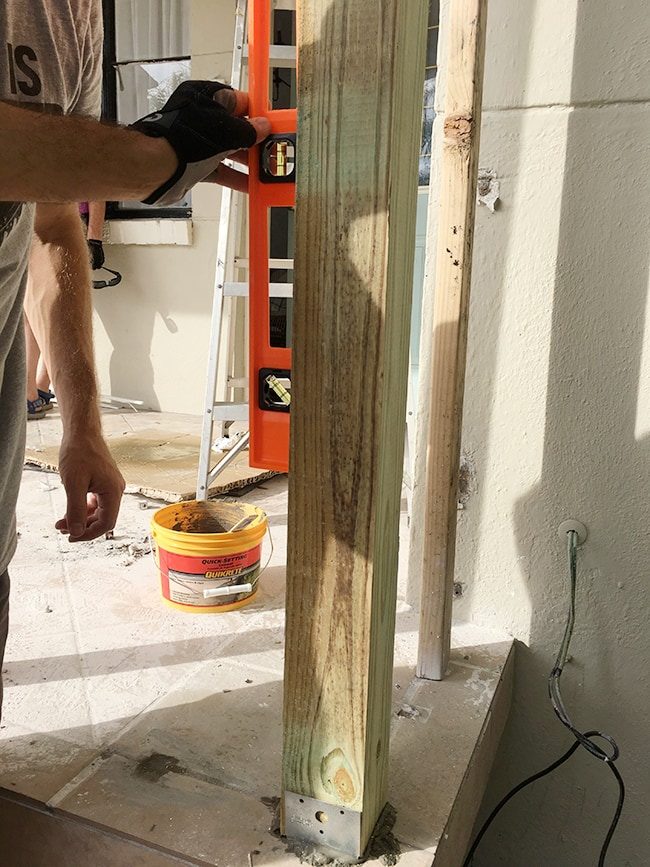
Success!

After securing the top of the posts with screws, we added 2×4″ spacers to the back and inside of the columns to beef them up a bit.
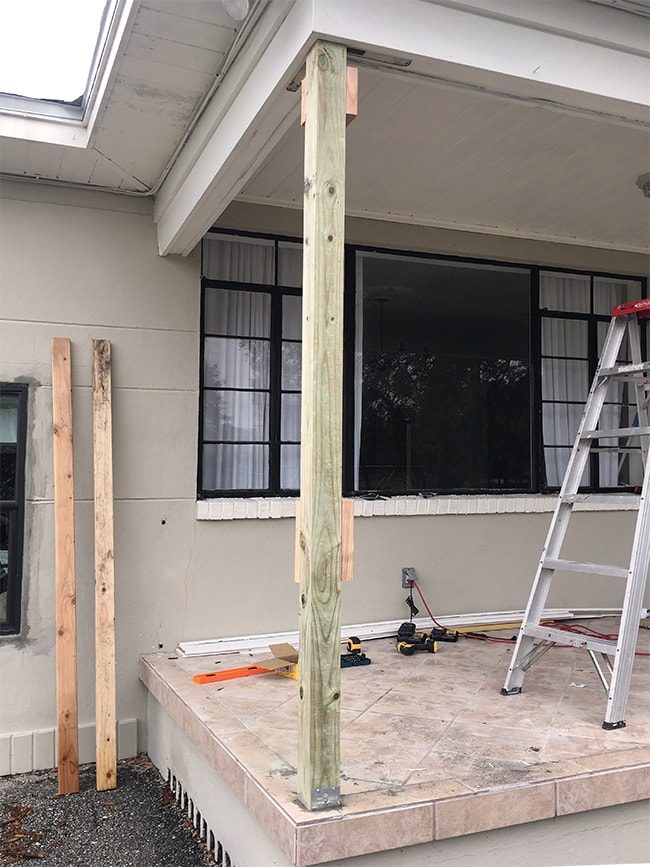
Before wrapping the columns, we went ahead and attached the remaining posts for the railing. After considering our options, we decided that stained wood railing would not only be the easiest/most economical option, but also the best way to break up all of the beige/black/white paint and add some warmth to the curb appeal.
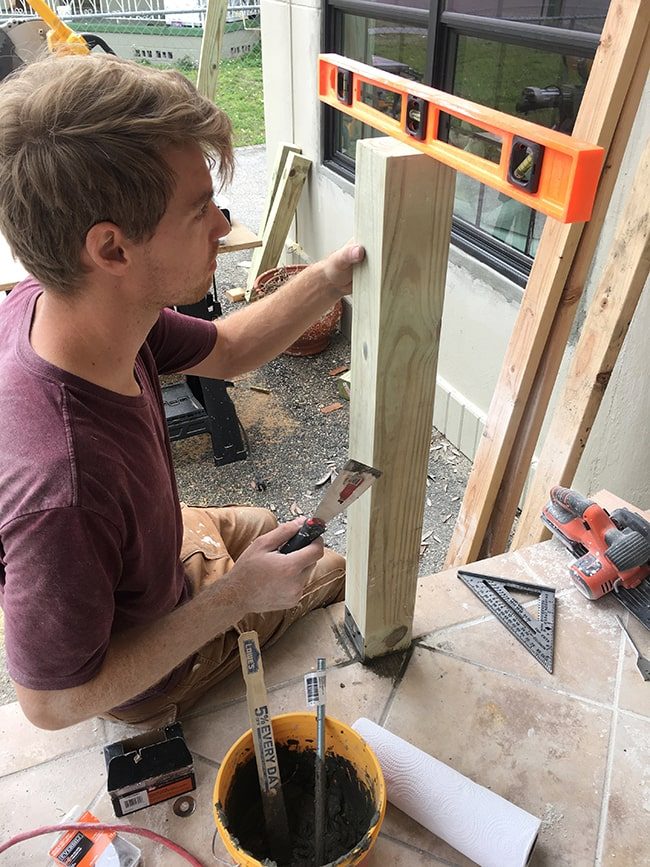
We used our pressure treated 4×4's (cut down to 33″) and secured them to the ground using the same method. The new posts were placed at the same locations as the old railing posts.

Then it was time to wrap the columns! We purchased 1×8's and 1×6's, and ripped them (with our table saw) down to 1×5 and 1×7 so that they'd line up evenly.
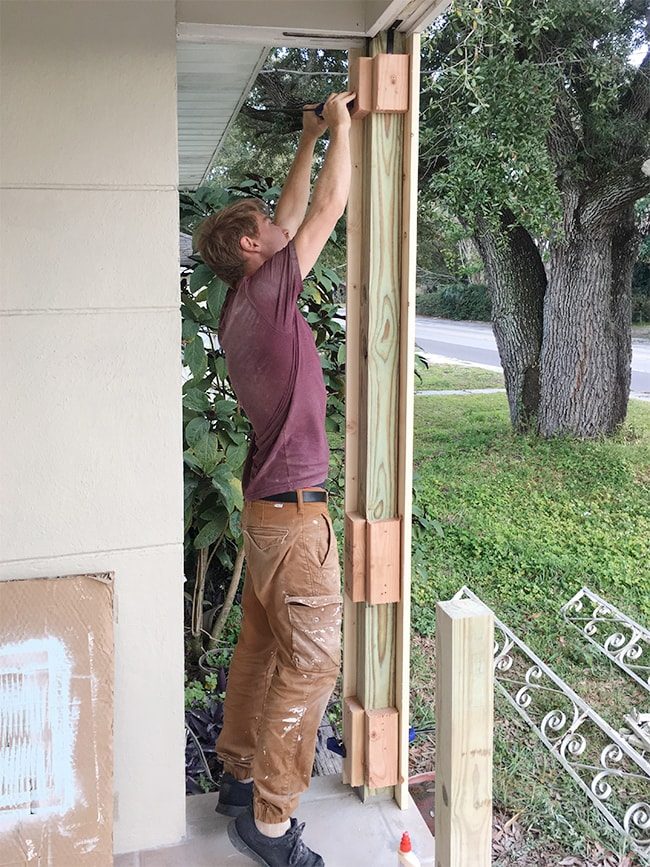
They were attached using wood glue and counter-sunk screws (finish nails will not cut it for exterior wood—it warps overnight in the humidity!)
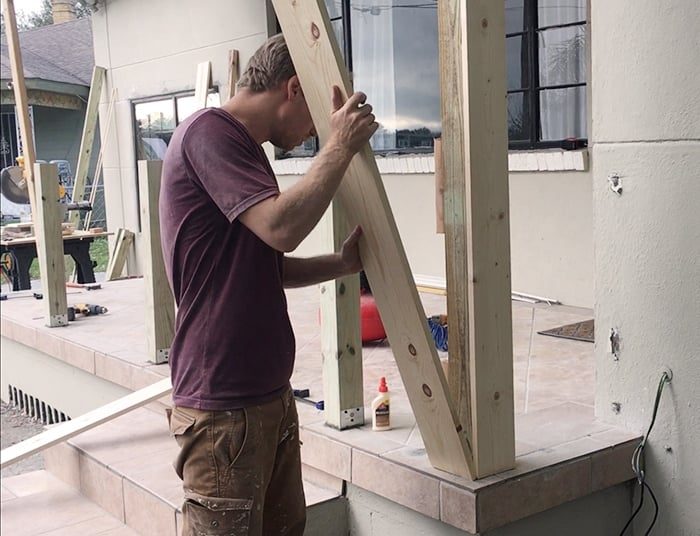
Everything is going so smoothly, right?!
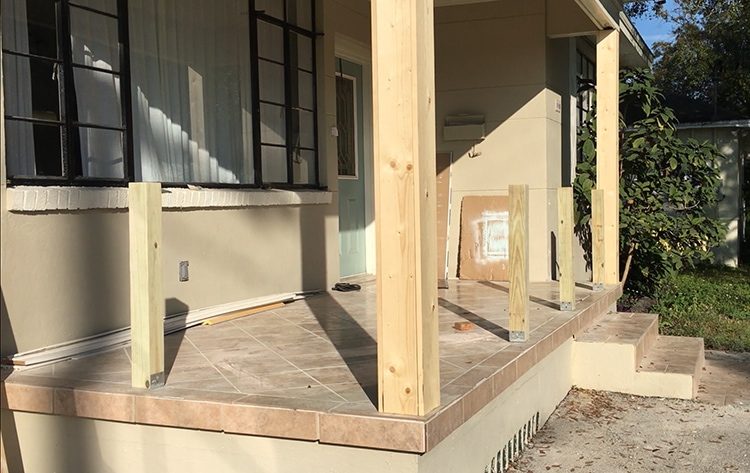
Not so fast. After letting the posts set up overnight, we gave them a wiggle and found that they were not completely secure. All that drilling and concreting for nothing, it seemed.
We knew that attaching the horizontal supports to the columns would stabilize the middle posts, but our biggest concern was the two end posts on either side of the stairs—those had to be solid. It was time to send out the reinforcements! We found these heavy duty angle braces and attached them to the tile (using Tapcon screws) for extra support.
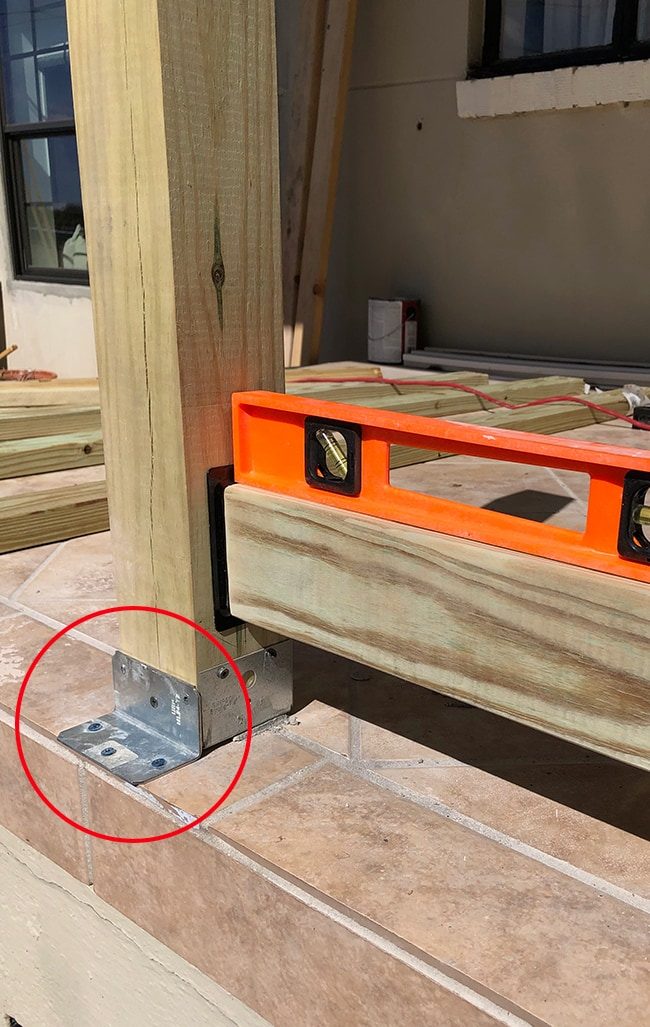
Certainly not the prettiest option but it worked, and the plan was to add trim around the bottom and paint the tile so that it would not be too noticeable.
We decided to skip the stair railing because A) no railing is actually required at all by code because our porch is less than 30″ from the ground, and B) so much work, not enough time. At this point, DIY time is limited and every day counts!
With the posts secured, it was time to move onto the railing. We opted to assemble the railing ourselves (rather than buying the prefab wood rail kits) so we could customize the height (and save $$). The balusters were only 87 cents/piece and the top rails $9/ea. The wood comes pretty rough, so Lucas spent time sanding down the edges of each board before installing (our orbital sander is the best for these types of projects!)
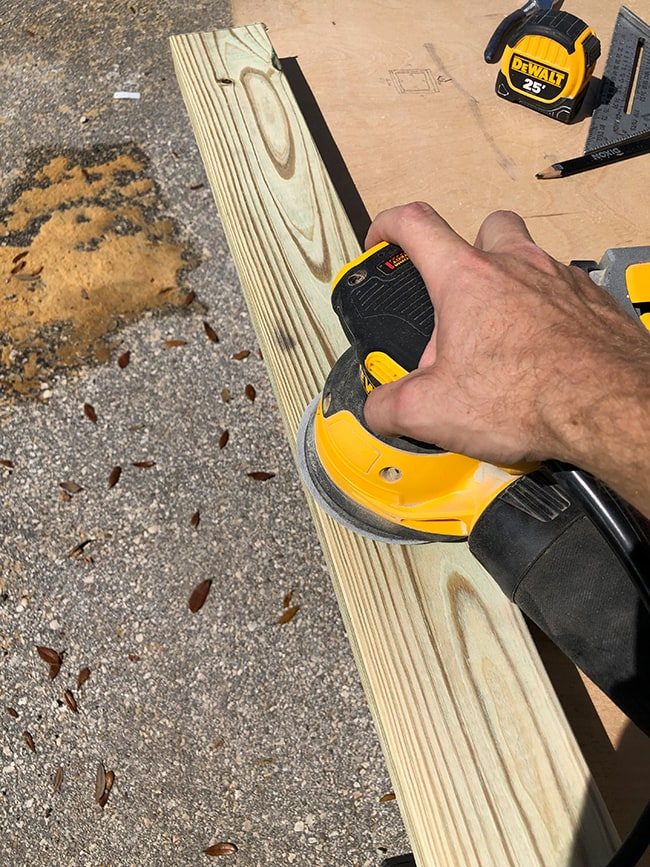
We used 2×4's horizontally along the bottom, attached to the posts with specialty metal brackets.
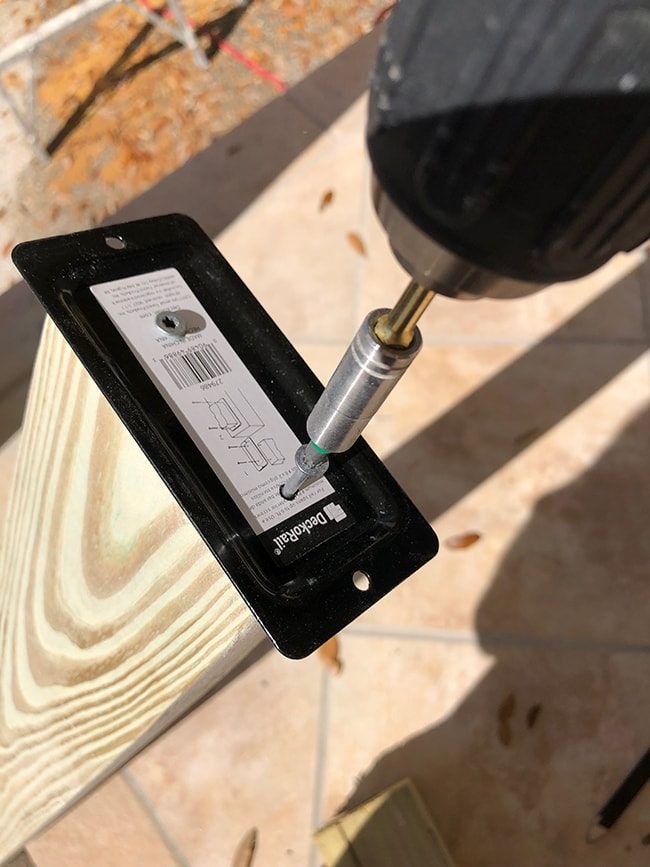
Checking for level during every step is crucial!
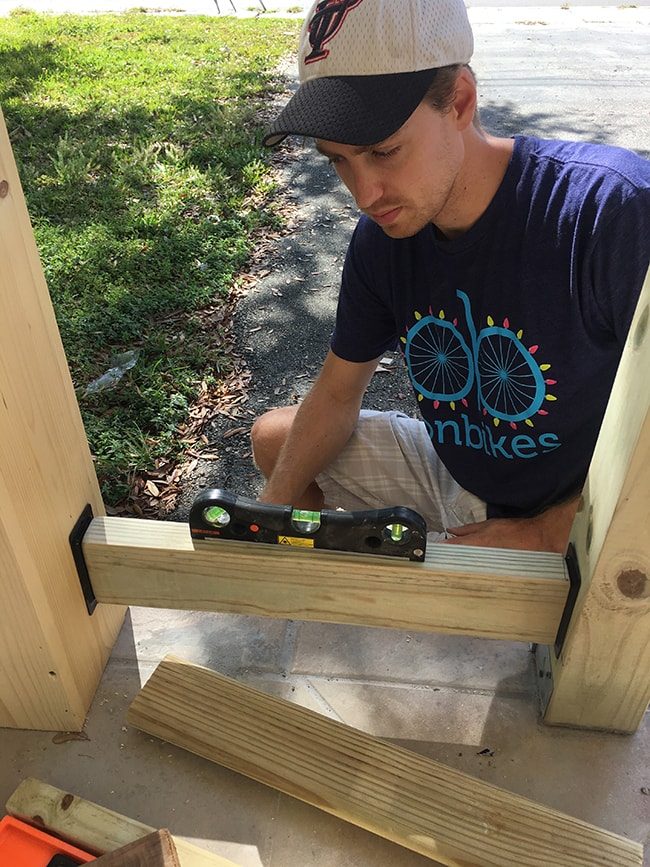
We left a 4″ gap below the 2×4's (per code) and this step was the quickest one.
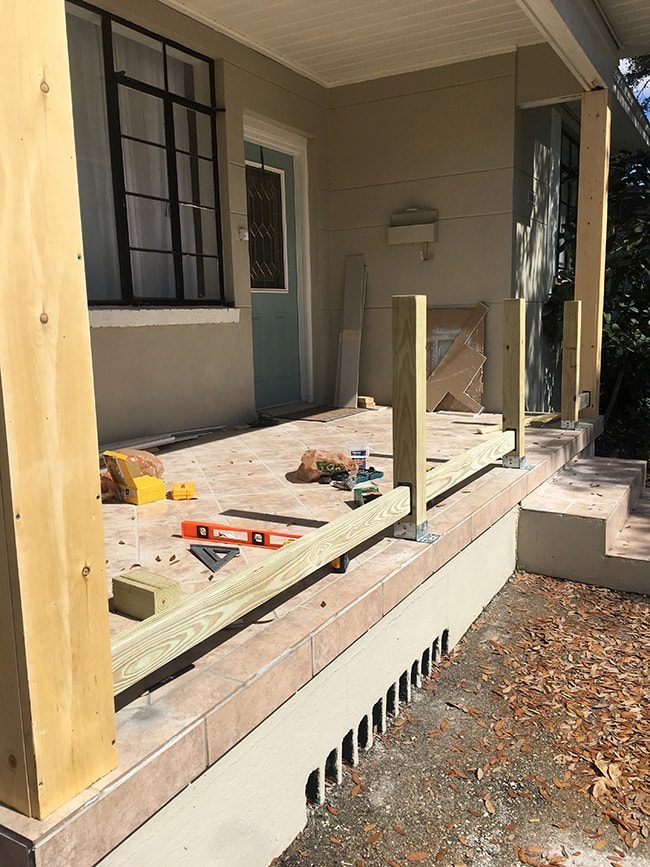
Interesting observation—remember how light the color of the wood columns were earlier? They darkened within just a couple days of exposure to the elements. All of the wood we bought for this project (the 2×4's, posts, balusters and railing) were different wood tones (some of the 4×4's were actually green!) and I was worried they would not match after staining, but in a matter of days, everything evened out to be the same color. What a relief! Not sure if the Florida climate has anything to do with it, but it is definitely worth mentioning for those with the same concerns.
With the bottom of our railings in, it was time to secure the tops. Another straightforward installation using L brackets.
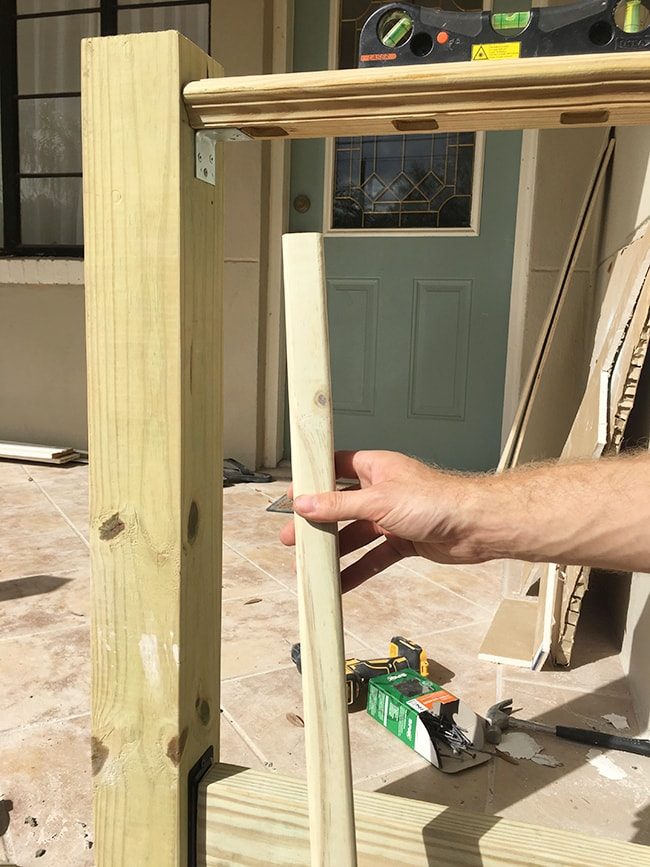
The top rails have notches predrilled, which makes attaching the balusters an easier process—you just have to make sure they are cut to the right size and level.
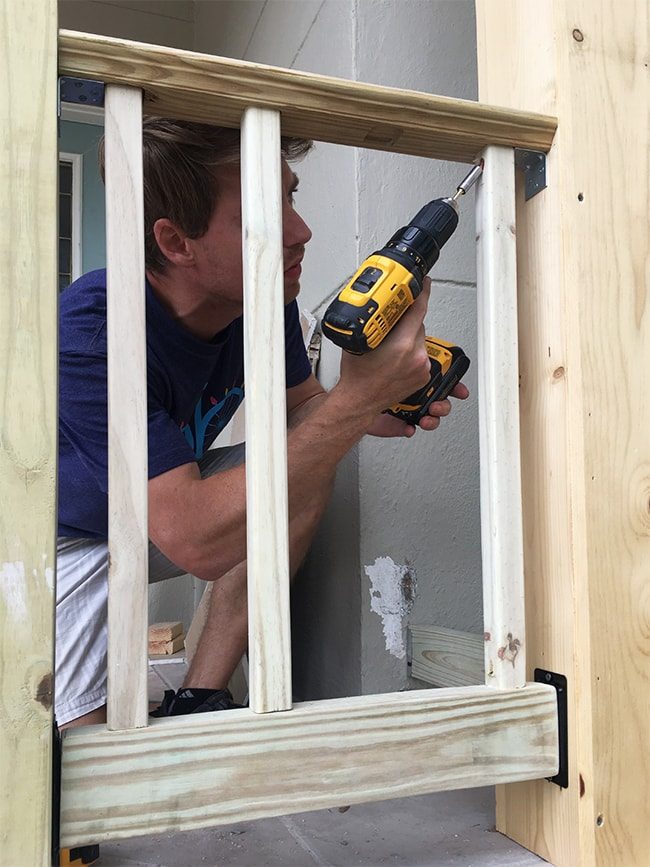
Lucas drilled his own pocket holes and secured them with outdoor screws. Check it out, our first finished section!
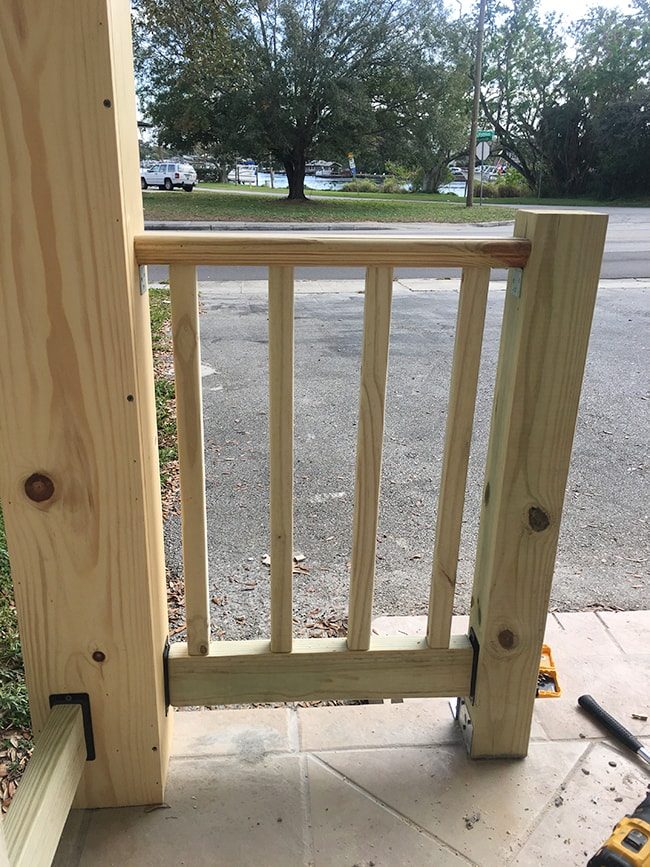
From there it was not difficult, just time consuming. Lots of measuring and cutting and drilling.
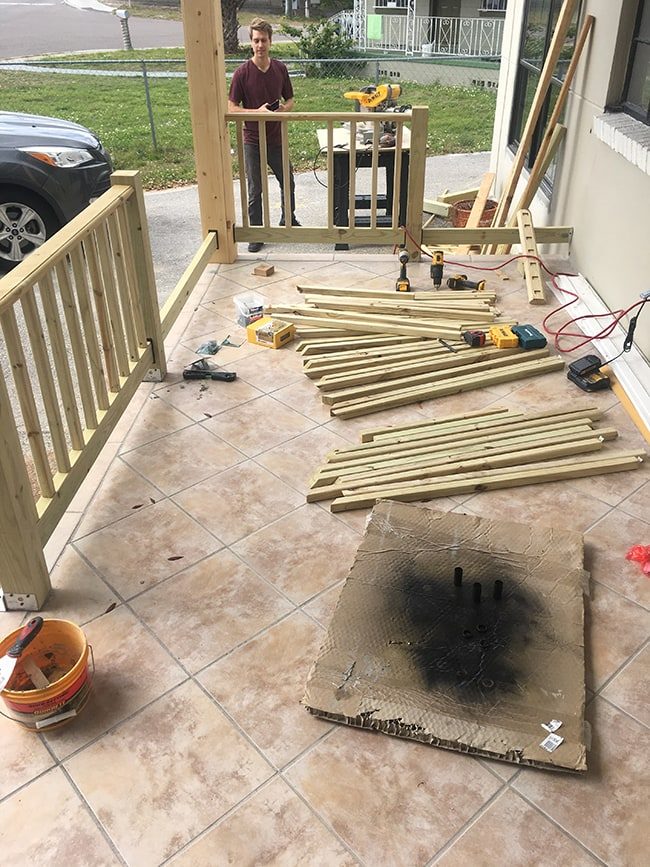
But worth the result, as always!
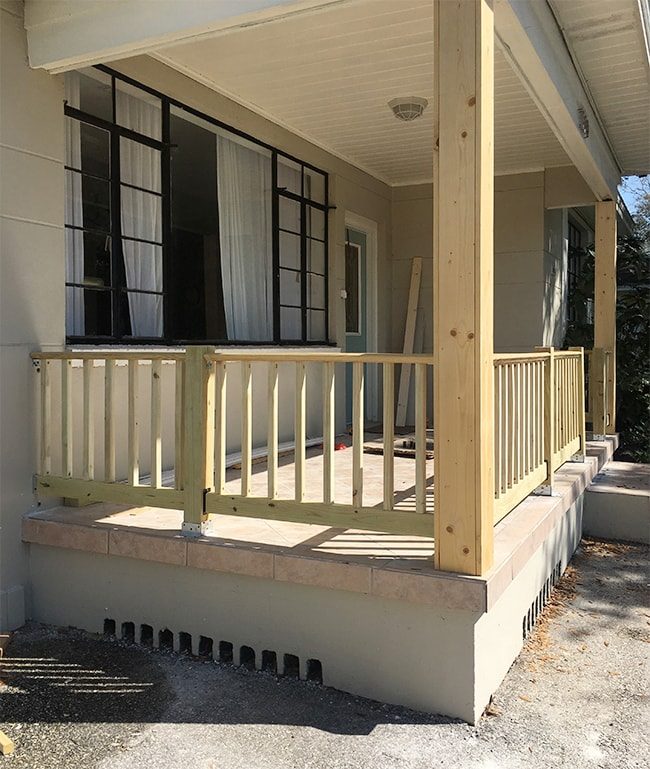
For the finishing touches, we topped the posts with decorative caps, and Lucas proceeded to custom fit 1×4's at the bottom to help conceal the braces.

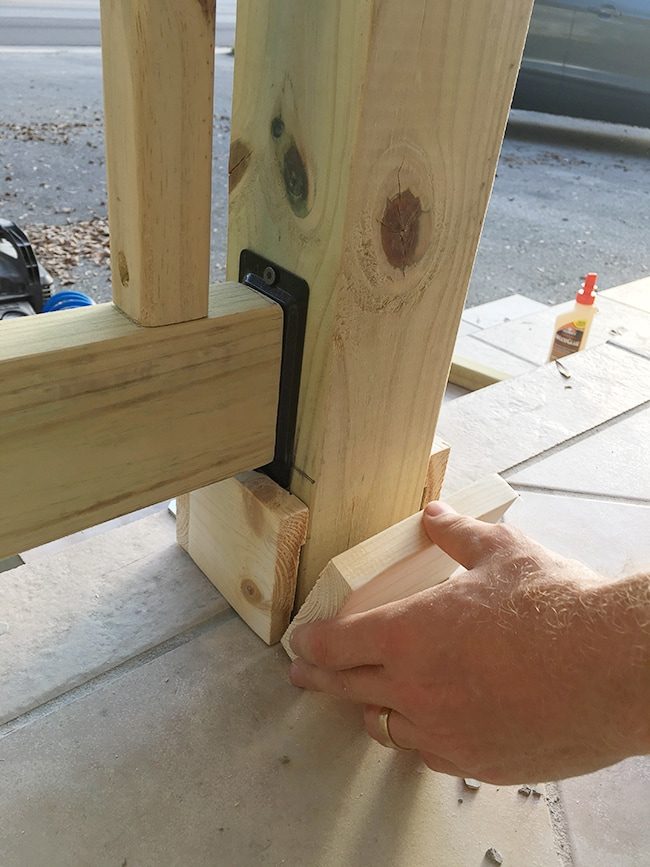
While he was wrapping that up, I used my trusty water putty to patch up all the holes in the columns and got it ready for priming.

The choice was to paint the columns rather than stain them because It helps to keep the look of crisp white framing out a porch, and it would tie in with the horizontal support under the roofline. The wood had to be primed first, to seal/protect it from the elements and to block the knots from bleeding through.
Since the plan was to paint over the tile floor as well, I needed a good bonding primer that would stick to hard/glossy surfaces too. After lots of research and reading reviews, I settled on this Kilz primer.

It worked just as expected on the wood.
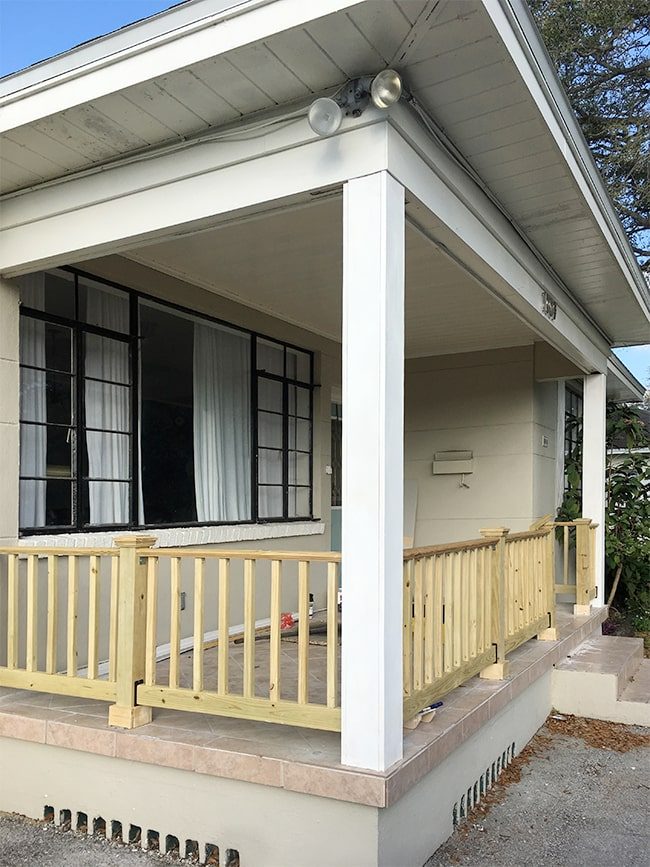
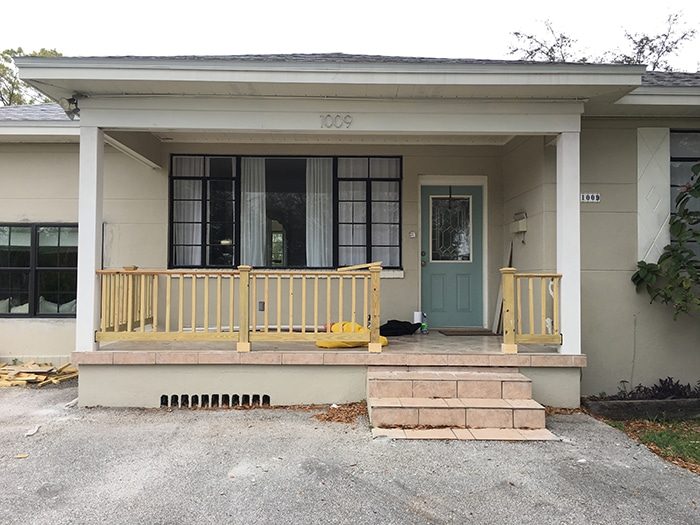
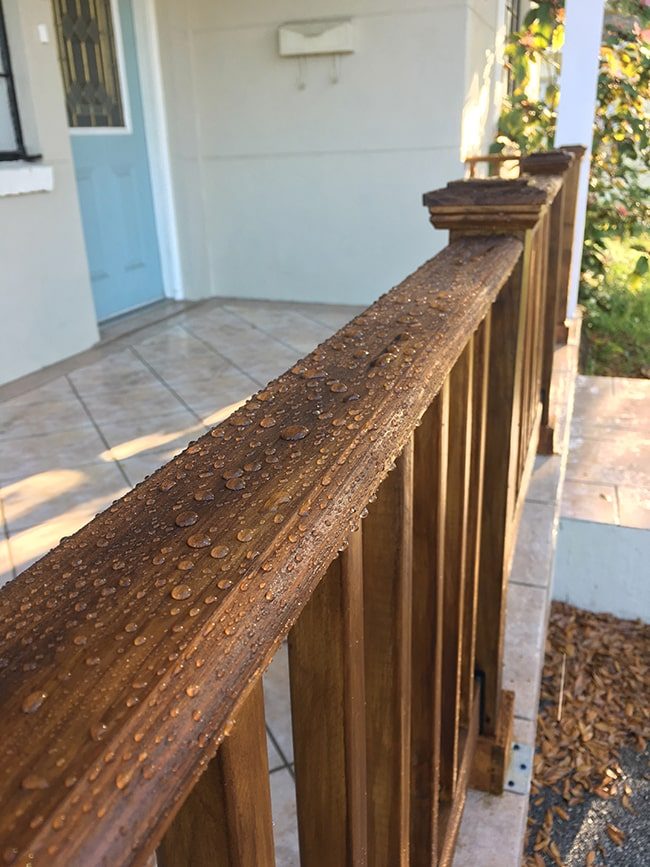
Before giving it a coat of paint, The choice was to tackle the messier job of staining the railing. The stain I chose was also a result of lots of research, and my requirement for it to have a built-in sealer. Staining railing is a tedious process so you want to avoid doing double the work!
I landed on this stain + sealer in Dark Walnut after reading the reviews and seeing photos of real results (also very important).

I used my favorite short angle brush and got to it—this stuff dries almost instantly so you have to work fast! Here is after one coat—this section took me around 30 minutes to complete.
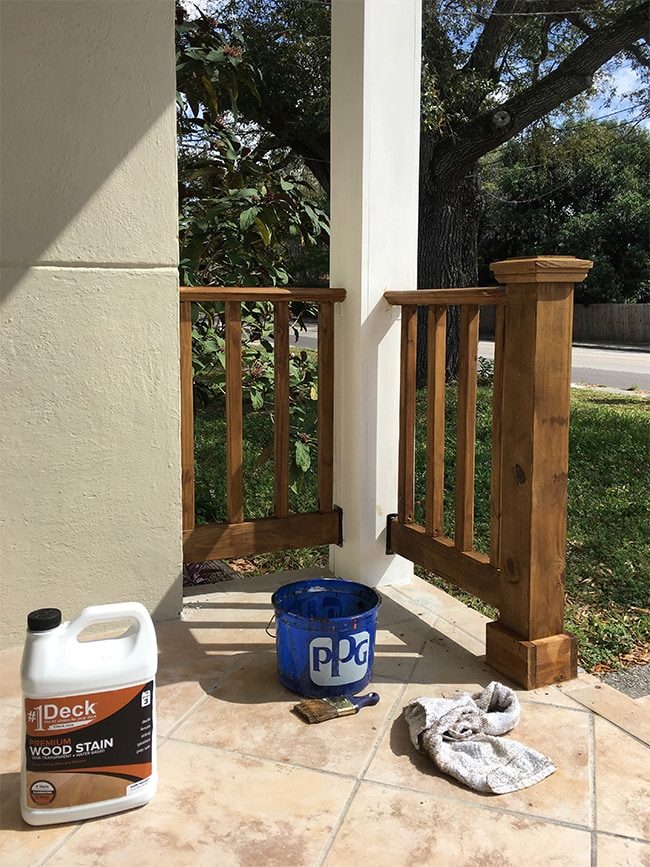
By late afternoon, I had finally worked my way around the porch.
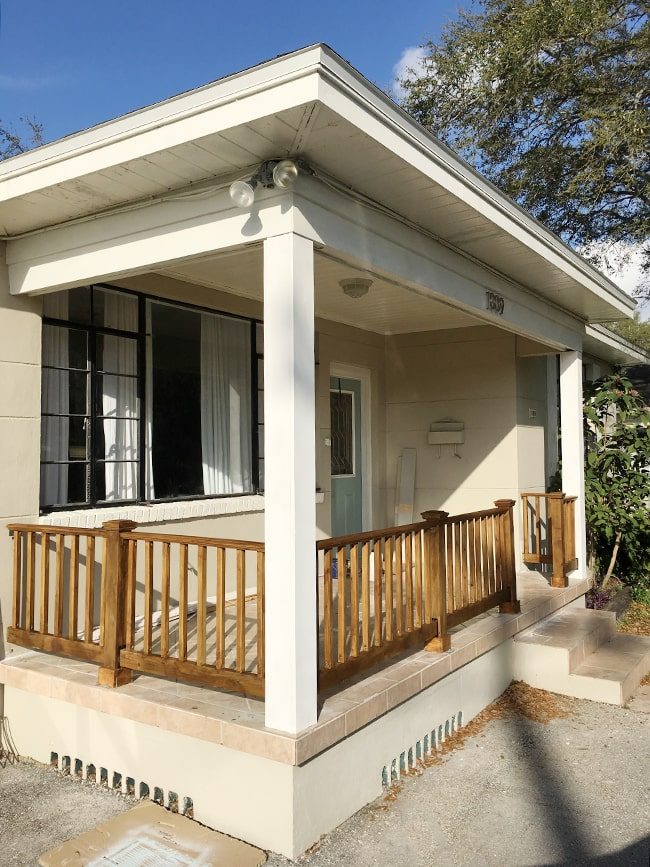
I had planned to do a second coat but after a full afternoon of staining, I was exhausted/sweaty/pregnant so I had to call it a night. If you are using a stain and sealer in one, take my advice and finish it in one day! By the time I was able to get back to it a few days later, the first coat had cured and the stain did not take as well. I was still able to coat it but some areas did not stick properly. Even still, this stain does a great job of waterproofing and I would recommend it.
With the stain taken care of, it was time to clean it all up with a fresh coat of paint. I figured this was the well suited time to touchup the house as well, like this eyesore around the window we added for the reading nook a few months ago:

The house had been painted in Behr's Castle Path, so I picked up a new gallon and got to work, touching up all of the chips and scuffs and patches from the old railing. Much to my dismay, the color was not an exact match (maybe from the sun? maybe it was not stirred or mixed properly?) and I ended up spending the whole morning repainting the entire front porch.
Fortunately, I do not mind painting (hello, instant gratification) and by the afternoon, I was ready for the trim paint.
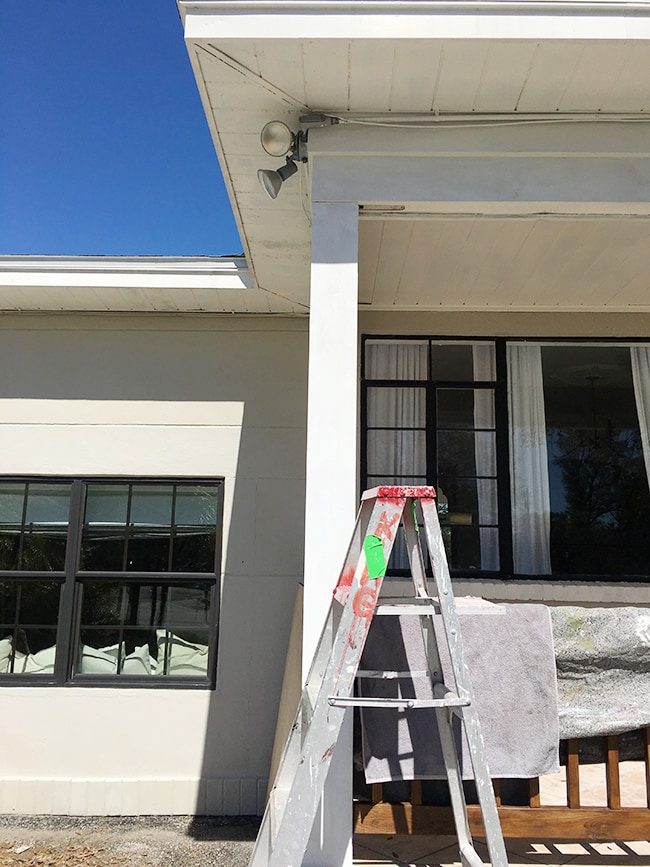
I bought a gallon of Sherwin Williams Exterior paint in Alabaster (semi-gloss), which is the white that the previous owners used all throughout the house. It seemed to match the swatch chip I had so I was pretty confident it was correct—NOPE. This new paint was noticeably brighter, so I spent the rest of the afternoon repainting all of the white trim.

At least everything looks nice and new!
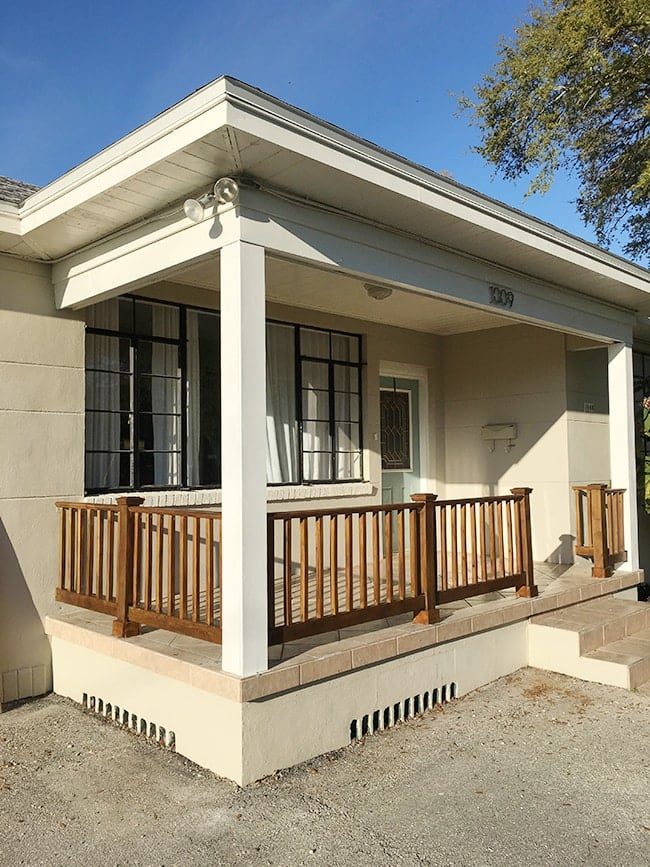
The next day, it was time to work on those tile floors.
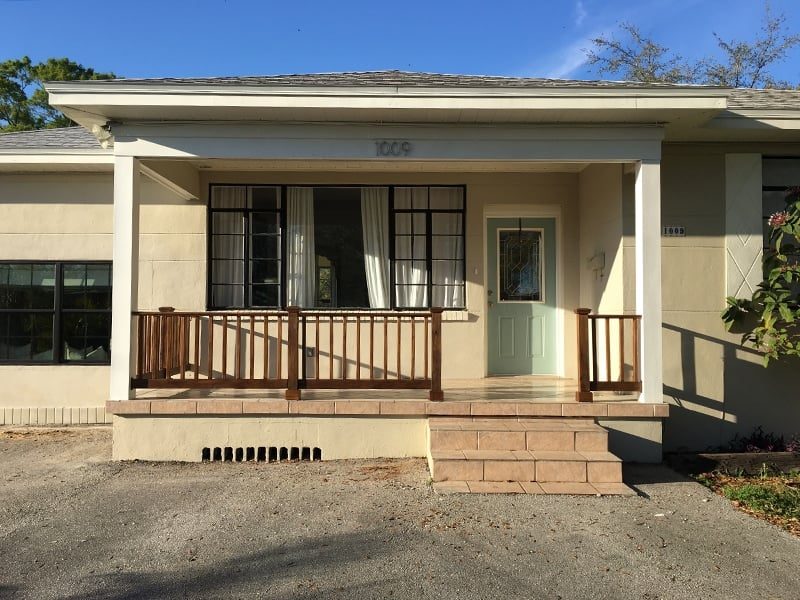
We went through ALL the possible options for the floor, and finally settled on painting the the tile. At one point we were leaning towards building a wood porch over the existing concrete (most definitely the nicest looking option), but that would require a ton of time and labor (removing all of the old tile and scraping the thinset, leveling the concrete, adding risers, attaching the wood, staining, etc). But the main reason we did not go that route is because our door is too low, so there would have been a small lip to step up onto the deck (hello, tripping hazard).
In the end, we decided we needed something relatively easy, low cost, and fast since this project should have been done a month ago. I have seen tons of tutorials by other folks painting their tile floors, so I spent plenty of time trying to hunt down the well suited products for our situation. I had already purchased the primer (which others had used successfully on their tile floors) and for the paint, I settled on this epoxy concrete & garage floor paint.
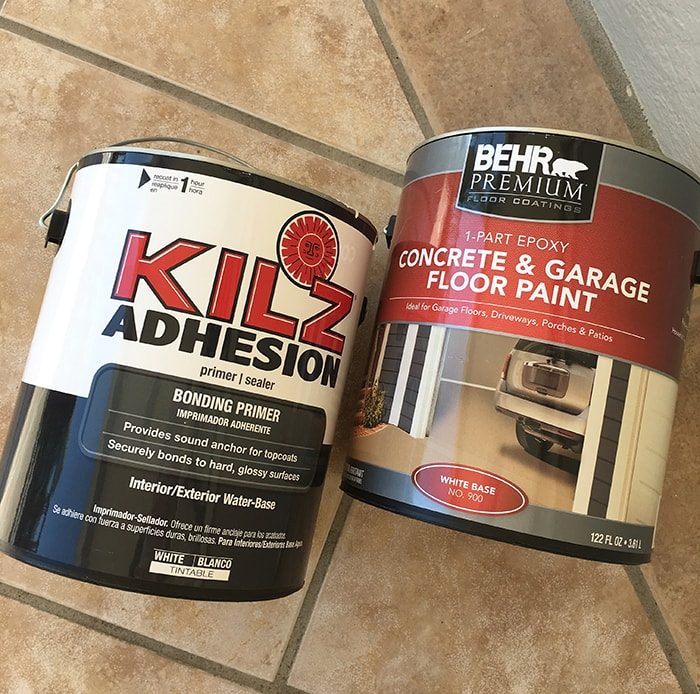
There are very few paints made specifically for tile, and even though this one is ideal for concrete/masonry, if it can withstand thousands of pounds and hot tires, a little foot traffic should be no big deal! This was also the only one I could find that offered tons of colors (the tile paints were all standard white/almond/blue-gray). Not only that, but we will be repainting our concrete backyard patio so this would do double duty.
I knew the importance of roughening the surface before starting, so I bought the roughest sandpaper I could find (60 grit) and went to town. I posted the disappointing results in my Instagram stories…
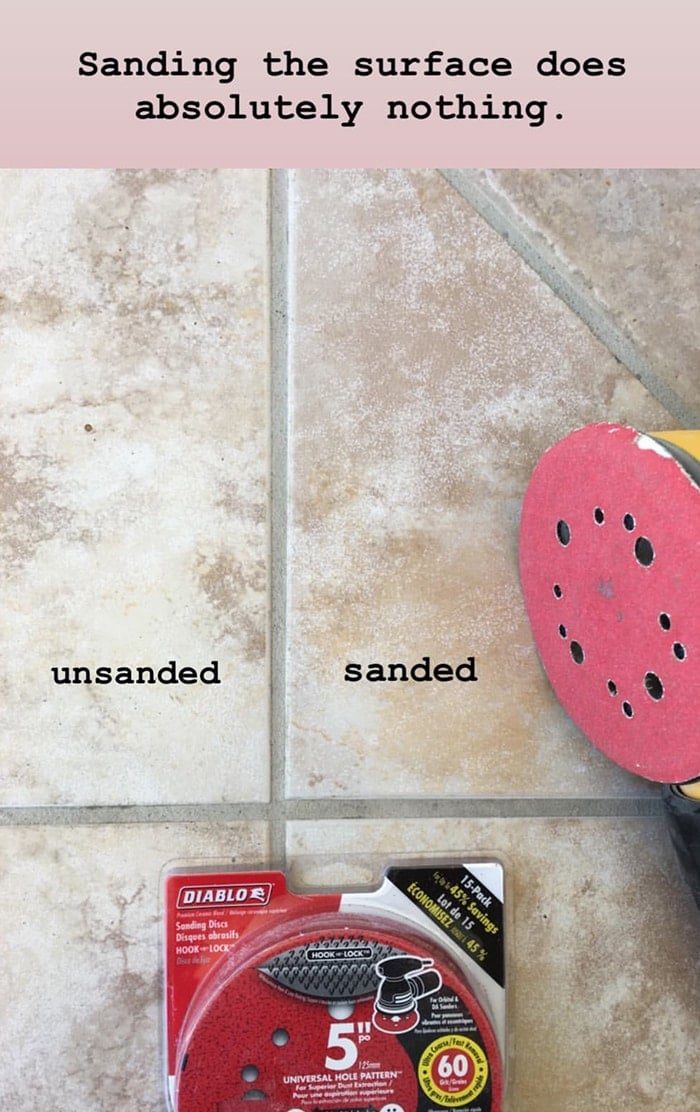
The glaze on this tile is so hard that nothing abrasive (short of a metal grinder) will penetrate it. I looked into acid etching as well, but I just cannot believe that any liquid would roughen the surface of this stuff—especially after I took a grinder to it and all it did was burn the tile (it was still smooth).
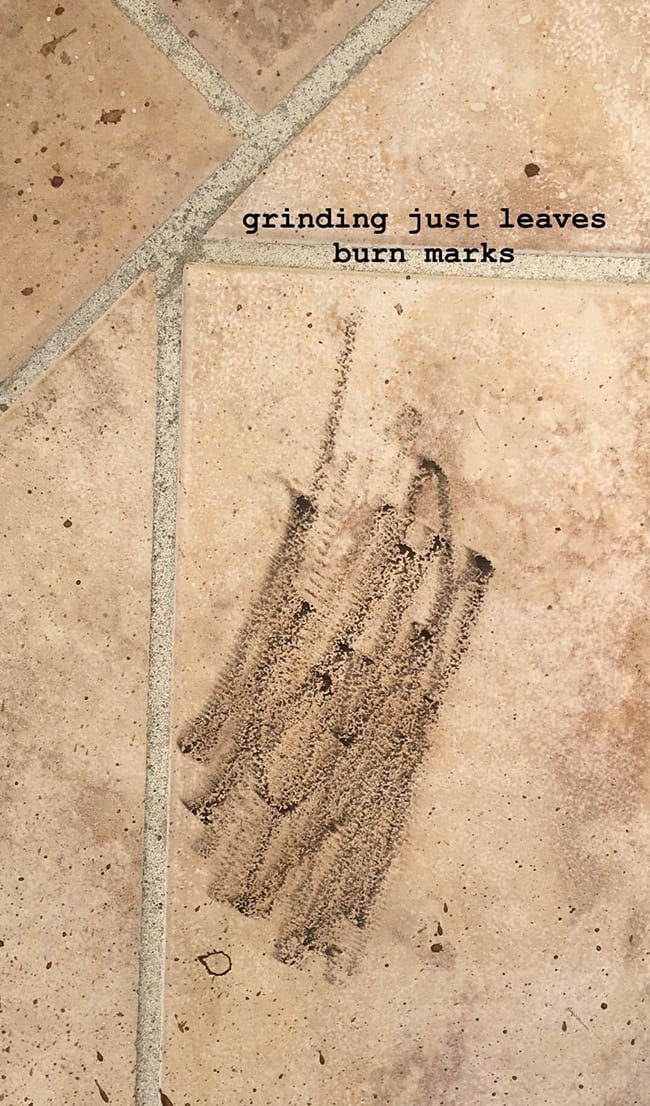
Not feeling very optimistic at this point, I went ahead and tested an area of the tile with two coats of primer and two coats of paint. The results were exactly what I had expected.
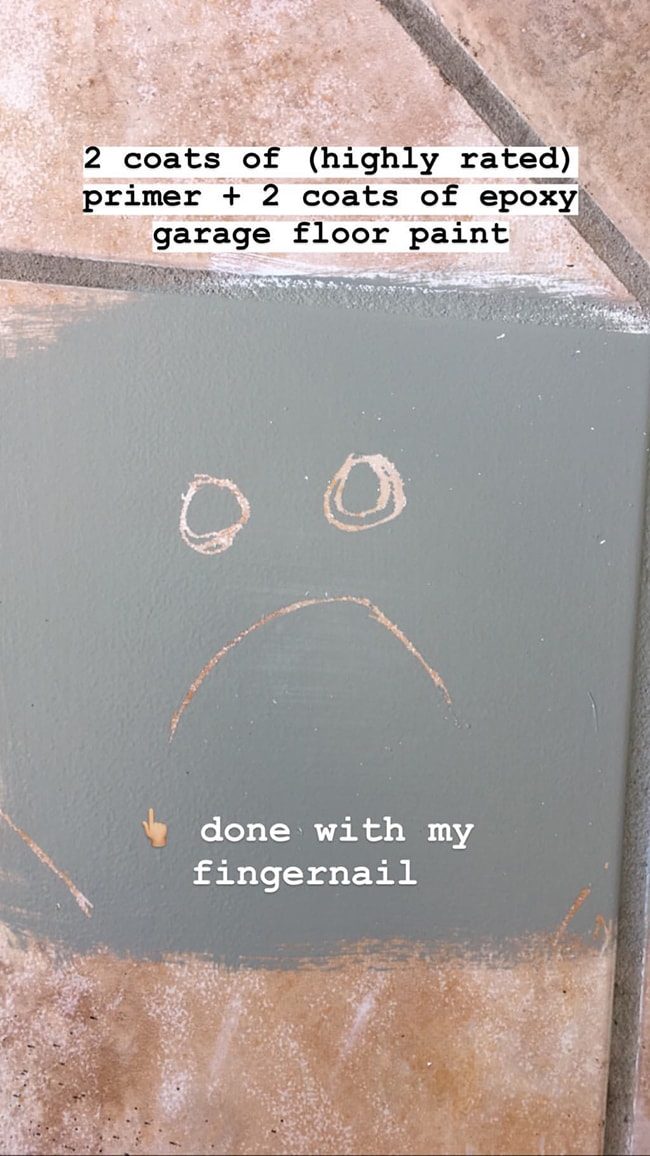
To be fair, I did this after it had dried but not cured. I tried again the next day and it was definitely resistant to rubbing and dull contact, but anything sharp still easily scratches through all the layers.
Yes, I could have waited several days for it to fully cure, then applied an epoxy sealer and waited for that to cure… then spent another 1-2 weeks repeating the process for the entire porch and hoping it all worked out. But I was not married to this idea enough to make it worth all the waiting and risk of scratching was not one The aim was to take (can you imagine trying to remove all those layers if it DIDN'T work?)

Feeling defeated and hormonally unstable, I turned to Instagram to talk me down from the ledge.
52% of you said the tile was not the worst thing ever, and my inbox was flooded with hundreds of messages weighing in with ideas. Most were options I would already considered, but a few of you pointed out that the stairs were the biggest issue and that I should just redo those. Light bulb moment! The curb appeal is our primary concern here (I can disguise the porch with a rug, chairs + plants) so now I just needed to come up with a unfussy fix for the tile visible from the front.
That got my creative juices flowing, and I drew up a quick idea in Photoshop…
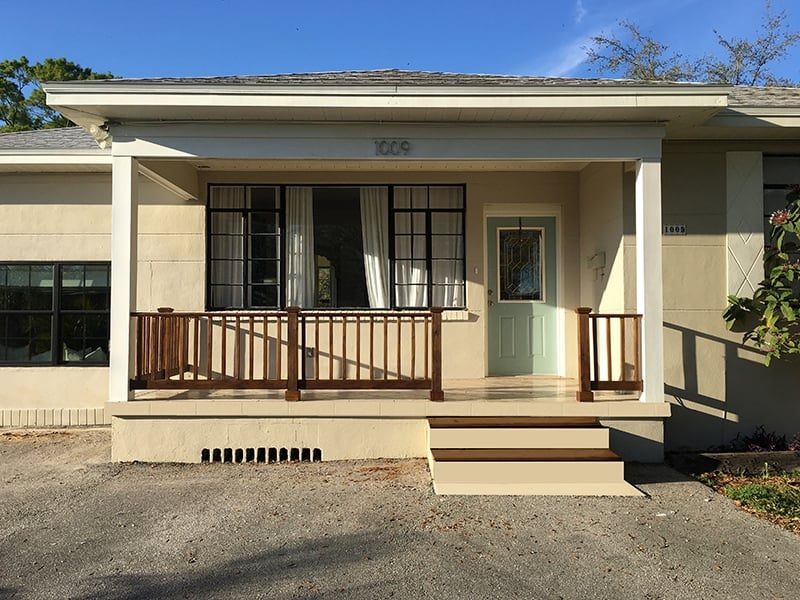
I could paint just the lip of tile around the front of the porch, paint the stair risers and add wood on the tops stained to match the railing. So much better already! The primer should be sufficient enough to keep the paint on the vertical tile (that does not get the same wear & tear of the flat surfaces), so I had no worries there.
A few tweaks later, some landscaping and a new front door genuinely sealed the deal:
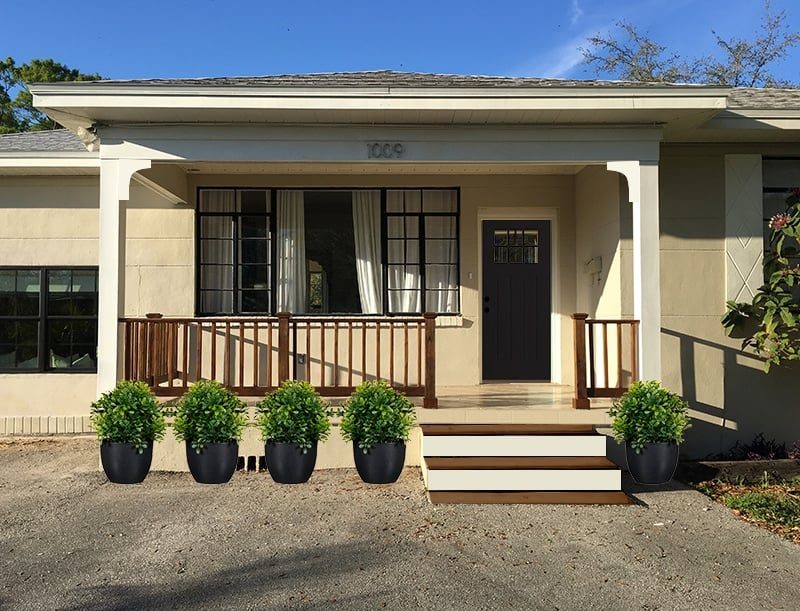
Ladies and gentlemen, I think we have a winner! Now I am glad the porch paint was not a home run, because this option is so much better (Plan B always seems to work out better in the end!) We have our shopping list for the wood steps (which should be pretty straightforward) and the primer is drying on the tile as I write this. If all goes well, that part will be done by the end of the weekend (famous last words, right?)
The later finishing touches will include a new front door, new mailbox and doorbell, shutters on the left window, a rug and chairs. A green front door could be interesting, too (this will be a fun vacation rental, after all…)
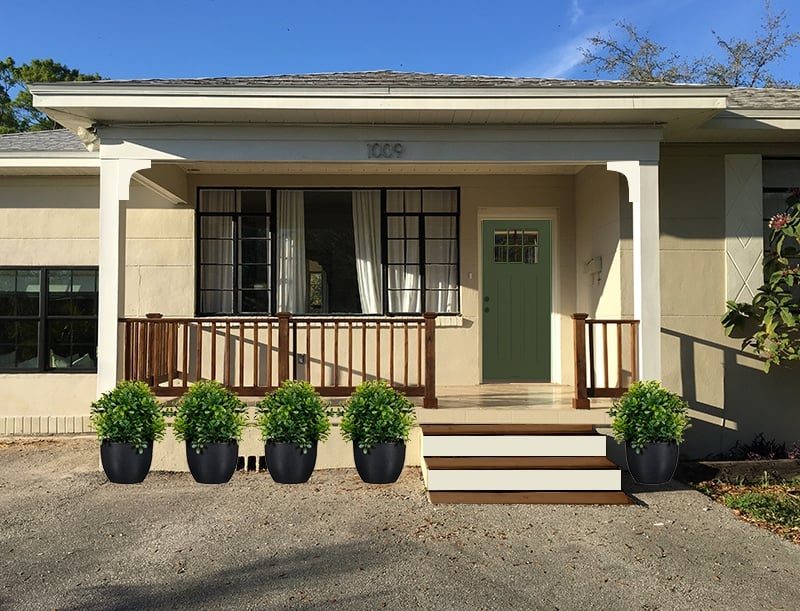
Eventually, if we are bored and in need of a project (ha!) we might change the top of the porch tile beyond covering it with a rug (most likely either tiling over it or resurfacing with concrete) but for now, I think it is perfectly fine the way it is and for the needs of this rental.
After this weekend, we will turn our attention to the backyard (which we also started in January) with the goal of finishing before it gets too unbearably hot to work outside. This project has proven to be much more labor intensive than the front porch, and we are not even halfway there!
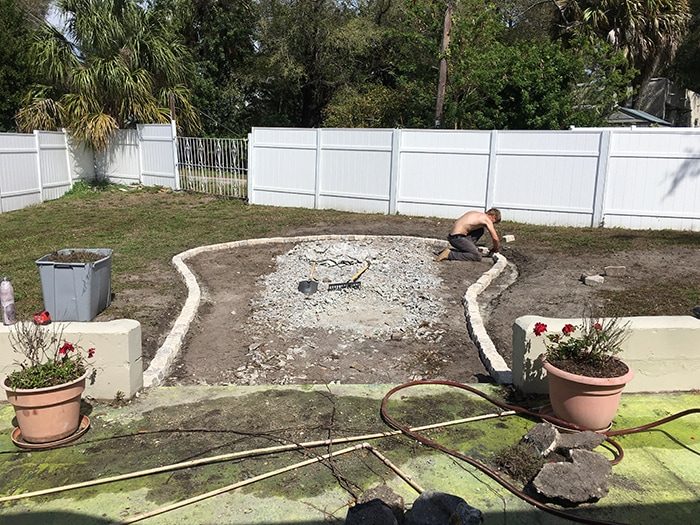
Lots to share on this, and it will be another two (or three? maybe four?) part series over the next few months. In the midst of backyard projects, we are about to start tiling the guest bathroom in the Heights House (and a handful of other projects) so keep an eye out for those on my Instagram stories over the next week!