How To: Beginner Landscape Acrylic Painting
This was the most fun I have had on a project in a while, and I am excited to break it all down for you today! If you have not seen my Instagram stories, go watch that…
This was the most fun I have had on a project in a while, and I am excited to break it all down for you today! If you have not seen my Instagram stories, go watch that first so you can see timelapse videos of the process in action…
Let me preface by saying I am not a professional by any stretch of the imagination. I loved art as a child but have not picked up a paint brush in 15 years! I did not remember a single thing about painting before this, so I spent a couple days searching YouTube videos to get reacquainted with the basics. I found this video to be the most helpful, and followed a few of his tips which I'll share in this post.
When we built our DIY fireplace this past winter, my vision for the space included a large well composed painting of some sort (the map was a placeholder).
Over the past few months, my focus narrowed in on an abstract landscape piece. I am sure you've all seen those Frame TV's and how they look like a striking piece of art (that you can easily change with the press of a button!). They seem to be all over Instagram, and were definitely part of the inspiration behind my idea.
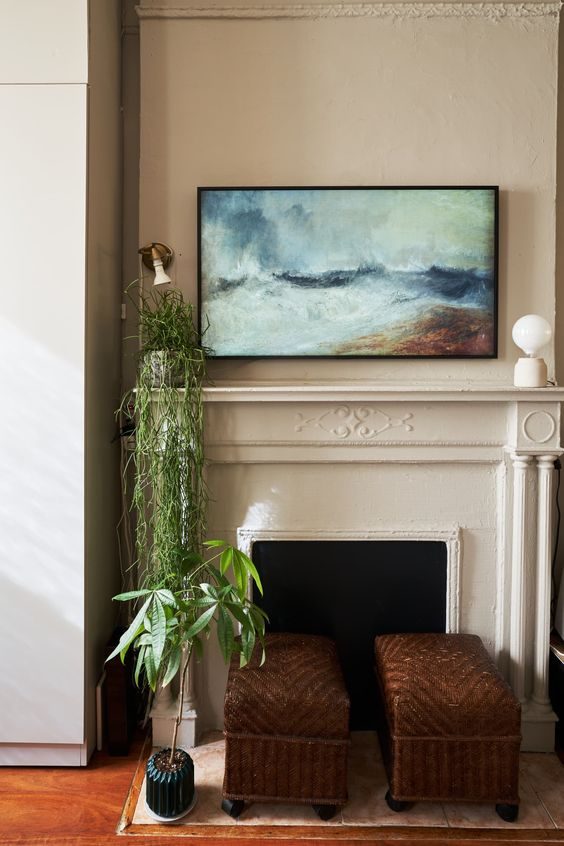
I have also been seeing these floating canvases everywhere lately, and decided it would be unfussy enough to recreate.
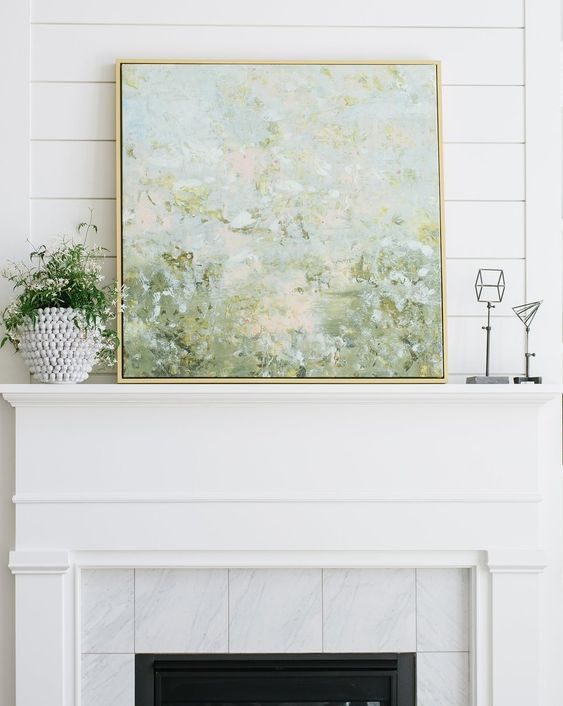
Before gathering any supplies, I spent some time browsing online and researching what to paint. I find it much easier, especially as a beginner, to have something to reference instead of making it up as you go along—but that is just me! After a long search, I settled on this image:
I loved the unfussy landscape, muted colors, and the brush technique seemed do-able for a beginner. Now, it was time to gather my supplies! The only thing I had on hand was a small set of inexpensive acrylics, and mytrusty short angled brush used for DIY painting. Fortunately, I was able to borrow my MIL's easel and a few of her brushes. The only materials I purchased were the following:
30×40″ canvas (on sale for $11)
Gesso (do not skip this step!)
White paint
Burnt umber paint
I was trying to keep costs down as much as possible so I did not splurge for the good stuff, and only spent $25 on supplies. That way I would not be too upset if it was a disaster 😉
On painting day, I rounded up a few brushes, choosing a small variety to cover my bases: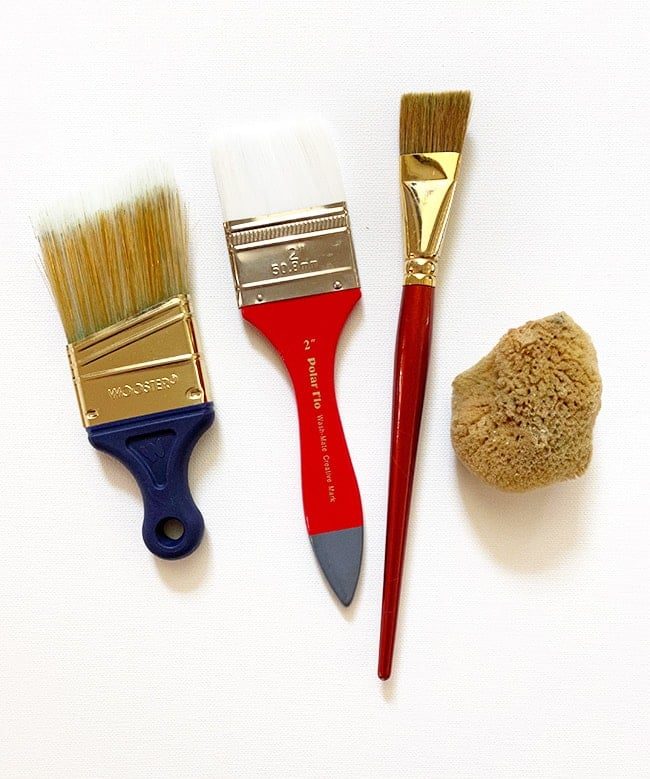
Then I set out my paints. Less is definitely more here—you can make almost any shade you want with just a few colors (I did not end up using the red and yellow).
The color scheme was inspired by our living room rug, with shades of olive green, brown, beige and rust:
For my palette, I took a tip from a YouTube video and used a baking pan, paper towel (soaked in water) and parchment paper. This is supposed to keep the acrylics from drying out, plus it is easy cleanup (and free, yay!)
Here is my dining room table setup with everything laid out.
The easel was too small for the canvas so it was a bit wobbly, but I made it work.
I also printed out my inspiration photo for easy reference.
The last and most important step before getting started… put on some good tunes! My music of choice was Norah Jones ??
Okay, let us get started! Before picking up a brush, I did a light pencil sketch of the general shapes (dividing lines between different shades of color) but it turns out that was a waste of time since the gesso hides it (whoops, told you I am a beginner).
So the real first step should be coating the canvas with gesso. I used my larger wooster brush for this.
Think of gesso as primer—it coats the canvas and fills in the texture, leaving you with a smooth surface for your paint to easily glide across. I applied two coats, and then immediately started the 'underpainting'.
This is a base layer that builds up texture and depth using a transparent color (this article has a great explanation for why it is needed). I chose white + a dash of burnt umber for my underpainting. You do not need to spend too much time on this, you just want a nice varied layer to give depth and dimension to your final piece. Heck, you could even stop here if you wanted something particularly unfussy and abstract…
Before moving on, I figured I would give my pencil sketch another shot. I definitely would not skip this step if you are a beginner.
Now the real painting begins. I am not sure if there is a best approach to this, but The choice was to paint in different layers by color, starting with my mid-tone using a mix of white, burnt umber, and viridian. I mixed in batches as I went—the color does not have to be exact each time so do not worry about using precise amounts of each. Just continue to mix a little here and there and experiment!
Then I started adding in some of the shadows, using more burnt umber (or less white). These are screenshots from the timelapse shared in my IG stories:
Once the shadows were filled in, I moved onto the lighter shades, using a mix of mostly white + yellow ochre (plus a bit of burnt umber and dash of burnt sienna in some areas).
I found it helpful to have plenty of paint on the brush at all times, and not too much water as that could remove the paint to reveal the canvas underneath. You want to blend the colors together on the canvas a little, but not so much that they become completely muddled together.
Once I was pretty happy with the composition of the light and medium shades, I took a step back to evaluate.
Works for me! Next it was time to move onto the darkest shades and paint the trees. This part was a bit less abstract than the sky and foreground, so I tested out a few different brushes to try and figure out the right technique.
I am sure there is a brush out there that is much better suited for what I needed, but the top right was the closest match so that is what I went with (if you are reading this and you are a pro painter, please recommend a good brush?!)
I began by outlining the shape of the tree using pure burnt umber (following my pencil guides), and tried to make the edges as 'smudgy' as possible. It was a little tricky with this brush. I figured out that a damp paper towel helped to soften the lines a bit.
I also used the smaller paint brush for the areas with finer detail.
Around the trees, I used burnt umber mixed with a bit of white for the secondary dark shade.
The last 30 minutes or so were spent going back over a few areas that did not look quite right and making small adjustments until I was happy with it. It is hard to know when to quit, and you can spend days painting and repainting over your work if you are a perfectionist. I capped my painting time at around 3-4 hours to avoid this. Just keep in mind the words of the famous Bob Ross: There are no mistakes, only happy little accidents.
Ta-da! What do you think? Does it seem pretty doable? Here is a closer look:
My advice if you are just starting out—the more abstract the art, the easier it is. Anything goes and you will not stress about how realistic/proportional it looks. The trees were the most difficult part of this painting, so you could skip those and just have a nice hillside landscape.
Another tip: start small. My 30×40″ canvas was a pretty massive space to work in, which means more room for “happy little accidents”. I would go with a more manageable 8×10″ or 11×14″ size to get the hang of things first.
The final step is to protect your painting with a varnish/sealer. I used a water based matte Polycrylic.
Hopefully Esmé grows up to love this painting and I can pass it down to her one day, so it needs to last a very long time! No one has to know it only cost 25 bucks to make ?
Up next: the unfussy $10 DIY canvas floating frame we built for this painting. I decided it needed its' own tutorial, so do not go anywhere cause I'll be sharing all the details here on the blog tomorrow!