Ikea Malm nightstand hack
How to transform an Ikea Malm chest into a designer inspired nightstand! Follow this unfussy step by step tutorial.
If you are looking for a stylish nightstand with plenty of storage (without spending a fortune) this is the Ikea hack for you! Find out how we took this Ikea Malm chest from boring and basic to designer-inspired nightstand in this step by step tutorial.
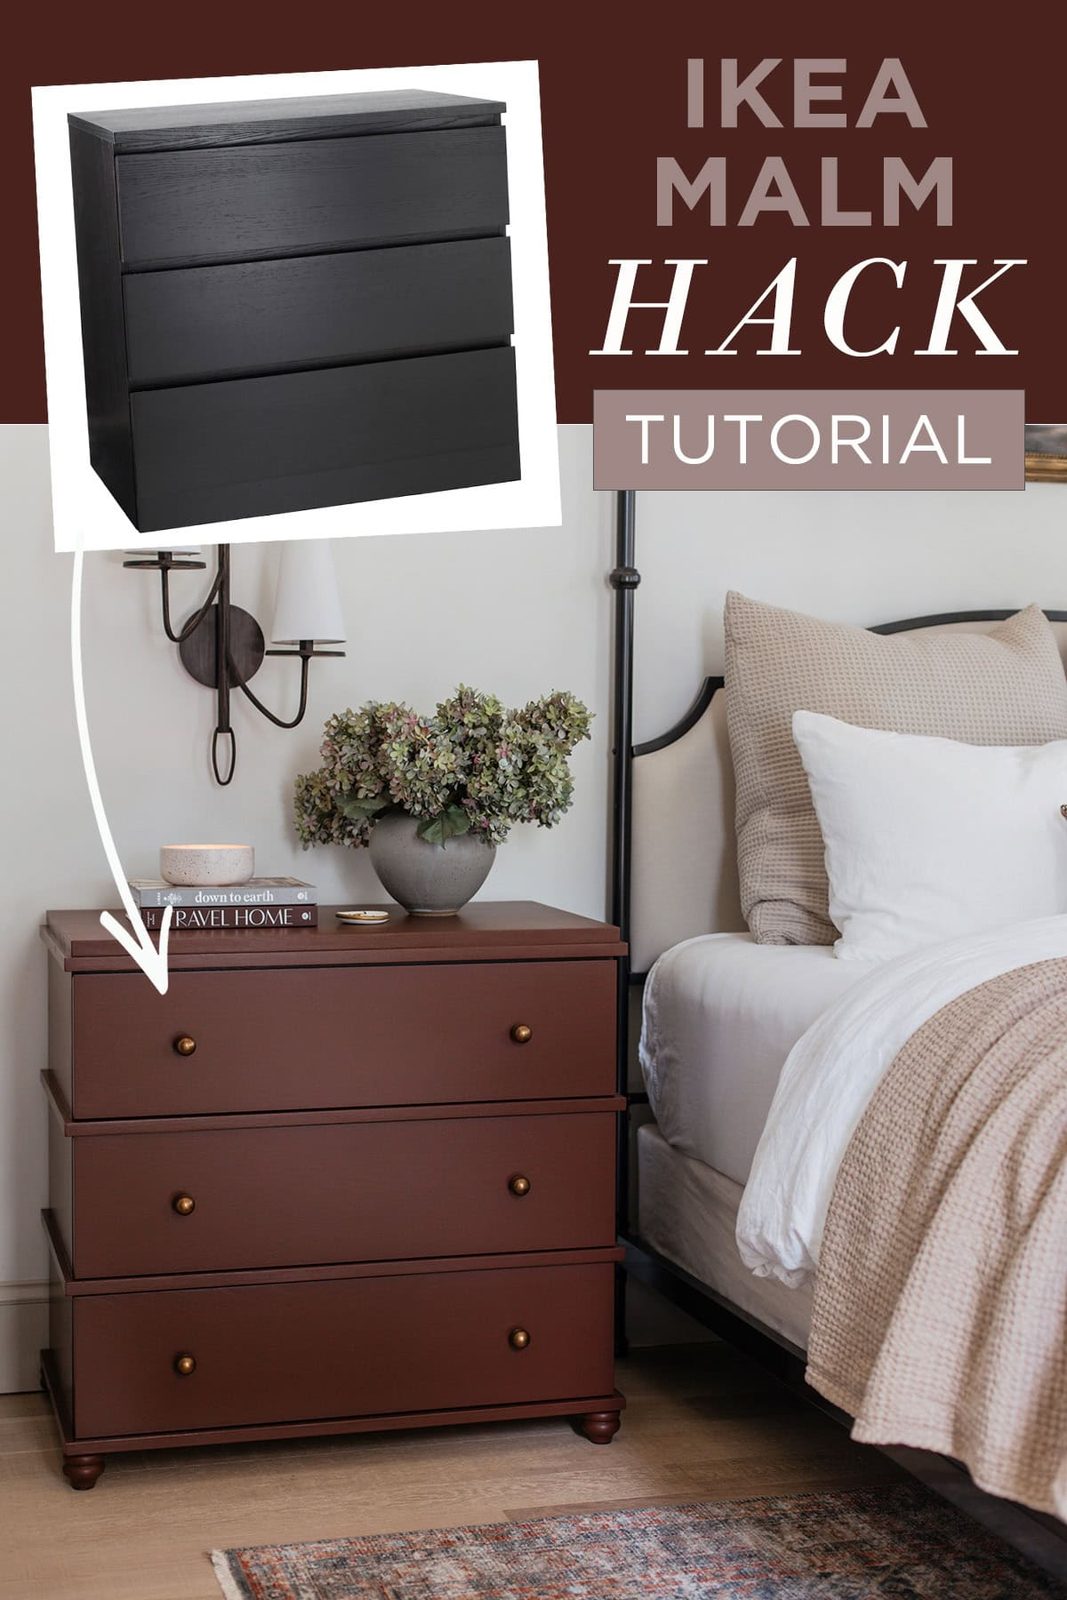
There is a serious shortage of well composed, substantially sized nightstands (at least 30″ wide) at a decent price point. Most nightstands are 24″ or less and can look off scale with queen or king size beds (IMO)—plus, lots of storage is a must for me. Designers often use 'bachelor chests' as an alternative, and I came across this beauty that reminded me plenty of the Ikea Malm… could you see the potential?
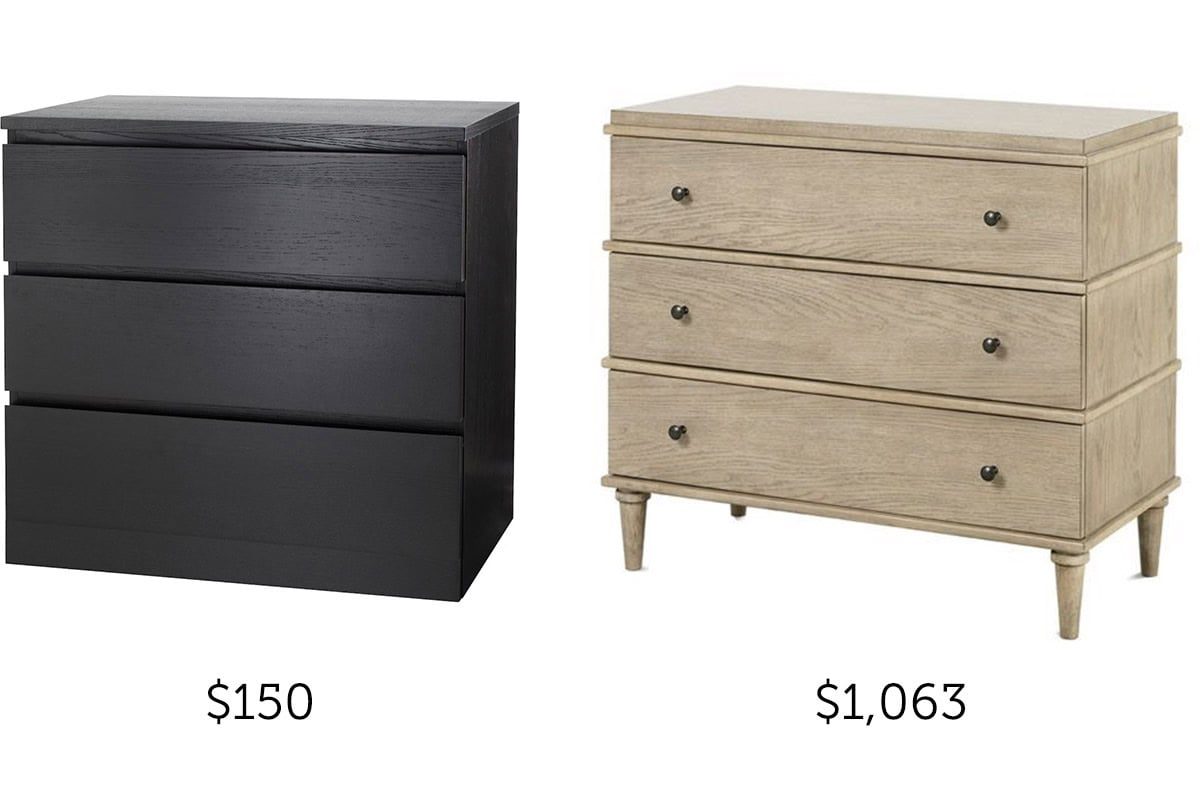
They are nearly the same size, and the black/brown finish is made with real wood veneer which is ideal for painting. Malm chests are mass produced and very common to find used on your local Facebook Marketplace or OfferUp, if you want to save $$. There were several listed in my area, but The aim was to be certain that ours was in well suited working condition so we paid full price at our local Ikea.
Let us get right into it!

Supplies
- Ikea Malm 3-drawer chest (black/brown or stained oak)
- 3/4” 1x6x6' select pine board
- 3/4” 2×4' plywood
- Furniture feet(optional)
- Cabinet knobs
- Edge banding
- 100 + 220 grit sandpaper
- Wood glue
- Wood filler
- Primer + Paint
- Paint brush + roller
- Sealer
Tools
- Miter saw
- Table saw
- Finish nailer
- Orbital sander
- Large + small bar clamps
- Drill
Step 1: Trim down dresser height
This step is optional if you do not plan to add furniture feet. The Malm chest is 31 3/4” tall which is about the max I would want as a nightstand, so I did not want to raise it up any more. We planned to add a wood base to reinforce the bottom, and attach feet to that.


Before assembling the chest, set your table saw to 2 9/16”, and run both sides and the lower back piece through. This measurement is 1/16” below where the bottom drawer sits, so the new base will be at the well suited height.
Step 2: Sand and assemble
Technically sanding is also optional, but I would highly recommend it for better paint adhesion. I chose the black/brown Malm because it has a layer of real wood veneer, and the stain/lacquer can be sanded off. Bare wood is the ideal surface for paint to ensure a durable, lasting finish.
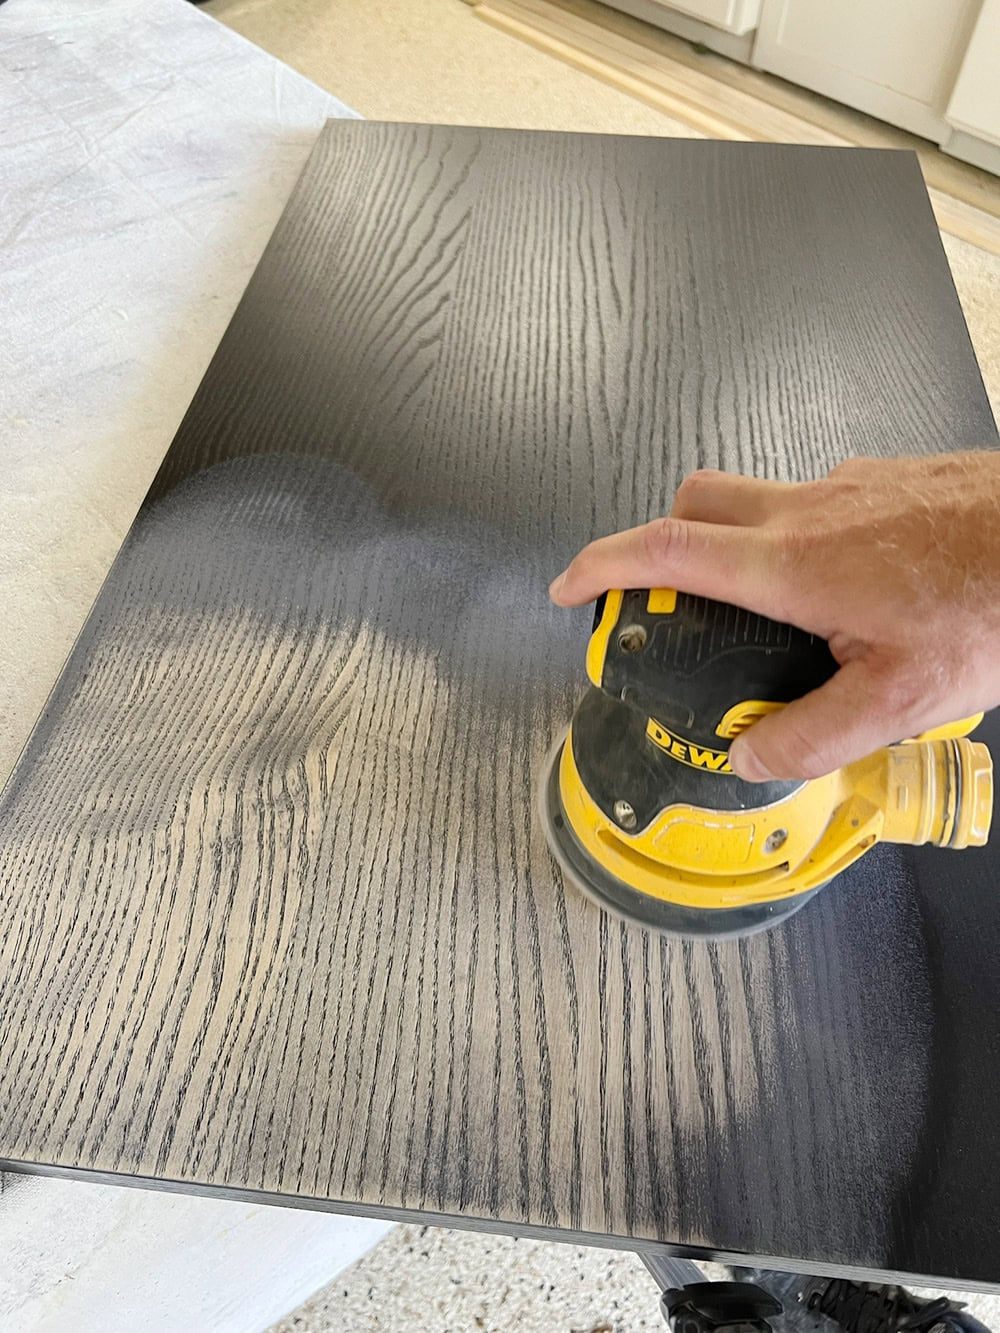
We found it easier to sand the pieces before assembling, but either way works.
Step 3: Rip down 3/4” trim pieces
We used scrap 3/4” pine wood, but any knot-free 3/4” wood is fine. Here is the cut list (per dresser):
- 3/4” x 1/2” x 18″ (x6) side pieces
- 3/4” x 1 ⅜” x 32 ½” (x3) front pieces

With these measurements, the side pieces project 1/2″ from the dresser, and the front pieces extend 3/16″ beyond the drawer fronts. Feel free to adjust this to your own preference!
Use an orbital sander with 100-220 grit to smooth out any saw marks and sharp edges.

Step 4: Attach front and side trim pieces
Apply wood glue to one of the side pieces and use bar clamps to hold it in place. We started at the top.


Use finish nails to secure it.

Repeat the process on the other side.

Add the front trim piece, making sure to line it up evenly on both sides. Clamp it to the top of the dresser and nail in place.

Since the two lower front pieces rely on the strength of the wood glue, we kept the clamps on for at least an hour to allow the glue to dry before removing them.
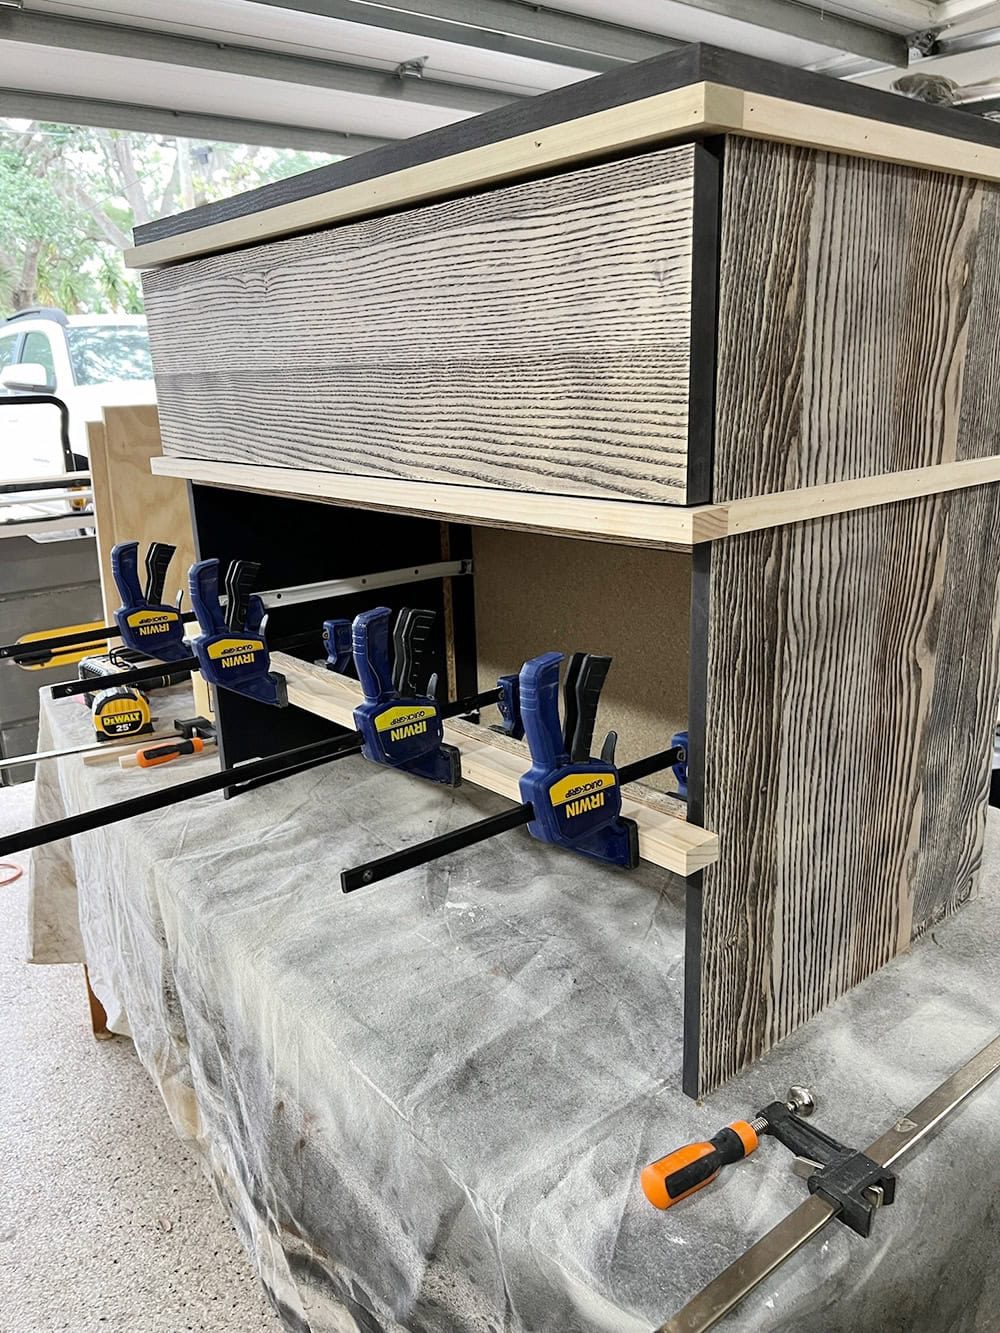
Heres how the finished trim looks:

Step 5: Attach the base
Cut a piece of 3/4” plywood to 19½” X 32½”. This matches the length + width of the top trim section.

Iron on edge banding to finish off the edges.

Flip the dresser over, apply wood glue along the bottom and align the plywood base on top. We used a long straight edge to ensure everything matched up on all sides.

We shot a few nails in first to ensure the wood would not shift when attaching.

Then, secure the base to the dresser with wood screws (we used two on each side). Pre-drill your holes first, and make sure they are going into the center line of the sides below to avoid splitting.

Step 6: Add legs
I found these cute2” wood legs on Amazon and bought two sets. I think they genuinely elevate the style of a dresser (literally and figuratively 😉)

The final dresser dimensions end up at 32½” w x 19½” d x 30¾” h. Nice and substantial enough for any size bedroom!

Step 7: Fill nail holes and sand
We filled the nail holes and seams with plastic wood, then sanded everything smooth with 220 grit. This is our go-to technique for a well composed seamless result.

Step 8: Prime, paint, protect
Priming is always a good idea, particularly with furniture that receives heavy use. Little Greene Paint Company sent me primer and paint from their new Sweet Treats collection to try out.

The primer is water based for easy cleanup, and they were able to tint it to match my paint color which was a nice bonus.


I have been genuinely digging rich brown and burgundy tones lately, so I was excited to try the color Ganache (in eggshell) out on a piece of furniture! The right paint color can be a great alternative to get the same feel of dark natural wood.

Look at my Furniture Painting Guide to learn the exact tools and steps we use for a professional, lasting finish. One coat of primer + two coats of paint later…

After the paint dried overnight, I finished it off with three coats of matte polycrylic for protection.

Cannot forget the hardware! These brass knobs are a favorite affordable find.
The Reveal

I cannot get over this color. It is truly the well suited mix of brown and burgundy.

This makeover is just another example of the transformative power of trim and paint.

And those dainty brass knobs are the icing on the chocolate cake.

These nightstands were intended for the primary suite in the new house renovation, but I am almost wishing they could stay in our room now.

I think I'll just have to refinish our existing nightstands—I am in love with this color and the richness it adds.

Anyone else ready to paint something dark brown now? Let us do it!