Modern Mediterranean Kitchen Reveal
Revealing our DIY Modern Mediterranean kitchen! Get inspired with DIY project tutorials, links to sources and a full cost breakdown.
After over a year of planning, designing and building… our dream DIY 'Modern Mediterranean' kitchen is complete! This renovation was truly a labor of love—certainly the most hours we have ever put into a single project, and one that required the most skill. Now that it is over, I feel like we can tackle anything!
Please join me for a video tour…
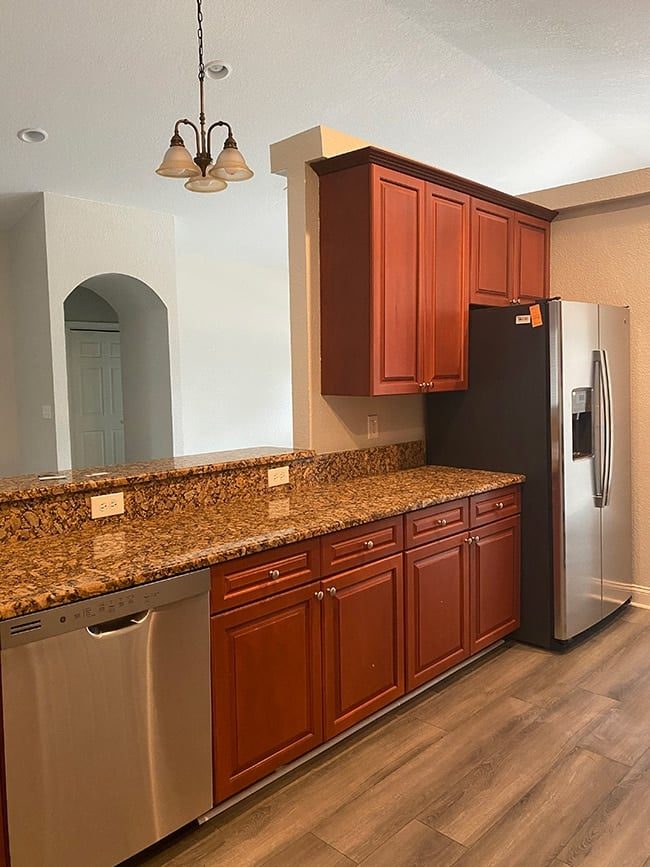
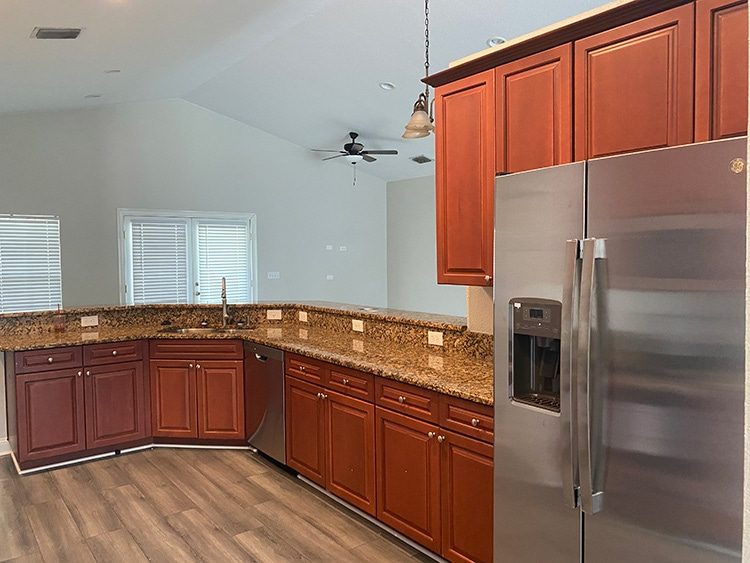
Before
First, let us go back to the beginning and remember how this room started at the Hacienda Hideaway. It was an awkward, closed off kitchen in the middle of a great room. We promptly tore it out within days of buying the house:


During
After demo:

Building therange hood:
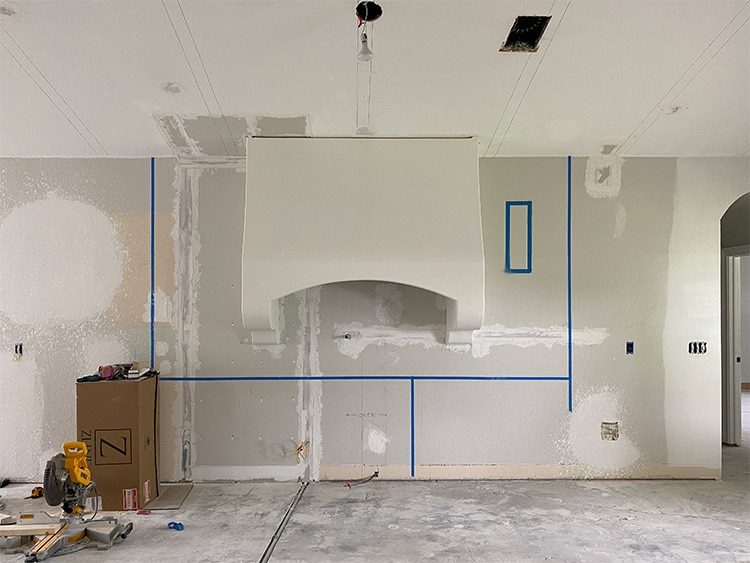
DIY ceiling beams and floor install:

During the custom cabinet installation:
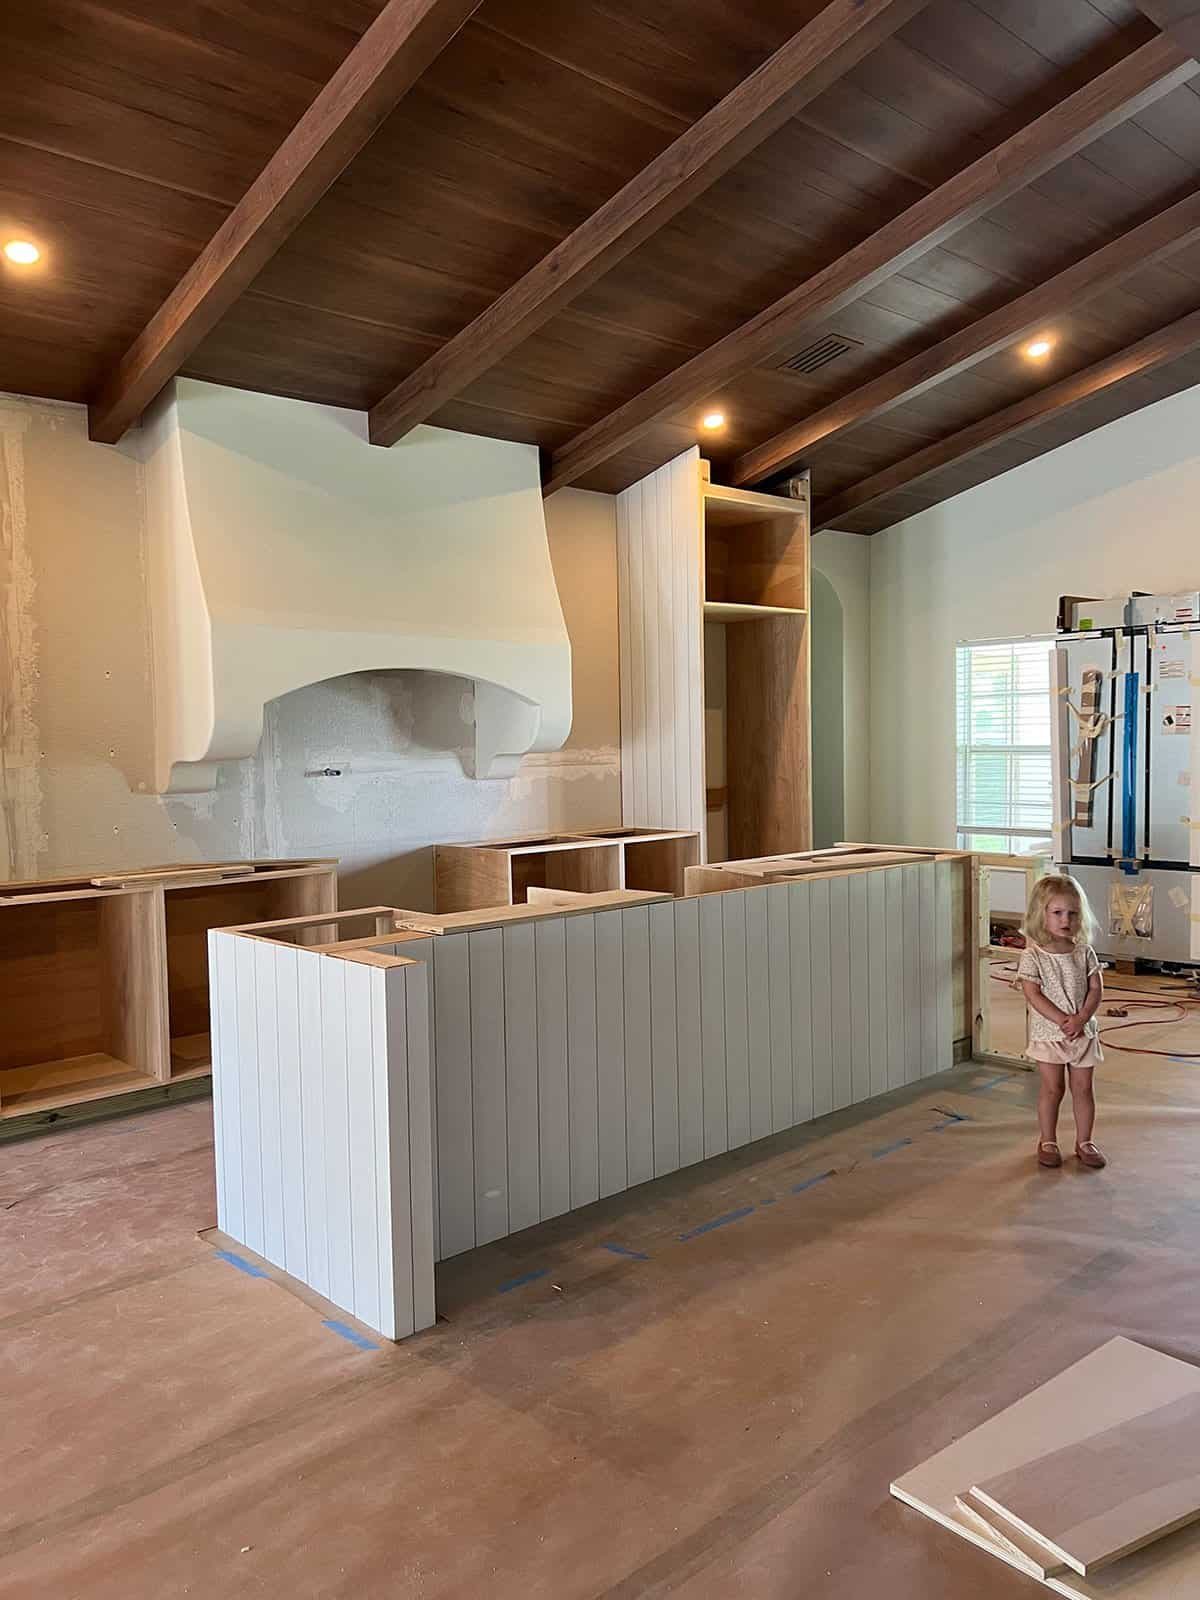
After cabinetry, counter and tile install:

After
And that brings us to the grand finale! I present to you, the new Hacienda Hideaway kitchen:
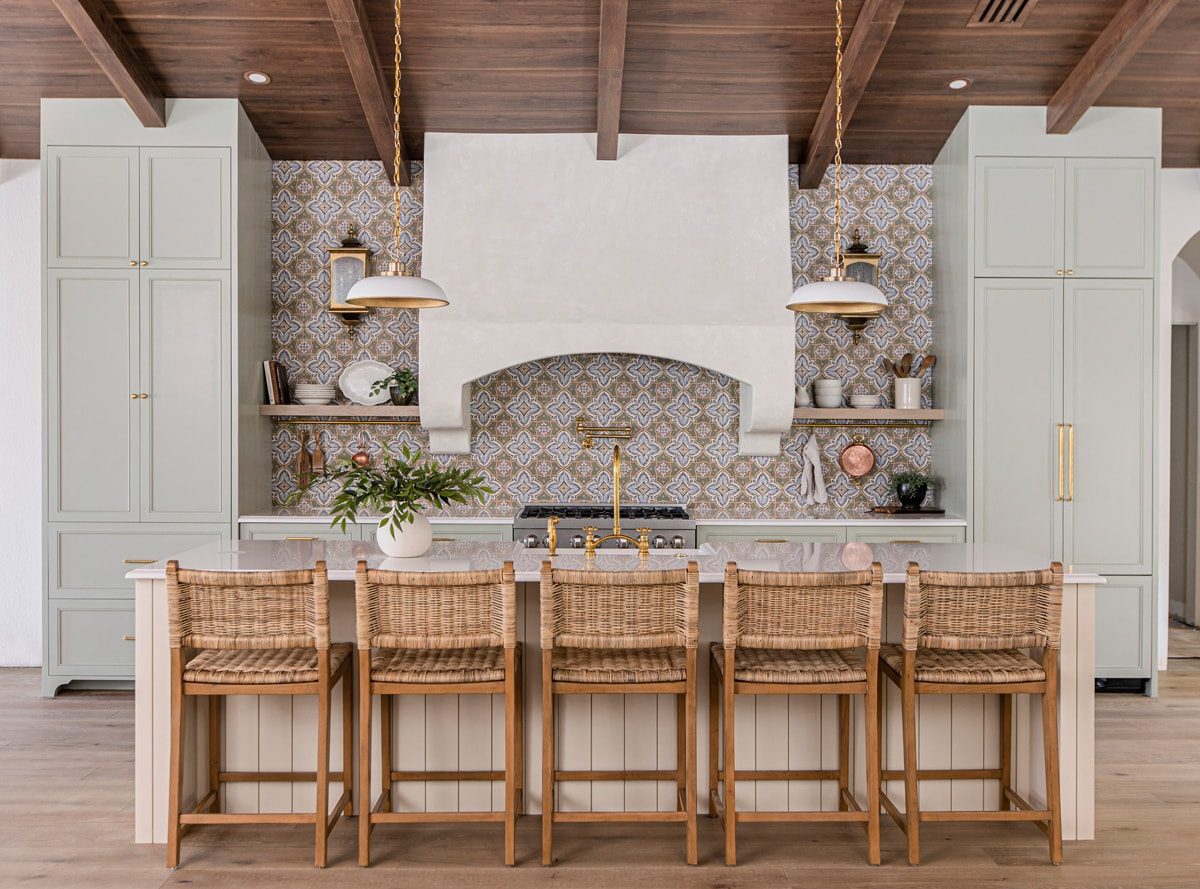
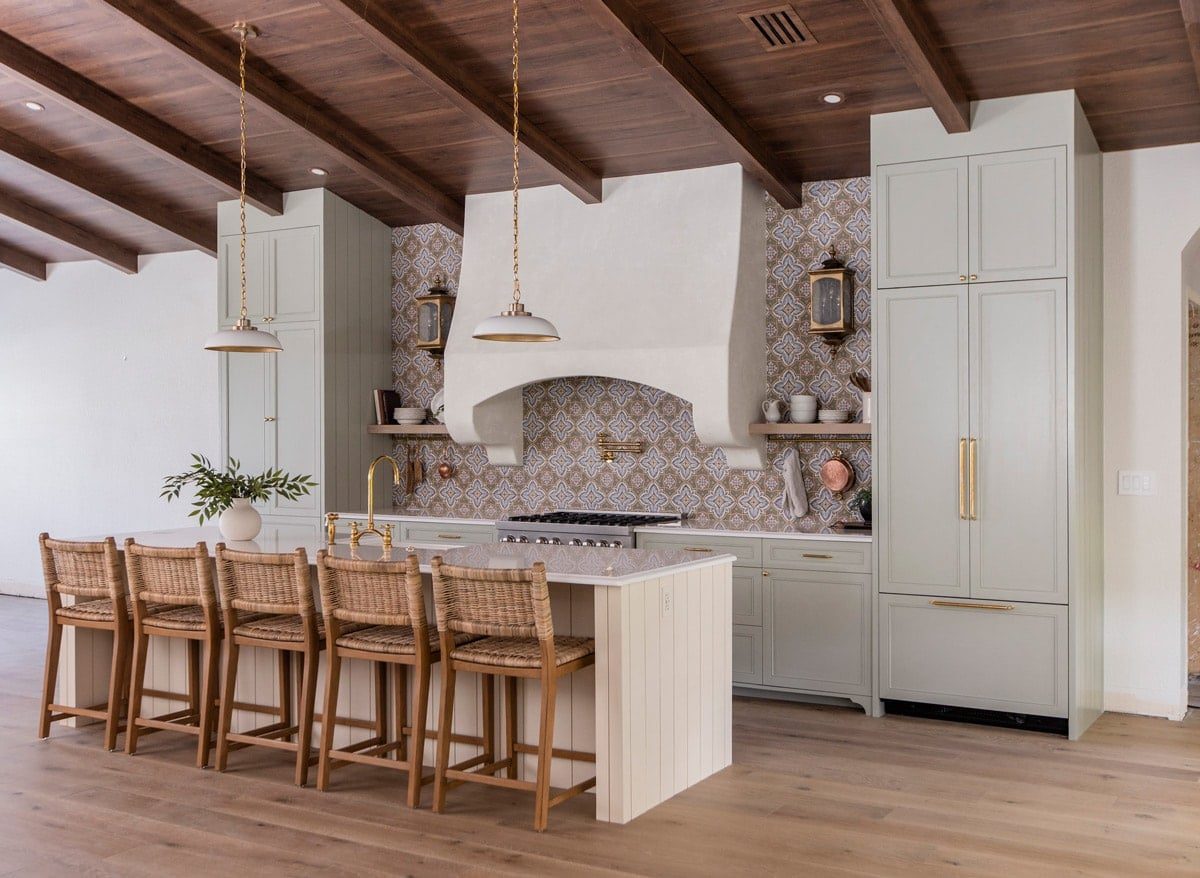

Do not look too closely at the background—the rest of the house is still a construction zone (hello, missing baseboards).


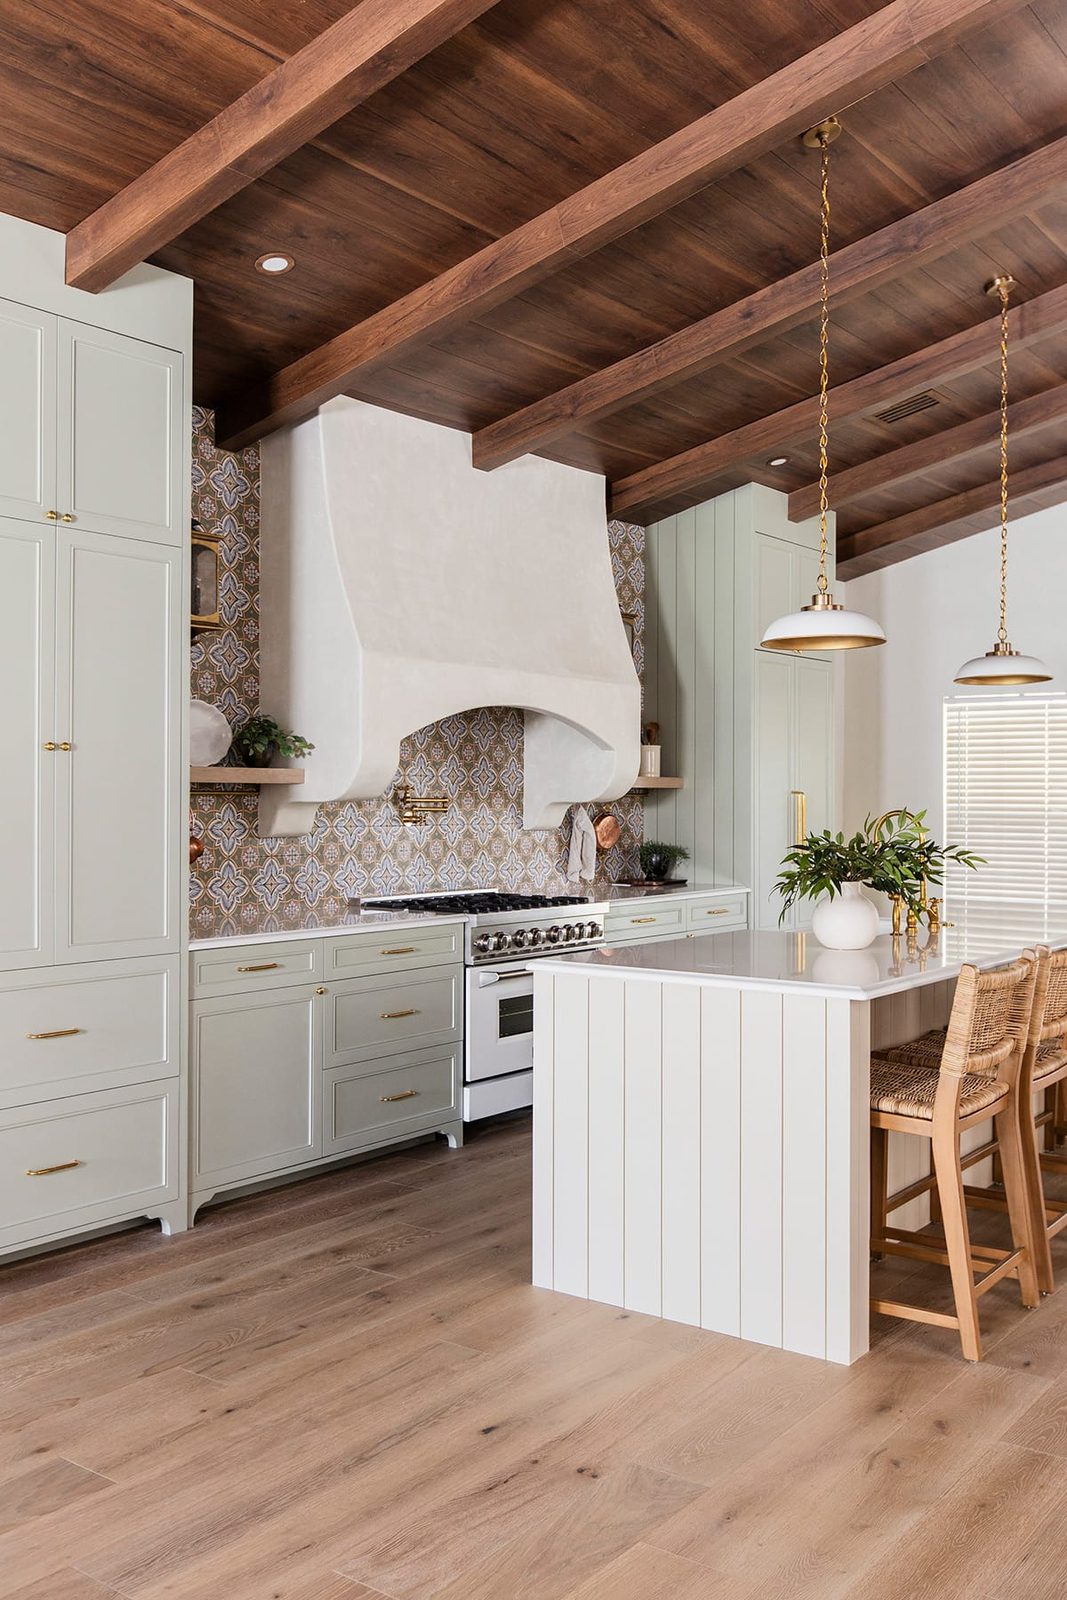
I cannot decide which angle is my favorite… so I am just going to post them all.
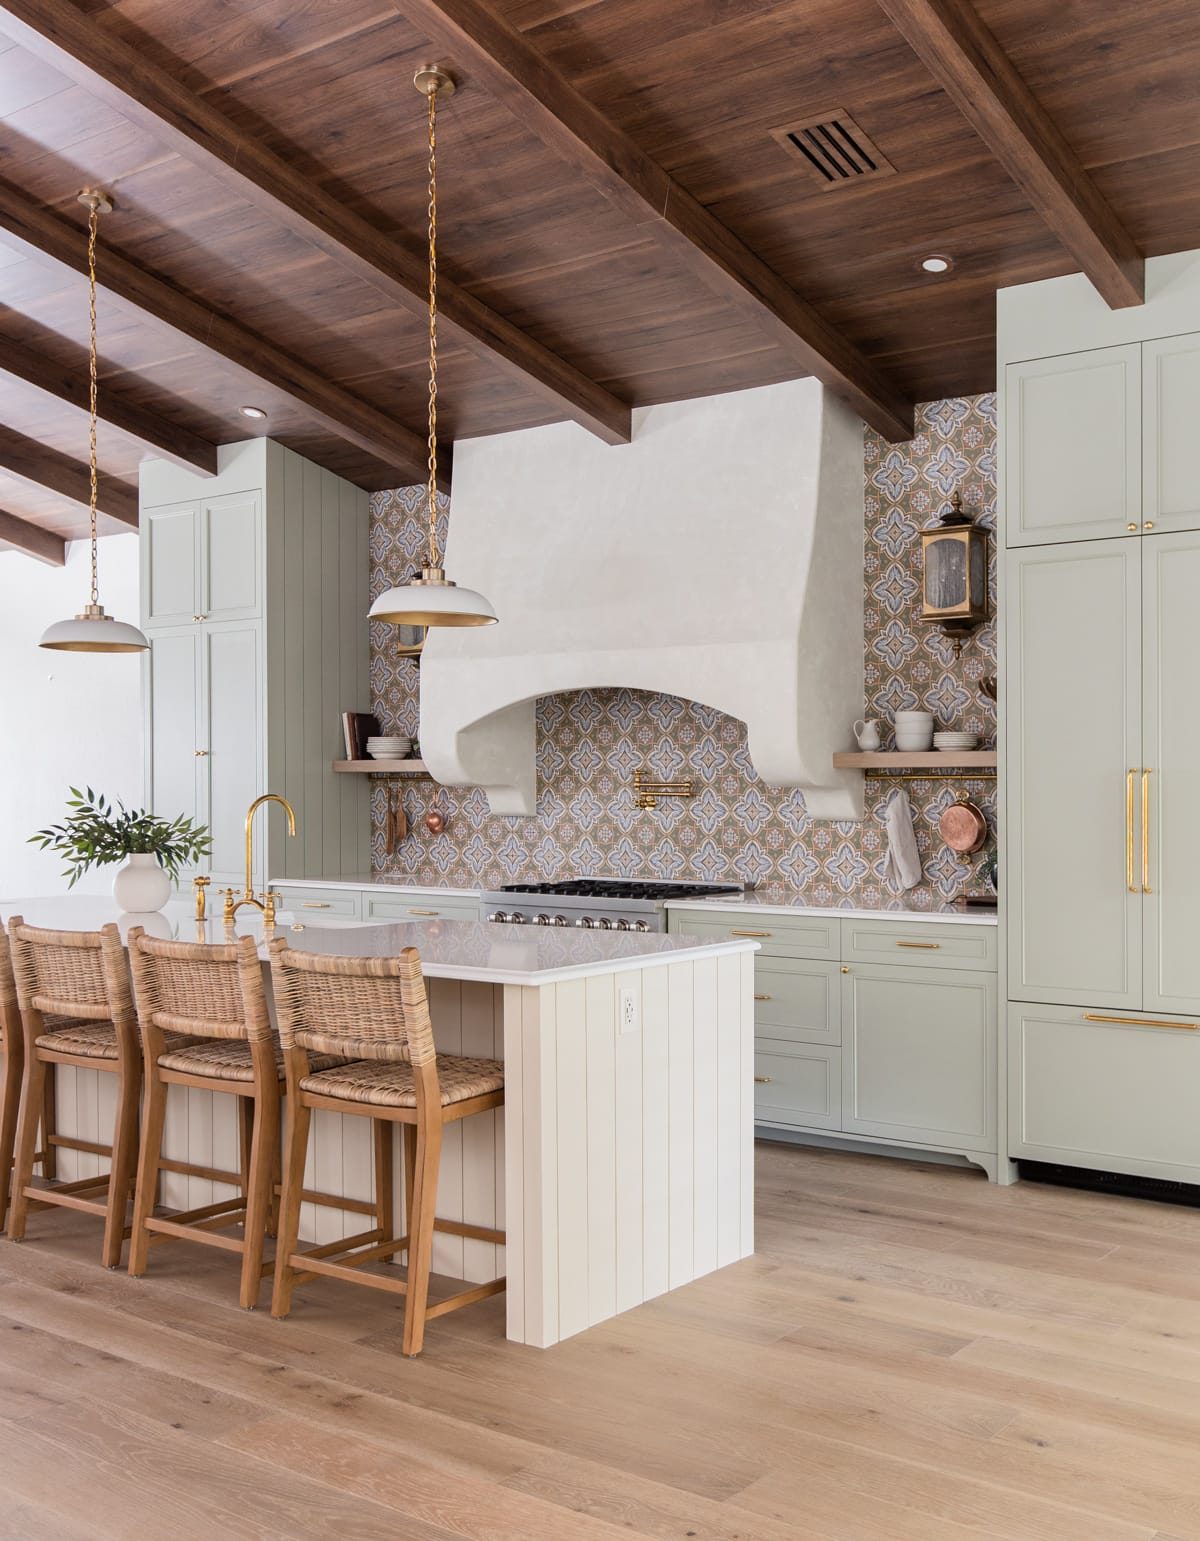
Let us talk about these cabinets. I am still surprised we were able to pull off that 1/16″ reveal and get everything to fit so well. Shout out to Nieu Cabinet Doors for providing the doors, drawers and hardware that made installation so much easier!

Hidden behind the far right doors you will find this Jenn-Air panel-ready fridge. There are surprisingly few options for 36″ panel-ready fridges, so this was by far the biggest splurge of the kitchen (luckily I was able to use an employee friend's 40% discount, and the price has gone way up since!):

The range, hood insertand dishwasher are all from Z-LINE. They were the most affordable white appliances I could find, with great reviews, and so far they have not disappointed!

I chose the 36″ DuraSnow dual fuel range in white matte, and a matching top-control Energy Star white matte dishwasher.
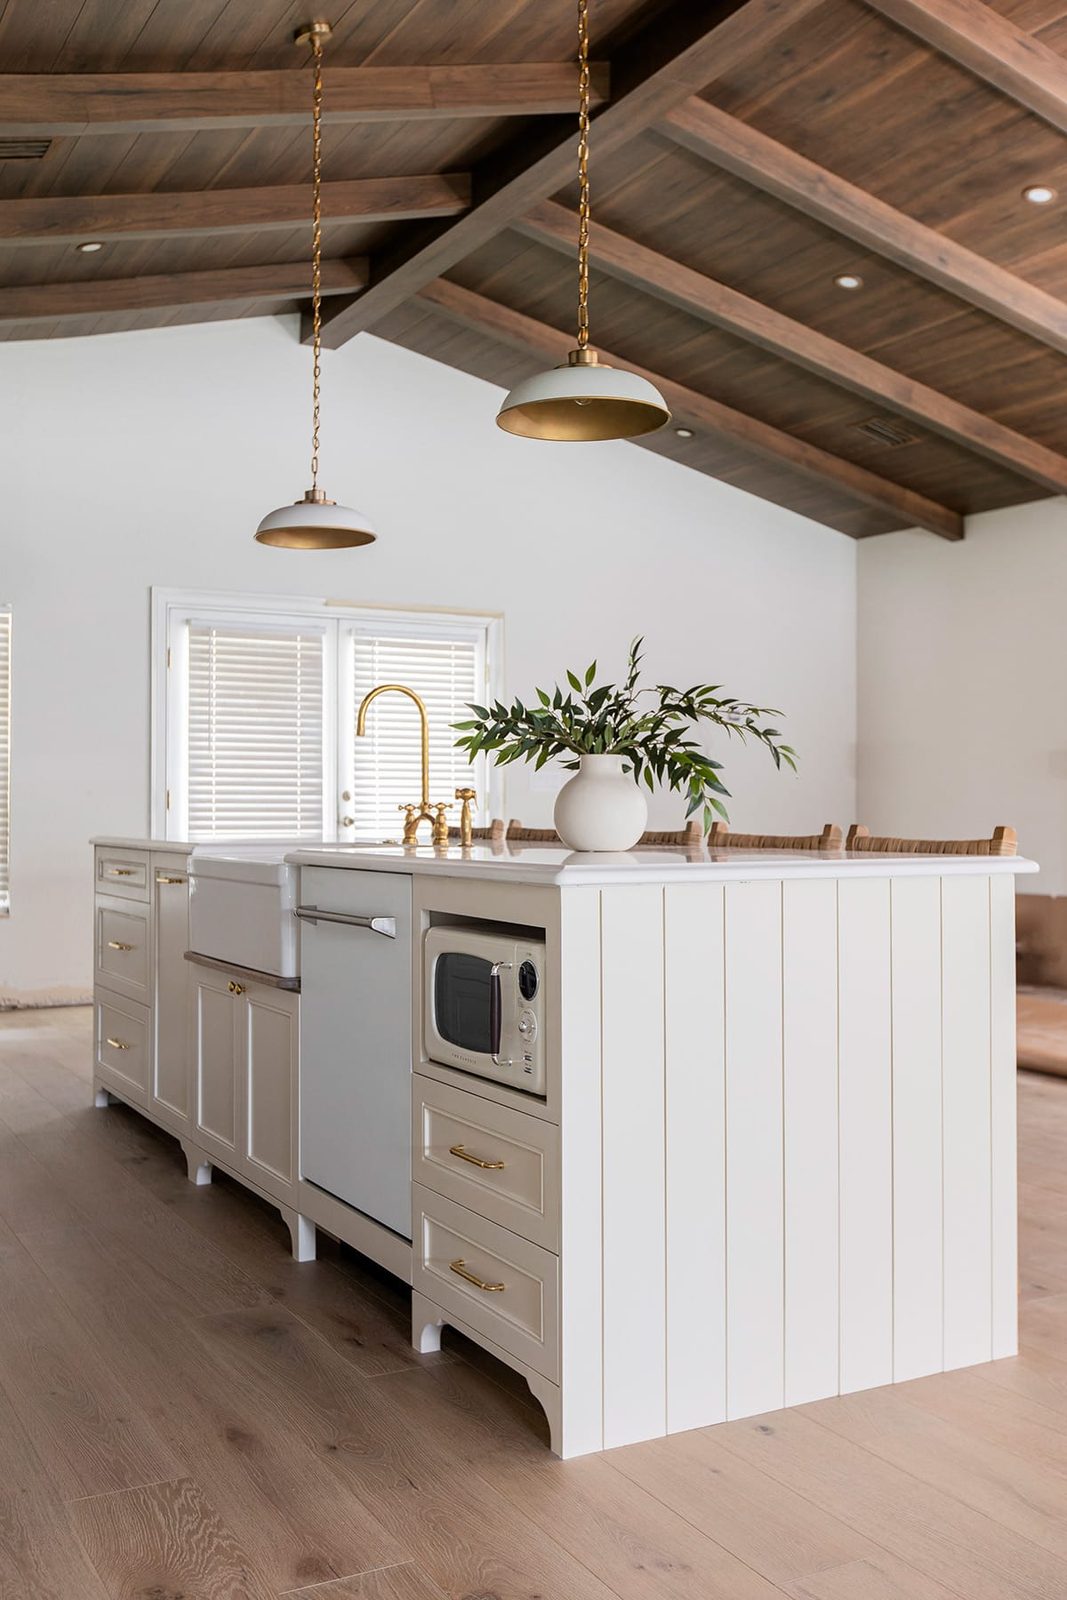
To the right of the dishwasher, we built an open cubby and found this cute retro microwave (small but it holds full size plates!) A 30″ Elkay farmhouse sink + DIY drip ledge sits in the center of the island:

I had the hardest time finding non-cheap looking brass/gold faucets and hardware that matched, so I went with unlacquered brass across the board. Yes, there will be some maintenance involved, but the patina genuinely is charming and timeless.

I sourced the most reasonably priced raw brass bridge faucet and pot filler I could find on Etsy.

For the cabinet hardware, I landed on these 6″ pulls, appliance pulls, and knobs.
Both the lantern sconces and pendant lightsgot a quick makeover using Gold Leaf Rub 'n buff. And look at that ogee edge detail on theHanstone Quartz countertops—worth every penny!

The hand painted-style backsplash tileis made in Spain, and brings such character to the space. And hallelujah for finding an alternativeto drilling outlets into the backsplash!

I made a last minute decision to install a pot railunder the DIY floating shelves, and I am so glad I did! They are definitely giving me old world European vibes.

The counter stoolswere a World Market find, and I think they are a well suited fit for this space. The natural woven material helps balance out all of the hard and shiny surfaces.

DIY Projects
In case you missed any updates over the last year, here are all the projects you need to know:
- Kitchen Design Plans
- DIY Range Hood
- DIY Ceiling Beams
- Floor installation
- DIY kitchen cabinets with Nieu Cabinet Doors
- How to hide kitchen outlets
- How to make custom toe kicks
- DIY sink drip rail
- Venetian Plaster range hood
- DIY floating shelves
Sources
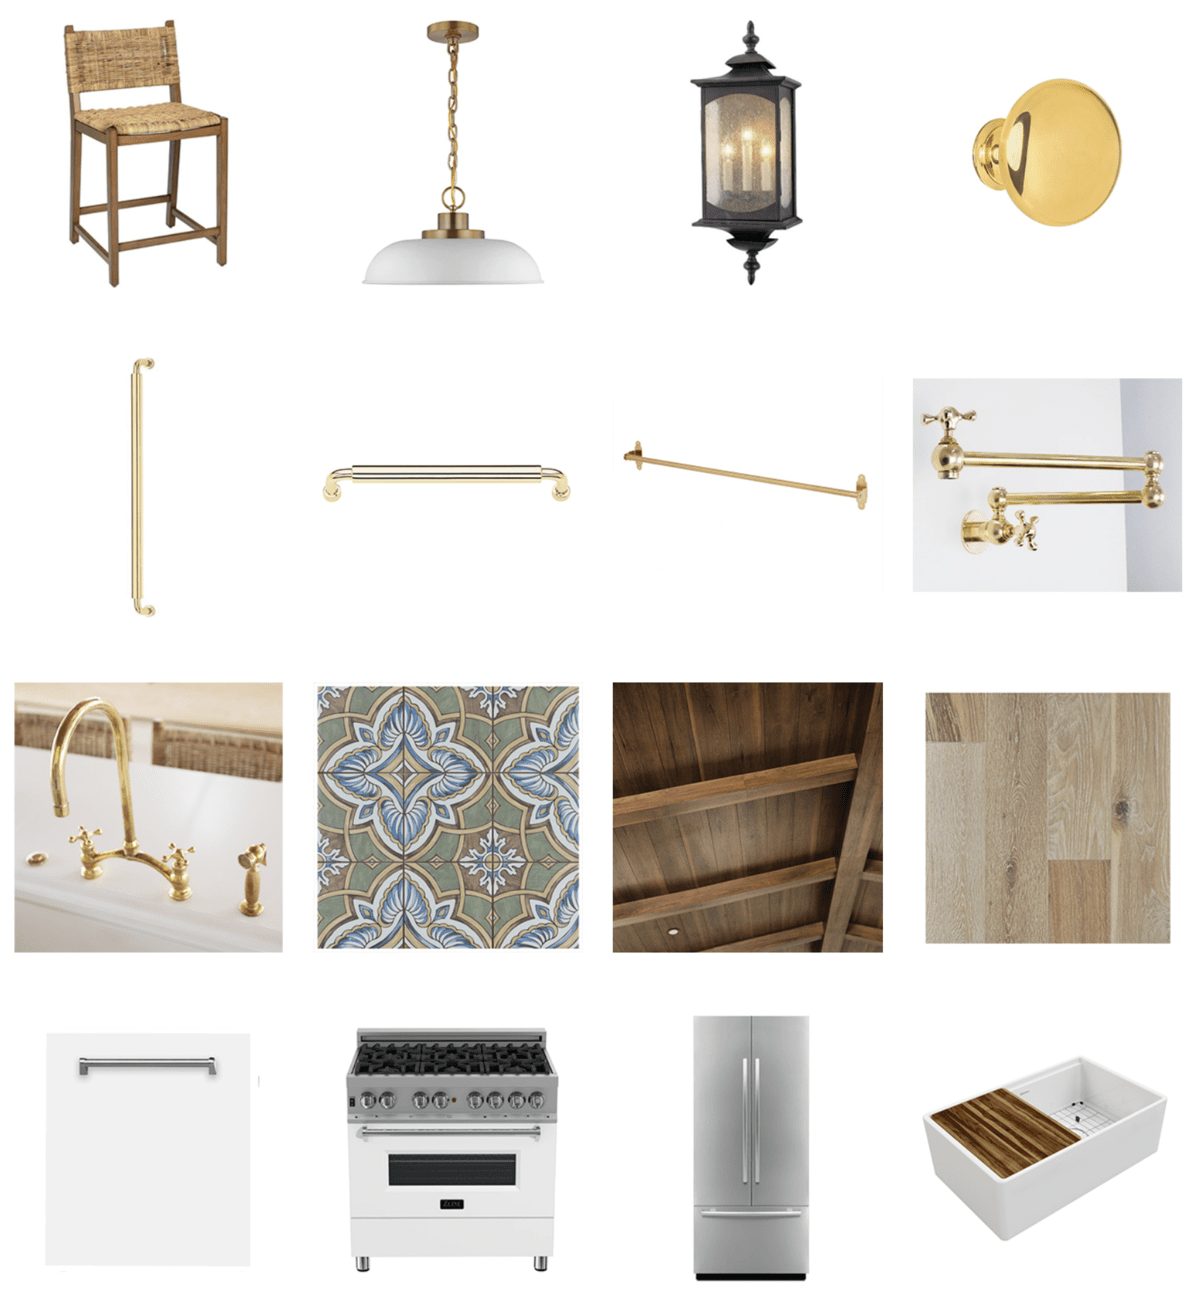
I have added the Hacienda Hideaway to my Sources page, so you can now reference these links at any time! Click below to find all of thepaint colors and sources:
Cost Breakdown
As promised, here is a full cost breakdown by category (materials + labor). Note that these line items include the full retail value for the materials used. Some of these items were provided at no cost or a discounted rate for sponsored posts—I'll also share our actual cost below.
Materials
| Cabinets & hardware | $11,562 |
| Appliances | $14,263 |
| Countertops | $6,400 |
| Tile | $691 |
| Lighting | $678 |
| Electrical | $726 |
| Faucet & pot filler | $1,186 |
| Sink & plumbing | $1,718 |
| Range Hood | $614 |
| Shelves | $165 |
| Counter stools | $1,212 |
Labor
| Plumbing | $2,313 |
| Electrician | *$3,000 |
| Counter installer | $3,677 |
| Tile installer | $2,000 |
| GRAND TOTAL | $50,205 |
*We hired an electrician for multiple jobs throughout the house at once, so this is just a rough estimate of what the kitchen portion may have been.
*I did not include the ceiling or floors, as those are part of the great room/entire house and not kitchen specific.
After sponsored and discounted items, our actual total came in closer to $23k. Our original budget estimate was higher than this, so we are happy with that number! Even if it did take us half a year longer to finish than we thought 😉
We also sold the old cabinets, counters and appliances in the original kitchen for $2,065, so that helped offset our expenses.
Of course, we saved the most by DIYing—building the cabinets and range hood from scratch, along with plenty of the finish work. If we were to hire out those specialized jobs, we'd probably be looking at at least another $25-30k in labor costs.

Thank you to everyone who followed our progress and supported us along the way! It has been a pleasure to document and share these projects with you. Now that this one is over, it is time to get back to our long overduelaundry room remodel. More on that next week!