DIY Built-in Bunk Beds
How to build DIY built-in bunk beds! Follow this easy step by step tutorial to learn how to build custom bunk beds for kids and adults.
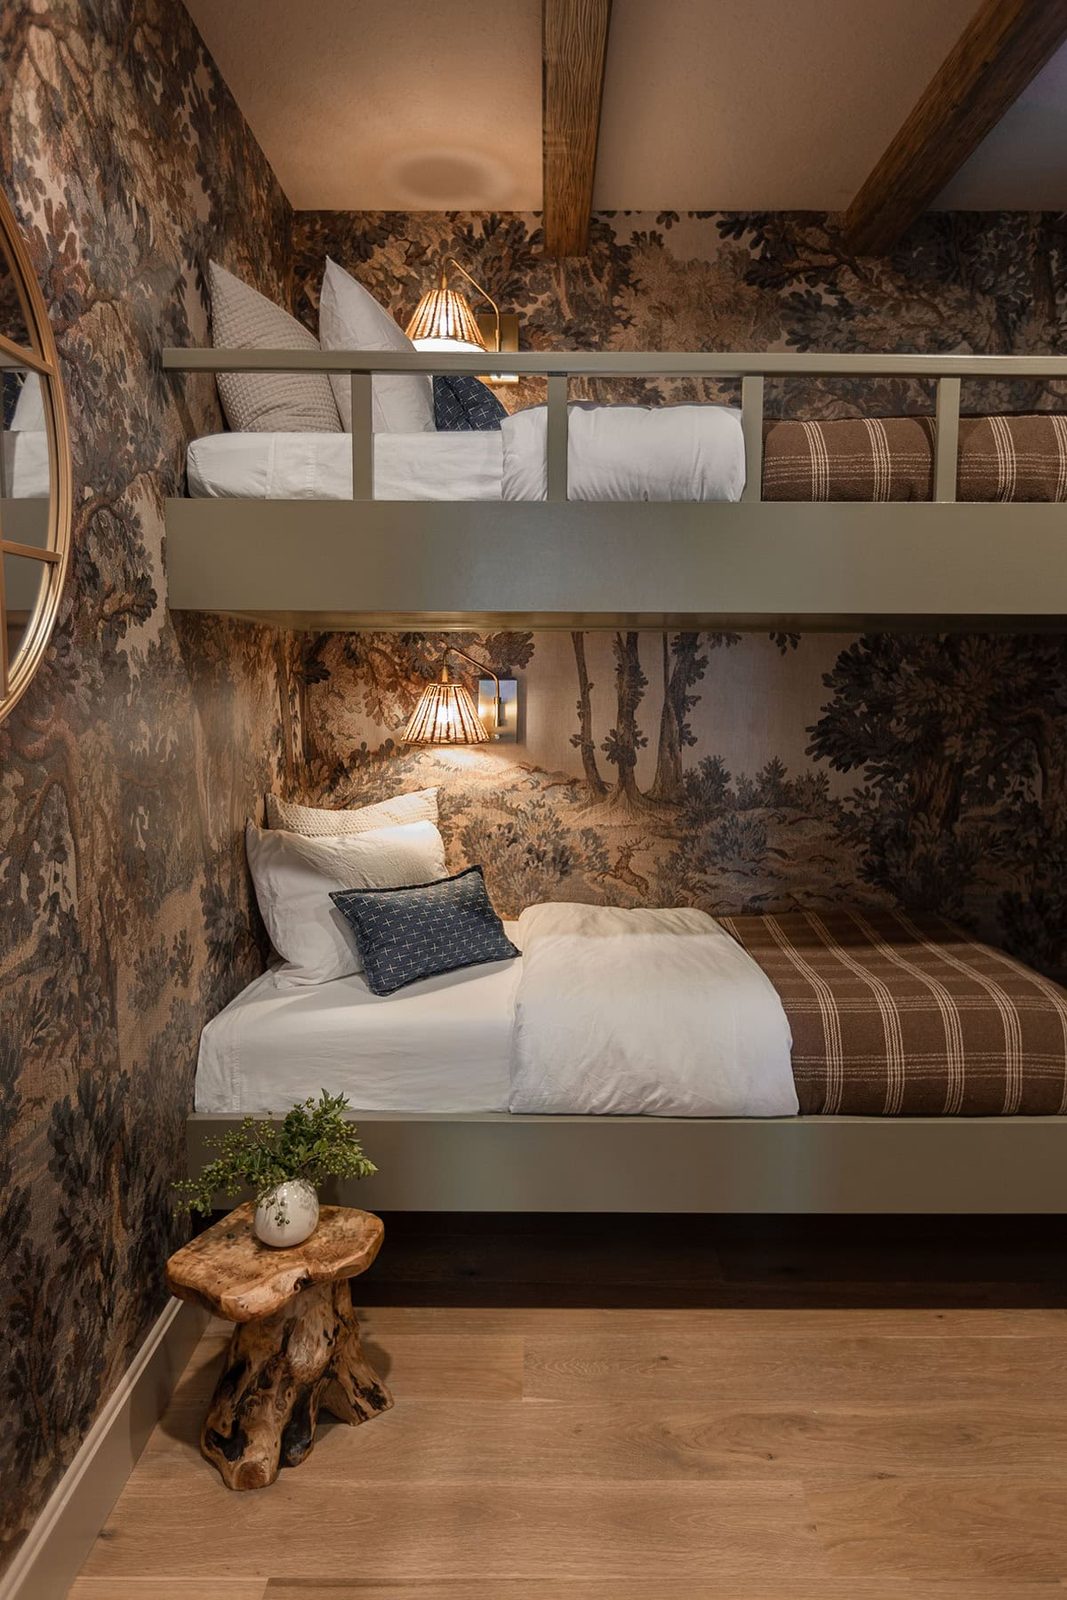
Looking to upgrade your room and maximize space with a custom bunk bed solution? Follow this tutorial and learn how to build unfussy and sturdy built-in bunks that can be adapted to fit any wall or mattress size.
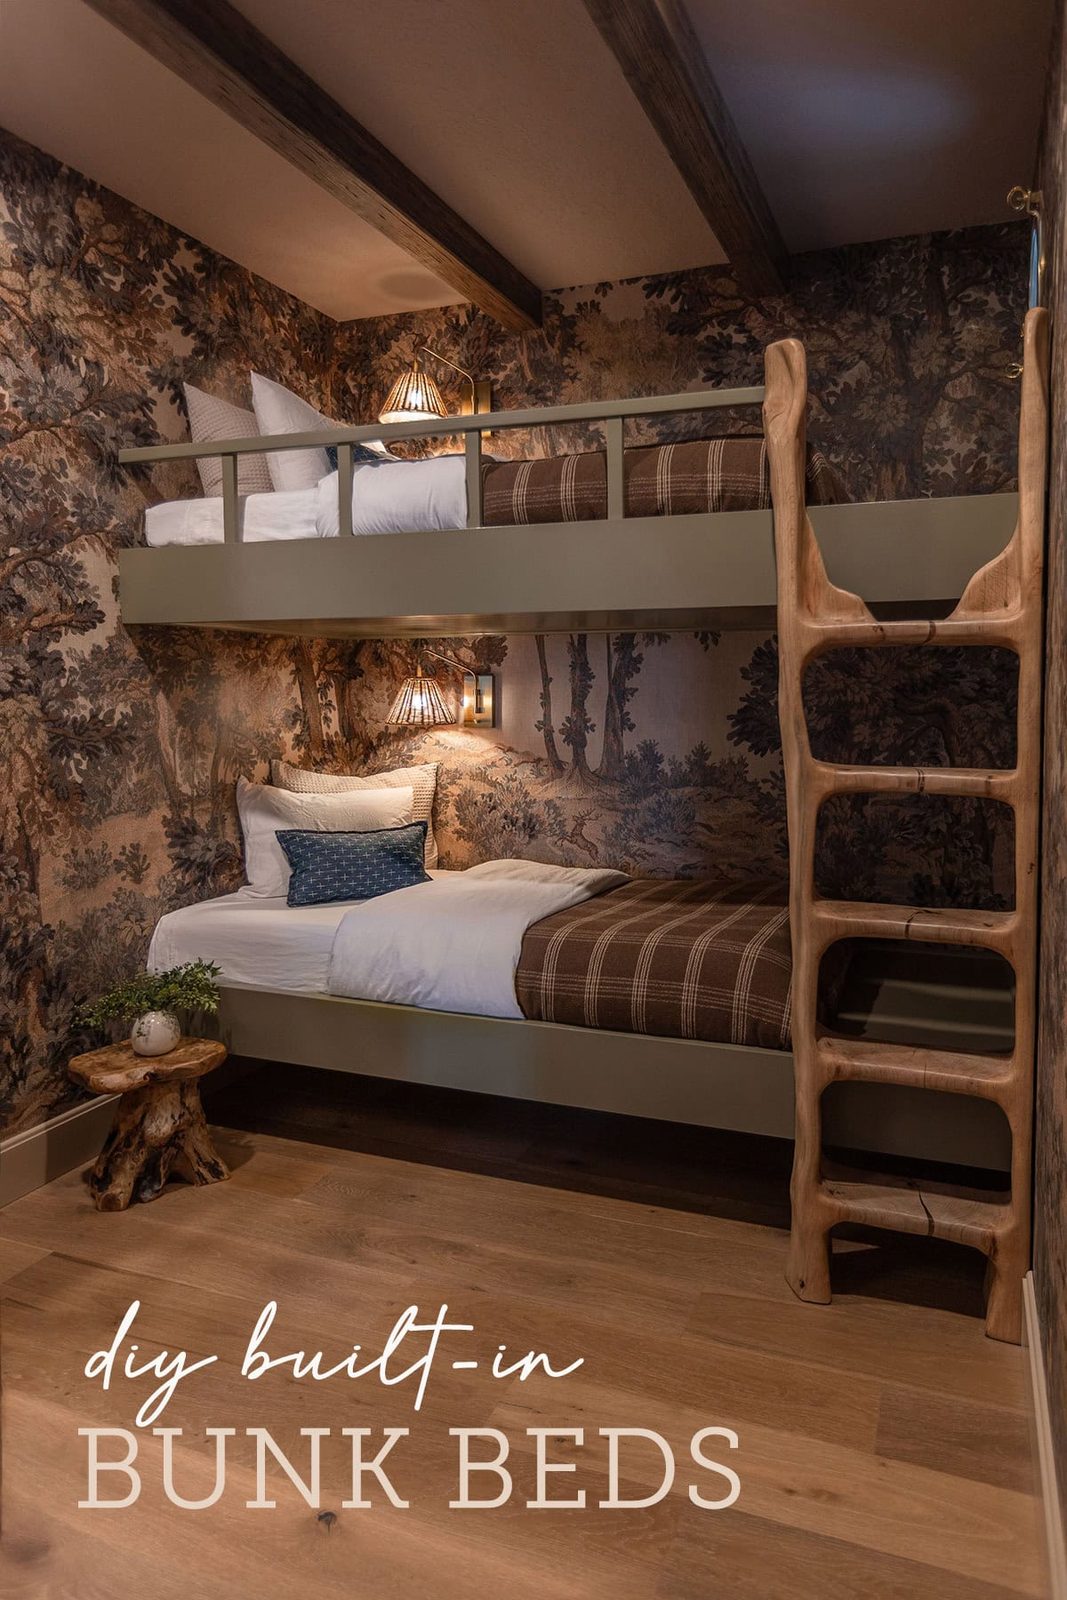
Over the years, we have had fun designing and building loft beds, hanging beds, big kid beds, and quadruple bunks to name a few. I would like to think we have got the process down by now, and today I am sharing a unfussy and straightforward bed construction that you can customize to fit your needs.
This is how we built the bunk beds for our Treehouse Bunk Room:
Tools
- Finish nailer
- Impact driver
- Miter saw
- Circular saw or Table saw
- Orbital sander
- Multi-tool
- Clamps
Note that the materials list below shows quantities for two twin beds on an 8' wall. Yours will vary based on wall and bed size.
Materials
- 2x4x8 (8)
- 2x6x8 (6)
- Structural screws
- Joist hangers (14)
- Framing nails
- 3/4″ 4×8' plywood (2)
- 1/2″ 4×8' panel (2)
- 3/4″ and 2″ edge banding
- 1x2x8 for railing (1)
- 2x2x8 for railing (1)
- Quarter round trim (5)
- Shiplap panel (1) or planks
- Anchor bolts
- Liquid nails
- Wood glue
- Wood filler
- Caulk
- Paint + primer
Framing
First, decide on the height you want your beds to be. Our ceilings are 8'11”, and we installed the 2×6″ framing as shown below. Make sure to add a few extra inches to allow enough room for bedding.
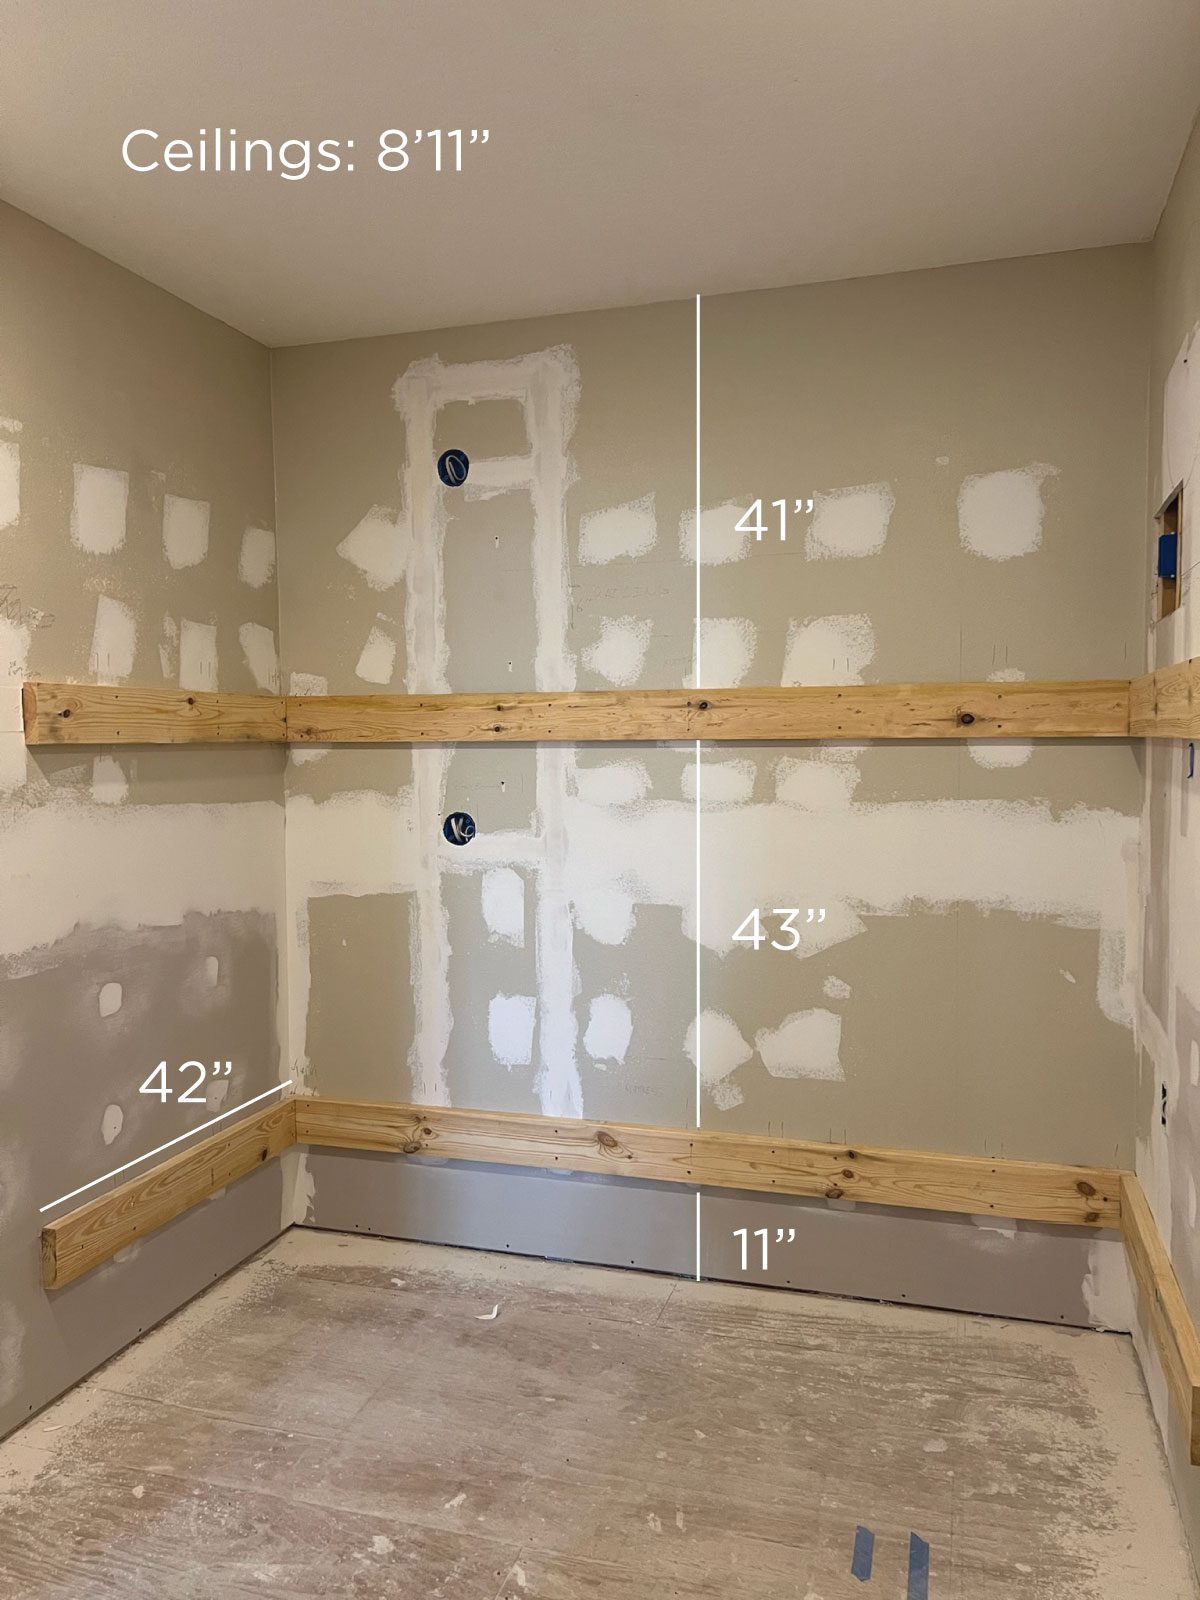
Attach the front 2×6's using concealed joist hangers and framing nails.

Next, use joist hangers to attach 2×4's horizontally, in line with the top of the frame. We spaced ours 16″ apart to help distribute the weight.

Here is a closeup view (after the platform was in):

Platforms
We opted for 1/2″ MDF because it is cost effective, easy to paint, and sturdy enough for a bed base. You could also use plywood and/or 3/4″ material if desired.

To help keep the mattresses in place, a piece of 3/4″ plywood was cut and installed at the foot of each bed. Quarter round trim was then attached along the wall to hide any wonky gaps.

The bottom bunk platform was attached later, after the ladder was secured to the bed framing.
Front Panels
The front panels were constructed using two strips of 3/4″ plywood sandwiched together. These can be ripped down with a circular saw or table saw. We made our top panel 8 1/4″ wide, and the bottom 7 3/4″.

The panels are joined together using wood glue and clamps, and finished with edge banding to give the appearance of one thick solid piece. On the top panel, we made the front piece 2″ taller than the back piece to attach the railing to, and used 3/4″ edge banding.

Attach the panels to the framing with wood glue and screws from the inside. Make sure there is enough overhang to attach the railing at the top, and to extend above the platform along the bottom.

Below you can see the how the top front panel extends above the piece behind it. This is where the railing will go.

Railing
You can get genuinely creative with railing and we almost did something genuinely intricate, but in the end decided to keep it unfussy. We used a 2×2 as the top horizontal piece, and 1×2's for the balusters. Grooves were notched into the 2×2 to hold the 1×2's in place along the top.


Once the railing was constructed, it was glued and clamped in place, and sandwiched between another 1×2″ along the bottom.

Wood glue + clamps are plenty strong enough to keep everything in place, so no nails or screws were used here (but you could if you wanted!)

To fill the gaps between the balusters, 1×2's were cut to size, glued and and wedged in between.

The 2×2 rail piece was secured to the wall with a toggle bolt anchor, through a pocket hole opening on the bottom.

Ladder
Our ladder was hand carved from a fallen oak tree and took months to create, so I am sorry to say there is not a tutorial!

The ladder was attached to both the top and bottom bunk with screws through the framing and the front panels.

If you are looking to DIY your ladder, there are some good tutorials out there like this one from Yellow Brick Home and Plank and Pillow. Alternatively, you could buy one at a pretty reasonable price—like thissteel hook-on ladder, this wood ladder, or this custom made to order ladder.
Finish work
In our situation, attaching the ladder was one of the last steps, so the bunks were painted in different phases. First, primer was applied to the wood.

After testing out 17 peel and stick paint samples, I landed on Benjamin Moore Pine Grove (Advance formula in satin).
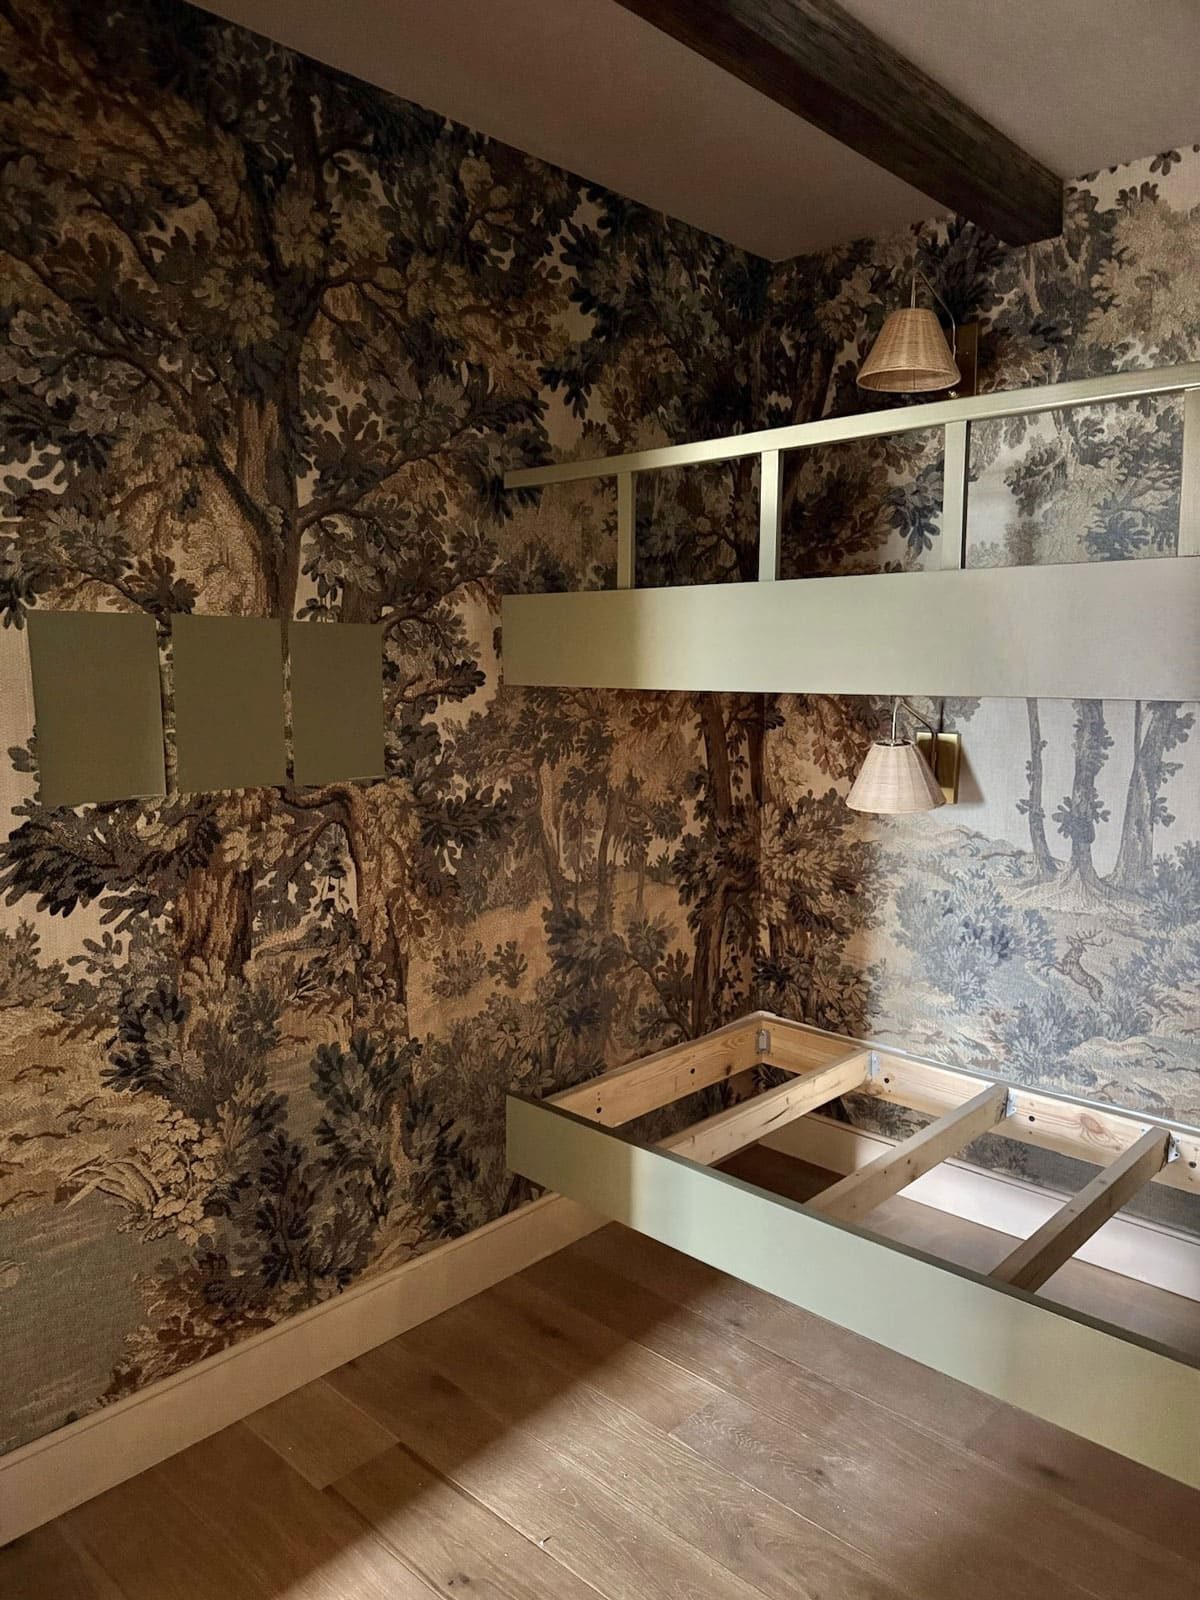
Once the ladder was attached, the final trim pieces were attached and painted. We added 2×4's underneath the top bunk to attach the cover panel to:

To hide the framing, we ripped down and installed a 4×8' shiplap panel (the length fit perfectly with our 8' wall). If your wall is longer, you could use individual 12' shiplap boards. You could also choose a different material entirely, like smooth plywood or beadboard. This only needs to be applied underneath the top bunk, as the lower bunk will not be visible.

Quarter round was used around the edges of the shiplap to hide any gaps.

Finally, the exposed areas of the platforms were painted, and our bunk bed project was complete!
These beds are well suited for kids of all ages, but also sturdy enough for full grown adults! And way cooler than any bunk bed you could buy, in my opinion 😉
I hope this tutorial was helpful if you plan on building bunks, or even just a single lofted or elevated bed. As always, I am happy to answer any questions if you need more detail! This process works every time, and you do not have to be an advanced level DIYer to tackle it. Makes sure to pin or bookmark this one for later—and follow along for more updates on this renovation on my Instagram,